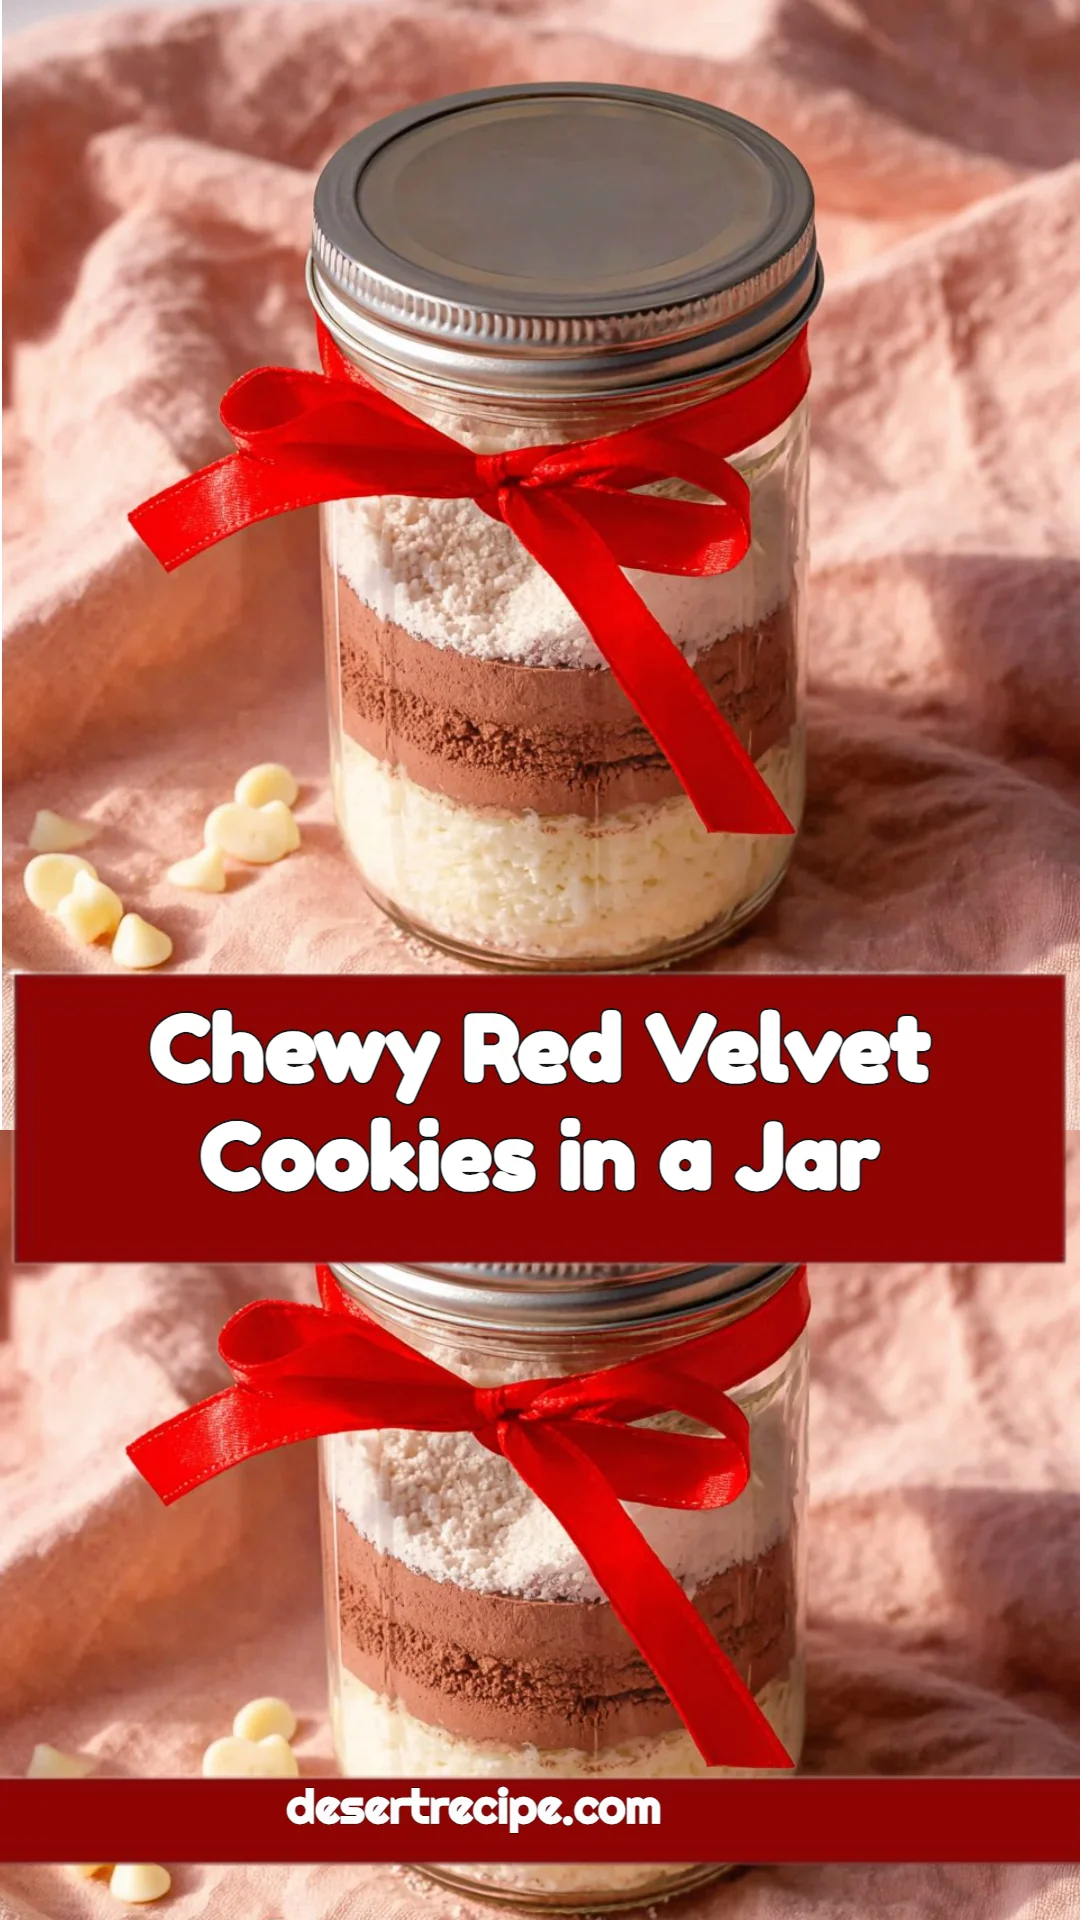
Irresistibly Chewy Red Velvet Cookies in a Jar: A Sweet Treat to Share
There’s something magical about cookies—especially when they come in vibrant, eye-catching colors. I remember the first time I baked red velvet cookies with my grandma; the kitchen filled with the sweet, decadent aroma of chocolate and vanilla, and the soft crunch of the cookies melted in our mouths. Now, every time I whip up a batch of Chewy Red Velvet Cookies in a Jar, I’m reminded of those cherished moments.
These cookies aren’t just your average dessert; they’re a glorious fusion of chewy and soft textures, artfully bridging the gap between a cake and a cookie. The vibrant red hue makes them visually stunning, ideal for gifting or special occasions. But what makes this recipe truly unique is the ease of preparation—layered beautifully in a jar, they are as simple to make as they are delightful to eat!
In this post, I’ll share step-by-step instructions on how to recreate this beloved family recipe, along with some insider tips, tricks, and personal stories that make these cookies extra special. You’ll not only learn how to make them, but you’ll also understand why they deserve a spot in your baking repertoire.
What Are Chewy Red Velvet Cookies in a Jar?
The origin of red velvet cookies is a delicious entanglement of southern baking tradition and modern trends. They originated from the classic red velvet cake, combining chocolaty goodness with a stunning red hue. The emergence of red velvet in cookie form adds a fun twist, offering a chewy texture with a hint of cocoa that is so satisfying.
Chewy Red Velvet Cookies in a Jar are like a party in your mouth—rich, decadent, and bursting with flavor. Imagine biting into a still-warm cookie, its soft exterior giving way to a melt-in-your-mouth center, punctuated with the sweetness of white chocolate chips. Perfectly suited for any occasion, whether it’s a holiday gathering, a cozy evening at home, or as a centerpiece at a birthday party, these cookies are bound to impress.
So why make these cookies? They’re not only beautiful and delicious but also versatile and easy to prepare. Gathering friends and family around while sharing heartfelt moments over freshly baked cookies is what life is all about!
Why You’ll Love This Recipe
Here are five reasons why this Chewy Red Velvet Cookies in a Jar recipe will steal your heart:
Visual Appeal: The striking red hue makes these cookies stunning! They’re perfect for gifting—or simply for impressing guests. I love bringing these cookies to potlucks; they’re almost too pretty to eat (but trust me, you’ll want to!).
Flavor Explosion: Rich and chocolatey, with bursts of creamy white chocolate, these cookies deliver a delightful medley of flavors. Unlike store-bought varieties, you control the quality of ingredients, ensuring every bite is heavenly!
Cost-effective: Making these cookies at home is far cheaper than purchasing gourmet alternatives from bakeries. All the ingredients are affordable and often found in your pantry!
Customization: Whether you want to add nuts, substitute dark chocolate chips, or play with flavorings like almond extract, this recipe is incredibly flexible, allowing for creativity based on your taste preferences.
Simplicity: With just a few steps, preparation takes about 20 minutes, followed by a short bake. Even novice bakers can achieve cookie excellence—perfect for quiet evenings or last-minute gatherings!
Ingredients Section
Here’s what you’ll need to create your Chewy Red Velvet Cookies in a Jar:
- 1 cup all-purpose flour: Always use quality flour for the best texture. I recommend King Arthur or Bob’s Red Mill.
- 1/3 cup cocoa powder: Sifted to remove lumps. Dutch-processed cocoa gives a rich chocolate flavor.
- 1/2 tsp baking soda
- 1/4 tsp baking powder
- 1/2 cup granulated sugar: Sweetness is key! Make sure it’s fresh.
- 1/4 cup brown sugar: Lightly pressed to enhance the chewiness of the cookies.
- 1/2 cup white chocolate chips: Opt for high-quality chips; Ghirardelli or Guittard work wonders!
- 1/4 cup melted unsalted butter: Room temperature. Use European brands like Kerrygold for added richness.
- 1 egg: Ensure it’s at room temperature for better incorporation.
- 1 1/2 tsp vanilla extract: Pure extract is preferable; it makes all the difference.
- 1 tsp red food coloring: Use concentrated gel coloring for vibrant results.
Make sure to have your butter at room temperature, which will help in creating that soft, chewy texture that we all love. Ready to start baking? Let’s continue!
Step-by-Step Instructions
Sift the Cocoa Powder: Start by sifting the cocoa powder into a bowl. This helps eliminate any lumps, ensuring a smooth mixture.
Layer in the Jar: In a clean jar, carefully layer the ingredients in this order:
- Flour
- Cocoa powder
- Baking soda
- Baking powder
- Granulated sugar
- Brown sugar
- White chocolate chips
(This not only looks beautiful but also creates an easy-to-use instant cookie mix!)
Preheat the Oven: Set your oven to preheat at 350°F (175°C). This will ensure your cookies bake evenly.
Prepare the Wet Ingredients: In a separate bowl, whisk together:
- Melted butter
- Egg
- Vanilla extract
- Red food coloring
(It’s amazing how such a simple addition transforms the cookie’s personality!)
Combine the Mixtures: Pour the jar contents into a large mixing bowl, making a well in the center to add the wet mixture. Mix everything together until just combined. Avoid over-mixing for tender cookies!
Shape the Cookies: Using a tablespoon, drop rounded portions of dough onto an ungreased baking sheet, allowing 2 inches of space between cookies for spreading.
Bake: Slide your baking sheet into the oven and bake for 10-12 minutes. The edges should be set, while the center will look slightly soft.
Cool: Allow the cookies to cool on the baking sheet for 2 minutes before transferring them to a wire rack to cool completely.
Stay tuned for some chef’s tips along the way!
Chef’s Tips
- Tip 1: Check your oven temperature with an oven thermometer; ovens can vary, and accurate temperatures lead to optimal results.
- Tip 2: If you want an extra chewy texture, chill your dough for 30 minutes before baking.
- Tip 3: Avoid using too much food coloring; a little goes a long way. Aim for a rich, yet not overwhelming, color.
Avoid common mistakes like not preheating your oven or over-baking, and you’ll be golden!
Expert Tips & Tricks
You deserve cookies that are as perfect as possible! Here are some of my expert tips:
Storage Recommendations: Once cooled, keep your cookies in an airtight container at room temperature for up to one week. Chilling them will help retain moisture.
Make-Ahead Instructions: You can prepare the dry ingredients ahead of time, placing them beautifully in jars for gifting. Just remember to label them with the wet ingredient instructions!
Troubleshooting: If your cookies aren’t spreading, try slightly softening the butter before mixing or extending the baking time by a couple of minutes.
Experiment Freely: Change up the white chocolate chips with dark chocolate, or even try adding a dash of peppermint extract for a refreshing twist around the holidays.
Bring on the Spice: A pinch of cinnamon or nutmeg can add an unexpected depth of flavor to your cookies.
With these tips, you’ll perfect the art of Chewy Red Velvet Cookies in a Jar in no time!
Serving Suggestions
While these cookies are delicious on their own, here are some ideas to elevate your serving experience:
Pair with Milk: A classic cold glass of milk never disappoints. It complements the richness and balances the sweetness beautifully.
Presentation Tips: Use a simple decorative plate or even a cookie jar for a rustic touch. Add a sprig of mint or edible flowers for a pop of color!
Occasion Ideas: Perfect for Valentine’s Day, Christmas gatherings, or even an impromptu dessert night with friends!
Variations & Substitutions
Love experimenting in the kitchen? Here are some fun ways to switch things up:
Flavor Combinations: Add crushed nuts such as walnuts or pecans for a crunch, or consider integrating flavors like orange zest or almond extract for a unique twist.
Dietary Adaptations: For gluten-free options, use a 1:1 gluten-free baking blend instead of all-purpose flour. Ensure all other ingredients are gluten-free as well.
Seasonal Variations: For spring, try incorporating pastel-colored M&Ms or swapping chocolate chips for butterscotch chips for a warm, buttery taste.
Nutrition & Storage Info
- Prep Time: 20 minutes
- Cook Time: 10-12 minutes
- Total Time: Approximately 30 minutes
- Yield: About 24 cookies
- Estimated Calories: Approximately 150 calories per cookie
- Storage Instructions: Store cookies in an airtight container at room temperature for up to one week. They can also be frozen for up to three months.
FAQ Section
Can I use a different type of chocolate chips?
Yes! Feel free to use dark, milk, or even semi-sweet chocolate chips depending on your preference!How do I ensure my cookies are chewy?
Do not overmix your dough and let them cool on the sheet for a short period before transferring them to a cooling rack.Can I make these cookies vegan?
You can substitute the egg with flaxseed meal combined with water (1 tablespoon of flaxseed meal mixed with 2.5 tablespoons of water). Use vegan butter instead of regular butter.What if I don’t have red food coloring?
You can omit it, but the color will be more muted. Alternatively, consider using beet powder as a natural dye!How do I prevent my cookies from spreading too much?
Make sure your butter isn’t too warm and consider chilling your dough for about 30 minutes before baking.Can I make the dough in advance?
Absolutely! You can prepare the dough, chill it in the fridge for up to three days, or freeze it for up to three months.Will these cookies last long?
If stored properly, they should last about a week at room temperature and up to three months in the freezer.Can I use coconut sugar instead of brown sugar?
Yes! This will provide a slightly different flavor but still works well in the recipe.Can I add spices?
Definitely! Adding cinnamon or nutmeg will compliment the chocolate flavor beautifully.How can I gift these cookies?
Layer the dry mix in a jar and attach a cute note with baking instructions for a charming homemade gift!

Conclusion
These Chewy Red Velvet Cookies in a Jar are more than a delightful sweet treat; they’re a way to create fond memories in the kitchen and share your love of baking with friends and family. I hope you find joy in every bite you take!
So why not give them a try? I would love to hear your feedback or any twists you’ve added to the recipe. Happy baking! And for more delightful treats, don’t forget to check out my other recipes like Chocolate Chip Cookie Bars and Classic Double Chocolate Cookies on the blog!