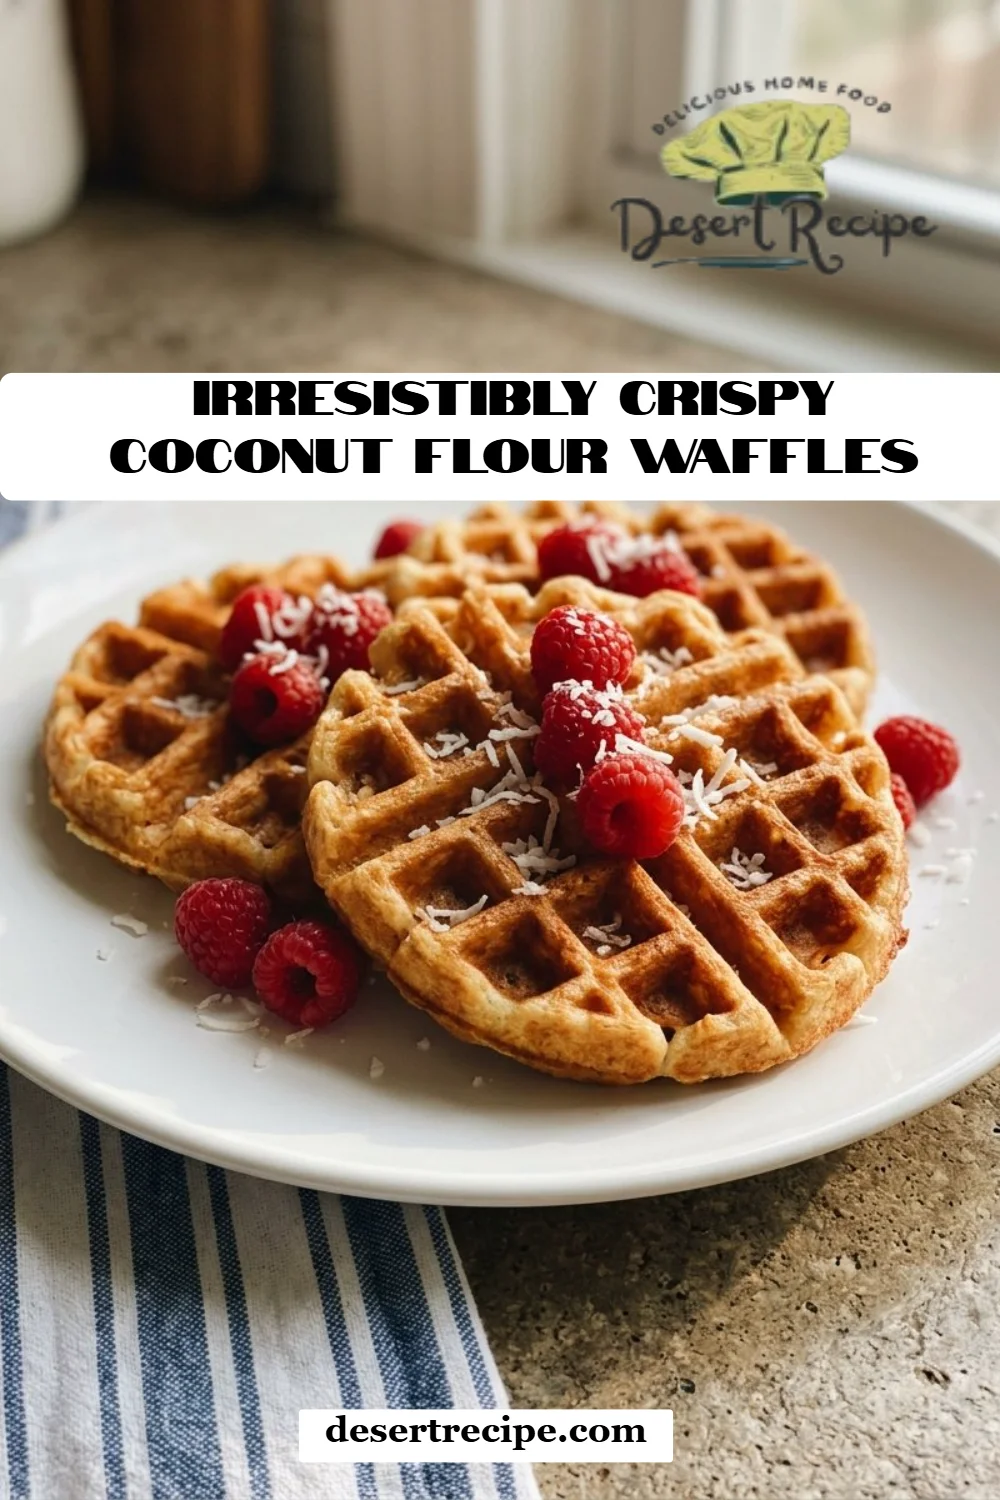
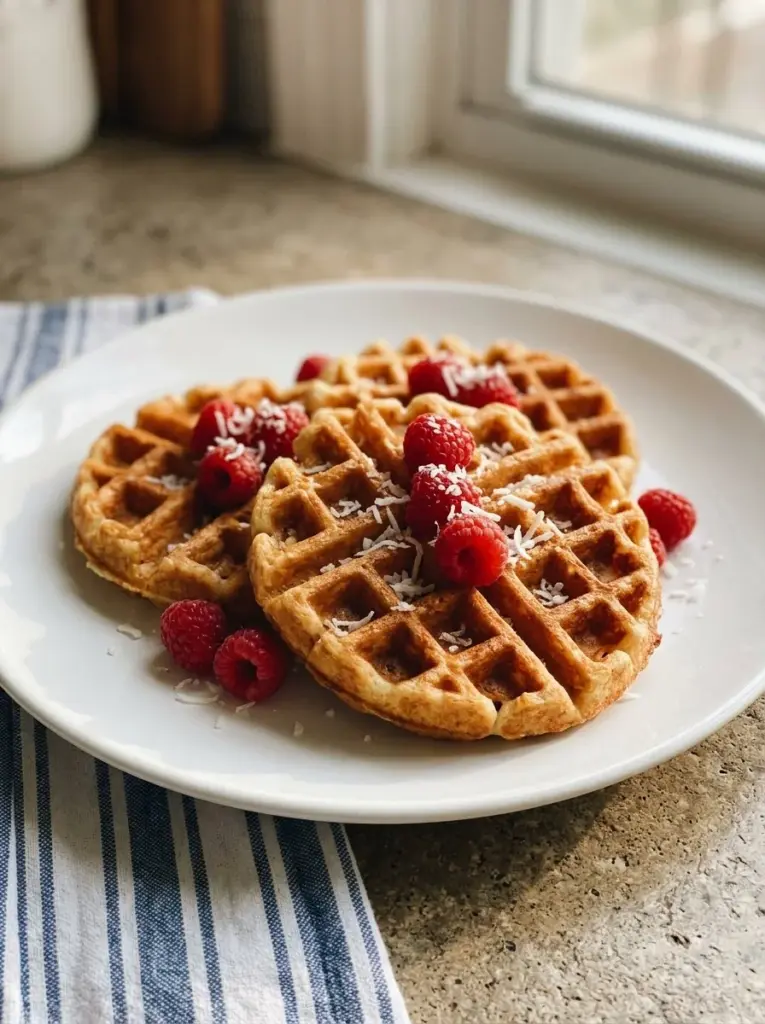
Irresistibly Crispy Coconut Flour Waffles: A Guilt-Free Breakfast Delight
There’s nothing quite like a lazy Sunday morning. The air is filled with the warm aroma of freshly brewed coffee, and sunlight softly spills through the kitchen window. This is the time when I love to whip up something special for my family—something that brings us all together. Enter my Irresistibly Crispy Coconut Flour Waffles. These waffles have become a household favorite; their light and crispy texture combined with a delicate hint of coconut takes breakfast to a whole new level.
What makes this recipe truly special is the crispy texture that comes from using coconut flour, which also makes them gluten-free! Unlike conventional waffles that can be dense, these beauties are airy and indulgent without the guilt. Every bite offers a satisfying crunch, and the warming flavors evoke cherished memories of home.
In this recipe, you’ll learn how to create these mouthwatering waffles that are perfect for a cozy family brunch or a quick weekday treat. You’ll not only savor every bite but also enjoy the bonding moments they’ll inspire at your breakfast table.
What Are Irresistibly Crispy Coconut Flour Waffles?
The journey of my Irresistibly Crispy Coconut Flour Waffles began out of necessity. My family has a history of dietary restrictions, particularly regarding gluten. To satisfy our craving for waffles without compromising health, I experimented with coconut flour—a great alternative that brings its unique flavor and texture.
These waffles are delightfully crispy on the outside and fluffy on the inside, creating a perfect harmony that’ll have you coming back for seconds (or thirds!). Their subtle coconut flavor adds a tropical twist, elevating a simple breakfast into something extraordinary.
When should you make these waffles? Well, any time works for me! They’re fantastic for lazy breakfasts, brunches with friends, or even special occasions like birthdays and holidays.
Why You’ll Love This Recipe
Here are a few compelling reasons why you’ll fall head over heels for these Irresistibly Crispy Coconut Flour Waffles:
Health Conscious: Unlike typical high-carb, gluten-filled waffles, these are made with coconut flour and tapioca starch, making them gluten-free and lower in carbs!
Simple & Budget-Friendly: With just a handful of ingredients, you can whip these up without breaking the bank, making them perfect for an easy recipe that doesn’t skimp on comfort.
Customization Galore: One of the things I adore about this recipe is its versatility. You can toss in blueberries, chocolate chips, or even spices like cinnamon or nutmeg to give them your personal touch!
Quick & Easy: This recipe doesn’t require fancy techniques, making it perfect for novice bakers. From prep to plate, you can have these ready in about 30 minutes.
Better than Store-Bought: Imagine biting into homemade waffles that taste fresher and more delightful than those from your local café. Plus, there are no mysterious ingredients—just real food you can feel good about.
Ingredients
To create these delightful Irresistibly Crispy Coconut Flour Waffles, gather the following ingredients:
- 3 large eggs (preferably organic for better flavor)
- 3 Tbsp melted coconut oil (use refined coconut oil for a neutral flavor)
- 2 Tbsp pure maple syrup (the real deal enhances the sweetness without being overwhelming)
- 2 Tbsp water (filtering it adds a bit more purity)
- 1 tsp vanilla extract (pure vanilla extract brings better flavor than imitation)
- 1/4 cup coconut flour (make sure it’s fresh)
- 1/4 cup tapioca starch (this is essential for that crispiness)
- 1 tsp baking powder (make sure it’s fresh for optimal rise)
- 1/4 tsp salt (always use fine sea salt for best blending)
Prep Notes:
- Ensure the eggs and melted coconut oil are at room temperature for better mixing.
- If you want to save time, prep your waffle iron to heat while mixing.
Brand Recommendations:
- For coconut flour, I love using Bob’s Red Mill for its consistent quality.
- For maple syrup, a local brand or Vermont’s finest can make a significant difference.

Step-by-Step Instructions
Creating your Irresistibly Crispy Coconut Flour Waffles is a breeze if you follow these detailed steps:
Preheat Your Oven: Set a wire cooling rack in your oven and preheat it to 300°F (150°C). This will keep your waffles warm and crisp while you cook the rest.
Prepare the Waffle Iron: Preheat your waffle iron according to the manufacturer’s instructions. The hotter it is, the crispier your waffles will be!
Separate the Eggs: Carefully separate the egg whites from the yolks. Place the whites in a clean bowl and beat with a hand mixer or whisk until soft peaks form (about 3-4 minutes).
Mix the Wet Ingredients: In a separate bowl, whisk together the egg yolks, melted coconut oil, maple syrup, water, and vanilla extract until they’re well combined.
Combine Dry Ingredients: Add the coconut flour, tapioca starch, baking powder, and salt to the wet mixture. Whisk until smooth—note that the batter will thicken!
Fold in the Egg Whites: Gently fold the whipped egg whites into the batter, taking care not to deflate them. This step is crucial for achieving that light and fluffy texture.
Cook the Waffles: Scoop the batter onto the preheated waffle iron, filling it about three-quarters full. Close the lid and cook for about 4-5 minutes, or until they are golden brown and crisp.
Crisp Up the Waffles: Once cooked, place the waffles on the wire rack in the oven for an additional 8 minutes. This final crisping step is key!
Repeat: Keep pouring batter and cooking until all the batter is used up.
Chef’s Tips:
- Avoid overmixing the batter to keep it light.
- Make sure to clean your waffle iron thoroughly between uses for the best results.
Common Mistakes to Avoid:
- Don’t skip the cooling rack step; it’s essential for achieving ultimate crispiness!
- Ensure your egg whites form soft peaks; stiff peaks will lead to dense waffles.
Expert Tips & Troubleshooting
To help you nail your Irresistibly Crispy Coconut Flour Waffles, here are some expert tips:
Storage Instructions: Store any leftover waffles in the refrigerator for up to 3 days. For longer storage, freeze them in an airtight container, separated by parchment paper for easy reheat later.
Make-Ahead: You can prepare the batter the night before, just store it in an airtight container in the fridge. Give it a quick stir before cooking!
Troubleshooting: If your batter is too thick, add a tablespoon of water or more until you reach your desired consistency. If they stick to the waffle iron, ensure it’s well-greased and preheated.
Reheating Frozen Waffles: Pop them in a toaster or reheat them in the oven at 350°F for about 5-7 minutes until they’re heated through.
Experiment with the Base: If you want to replace coconut flour, consider almond flour, but the ratios will change slightly.
Consistency Matters: If you find your batter often too thick, double-check your measuring techniques. Always fluff your flour before scooping!
Serving Suggestions
These Irresistibly Crispy Coconut Flour Waffles are a fantastic canvas for toppings and sides. Here are a few ideas to enhance your breakfast:
- Dress them up with fresh fruit like sliced strawberries, blueberries, or bananas.
- Drizzle with more pure maple syrup or even a rich coconut cream.
- Pair with crispy bacon or turkey sausage for a savory balance.
If you’re hosting brunch, stack the waffles high, dust with powdered sugar, and sprinkle with edible flowers for a stunning presentation!
Variations & Substitutions
Why not get creative with your Irresistibly Crispy Coconut Flour Waffles? Here are a few fun twists to try:
- Chocolate Chip Waffles: Add 1/4 cup of mini dark chocolate chips to the batter for a sweet touch.
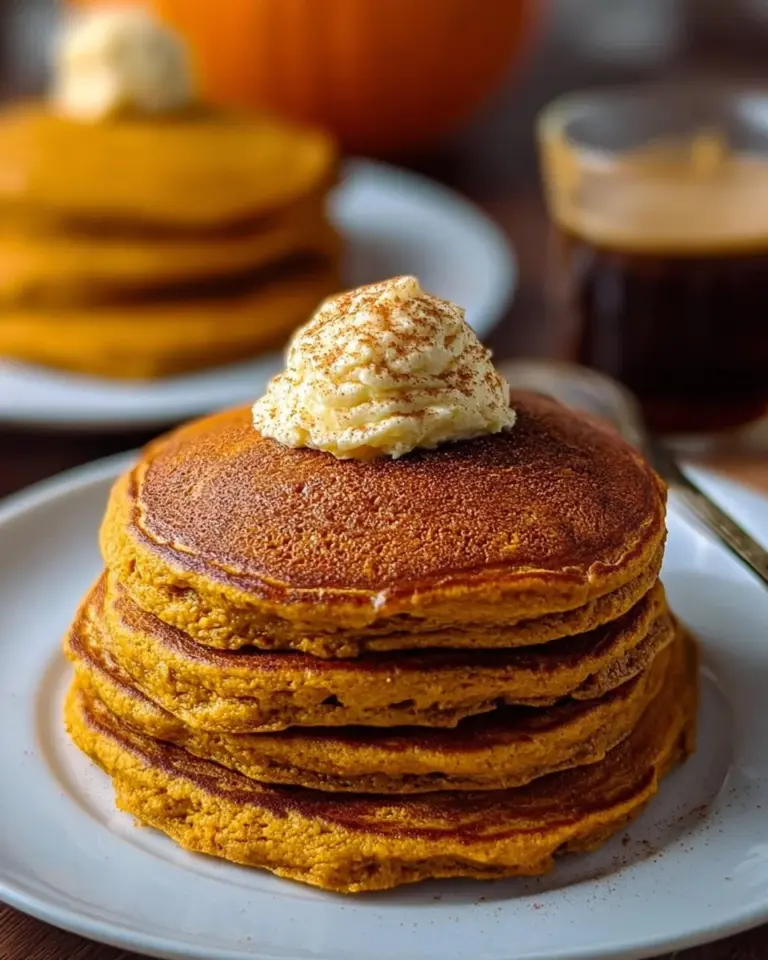
- Pumpkin Spice: Change things up in the fall by incorporating 1/2 cup of pumpkin puree and adding a teaspoon of cinnamon and nutmeg.
- Banana Waffles: Mash a ripe banana into the batter for natural sweetness and a hint of fruitiness.
- Nutty Twists: Add chopped nuts or shredded coconut for extra texture and flavor.
Feel free to customize for any dietary needs—this recipe is very adaptable!
Nutrition & Storage Info
- Prep Time: 10 minutes
- Cook Time: 20 minutes
- Total Time: 30 minutes
- Yield: About 4 servings (or 8 waffles)
- Estimated Calories per Serving: Approximately 200 calories
Storage Instructions:
- Room Temperature: Keep on the counter for 1 day if consumed quickly.
- Fridge: Lasts up to 3 days in an airtight container.
- Freezer: Can be frozen for up to 3 months. Thaw and reheat in the toaster for best results!
FAQ Section
Q1: Can I use other types of flour?
A1: You can use almond flour, but note that the consistency will change, and you may need to adjust the liquid.
Q2: Is this recipe suitable for meal prep?
A2: Absolutely! You can make a big batch, freeze them, and reheat during the week for quick breakfasts.
Q3: Can I make these ahead of time?
A3: Yes, you can prepare the batter the night before and store it in the fridge. Just whisk again before using.
Q4: Why are my waffles sticking to the iron?
A4: Make sure your waffle iron is well-greased and preheated properly before adding the batter.
Q5: How can I make these dairy-free?
A5: This recipe is already dairy-free, thanks to the coconut oil. Just stick with pure maple syrup for sweetness.
Q6: Can I use a different sweetener?
A6: Yes! You can substitute honey or agave nectar; just be mindful of the liquid content.
Q7: What can I serve them with?
A7: They pair wonderfully with fresh fruit, whipped cream, yogurt, or maple syrup.
Q8: Are these gluten-free?
A8: Yes, this recipe is gluten-free thanks to coconut flour and tapioca starch.
Q9: Are they suitable for kids?
A9: Absolutely! Kids love them, and you can make them healthy with plenty of toppings.
Q10: How do I know when the waffles are done?
A10: They’re ready when they turn a golden brown and crisp up nicely in about 4-5 minutes in the iron.

Conclusion
My Irresistibly Crispy Coconut Flour Waffles are more than just breakfast; they’re a way to gather loved ones and share comforting moments. With each crispy bite, you’ll taste the thoughtfulness and care that goes into them. So, I encourage you to try out this wholesome recipe and create your own family memories around the breakfast table.
I’d love to hear your feedback or any variations you try—drop a comment below! And don’t forget to check out my other delicious breakfast recipes on the blog. Happy cooking!
Irresistibly Crispy Coconut Flour Waffles
Ingredients
Method
- Preheat your oven by setting a wire cooling rack inside and preheating to 300°F (150°C) to keep waffles warm and crisp.
- Preheat your waffle iron according to the manufacturer’s instructions.
- Separate the egg whites from the yolks. Beat the egg whites in a clean bowl until soft peaks form, about 3-4 minutes.
- In a separate bowl, whisk together the egg yolks, melted coconut oil, maple syrup, water, and vanilla extract until well combined.
- Add the coconut flour, tapioca starch, baking powder, and salt to the wet mixture and whisk until smooth.
- Gently fold the whipped egg whites into the batter, taking care not to deflate them.
- Scoop the batter onto the preheated waffle iron, filling it about three-quarters full. Cook for about 4-5 minutes until golden brown and crisp.
- Transfer cooked waffles to the wire rack in the oven for an additional 8 minutes to crisp up.
- Repeat until all batter is used.