Deliciously Nut-Free Protein Bars: Your Go-To Energy Boost
As a food lover and home baker, there’s nothing quite as satisfying as whipping up a batch of Nut Free Protein Bars. I remember weekends spent in the kitchen with my family, experimenting with flavors and ingredients. We would share stories and laughter, waiting impatiently for our healthy treats to set. These Nut Free Protein Bars aren’t just delicious; they hold memories of joy and togetherness, reminding me of those quaint family moments spent baking together.
What sets these bars apart from others on the market? Not only are they nut-free (great for those with allergies), but they’re also loaded with wholesome ingredients that make you feel good about snacking. Unlike those store-bought options that are often packed with preservatives, these bars are fresh, customizable, and delicious without the guilt. I promise you’ll learn how simple it is to make your own, and the best part? You can tweak the flavors to make them your own!
What Are Nut Free Protein Bars?
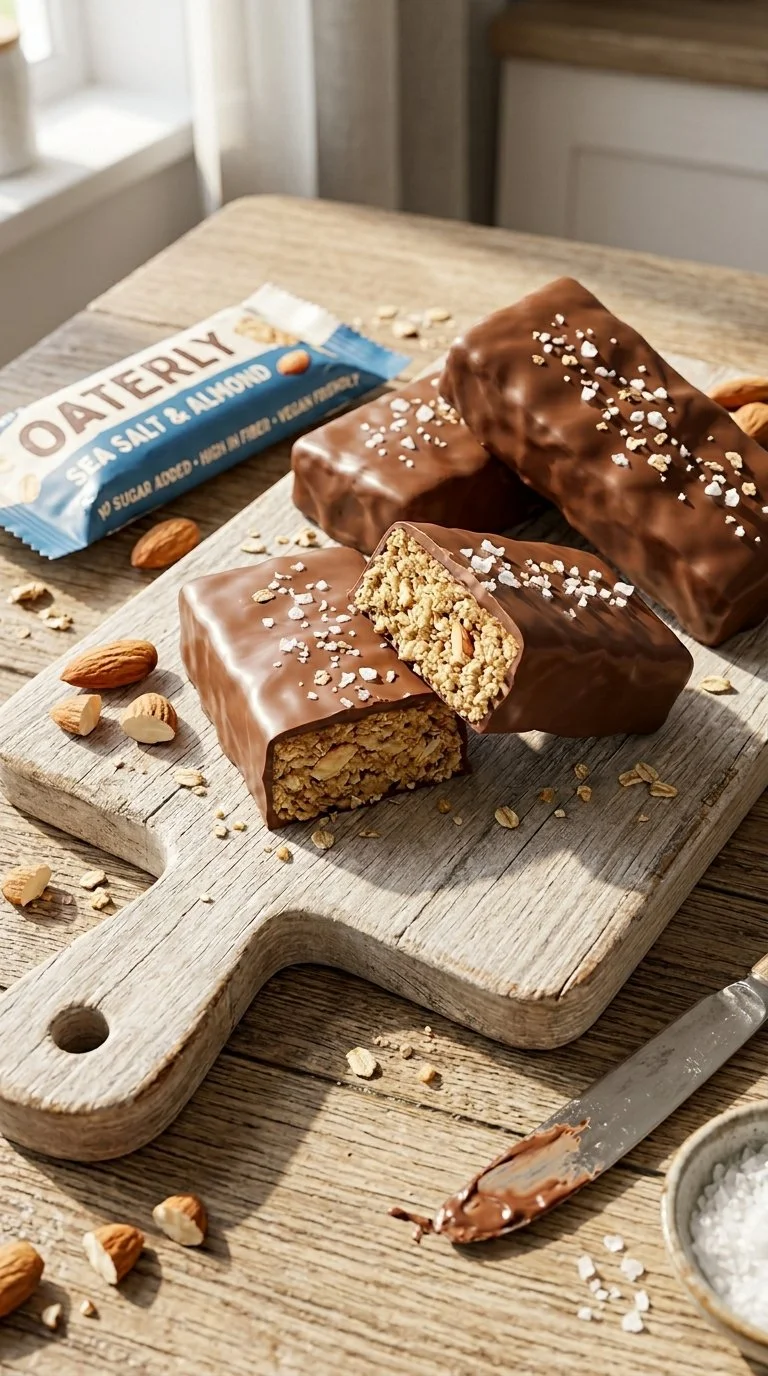
Nut Free Protein Bars have gained popularity as a healthy, on-the-go snack that doesn’t compromise on taste. These bars originated from the need for an accessible source of protein that can appeal to those avoiding nuts due to allergies. The texture is wonderfully chewy, with a hint of crunch from sunflower seeds and coconut, complemented by delightful notes of dark chocolate—a winning combination!
These bars are unique because they are not only scrumptious but also versatile. You can enjoy them as a post-workout snack, a mid-afternoon energy boost, or even as a healthy dessert. Whenever you’re in need of a quick pick-me-up, these bars can be your lifesaver!
Why You’ll Love This Recipe
Healthy Indulgence: Compared to store-bought protein bars, which can be overly sweetened and expensive, these Nut Free Protein Bars are made from all-natural ingredients. You know exactly what’s in them!
Cost-Effective: Making your own protein bars is much more budget-friendly than continually purchasing pre-packaged ones. You’ll save money and stock up on healthy snacks for the week.
Customization Options: Feel free to switch up ingredients based on your cravings! Add different seeds, swap in your favorite protein powder, or toss in some dried fruits—the possibilities are endless.
Simplicity: This easy recipe requires minimal cooking skills. With just a few ingredients and straightforward steps, you can have a batch ready in no time!
Make-ahead Convenience: You can whip these up in advance and freeze them for those busy days when you need a nutritious snack on the run. Plus, they last up to two weeks in the fridge!
Ingredients Section
For your Nut Free Protein Bars, you’ll need the following ingredients:
- 1 cup unsweetened shredded coconut: Look for high-quality, organic coconut for added flavor and texture. You can substitute with finely chopped oats if you prefer.
- 1/2 cup raw sunflower seeds: A great source of healthy fats. Feel free to swap these for pumpkin seeds or hemp seeds.
- 2/3 cup pea protein powder: Check for an unflavored option, or explore flavored versions if you’re feeling adventurous.
- 6 Medjool dates, pitted: Make sure they are soft and fresh; they will sweeten the bars naturally.
- 2 tsp vanilla extract: A must for flavor depth. Go for pure vanilla whenever possible!
- 1/4 tsp salt: Helps to balance the sweetness.
- 1/2 cup water: Adjust as needed to achieve the right texture.
- 1/3 cup dark chocolate chips: You can use vegan chocolate chips to keep it dairy-free as well.
- 2 Tbsp sunbutter (sunflower seed butter): Adds creaminess and nutty flavor without the nuts!
Prep Notes: Ensure your dates are at room temperature to blend easily. If they’re too hard, soak them in warm water for a few minutes to soften.

Step-By-Step Instructions
Prepare Your Dish: Line an 8" x 8" baking dish with parchment paper, leaving some overhang for easy removal later, and set aside.
Soak the Dates: Soak the Medjool dates in a bowl of hot water for about 5 minutes to soften them. This makes blending a breeze!
Blend the Ingredients: Drain the water from the dates. In a food processor, combine the softened dates, shredded coconut, sunflower seeds, and pea protein powder. Pulse until the mixture resembles a chunky dough.
Add Wet Ingredients: Gradually add the water and vanilla extract to the processor. Blend until the dough starts to clump together. Be careful not to overblend; you want a texture that holds but still has some chunk!
Press the Base: Firmly press the mixture into the lined baking dish, smoothing it out evenly with the back of a spatula or your hands.
Melt the Chocolate: In a small microwave-safe bowl, melt the dark chocolate chips. Microwave in 20-30 second intervals, stirring in between, until fully melted and smooth.
Mix with Sunbutter: Stir in the sunbutter with the melted chocolate until everything is well combined.
Coat the Bars: Evenly spread the chocolate-sunbutter mixture over the pressed base, using a spatula to ensure it’s smooth.
Chill to Set: Place the baking dish in the fridge for at least one hour to let the bars set.
Cut and Store: Once set, lift the bars out of the dish using the parchment overhang. Cut into 12 bars and enjoy! Store leftovers in an airtight container in the fridge for up to 2 weeks.
Chef’s Tip: If you find the mixture too dry, add an extra tablespoon of water. Conversely, if it’s too wet, just add a smidge more shredded coconut or protein powder!
Expert Tips & Troubleshooting
Storage: Keep your protein bars in an airtight container in the fridge, where they’ll last for up to two weeks. If you want to freeze them, wrap them individually for easy grab-and-go snacks later.
Make Ahead: These bars can be made up to 3 days in advance. Just ensure they’re stored properly.
Common Mistakes: Avoid over-soaking the dates, which can make the mixture too wet. Blending too long can also cause the mixture to become too smooth—aim for a chunky texture.
Texture Troubles: If your bars crumble, they may need a tad more moisture or pressing before chilling, so don’t hesitate to adjust as necessary!
Using Different Protein: Different protein powders can yield different textures. You may need to add or subtract water to achieve your desired consistency.
Personal Taste: Experiment with additional flavors like cinnamon, cocoa powder, or even a pinch of sea salt for a gourmet touch!
Serving Suggestions
These Nut Free Protein Bars are delightful on their own, but why not make them even more special? Pair them with a dollop of Greek yogurt or a side of fresh fruit for a balanced snack. They’re perfect for enjoying during hikes, as a quick breakfast on busy mornings, or served at gatherings. Try wrapping them individually and placing them in a colorful basket for a lovely presentation!
Variations & Substitutions
Flavor Combinations: How about adding dried cranberries or apricots for a fruity kick? You can also experiment with spices like cinnamon or nutmeg for different flavor profiles.
Dietary Adjustments: If you’re looking for a lower-sugar option, substitute the dates with ripe bananas or applesauce. For a vegan alternative, stick with plant-based protein powder.
Seasonal Ideas: Incorporate pumpkin puree and a dash of pumpkin spice for an autumn-themed bar, or dried mango and coconut for a tropical twist!
Nutrition & Storage Info
- Prep time: 10 minutes
- Cook time: 1 hour (for chilling)
- Total time: 1 hour 10 minutes
- Yield: 12 servings
- Estimated calories per serving: 150 calories
- Storage: These bars will last for about 2 weeks in the fridge and can be frozen for up to a month.

FAQ Section
Can I use other types of protein powder?
Absolutely! While the recipe uses pea protein, feel free to substitute it with whey or plant-based protein powders as per your dietary preferences.Are these bars gluten-free?
Yes, all the ingredients in this recipe are gluten-free; just be sure your protein powder is certified gluten-free.Can I replace the sunflower seeds?
Yes! Pumpkin seeds or chia seeds can make a great alternative while still keeping the nut-free quality intact.How do I make these more chocolatey?
You can fold in extra chocolate chips to the base or sprinkle some on top before chilling for double the chocolate goodness!What if the mixture is too sticky?
If the mixture is too sticky, take a little extra shredded coconut and mix it in to achieve your desired consistency.Can I make them in a different size pan?
Certainly! Just adjust the cooking time as necessary. A larger pan will yield thinner bars and may require less chilling time.Can I add protein powder post baking?
It’s best to incorporate protein powder into the mixture before pressing it into the pan; adding it afterward can alter the texture and taste.Why are my bars falling apart?
You might need to increase the binding agents. Ensure you blend the ingredients long enough and press the mixture firmly in the pan.Can I use syrup instead of dates for sweetness?
While syrup can work, dates provide binding as well as sweetness. You may need to adjust the amount of liquid in the base if you go this route.How many should I eat at once?
Like any treat, moderation is key! One bar is a perfect healthy snack or post-workout boost.
Conclusion
Making your own Nut Free Protein Bars is a rewarding and satisfying way to ensure healthy snacking is always within reach. These bars are not only delicious but also filled with fond memories as you whip them up in your kitchen. I encourage you to try this recipe and make it your own! Please leave a comment below with your feedback or any fun variations you’ve tried. And don’t forget to explore other wholesome recipes here on the blog that celebrate the joy of good food!

Nut Free Protein Bars
Ingredients
Method
- Line an 8" x 8" baking dish with parchment paper, leaving some overhang for easy removal later, and set aside.
- Soak the Medjool dates in a bowl of hot water for about 5 minutes to soften them. This makes blending a breeze!
- Drain the water from the dates. In a food processor, combine the softened dates, shredded coconut, sunflower seeds, and pea protein powder. Pulse until the mixture resembles a chunky dough.
- Gradually add the water and vanilla extract to the processor. Blend until the dough starts to clump together. Be careful not to overblend; you want a texture that holds but still has some chunk!
- Firmly press the mixture into the lined baking dish, smoothing it out evenly with the back of a spatula or your hands.
- In a small microwave-safe bowl, melt the dark chocolate chips. Microwave in 20-30 second intervals, stirring in between, until fully melted and smooth.
- Stir in the sunbutter with the melted chocolate until everything is well combined.
- Evenly spread the chocolate-sunbutter mixture over the pressed base, using a spatula to ensure it’s smooth.
- Place the baking dish in the fridge for at least one hour to let the bars set.
- Once set, lift the bars out of the dish using the parchment overhang. Cut into 12 bars and enjoy! Store leftovers in an airtight container in the fridge for up to 2 weeks.