Table of Contents
Table of Contents
Ah, the holiday season! The air is crisp and filled with the delightful scent of pine trees and festive cheer. This time of year always brings me back to my childhood, standing beside my grandmother as she pulled her famous Candy Cane Cookies from the oven, their vibrant swirls of red and white twinkling like little striped ornaments. There’s a certain magic in the kitchen during the holidays, and there’s nothing quite like sharing familiar traditions and comforting treats with loved ones.
What makes these Candy Cane Cookies special? Not only do they boast that delightful crunch followed by a tender, melt-in-your-mouth texture, but they’re also infused with the refreshing essence of peppermint. Trust me, these cookies are a heartfelt nod to the season. In this recipe, I’m sharing my grandmother’s tried-and-true method, with a few twists of my own that make them even better than the store-bought ones. You’ll learn how to master the candy cane shape while creating memories that will warm your heart for years to come.
Grab your mixing bowl and get ready to bring some holiday spirit into your home!
What Are Candy Cane Cookies?
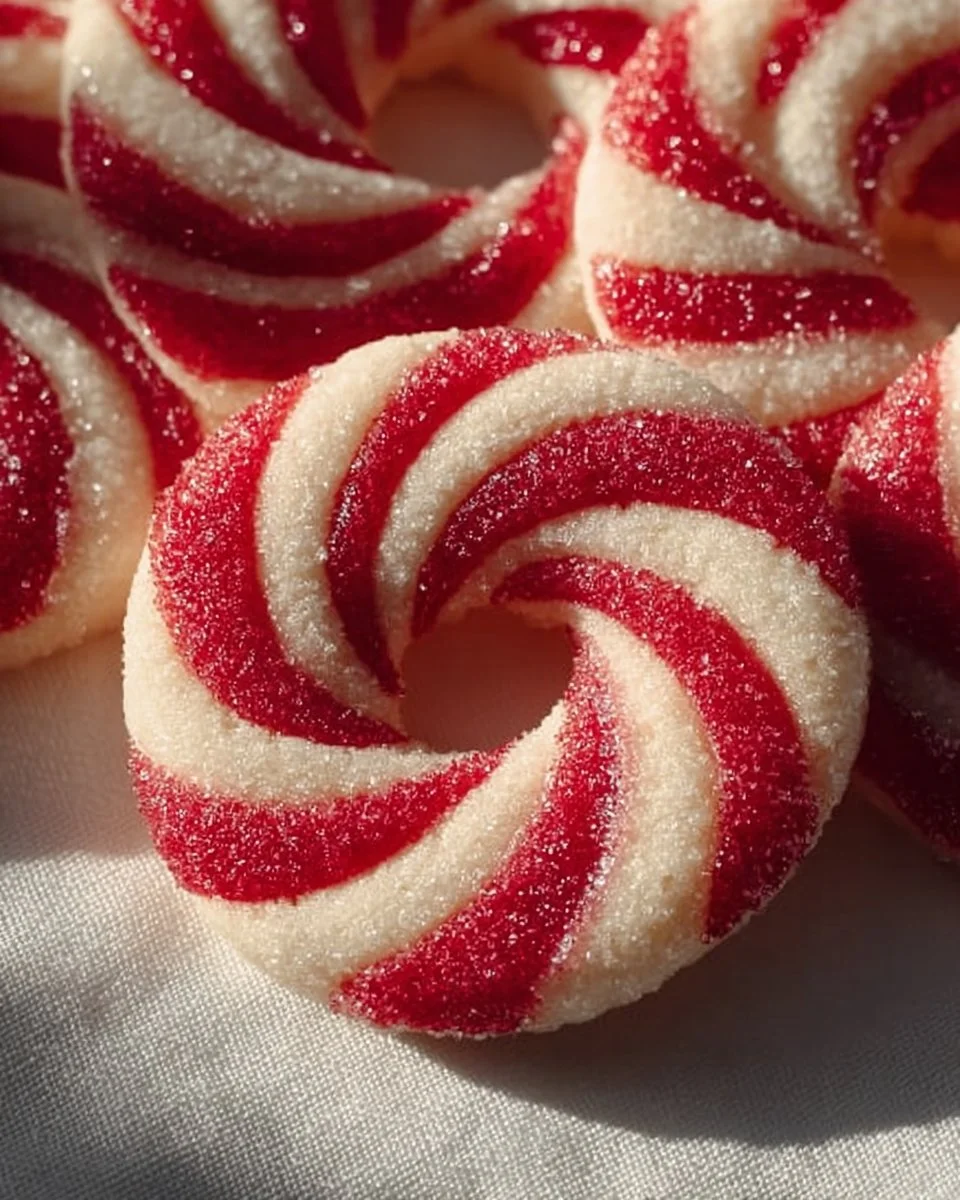
Candy Cane Cookies are a delightful holiday treat that showcases not just flavor but the artistry of baking. These delightful cookies originated in Europe, where they were often made to celebrate the festive season, fitting perfectly into the tradition of snacking and sharing sweets during winter gatherings.
With their unique combination of smooth vanilla and peppy peppermint flavors, these cookies bridge the gap between crispy and chewy—a treat that can charm anyone. The swirling red and white dough mimics the classic candy canes we hang on our Christmas trees, making them not just delicious but visually stunning as well.
They’re perfect for holiday cookie exchanges, cozy family gatherings, or simply to enjoy while wrapped in a warm blanket watching your favorite holiday movie. As you make these, you’re not just baking; you’re creating a canvas of memories filled with love and laughter.
Why You’ll Love This Recipe
Here are five compelling reasons to whip up a batch of these Candy Cane Cookies today:
Family Tradition: Made from a recipe that has been passed down through generations, these cookies are steeped in warmth and nostalgia. There’s something magical about baking them while sharing stories with family.
Customization Galore: Feel free to experiment! Add chocolate chips, nuts, or even a drizzle of white chocolate over them. The possibilities are endless, allowing you to make these cookies reflect your family’s taste.
Cost-Effective: Why buy expensive specialty cookies when you can create delightful treats right at home? The ingredients in this recipe are simple and inexpensive, yet the result feels luxurious.
Far Better than Store-Bought: While store-bought cookies might look appealing, they can’t match the homemade flavor and texture. Plus, you can control the quality of your ingredients, using organic or allergy-friendly options.
Easy to Make: With just a few steps, these cookies come together quickly, so you won’t spend your entire day in the kitchen. Even if you’re a beginner, I promise you can master this recipe and impress your guests!

Ingredients Section
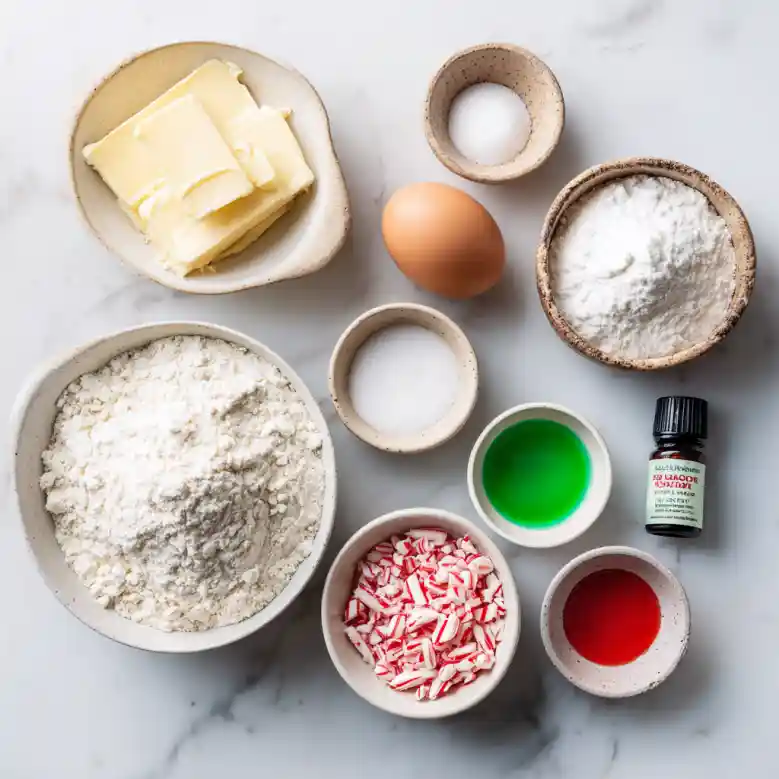
To create your delicious Candy Cane Cookies, gather the following:
- 1 cup unsalted butter, softened (Bring to room temperature for easier mixing)
- 1 cup granulated sugar
- 1 large egg
- 1 teaspoon vanilla extract
- 1 teaspoon peppermint extract (For a stronger flavor, consider using peppermint oil)
- 2 1/2 cups all-purpose flour (For best results, use a brand like King Arthur Flour)
- 1/2 teaspoon salt
- 1/2 teaspoon baking powder
- Red and green food coloring (I love using gel food coloring for its vibrant colors)
- Crushed candy canes for garnish (Use a zip-top bag and a rolling pin to crush them finely)
Prep Notes: Make sure your butter is at room temperature for easy creaming with the sugar.
Step-by-Step Instructions
Preheat your oven to 350°F (175°C). This is essential for even baking.
In a large bowl, cream together the butter and sugar until light and fluffy—about 3-5 minutes. You’ll know it’s ready when it turns pale and airy.
Beat in the egg, vanilla extract, and peppermint extract. Mix until well combined. The scent should start to feel festive!
In another bowl, whisk together the flour, salt, and baking powder. Gradually add these dry ingredients to the wet mixture. Mix well until a dough forms.
Divide the dough in half. Color one half with red food coloring and leave the other half plain. Knead the dough slightly to ensure even color distribution.
Take small pieces of each dough and roll them into ropes about 6 inches long. How cool it is to create your very own candy cane shapes!
Twist the red and plain dough together, forming a candy cane shape. Place them on a baking sheet lined with parchment paper, making sure to leave space between each.
Bake for 8-10 minutes or until the edges are lightly golden. Keep an eye on them; you want that perfect bake!
Remove from the oven and let cool on the baking sheet for a few minutes before transferring them to a wire rack. While they’re cooling, sprinkle with crushed candy canes for that extra festive touch.
Expert Tips & Tricks
Perfecting the Shape: If you struggle with shaping the dough, refrigerate it for 15 minutes so it’s easier to handle.
Storage Recommendations: These cookies can be stored in an airtight container at room temperature for up to a week, or in the fridge for longer freshness.
Make-Ahead Instructions: You can prepare the dough a day ahead and keep it refrigerated. Just let it come to room temperature before shaping.
Troubleshooting: If your cookies spread too much, check the butter temperature. Too soft can lead to flat cookies.
Freezing: Freeze unbaked shaped cookies on a baking sheet, then transfer to a zip-top bag for easy baking any time!
Serving Suggestions
These festive Cookie Canes are perfect on their own, but don’t hesitate to elevate your treat plate with a side of hot cocoa or a scoop of peppermint ice cream. For a stunning presentation, arrange them on a decorative platter alongside some homemade truffles or chocolate-covered pretzels. They make a fantastic addition to cookie trays and holiday parties!
Variations & Substitutions
Feeling adventurous? Try swapping out 1/4 cup of all-purpose flour for cocoa powder to make chocolate Candy Cane Cookies. For those with dietary restrictions, substitute the butter with coconut or vegan butter, and use gluten-free flour instead of all-purpose for an inclusive cookie experience.
Seasonal variations can range from adding orange zest for a citrus twist to brushing the cookies with egg wash and sprinkling them with festive sprinkles for added flair.
Nutrition & Storage Info
- Prep time: 20 minutes
- Cook time: 10 minutes
- Total time: 30 minutes
- Yield: About 24 cookies
- Estimated calories per serving: 120
Storage Instructions: Store these cookies at room temperature in an airtight container for up to 1 week, or in the refrigerator for up to 2 weeks. They can also be frozen for up to 3 months. Just let them thaw naturally before enjoying.

FAQ Section
Can I use margarine instead of butter?
Yes, but butter will yield a better flavor and texture.How do I know when my cookies are done?
Look for lightly golden edges and a soft center that will firm up as they cool.Can I use a different extract?
Absolutely! Almond or vanilla extract can provide a unique flavor twist.Why do my cookies spread out?
Make sure your butter is the right temperature (room temp, not melted) and opt for chilled dough.Can I use colored sugar instead of crushed candy canes?
Yes! Colored sugar will give a great sparkling finish.Will the dough work well if refrigerated overnight?
Yes, refrigerating the dough allows the flavors to meld beautifully.How can I make these gluten-free?
Substitute with a gluten-free all-purpose flour blend and ensure all other ingredients are gluten-free.Is there a way to make these dairy-free?
Yes! Use a dairy-free butter substitute and plant-based milk to replace the egg or use a flax egg.Can I freeze these cookies?
Yes! Both the shaped dough and baked cookies freeze well.What should I do if I don’t have peppermint extract?
You can substitute with more vanilla extract, or experiment with other flavors like almond.
Conclusion
There’s something undeniably special about making Candy Cane Cookies from scratch. Beyond their delicious flavor and signature festive appearance, they embody nostalgia and create lasting memories. I hope you’ll take the plunge and share this delightful recipe with your loved ones this season. I would love to hear how your batch turns out, so please share your feedback in the comments below. And while you’re here, be sure to check out my other holiday recipes on the blog—I’m sure you’ll find something else that will warm your heart and home!
Graving More Rescipes?
Sweet and Salty Christmas Cookies
Happy baking!
Candy Cane Cookies
Ingredients
Method
- Preheat your oven to 350°F (175°C). This is essential for even baking.
- In a large bowl, cream together the butter and sugar until light and fluffy—about 3-5 minutes.
- Beat in the egg, vanilla extract, and peppermint extract. Mix until well combined.
- In another bowl, whisk together the flour, salt, and baking powder. Gradually add these dry ingredients to the wet mixture. Mix well until a dough forms.
- Divide the dough in half. Color one half with red food coloring and leave the other half plain.
- Take small pieces of each dough and roll them into ropes about 6 inches long.
- Twist the red and plain dough together, forming a candy cane shape.
- Place them on a baking sheet lined with parchment paper, making sure to leave space between each.
- Bake for 8-10 minutes or until the edges are lightly golden.
- Remove from the oven and let cool on the baking sheet for a few minutes before transferring them to a wire rack.
- While they’re cooling, sprinkle with crushed candy canes for that extra festive touch.