Table of Contents
Table of Contents
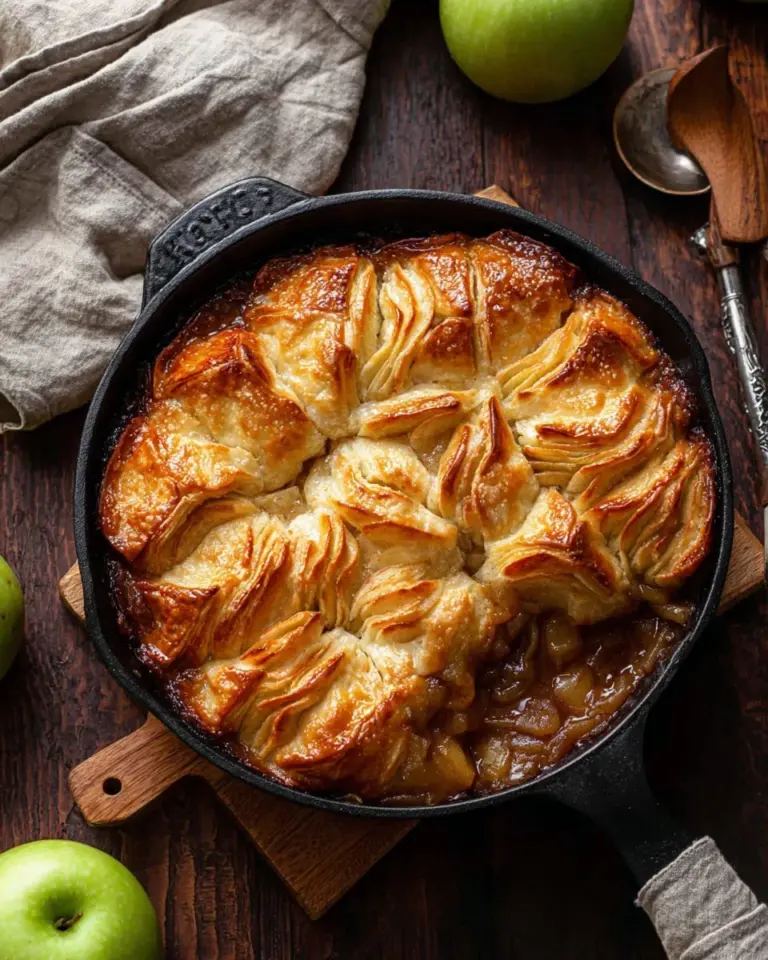
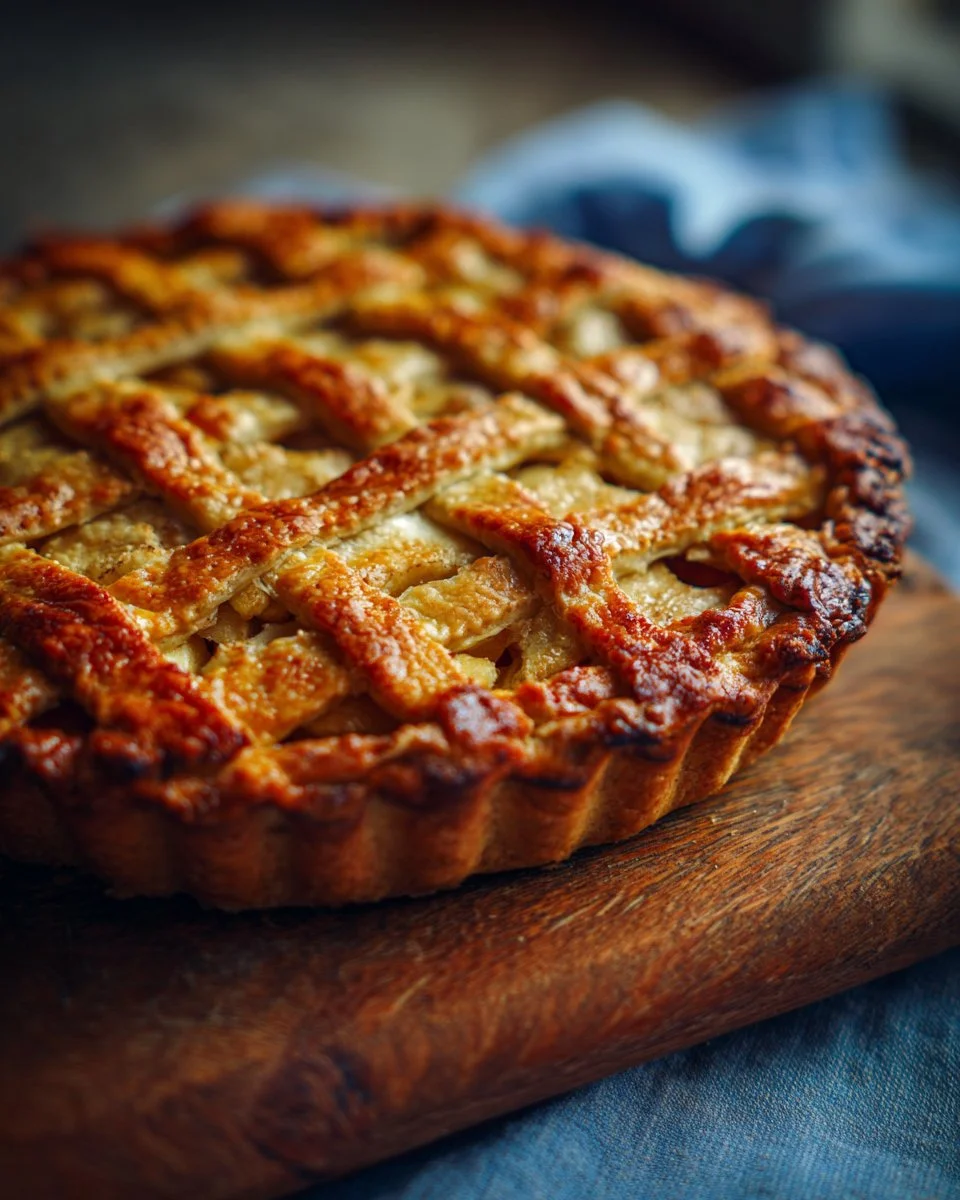
The Ultimate Apple Pie Recipe: A Slice of Nostalgia
Imagine a chilly afternoon where the scent of warm spices fills the air, wrapping around you like a cozy blanket. For me, those were the moments I’d spend in my grandmother’s kitchen, the sweet and tart notes of freshly baked Apple Pie dancing in the air. Each bite felt like a hug from the past, a reminder of family gatherings, laughter, and love woven into every slice. Today, I’m excited to share with you my go-to Apple Pie recipe that surpasses any store-bought version.
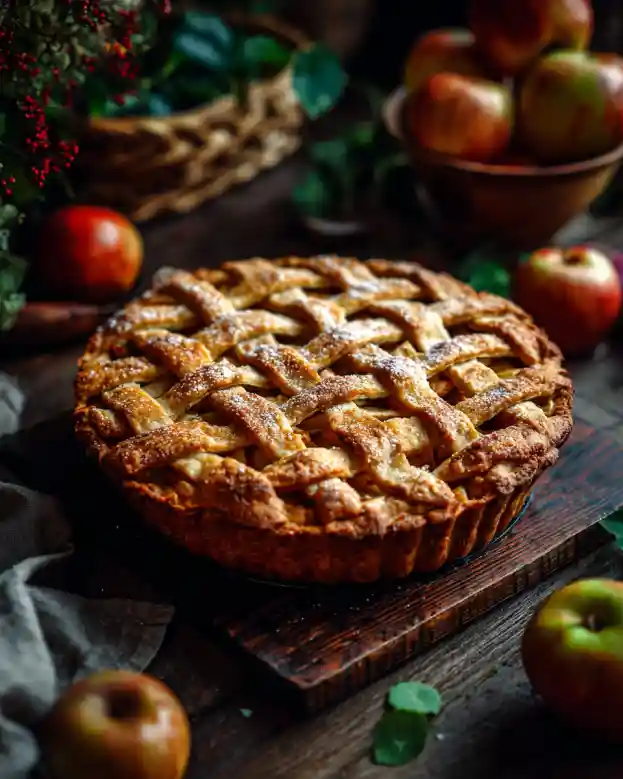
This recipe is special—it’s not just about combining apples and sugar. It brings together juicy, thinly sliced apples enveloped in a delicate, flaky crust, harmonizing flavors of cinnamon, lemon, and the subtle sweetness of brown sugar. Not only is it easy to make, but it also allows room for your personal touch, making it the perfect dessert for any occasion. By the end of this post, you’ll learn how to create a stunning Apple Pie that will not only impress your family and friends but also wrap you in the comforting memories of your own culinary adventures.
What Are Apple Pies?
Apple Pie, often regarded as the quintessential American dessert, has a rich history that dates back to the early settlers of America who brought their pie-making traditions from Europe. The charm of Apple Pie lies in its simple ingredients: a buttery crust encasing a warm, luscious filling of spiced apples. The…
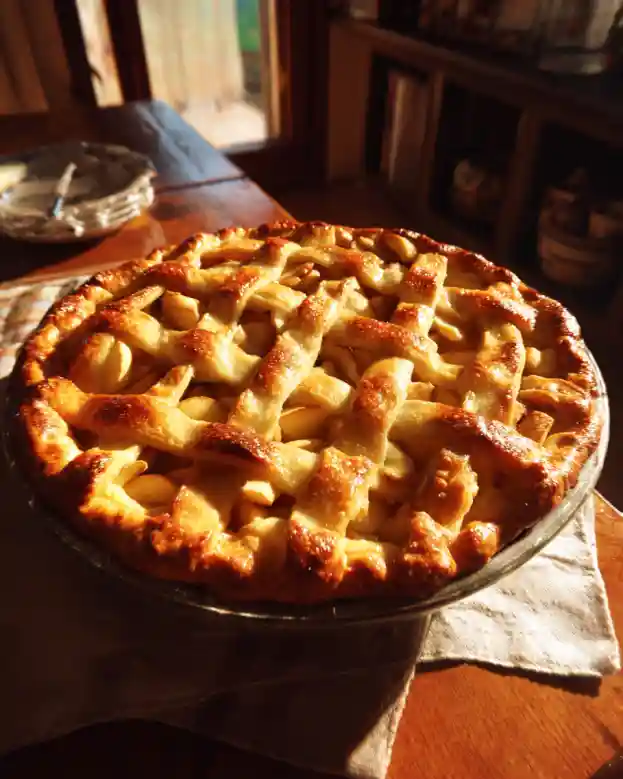
Flavor & Texture
Each slice boasts a tender, buttery crust that crumbles gloriously at the touch of your fork, revealing a gooey filling of perfectly spiced apples that balance sweetness with a hint of tartness.
Uniqueness
What truly makes Apple Pie unique is its ability to be a blank canvas for creativity. Whether you prefer a classic taste or a twist of flavors, the possibilities are endless.
Occasional Bliss
Apple Pie is perfect for family gatherings, cozy autumn evenings, or even a spontaneous weekend baking session. It evokes feelings of home and comfort, making it a timeless recipe to cherish and share.
Why You’ll Love This Recipe
Homemade Goodness: This Apple Pie recipe is crafted from scratch, giving you the chance to control the quality of ingredients. You’ll be amazed at the difference between this labor of love and any store-bought version.
Cost-effective: Making your own Apple Pie is not only fun but also budget-friendly. With just a handful of pantry staples, you can whip up a delicious dessert that serves many, at a fraction of the cost of buying one.
Customizable: Whether you like your Apple Pie traditional or with a twist (think caramel or pecans), you can easily adjust this recipe to cater to your taste preferences, making it uniquely yours.
Satisfaction Guaranteed: There’s an indescribable joy that comes from creating something delightful from scratch. Once you slice into this pie, you’ll feel a sense of accomplishment and anticipation that can’t be bought.
Time Investment: This recipe might take some time—with a little patience in preparing the filling and crust—but trust me, it’s worth it. Plus, the aromatic journey of baking will fill your kitchen with warmth and nostalgia.
Ingredients
1 Perfect Pie Crust Recipe:
(Start with this crust – it’s flaky and buttery!)
- ¼ cup butter (Room temperature for easy mixing)
- 8 cups thinly sliced apples (Peeled and cored; Granny Smith or Honeycrisp are great choices for their balance of sweet and tart)
- 2/3 cup lightly packed brown sugar (Try using light brown for its subtle molasses flavor)
- 1 tablespoon all-purpose flour (For thickening the filling)
- 2 teaspoons cinnamon (Plus more for a sprinkle on top!)
- 1 teaspoon lemon juice (To brighten the flavors)
- ¼ teaspoon salt (To enhance the sweetness)
- 1 egg (For the egg wash)
- 1 teaspoon water (For the egg wash)
- Coarse sugar (optional; for a little sparkle on the crust)
Chef’s Tip: Always use high-quality ingredients for the best flavor. If you prefer a different fat, you can swap butter for coconut oil for a dairy-free version.
Step-by-Step Instructions
Preheat and Prepare: Set aside a 9-inch pie plate and preheat your oven to 425°F (220°C). The initial high temperature will give our pie a beautiful golden crust.
Butter Meltdown: Melt the butter in a large pot over medium-low heat.
Apple Medley: Add the sliced apples, brown sugar, flour, cinnamon, lemon juice, and salt. Stir the mixture together and let it cook, stirring occasionally for about 8 to 10 minutes until the apples soften. Remove from heat, let cool, and transfer to a bowl.
Dough Prep: Divide the prepared pie dough in half (if it isn’t already in two discs) and lightly flour your work surface. Roll one disc of dough out to around 1/8-inch thick, ensuring it’s a bit larger than your pie plate. Transfer the rolled dough into the pie plate, gently pressing it into the bottom.
Egg Wash Ready: In a small bowl, whisk together the egg and water to create your egg wash.
Filling Action: Transfer the cooled apple pie filling into the prepared crust, ensuring an even distribution.
Top Layer: Roll out the second disc of pie dough on a floured surface. Carefully place it on top of the filling. If you’re feeling creative, use a pizza cutter to cut strips and create a braided pattern on top. Don’t forget to cut vents in the crust to let steam escape.
Seal the Deal: Trim any excess dough, crimp the edges with your fingers, and brush the top with the egg wash. If you want to add a little sparkle, sprinkle the top lightly with coarse sugar.
Bake to Perfection: Bake the pie for 15 minutes at 425°F, then reduce the temperature to 350°F (175°C) and continue baking for another 40 minutes. Keep an eye on it—if the crust starts to brown too much, tent it with aluminum foil.
Cool Down: Let your magnificent Apple Pie cool for at least an hour before serving. The flavors will meld beautifully during this time!
Expert Tips & Tricks
Storage: Store leftover pie at room temperature for up to 2 days or in the refrigerator for up to a week. For longer storage, wrap it tightly in plastic wrap and freeze for up to 3 months.
Make-Ahead: You can prepare the pie crust ahead of time and refrigerate it for up to 3 days, or freeze it for up to 3 months. Just remember to thaw it overnight in the fridge if frozen before rolling out!
Common Mistakes: Avoid a soggy bottom by pre-baking the crust for 10 minutes before adding your filling. Ensure the apples are sufficiently cooled before filling to avoid a steamy mess!
Personal Touch: Experiment with flavors! Add a dash of nutmeg, ginger, or vanilla extract for a twist that reflects your taste.
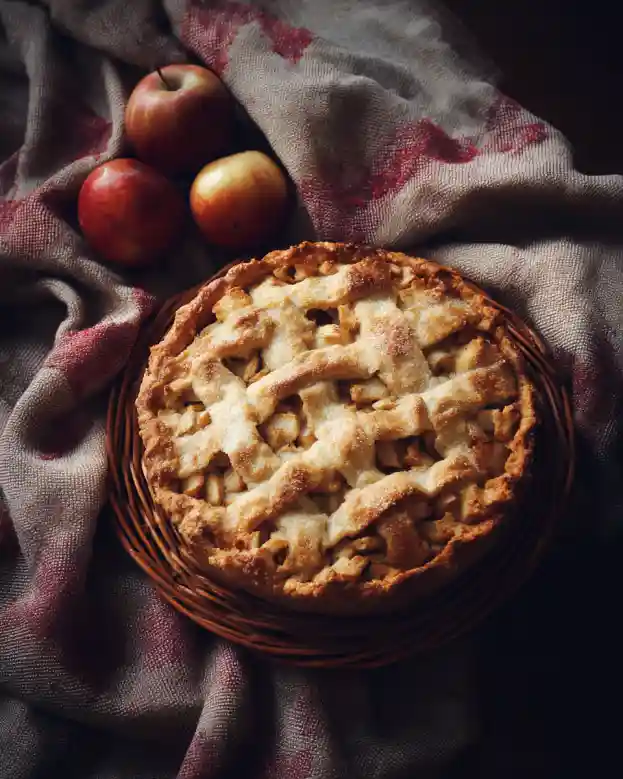
Serving Suggestions
Serve your homemade Apple Pie by itself, or elevate the experience with a scoop of vanilla ice cream melting over the warm pie. For a festive twist, drizzle homemade caramel sauce on top or sprinkle with chopped nuts like walnuts or pecans. This pie is a star at fall gatherings, holiday dinners, or simply as a comforting dessert on a rainy day.
Variations & Substitutions
Flavor Combinations: Consider adding cranberries for a sweet-tart punch or even sliced star fruit for a tropical twist.
Dietary Restrictions: To make a gluten-free version, substitute all-purpose flour with a gluten-free flour blend. For a dairy-free approach, swap butter for coconut oil or use a plant-based butter.
Seasonal Variations: In the fall, add pumpkin spice for a seasonal touch. For summer, mix in fresh berries along with the apples for a refreshing twist!
Nutrition & Storage Info
- Prep Time: 30 minutes
- Cook Time: 55 minutes
- Total Time: 1 hour 25 minutes
- Yield: 8 servings
- Estimated Calories per Serving: 250-300 calories (varies with specific ingredients and portion sizes)
- Storage Instructions: Store at room temperature for 2 days, in the fridge for up to a week, or freeze for up to 3 months.
FAQ
1. Can I use frozen apples for this recipe?
Yes, you can use frozen apples, but make sure to thaw and drain off any excess moisture before using.
2. What type of apples are best for apple pie?
A blend of sweet and tart apples works best. Granny Smith, Honeycrisp, and Fuji are popular choices.
3. Can I prepare the pie crust ahead of time?
Absolutely! Pie crust can be made and stored in the refrigerator for a few days or frozen for longer.
4. What’s the best way to slice apples for the pie?
Aim for even slices, about 1/4 inch thick, to ensure uniform cooking.
5. How do I prevent a soggy bottom crust?
Pre-baking the crust for about 10 minutes before adding the filling can help prevent sogginess.
6. How can I tell when my pie is done baking?
The crust should be golden brown, and the filling should be bubbling. You can also insert a knife into the filling; the apples should be tender.
7. Can I make a smaller pie?
Yes! Simply halve the ingredients for a smaller version or use a smaller pie plate.
8. What if I don’t have brown sugar?
You can substitute light brown sugar with white sugar mixed with a little molasses (1 tablespoon molasses to 1 cup white sugar).
9. How long does it take to cool?
Let your pie cool for at least an hour before slicing to allow the filling to set up properly.
10. Can I add a crumb topping instead of a second crust?
Of course! Just mix flour, sugar, and butter together until crumbly and sprinkle over the apple filling before baking.
Conclusion
This Apple Pie recipe is a true treasure—rich in flavor and steeped in nostalgia. It’s not just about making dessert; it’s about creating memories in your kitchen that you’ll cherish for years to come. I encourage you to try this at home, and I’d love to hear your thoughts or any variations you come up with! If you’re on the hunt for more comforting recipes, don’t forget to explore my blog for delicious ideas that will make your kitchen feel like home.
Graving More Recipes?
Happy baking!

Apple Pie
Ingredients
Method
- Set aside a 9-inch pie plate and preheat your oven to 425°F (220°C).
- Melt the butter in a large pot over medium-low heat.
- Add the sliced apples, brown sugar, flour, cinnamon, lemon juice, and salt. Stir and cook for about 8 to 10 minutes until the apples soften. Remove from heat, let cool, and transfer to a bowl.
- Divide the pie dough in half and roll one disc out to around 1/8-inch thick, ensuring it’s larger than the pie plate. Transfer the rolled dough into the pie plate.
- In a small bowl, whisk together the egg and water to create your egg wash.
- Transfer the cooled apple filling into the prepared crust.
- Roll out the second disc of pie dough and place it on top of the filling. Cut vents in the crust.
- Trim excess dough, crimp the edges, and brush the top with egg wash. Sprinkle with coarse sugar if desired.
- Bake the pie for 15 minutes at 425°F, then reduce the temperature to 350°F (175°C) and bake for another 40 minutes.
- Let the pie cool for at least an hour before serving.