Table of Contents
Table of Contents
As the leaves turn golden and the air gets crispier, I find myself yearning for nostalgic flavors that warm the soul. For me, nothing evokes the spirit of my childhood like the sizzle of crispy potato latkes frying on the stovetop. I remember standing by my grandmother’s kitchen counter—she adorned with flour dust and a mischievous sparkle in her eye—teaching me the precious secrets of making authentic latkes. Fast forward to today, and I’m here to share my Crisp Potato Latkes Recipe with all of you!
What sets this recipe apart from countless others is the secret to achieving that golden-brown crispiness we all love, perfect balance of flavors, and memories of gathering around the table with family. These latkes aren’t just food; they’re a bridge to cherished moments, laughter, and love shared with those we hold dear.
In this post, you’ll discover how to create latkes that are perfectly crispy, impossibly fluffy on the inside, and seasoned just right. Plus, I’ll share some tips and tricks I’ve learned over the years to ensure your latkes are the absolute best they can be. Get ready for a culinary adventure that will take your taste buds on a delightful journey!
What Are Crisp Potato Latkes?
Crisp potato latkes are traditional Jewish pancakes made primarily from potatoes and onions, inextricably tied to the celebration of Hanukkah. Originating in Eastern Europe, latkes were originally cooked in oil as a nod to the miracle of the oil that lasted eight days in the Hanukkah story.
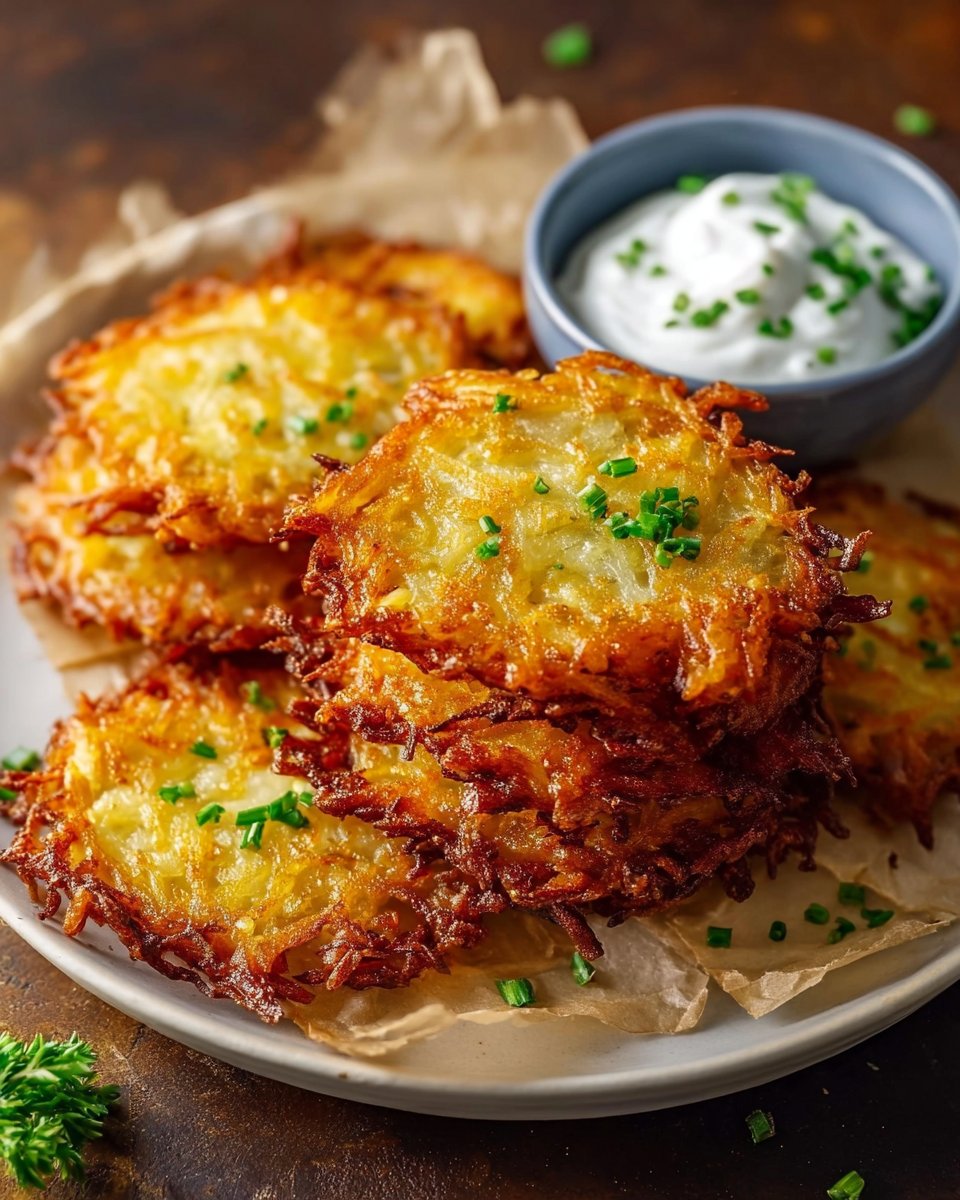
The perfect latke has a beautiful crunch on the outside while still being soft and tender on the inside. When you take your first bite, you’re met with a harmonious medley of flavors—the earthy sweetness of the potatoes, the slight bite of onions, and a sprinkle of salt that all come together in perfect harmony.
These latkes are not just reserved for Hanukkah; they’re also ideal for brunches, holiday gatherings, or any time you crave comfort food. With the right recipe, including my Crisp Potato Latkes Recipe, anyone can channel their inner chef and impress family and friends alike.
Why You’ll Love This Recipe
Unbeatable Crispiness: Unlike store-bought versions that can end up mushy, my latkes are extra crispy thanks to proper drainage and the right frying technique. After using this recipe, you’ll never go back to the frozen variety.
Simplicity Meets Flavor: Made with just a handful of ingredients—russet potatoes, onion, and essential seasonings—this easy recipe allows the natural flavors to shine through.
Cost-Effective: With just one pound of russet potatoes and a few pantry staples, you can whip up a batch of these delicious treats for a fraction of the cost of dining out.
Customization: One of my favorite parts about latkes is the ability to personalize them! Add grated carrots for a hint of sweetness or try different seasonings to make them uniquely yours.
Mildly Challenging, but Worth It: While they might seem intimidating at first, latkes are easy to master with a little practice. You’ll be amazed at how quickly you pick up the technique and impress your friends and family.
So roll up your sleeves and let’s create some memories in the kitchen—your taste buds are in for a delightful treat with my Crisp Potato Latkes Recipe!
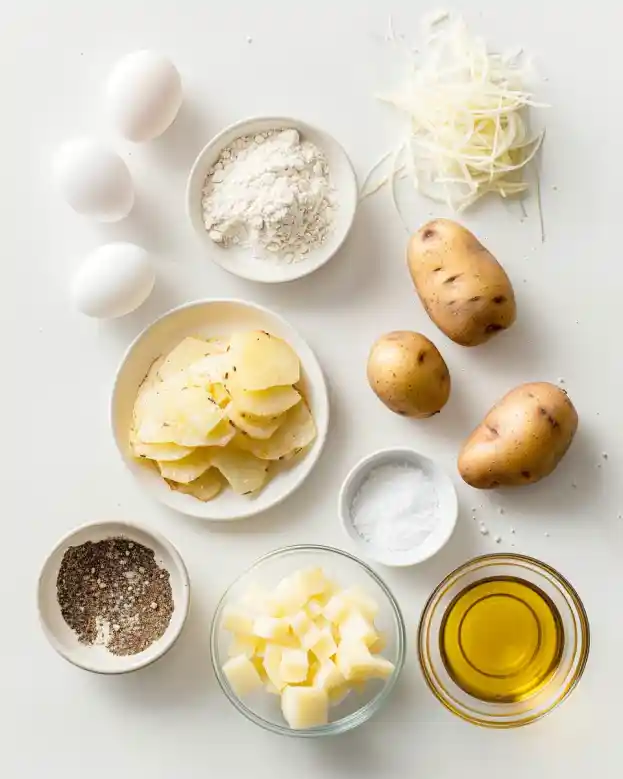
Ingredients
- 1 lb russet potatoes, peeled: Opt for starchy potatoes for the best texture. I love using Idaho potatoes for their fluffiness.
- 1/2 medium onion, peeled: Adds a subtle kick and sweetness. Yellow or sweet onions work great!
- 1/4 cup all-purpose flour or kosher matzo meal: Use whichever you prefer; matzo meal gives a lovely flavor and can be gluten-free.
- 1 tsp baking powder: This secret ingredient helps the latkes puff up slightly.
- 1 tsp fine sea salt: Brings all the flavors together—don’t skip this!
- 1/4 tsp freshly ground black pepper: For a hint of warmth.
- 1 large egg: Acts as a binder for the ingredients.
- Vegetable oil or extra light olive oil for frying: Use a high smoke point oil to get that beautiful, crispy texture.
- Kosher salt, to sprinkle: For seasoning right after frying.
Ingredient Notes
- Quality is Key: Whenever possible, use fresh, high-quality ingredients.
- Substitutions: Gluten-free folks can easily substitute all-purpose flour with gluten-free flour or matzo meal. Vegans can use a flax egg in place of the egg and still achieve a delicious result!
Prep Notes
- Make sure the potatoes are at room temperature before grating for easier handling.
Step-by-Step Instructions
Prepare the Potatoes and Onion: Using a box grater or food processor, grate the peeled russet potatoes and onion.
Chef’s Tip: Work quickly to avoid browning. You can soak the grated potatoes in cold water while you prepare your frying pan, but be sure to drain and thoroughly dry them afterward.
Drain Excess Liquid: Place the grated mixture into a clean kitchen towel or cheesecloth. Squeeze out as much excess liquid as possible. This step ensures your latkes will be crispy!
Mix the Ingredients: In a large mixing bowl, whisk together the flour (or matzo meal), baking powder, sea salt, black pepper, and egg until well combined. Add the drained potato and onion mixture, mixing thoroughly until evenly incorporated.
Heat the Oil: Pour vegetable or extra light olive oil into a large skillet to come about 1/4 inch up the sides. Heat the oil over medium-high heat until shimmering but not smoking, around 350°F (175°C).
Visual Cue: When the oil is hot enough, it will ripple gently but won’t be smoking.
Form the Latkes: Using a tablespoon or your hands, form the potato mixture into small patties about 3 inches in diameter.
Fry: Carefully place the patties into the hot oil, frying in batches to avoid overcrowding. Fry each side for about 3-4 minutes or until golden brown and crisp.
Common Mistake: Avoid touching the latkes too often while frying; let them form a crust before flipping!
Drain Excess Oil: Using a slotted spatula, transfer cooked latkes to a paper towel-lined plate to drain excess oil. While still hot, sprinkle with kosher salt to taste.
Serve: Serve the latkes immediately while warm and crispy, optionally accompanied by sour cream or applesauce. Enjoy!

Expert Tips & Tricks
Get Crispy Every Time: Easily achieve maximum crispiness by ensuring that the grated mixture is as dry as possible before mixing.
Storage Recommendations: If you have leftovers, store them in an airtight container in the fridge for up to 3 days.
Make-Ahead Instructions: You can prep the potato mixture a few hours in advance, just keep it covered in the fridge. Fry when ready.
Reheating: To reheat, place latkes in a single layer on a baking sheet in a preheated oven (around 375°F) for about 10-15 minutes to restore their crispness.
Troubleshooting: If your latkes aren’t cooking through, check the oil temperature and ensure it is hot enough before frying.
Batch Frying: It’s always best to keep latkes warm in a low oven on a wire rack while finishing up the frying process. This will prevent them from getting soggy at the bottom.
Serving Suggestions
Crispy latkes shine best when paired with traditional accompaniments. Serve them alongside a dollop of sour cream or a generous scoop of homemade applesauce for the perfect balance of savory and sweet.
For presentation, stack a few latkes on a plate and garnish with fresh herbs like chives or parsley to elevate the look. These latkes are perfect for holiday gatherings, brunches, or simply as a comforting snack.
Variations & Substitutions
Flavored Variations: Try adding grated carrots or sweet potatoes to bring a vibrant color and a slight sweetness to your latkes.
Herbal Add-Ins: Fresh dill, chives, or parsley can add aromatic flavors and a pop of color.
Dietary Adaptations: For gluten-free latkes, use certified gluten-free flour or matzo meal, and opt for flaxseed egg for vegan latkes without sacrificing texture.
Nutrition & Storage Info
- Prep Time: 20 minutes
- Cook Time: 30 minutes
- Total Time: 50 minutes
- Yield: Approximately 10-12 latkes (serves 4-6)
- Estimated Calories: About 150 calories per serving
Storage Instructions
- Room Temperature: Latkes are best eaten fresh, but you can keep them at room temperature for a few hours.
- Fridge: Store in an airtight container for up to 3 days.
- Freezer: Freeze for up to 2 months, separated by parchment paper. Reheat in the oven.
FAQ Section
- Can I add other vegetables to my latkes?
- Why do my latkes fall apart while frying?
- Can I prepare the mixture a day ahead?
- What type of oil is best for frying latkes?
- How do I get my latkes super crispy?
- Can I bake the latkes instead of frying?
- What can I serve with latkes?
- How do I store and reheat leftover latkes?
- How often should I change the frying oil?
- Can I use different types of potatoes?
Conclusion
This Crispy Potato Latkes Recipe isn’t just about cooking; it’s about creating heartwarming memories with family and friends. I encourage you to try making them from scratch, feeling the joy of biting into something so utterly delicious and comforting. Your efforts will surely be rewarded with smiles and a chorus of “Yum!”
If you have made latkes before or if this is your first time, I’d love to hear your feedback in the comments! Feel free to share your experiences, tips, or tweaks you made along the way. For more delightful recipes, be sure to check out my blog for heavenly sides, scrumptious desserts, and more culinary adventures!
Chicken Bacon Ranch Cottage Cheese Bowl

Crispy Potato Latkes
Ingredients
Method
- Using a box grater or food processor, grate the peeled russet potatoes and onion.
- Place the grated mixture into a clean kitchen towel or cheesecloth. Squeeze out as much excess liquid as possible.
- In a large mixing bowl, whisk together the flour (or matzo meal), baking powder, sea salt, black pepper, and egg until well combined.
- Add the drained potato and onion mixture to the bowl, mixing thoroughly until evenly incorporated.
- Pour vegetable oil into a skillet to come about 1/4 inch up the sides. Heat the oil over medium-high heat until shimmering but not smoking.
- Using a tablespoon or your hands, form the potato mixture into small patties about 3 inches in diameter.
- Carefully place the patties into the hot oil, frying in batches to avoid overcrowding.
- Fry each side for about 3-4 minutes or until golden brown and crisp.
- Using a slotted spatula, transfer cooked latkes to a paper towel-lined plate to drain excess oil, sprinkling with kosher salt to taste.
- Serve the latkes immediately while warm and crispy, optionally accompanied by sour cream or applesauce.