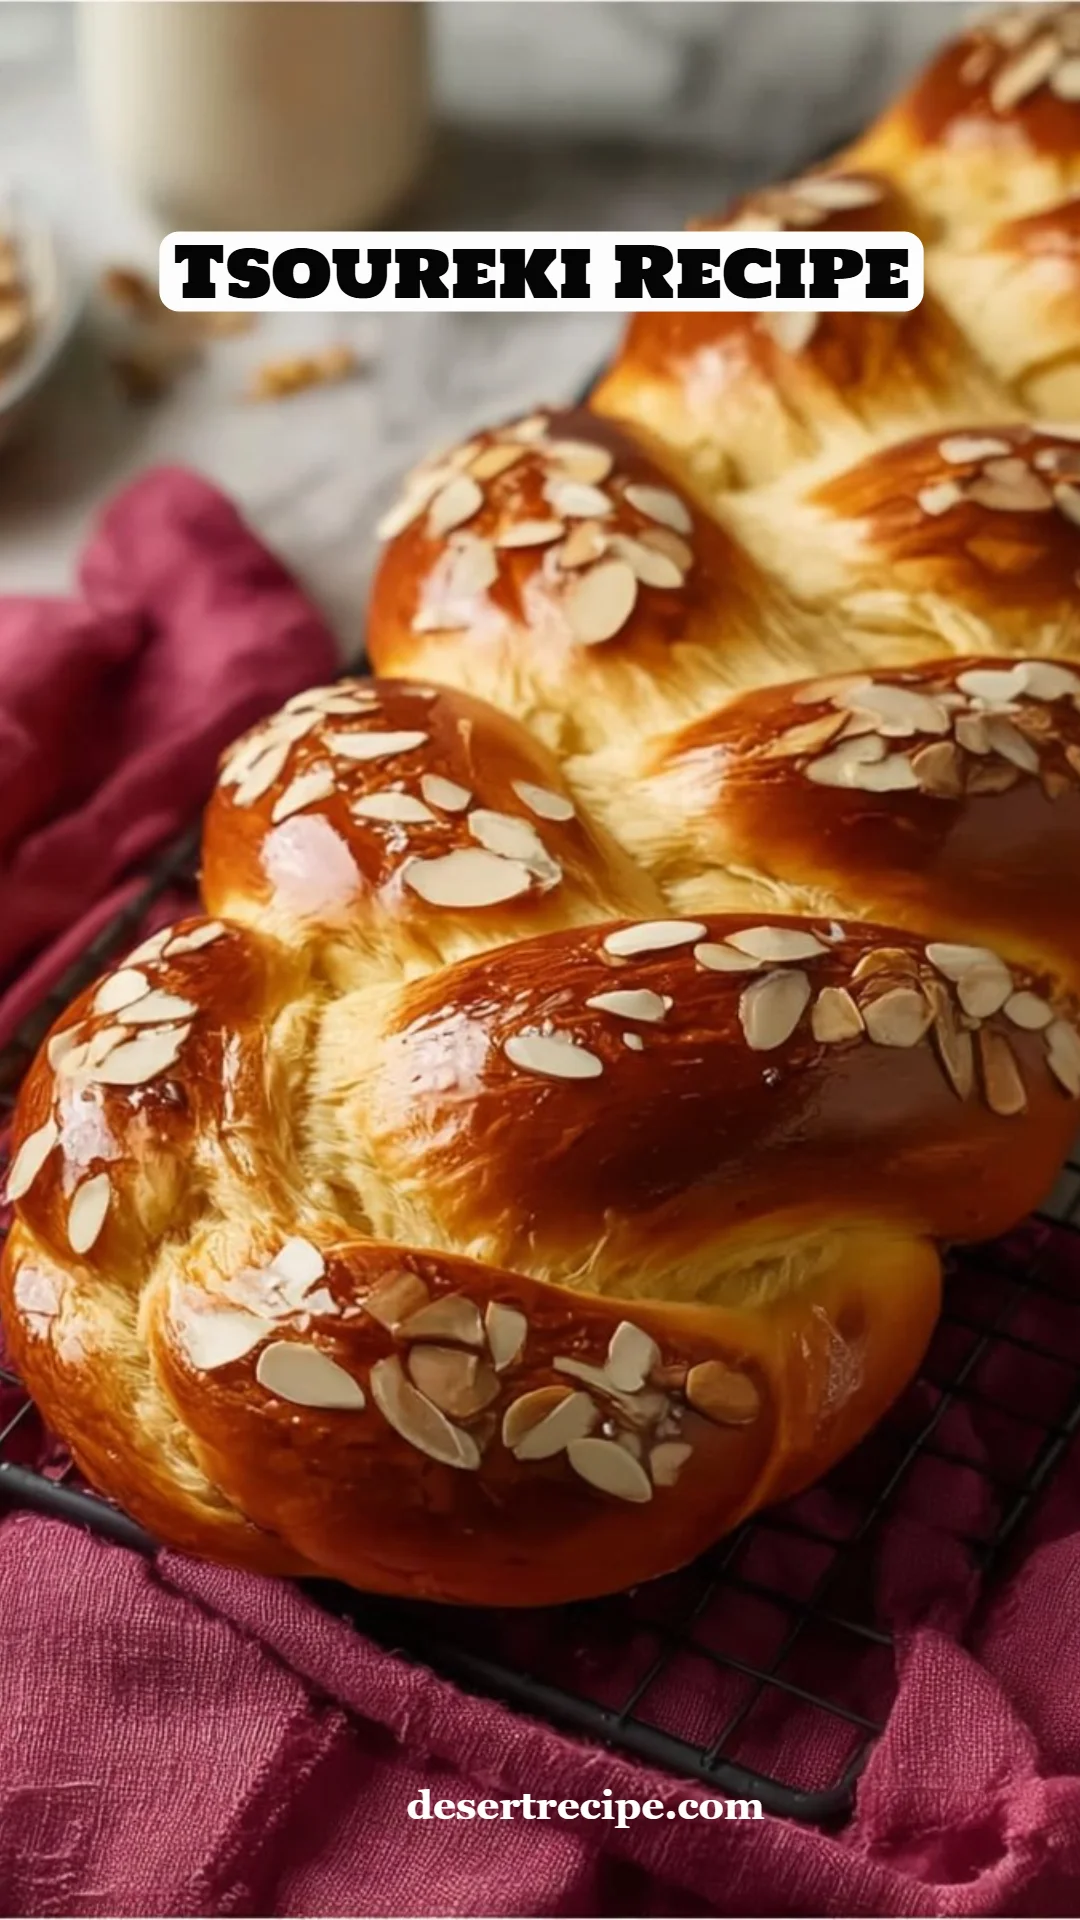
Tsoureki: The Joy of Homemade Sweet Greek Bread
As the sweet aroma of freshly baked bread wafts through my kitchen, I’m instantly transported back to my childhood. Every Easter, my grandmother would whip up her legendary Tsoureki, a braided Greek bread rich with flavor and tradition. With each bite, memories of family gatherings and joyful laughter come rushing back—the warm embrace of loved ones and the shared excitement of celebrating our heritage.
This Tsoureki recipe stands out from others because it isn’t just bread; it’s a bridge to our past. The tender crumb and fragrant hints of orange zest, mahleb, and mastic create an experience that store-bought loaves simply cannot replicate. It’s comfort food at its finest, embodying a love that transcends generations. In this blog post, I promise to guide you through my treasured Tsoureki recipe, sharing tips and tricks that I’ve gathered over years of baking. By the end, you’ll not only have a delicious loaf but also a sense of accomplishment that comes with creating something beautiful from scratch.
What Are Tsoureki?
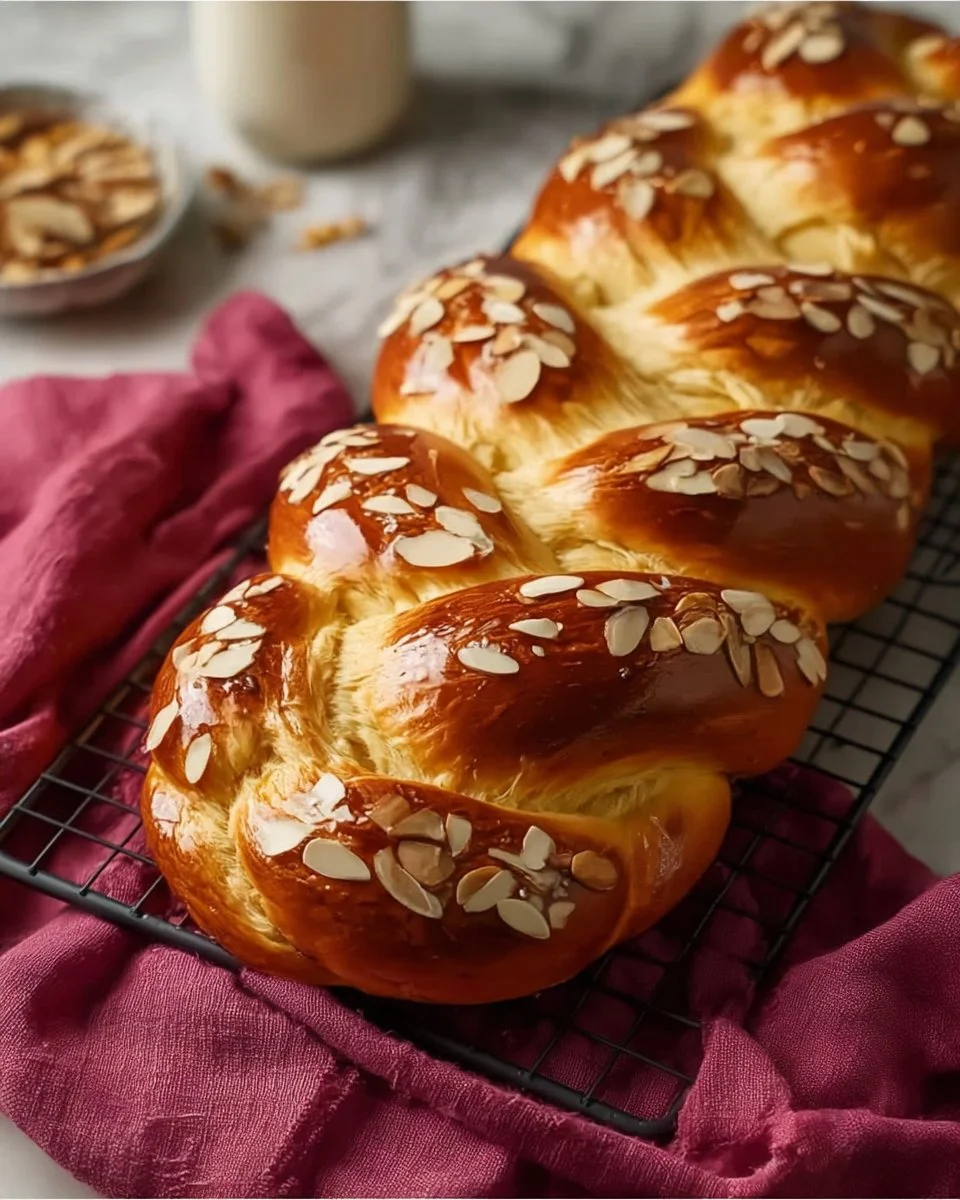
Tsoureki is an exquisite traditional Greek bread often enjoyed during Easter but perfect for any occasion. With roots deep in Greek culture, this braided bread has a history intertwined with celebrations and family gatherings. The balance of slightly sweet flavors and aromatic spices makes Tsoureki a delightful treat that simply dances on the palate.
Texturally, Tsoureki is a soft, pillowy bread with a golden-brown crust—thanks to the egg wash that gives it that glorious sheen. When you break into it, the inside is tender and slightly sweet, with an irresistible aroma that fills the air. What makes Tsoureki unique is its fragrant addition of mahleb and mastic; these spices impart a rich depth of flavor that is hard to find elsewhere. This bread basks in its heritage, making it a quintessential part of a Greek celebration or a cozy family brunch.
Why You’ll Love This Recipe
Authentic Flavors: This homemade Tsoureki recipe captures the soul of Greek baking. Don’t settle for bland, mass-produced versions when you can create authentic depth at home.
Cost-Effective: Creating your own Tsoureki is a delightful experience that will save you money compared to store-bought versions that are often less flavorful and full of preservatives.
Customization: Want to add chocolate chips or a sprinkle of cinnamon? The options are endless with Tsoureki! Personalize your loaf according to the flavors you adore.
Simplicity with Style: Despite its stunning presentation, Tsoureki is surprisingly easy to make. The steps may call for a little attention, but I promise the reward is worth every moment.
Bonding Experience: Baking is always better with company. Get your family in the kitchen and make it a bonding experience. You’ll create not just bread, but cherished memories.
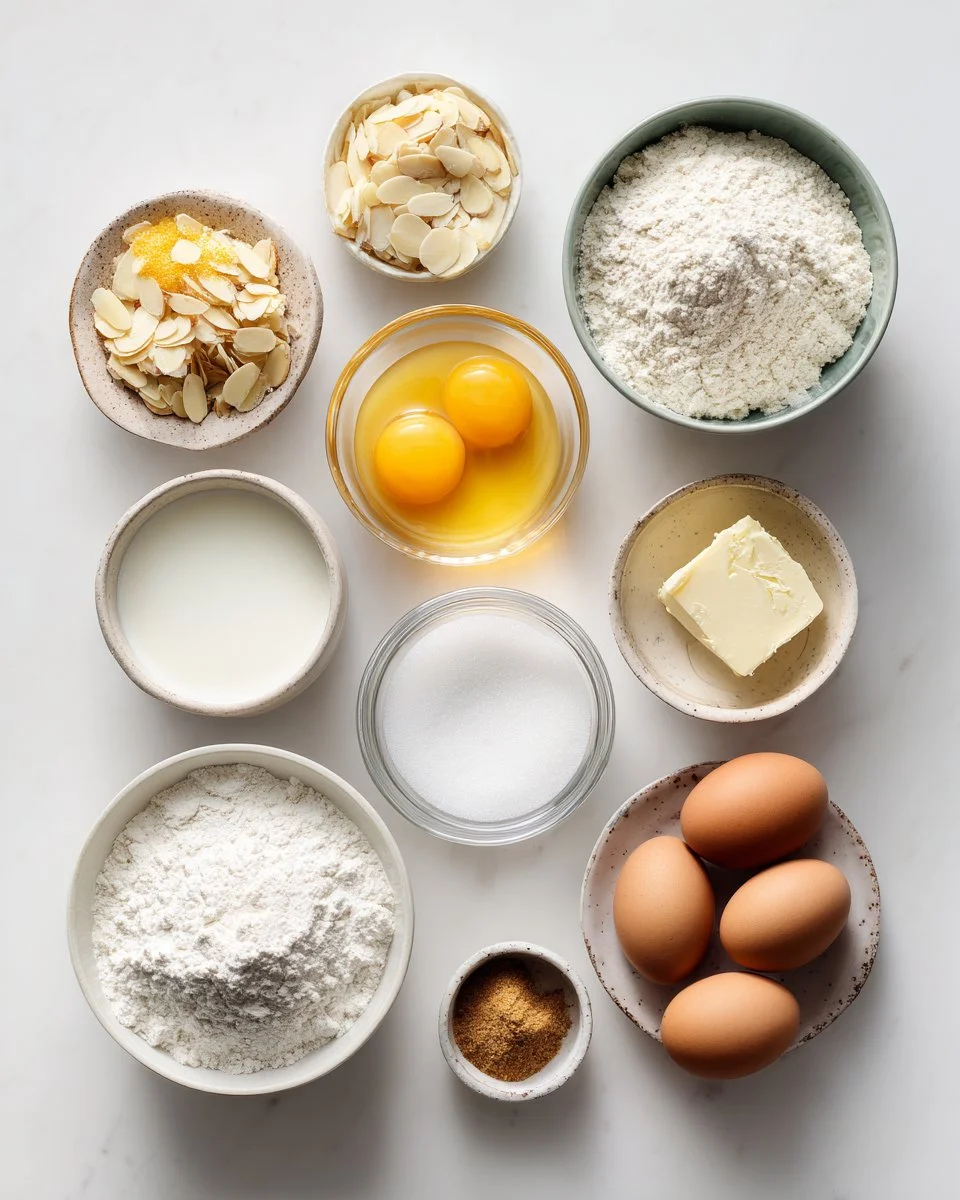
Ingredients
To create this delightful Tsoureki, you’ll need the following ingredients:
- 4 cups all-purpose flour: For a great texture. Consider using bread flour for even more chewiness.
- 2 1/4 teaspoons active dry yeast: Make sure it’s fresh for a good rise.
- 3/4 cup warm milk (about 110°F): Helps activate the yeast; stick with whole milk for richness.
- 1/2 cup granulated sugar: Sweetness is key!
- 2 large eggs: Use room temperature eggs for better incorporation.
- 1/2 cup unsalted butter, melted: Make sure it’s not hot; let it cool a bit.
- Zest of 1 orange: For a lovely citrus aroma.
- 1/2 teaspoon ground mahleb (optional): Adds that unique flavor that is essential for authenticity.
- 1/4 teaspoon ground mastic (optional): This gives Tsoureki its signature gum-like texture and subtle flavor.
- 1/2 teaspoon salt: Balances the sweetness.
- 1 egg (for topping): Creates a beautiful glaze.
- 1 tablespoon milk (for topping): Mix with the egg for a glossy finish.
- 2 to 3 tablespoons sliced almonds (for topping): Adds a delightful crunch.
Prep Notes:
- Ensure the butter is melted and cooled to room temperature before mixing.
- If you haven’t used mahleb or mastic before, they can usually be found at Mediterranean or specialty spice stores.
Step-by-Step Instructions
Activate the Yeast: Combine the warm milk and 1 tablespoon of the sugar in a small bowl. Sprinkle the yeast over the milk and let it sit for 8 to 10 minutes until foamy. If the mixture does not foam, replace the yeast before continuing.
Prepare the Dough: In a large mixing bowl, whisk together the flour, remaining sugar, salt, orange zest, mahleb, and mastic. In a separate bowl, whisk the eggs and melted butter until combined, then stir in the yeast mixture. Pour the wet ingredients into the dry ingredients and mix until a soft dough forms.
Knead the Dough: Transfer the dough to a lightly floured surface and knead for 10 to 12 minutes until smooth and elastic. The dough should feel soft and slightly tacky but not sticky. Test readiness by stretching a small piece; it should stretch thin before tearing.
First Rise: Place the dough in a lightly greased bowl and cover with a clean towel. Let it rise in a warm area for 1 1/2 to 2 hours until it’s doubled in size.
Shape the Braid: Gently deflate the dough and divide it into three equal portions. Roll each portion into a rope about 16 to 18 inches long. Arrange the ropes side by side and braid tightly. Tuck the ends underneath and transfer the braid to a parchment-lined baking sheet.
Second Rise: Cover the braided dough loosely and let it rise for another 45 to 60 minutes until puffy and slightly expanded.
Apply Egg Wash and Bake: Preheat the oven to 350°F (175°C). Whisk the egg with 1 tablespoon of milk and brush it evenly over the braid. Sprinkle sliced almonds over the top. Bake for 25 to 30 minutes until deep golden brown and fully baked through. If the top browns too quickly, cover loosely with foil during the last few minutes. Cool completely on a wire rack before slicing.
Chef’s Tips:
- For a perfect rise, find a warm, draft-free spot in your kitchen.
- The dough should not stick to your hands during kneading—add flour only if necessary!
Expert Tips & Tricks
Quality Ingredients Are Key: Use high-quality flour, butter, and spices to make a difference in taste.
Storage Recommendations: Store leftover Tsoureki in an airtight container at room temperature for up to 3 days or in the fridge for up to a week.
Make-Ahead Instructions: Prepare the dough the night before, let it rise in the fridge overnight, then shape and bake the next day for easy morning enjoyment.
Troubleshooting: If your dough isn’t rising, your yeast may not be active. Always check the expiration date and ensure the milk isn’t too hot.
Serving Suggestions: Slather with butter or serve with jam for breakfast—perfect with a warm cup of coffee!
Serving Suggestions
Tsoureki is a versatile bread that pairs beautifully with various accompaniments. Serve slices alongside a cozy breakfast of scrambled eggs and fresh fruit, or enjoy it as a snack with tea or coffee. For festive occasions, serve it with sweet spreads, jams, or even a light drizzle of honey.
When it comes to presentation, consider placing your Tsoureki on a wooden cutting board or a decorative platter, garnished with some seasonal flowers or fresh fruit to wow your guests.
Variations & Substitutions
Flavor Combinations: Customize your Tsoureki by adding cardamom or cinnamon for a spiced version. Want chocolate? Toss in some chocolate chips for a delightful twist.
Dietary Adaptations: To make it dairy-free, substitute plant-based butter and nondairy milk. For a gluten-free option, try using a gluten-free flour blend; just be sure to add additional xanthan gum as required.
Seasonal Variations: Add dried fruits like cranberries or apricots for a holiday twist, or substitute lemon zest for a refreshing summer variant.
Nutrition & Storage Info
- Prep Time: 30 minutes
- Cook Time: 30 minutes
- Total Time: 2.5-3 hours (including rise time)
- Yield: 12 servings
- Estimated Calories per Serving: 220 calories
Storage:
- Store Tsoureki in an airtight container at room temperature for up to 3 days or refrigerate for up to a week. It also freezes beautifully—wrap it tightly in plastic wrap and aluminum foil and it will last for up to 3 months.
FAQ Section
Can I make Tsoureki without mahleb or mastic?
- Absolutely! While these ingredients add authenticity, you can certainly enjoy Tsoureki without them.
What can I do if my dough is sticky?
- If the dough is too sticky, sprinkle in additional flour, a tablespoon at a time, while kneading until it’s soft and pliable.
How can I tell when my Tsoureki is done baking?
- A golden-brown crust and a hollow sound when tapped on the bottom are both great signs that it’s ready.
Can I use instant yeast instead?
- Yes! You can substitute instant yeast for active dry yeast in a one-to-one ratio.
What’s the best way to cool Tsoureki?
- Allow it to cool completely on a wire rack to prevent sogginess.
How can I make it vegan?
- Use plant-based butter, almond milk, and a flaxseed egg instead of regular eggs.
How do I reheat leftovers?
- Slice the Tsoureki, wrap it in foil, and warm it in a low oven (around 300°F) for about 10 minutes.
Can I add nuts or dried fruits?
- Definitely! Feel free to fold in your favorite nuts or dried fruits into the dough before the first rise.
What’s the ideal way to serve Tsoureki?
- Tsoureki is lovely served plain or toasted, with butter and jam for breakfast, or with coffee in the afternoon.
Can I freeze Tsoureki?
- Yes! Wrap it tightly and freeze for up to 3 months. Let it thaw at room temperature before enjoying.

Conclusion
This Tsoureki recipe is more than just food; it’s a celebration of life, love, and tradition. With each braided loaf, you are weaving together memories that will last a lifetime. I encourage you to embrace this journey; the flavors and aromas will remind you of home, even if you’re far away.
If you try this recipe, please share your thoughts in the comments! I’d love to hear how it turned out for you. Don’t forget to check out my other favorite recipes, like my Traditional Greek Spanakopita or Decadent Baklava, right here on my blog. Happy baking!