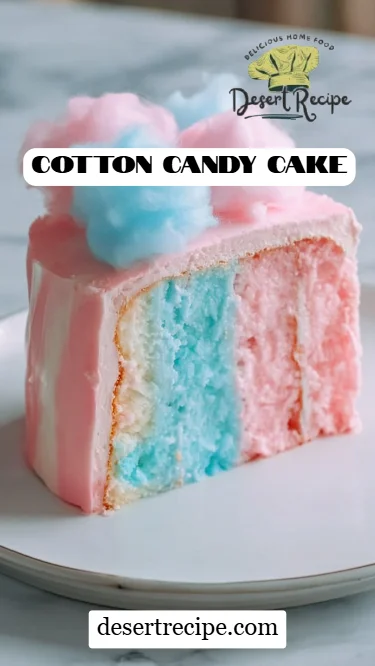
Whimsical Cotton Candy Cake: A Sweet Delight for Every Celebration!
Let me take you back to a sunny day at the county fair, where the air was sweet with the smell of cotton candy, and laughter echoed around every corner. That delightful blend of sweet nostalgia and festive fun always brings a smile to my face. Inspired by those cherished memories, I decided to create something extra special — a Cotton Candy Cake that not only pops with color but also bursts with nostalgic flavor!
What sets this Cotton Candy Cake apart from all the others? It’s not just about the vibrant layers or the fluffy, melt-in-your-mouth cotton candy on top. This cake encapsulates the joy of carefree childhood moments and offers a delightful taste that transcends the ordinary. With its fluffy vanilla layers, creamy buttercream, and playful pops of color, this cake is not just dessert; it’s a celebration.
In this post, I’ll guide you through each step of the way, sharing secrets that will make your Cotton Candy Cake the star of any occasion. By the end, you’ll be equipped with a recipe that ensures everyone will take a bite and exclaim, “Wow, this tastes just like the fair!”
What Are Cotton Candy Cakes?
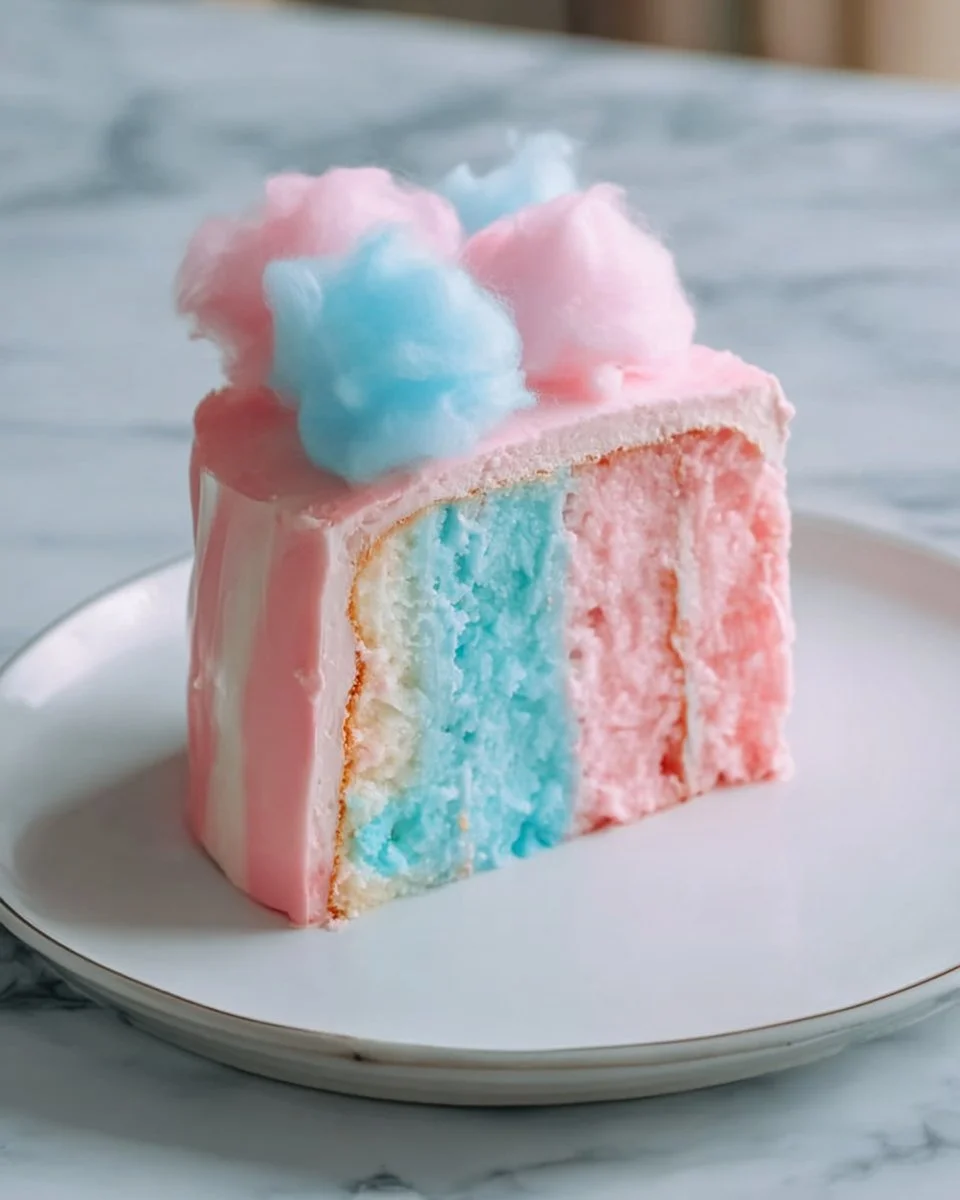
Cotton Candy Cakes are a playful and vibrant dessert that cleverly celebrates the nostalgic delight of the classic fair treat: cotton candy. These whimsical cakes are typically composed of multiple layers of vanilla cake tinted in bright, sugary shades that mimic the colors of cotton candy itself. The result? A feast for the eyes as well as the taste buds!
This cake offers a unique taste experience that beautifully melds the light and fluffy texture of vanilla cake with the sweet flavors constantly associated with carnival treats. The cotton candy topping adds an airy sweetness that pairs perfectly with the buttery richness of the frosting, creating an indulgent dessert that is light and fun—perfect for birthdays, baby showers, or any festive gathering!
You’ll love making this cake because it’s not only visually stunning but also incredibly versatile! Whether you decide to serve it for a special occasion or just as an extravagant pick-me-up, this cake promises to elevate any event with its delightful charm and comforting flavors.
Why You’ll Love This Recipe
Visually Stunning: Say goodbye to boring desserts! This Cotton Candy Cake stands out with its lush layers of color and fun cotton candy topping, making it a showstopper at any gathering. Just imagine the delighted reactions when your friends and family see it!
Nostalgic Flavor: Perfectly capturing the sweetness of cotton candy, this cake brings back childhood memories in every bite. It’s like taking a trip back to the fairgrounds without leaving your kitchen!
Cost-Effective: While store-bought cakes may look appealing, they often come with a hefty price tag. This homemade version is not only budget-friendly but also a fraction of the cost while allowing you to customize flavors and decorations to your liking.
Customization: Want to make it a bit more decadent? Add chocolate layers or experiment with flavored frostings! You can easily make the cake your own and suit the preferences of every guest.
Easy to Make: Believe me, you don’t have to be a baking expert to whip up this spectacular cake! With simple elicit stick-to-everyone’s-favorites ingredients, you’ll follow straightforward steps to create an impressive dessert that can be completed in under two hours.
With this irresistible recipe, you’ll soon see why everyone will be asking for seconds—and possibly even the recipe!
Ingredients
Before we dive into the baking adventure, here’s the lineup of ingredients you’ll need for your whimsical Cotton Candy Cake:
- 1 box of vanilla cake mix: I prefer Duncan Hines or Betty Crocker, as they’ve always yielded reliable results.
- 3 large eggs: Room temperature eggs will whip up fluffier, so take them out ahead of time.
- 1 cup of water: You can use milk instead for a richer flavor.
- 1/2 cup of vegetable oil: Yup, it may seem standard, but don’t substitute this or it will impact the cake’s moisture.
- Cotton candy (for decoration): Grab some fresh cotton candy, ideally in a few colors to match your cake layers’ hues.
- Food coloring (various colors): Gel food coloring works best for vibrant colors without adding too much liquid.
- Buttercream frosting: Homemade or store-bought, but if you make your own, you can flavor it to complement the cake.
- Vanilla extract: A couple teaspoons really enhances the flavor profile.
- Sprinkles (optional): Go wild with the sprinkles! They add fun and whimsy to your creation.
Prep Notes:
- Ensure your butter (if making frosting from scratch) is at room temperature for easy blending.
- Gather all your ingredients before starting so you’re prepared and efficient.
Step-by-Step Instructions
Ready to make some dessert magic? Let’s get started on your Cotton Candy Cake! Here’s a detailed, step-by-step guide to help you bake like a pro:
Preheat your oven to 350°F (175°C) and grease and flour three 8-inch round cake pans. This keeps your cake from sticking and ensures an easy release!
Mix It Up: In a large mixing bowl, combine the cake mix, eggs, water, and vegetable oil. Mix until smooth, probably about 2-3 minutes on medium speed, scraping down the sides of the bowl as needed.
Add Some Color: Divide the batter into three separate bowls (or however many colors you’re using), and tint each with different food coloring to create vibrant layers. Aim for shades that resemble classic cotton candy colors like pink, blue, and purple!
Pour and Bake: Pour the colored batters into the prepared pans. Use a spatula to spread the batter evenly. Bake in the preheated oven for about 25-30 minutes, or until a toothpick inserted comes out clean. You’ll know it’s done when the cakes spring back when gently touched!
Cooling Time: Allow cakes to cool in the pans for about 10 minutes. Carefully transfer them to wire racks to cool completely. This is key; don’t frost while warm—your frosting will slide right off!
Layer It Up: Once cooled, layer the cakes with a generous spoonful of buttercream frosting between each layer. Use an offset spatula to smooth it out nicely.
Frost It: Frost the top and sides of the cake with more buttercream. Don’t be shy—use lots of frosting for a beautiful finish!
Dress It Up: Finally, decorate with fluffy cotton candy and sprinkles on top. The straws can also jazz up the presentation—get creative!
Slice and Serve: Cut it into generous slices, serve to your lucky guests, and enjoy the happiness that follows!
Celebrate: Remember, the best part of baking is sharing! So gather around, dive in, and relish those delightful flavors together.
Chef’s tips:
- Avoid overmixing the batter, which can make the cake tough.
- If you’re not sure about baking times, set a timer for 25 minutes and check frequently thereafter.
Expert Tips & Tricks
Storage Recommendations: To keep your cake fresh, store it in an airtight container at room temperature for up to 2 days. If you want to keep it longer, refrigerate it for up to a week. Just remember to bring it back to room temperature before serving!
Make-Ahead Instructions: You can bake the cake layers a day in advance. Just wrap them tightly in plastic wrap and keep them in the fridge. Frosting should also be made ahead if you prefer!
Troubleshooting: If your cake layers dome too much while baking, you can level them down with a serrated knife once they’ve cooled. It’s a simple fix to ensure even stacking!
Flavor Add-Ins: If you’re feeling adventurous, consider adding a teaspoon of almond extract to the batter for an unexpected twist. You could also fold in some crushed candy or nuts to add a delightful texture.
Cotton Candy Consideration: Add the cotton candy as a topping right before serving. If you add it too early, the sugar can melt, and it won’t look as fluffy or festive.
Serving Suggestions
This Cotton Candy Cake is magical on its own, but it pairs beautifully with a scoop of vanilla ice cream or a drizzle of raspberry sauce for a splash of flavor. For a themed party, consider serving some colorful cocktails or flower-infused lemonade, encouraging a summery atmosphere.
Presentation is key! Use a beautiful cake stand and consider layering some colorful napkins underneath for an extra pop. Whether it’s a birthday, a holiday get-together, or just a sweet treat on a Wednesday, this cake fits the occasion perfectly.
Variations & Substitutions
Feeling creative? Here are a few fun ways to play around with this recipe:
Different Flavor Combinations: Swap vanilla cake for strawberry or lemon for a fruity twist. You could even incorporate coconut or chocolate for a more decadent cake.
Dietary Consideration Adaptations: Need it gluten-free? Use a gluten-free box mix, and make sure to select gluten-free frosting and colors. Looking for a vegan variant? Substitute eggs with flax eggs and use almond milk instead of water, and coconut oil in place of vegetable oil.
Seasonal Variations: For a fall-themed cake, incorporate pumpkin spice into the cake batter and top with caramel drizzle instead of cotton candy! During the winter months, use peppermint extract and crushed candy canes for a festive spin.
Nutrition & Storage Info
- Prep time: 20 minutes
- Cook time: 30 minutes
- Total time: 50 minutes (not including cooling)
- Yield: 12 servings
- Estimated calories per serving: Approximately 350 calories (depends on frosting)
Storage Instructions: Store at room temperature for up to 2 days or refrigerate for up to 1 week. For longer storage, freeze it wholly wrapped in plastic and foil for up to two months.
FAQ Section
Can I use homemade cake instead of box mix?
- Absolutely! You can just ensure it’s a light cake that rises well.
Can I make this cake ahead of time?
- Yes! You can bake the layers in advance and frost just before serving for optimal freshness.
Is this cake suitable for a one-year-old’s birthday?
- Definitely! Just ensure the cotton candy is in small pieces to avoid choking hazards.
Is it okay to leave the cake out at room temperature?
- Yes, as long as it’s not too warm or humid.
How can I get vibrant colors in my cake layers?
- Gel food coloring tends to work best as it provides rich hues without adding too much liquid.
Can I use other frostings?
- Yes! Cream cheese frosting, whipped cream, or even ganache can create unique flavors.
What do I do if my cake sinks in the middle?
- This can happen if there’s too much batter or if it wasn’t baked long enough. Make sure your baking powder is fresh and that you’re using the right bake times.
How long does cotton candy last?
- Fresh cotton candy is best used within a day or two, as it can lose its fluffiness.
Can I make mini cotton candy cakes?
- Yes! Use smaller baking pans and adjust the baking time accordingly.
Are there nut-free options?
- Yes! Just make sure to use nut-free cooking oil and check your food coloring and sprinkles for allergens.
Conclusion
This Cotton Candy Cake is truly a joyous creation that brings smiles and lovely memories to the table, embodying the sweetness of life! I promise you, from the vibrant layers to the delightful cotton candy topping, it will quickly become a favorite recipe in your baking repertoire.
So, what are you waiting for? Put on that apron, gather your friends or family, and bring a little magic into your kitchen! I would love to hear your thoughts, or see your beautiful variations, so do share your baking adventures in the comments below! Be sure to check out more of my recipes, like the delicious Chocolate Lava Cake or Rainbow Cupcakes, for more sweet inspirations on your baking journey. Happy baking!