Delightful Coconut Cake: Your Go-To Recipe for a Slice of Paradise!
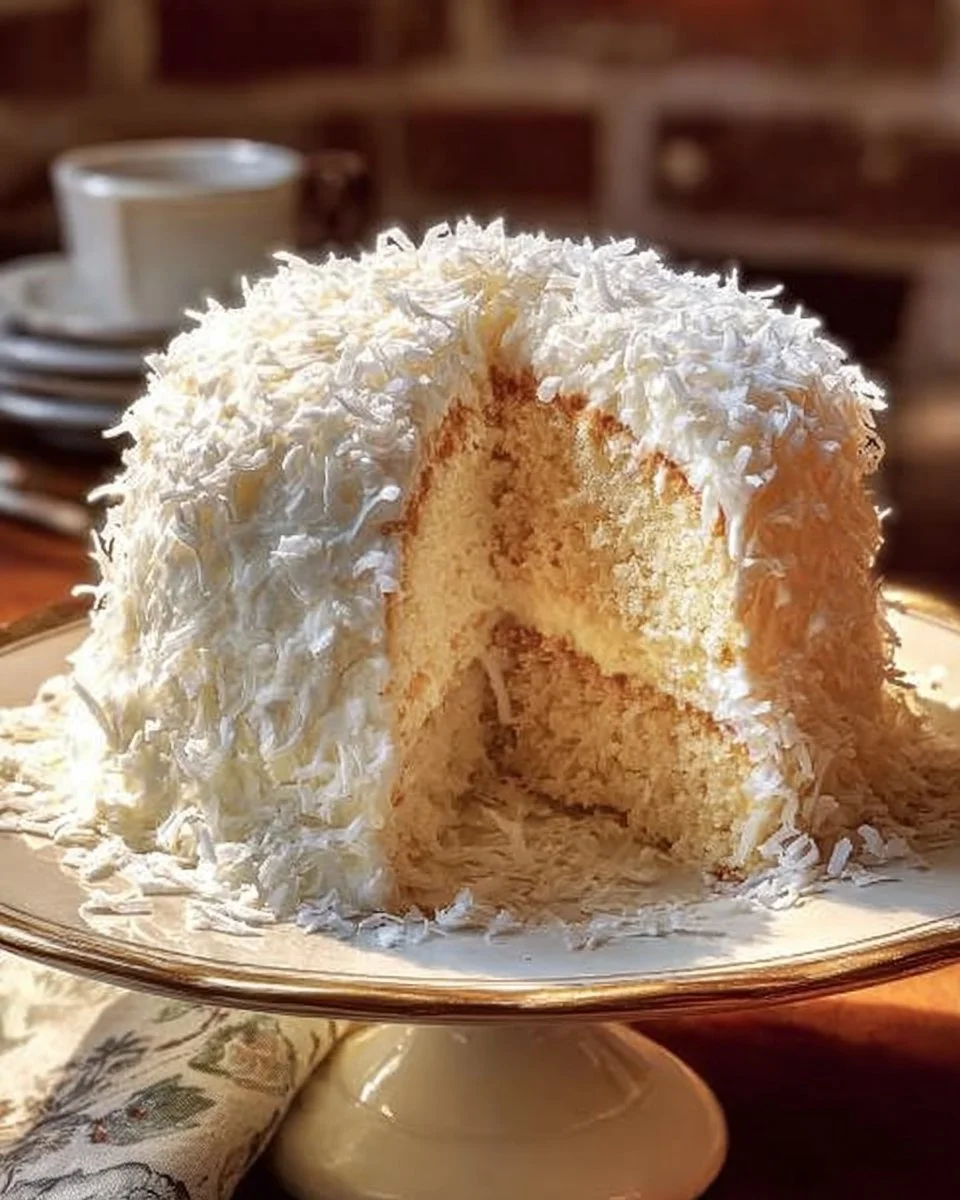
If you’ve ever taken a bite of a moist, fluffy Coconut Cake and felt like you were on a tropical vacation, then you know exactly what I’m talking about! This cake is more than just a dessert; it’s a ticket to cherished memories and priceless family gatherings. I can still recall the joyful chaos of my childhood kitchen, the sweet aroma of coconut drifting through the air while my grandmother expertly whipped up her signature Coconut Cake. It was a family tradition; every birthday, every holiday, that cake graced our table, its luscious layers sprinkled with shredded coconut inviting everyone to dig in.
What makes this Coconut Cake truly special is not just its flavor, but the personal touches you can add to it. Unlike store-bought versions that often disappoint, this homemade delight brings the perfect balance of sweetness and a tropical twist, making it a beloved comfort food. It’s light, fluffy, and infused with rich coconut milk, elevating your baking experience to new heights.
In this recipe, I promise to share all the tips and tricks I’ve learned from my kitchen adventures so you too can create that Coconut Cake magic for your family. Let’s dive in together and bake something beautiful!
What Are Coconut Cakes?
Coconut Cakes have a rich history that takes us to the tropical shores of the Caribbean and Southeast Asia. They’re a delightful combination of culinary traditions, reflecting the use of coconut as both a nutritional staple and a cherished ingredient in celebrations.
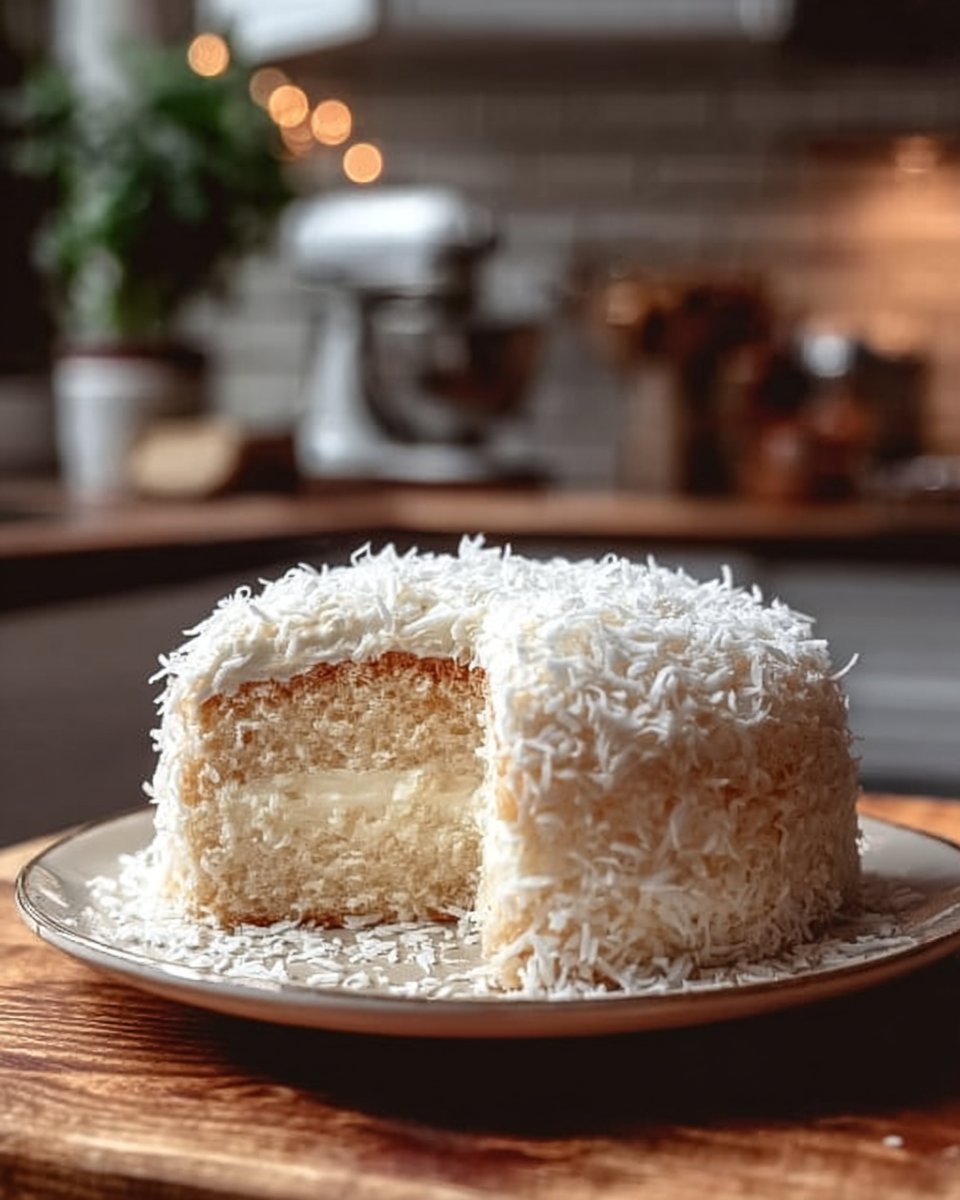
When you take your first bite, you’ll experience a delightful medley of flavor—sweet, creamy, and wonderfully moist. The texture is airy yet substantial, almost like a soft cloud that melts in your mouth. What makes these cakes distinct lies in the use of coconut milk combined with sweetened shredded coconut, resulting in a rich flavor profile that you simply cannot replicate with standard vanilla or butter cakes.
So, when should you whip up a coconut cake? Whether it’s a celebration, a summer gathering, or simply a cozy evening at home, Coconut Cake adds sunshine to any occasion.
Why You’ll Love This Recipe
1. Homemade Goodness
Do yourself a favor and skip the store-bought versions that are overly sweet and artificial. This Coconut Cake is made from scratch, using simple yet high-quality ingredients that let the fresh coconut flavor shine through.
2. Cost-Effective Indulgence
Have you ever splurged on an overpriced cake from a bakery only to feel slightly disappointed? Making this cake at home is not only easier but also much more affordable! With ingredients you likely already have on hand, you’ll save both time and money here.
3. Customization Galore
This recipe opens the door to endless possibilities—want to add a hint of lime for a zesty twist? Go for it! Feel free to mix in your favorite nuts or substitute the frosting to fit your personal flair.
4. Simple Steps for All Skill Levels
Even if you’re a novice in the kitchen, this cake is straightforward enough for anyone to tackle. With just a few steps and zero fancy equipment, you’ll impress your family and friends without breaking a sweat.
5. A Showstopper for Any Occasion
This Coconut Cake is not just delicious; it’s also visually stunning. The bright white frosting with a sprinkle of shredded coconut makes it perfect for any celebration, be it birthdays, holidays, or just a casual gathering with friends.
Ingredients
To create this heavenly Coconut Cake, you will need:
- 2 cups all-purpose flour: For a light, fluffy cake, use high-quality flour like King Arthur or Bob’s Red Mill. Sift it for a lighter texture!
- 1 1/2 cups granulated sugar: Regular granulated sugar works perfectly; feel free to use cane sugar for a more natural taste.
- 1/2 cup unsalted butter, softened: Let the butter sit at room temperature for about 30 minutes for easier creaming.
- 1 cup coconut milk: Full-fat coconut milk adds richness; you can also use light coconut milk if you prefer a lighter cake.
- 4 large eggs: Use fresh, organic eggs for the best flavor and nutrition.
- 1 tablespoon baking powder: Ensure your baking powder is fresh for a perfect rise.
- 1 teaspoon vanilla extract: Use pure vanilla extract for a more robust flavor.
- 1/2 teaspoon salt: Balances the sweetness.
- 3 cups sweetened shredded coconut: Opt for the finest quality you can find—this is where the coconut flavor shines!
- 1 cup heavy cream: This is essential for the rich frosting—again, using high-quality cream makes a difference.
- 1/2 cup powdered sugar: For a sweet, fluffy frosting, sift your powdered sugar before mixing.
Prep Notes
Ensure your butter is at room temperature, and if you want to make things smoother, allow your eggs to come to room temperature for about 30 minutes as well.
Step-by-Step Instructions
1. Preheat the oven: Start by preheating your oven to 350°F (175°C). Grease and flour two 9-inch round cake pans to ensure that your cakes come out easily.
2. Cream butter and sugar: In a mixing bowl, cream together the softened unsalted butter and granulated sugar using an electric mixer until the mixture is light and fluffy, about 3-4 minutes. This step is crucial for incorporating air into your batter.
3. Add eggs: Add the eggs one at a time, beating well after each addition. This not only ensures an even mix but also helps with the cake’s structure.
4. Vanilla extract and coconut milk: Stir in the vanilla extract and coconut milk until well combined. The mixture should be smooth and creamy.
5. Dry ingredients: In a separate bowl, combine the all-purpose flour, baking powder, and salt. Gradually fold the dry mix into the wet mixture until just combined—do not overmix; a few lumps are just fine!
6. Add shredded coconut: Gently fold in 1 cup of shredded coconut, creating that signature coconut flavor in every bite.
7. Divide and bake: Divide the batter evenly between the prepared cake pans. Bake for 25-30 minutes or until a toothpick inserted in the center comes out clean. Keep an eye on the cakes; around the 25-minute mark, start checking for doneness.
8. Cool the cakes: Let the cakes cool in the pans for 10 minutes before transferring them to a wire rack. This helps maintain moisture.
9. Whip the frosting: For the frosting, whip the heavy cream until soft peaks form. Gradually add the powdered sugar and continue beating until stiff peaks form your dreamy frosting.
10. Assemble the cake: Place one cooled cake layer on a serving plate. Spread a generous layer of frosting on top, then sprinkle with shredded coconut.
11. Add the second layer: Carefully place the second layer on top and frost the top and sides of the cake, ensuring a generous covering of frosting for that wow factor.
12. Garnish: Finish by garnishing the cake with the remaining shredded coconut to create a lush, tropical look.
Chef’s Tips
- Visual cues: The batter should be smooth before baking, and cakes are fully cooked when they start pulling away from the edges of the pans.
- Common mistakes to avoid: Don’t overmix your batter, or you risk a dense cake.
- Storage: Store any leftovers in an airtight container at room temperature for up to 3 days, or refrigerate for up to a week.
Expert Tips & Tricks
- Experiment with flavors: Consider adding some lime or almond extract for an extra layer of flavor that complements coconut beautifully.
- Storage: This coconut cake stays fresh in the fridge for up to a week or can be frozen for up to 3 months. Just wrap it tightly in plastic wrap.
- Make-ahead instructions: You can bake the cakes a day in advance. Just keep them tightly covered to avoid drying out before frosting and serving.
- Troubleshooting: If your cake sinks in the middle, it could mean you’ve added too much leavening agent or opened the oven door too soon.
- Decorating with ease: Use a piping bag to frost your cake for a more decorative finish. A simple star tip can create beautiful swirls!
Serving Suggestions
Pair slices of Coconut Cake with a light tropical fruit salad or fresh whipped cream for a refreshing contrast. Presentation matters too; consider placing the cake on a colorful platter and surrounding it with fresh fruits like ripe mangoes and cherries. This cake makes a delightful centerpiece for summer barbecues, birthday parties, or any occasion that calls for a bit of sweetness.
Variations & Substitutions
- Flavor combinations: Consider turning it into a chocolate coconut cake by replacing a portion of the flour with cocoa powder or swirling in chocolate ganache.
- Dietary restrictions: Make it gluten-free by substituting the all-purpose flour with a gluten-free blend. For dairy-free, use coconut oil instead of butter and non-dairy milk alternatives.
- Seasonal options: Add seasonal berries like strawberries or raspberries for a refreshing twist during summer months.
Nutrition & Storage Info
- Prep Time: 30 minutes
- Cook Time: 30 minutes
- Total Time: 1 hour
- Yield: 12 servings
- Estimated Calories: 320 per slice
Storage Instructions
- Room Temperature: Keep for up to 2 days; after that, refrigerate.
- Fridge: Lasts 1 week when stored properly.
- Freezer: Lasts up to 3 months if wrapped tightly.
FAQ SECTION
1. Can I make this cake ahead of time?
Absolutely! You can bake the cake layers up to a day in advance and frost them just before serving for maximum freshness.
2. How do I ensure my cake doesn’t sink in the middle?
Make sure to accurately measure your ingredients, and avoid opening the oven too soon while the cake is baking.
3. What can I substitute for coconut milk?
You can use almond milk or regular milk, but the flavor will differ. For the closest flavor, use another non-dairy milk that you enjoy.
4. How do I store leftover Coconut Cake?
Keep leftover cake covered at room temperature for a couple of days or in the fridge for up to a week.
5. Can I freeze the cake?
Yes, this cake freezes well! Wrap it tightly in plastic wrap and aluminum foil to keep it from getting freezer burn.
6. What types of frosting work best with Coconut Cake?
While whipped cream frosting is classic, you can also use cream cheese frosting for a tangy flavor contrast.
7. Is this cake suitable for special dietary requirements?
Yes! You can make it gluten-free or dairy-free with the right substitutes, as mentioned above.
8. Can I add fruit to the cake?
Absolutely! Try folding in crushed pineapple or chopped strawberries for added flavor and moisture.
9. What is the best way to serve Coconut Cake?
Serve slices chilled or at room temperature alongside fresh fruit or ice cream for a refreshing dessert.
10. How long does the frosting last?
Frosting can be stored in the refrigerator for up to a week. You can also freeze any leftover frosting.
Conclusion
This delightful Coconut Cake recipe isn’t just a treat; it’s a loving nod to cherished memories and family gatherings. Your loved ones will appreciate the thought and effort behind every slice, and you’ll find yourself baking this beautiful cake time and time again. Try it out and let me know how it turns out for you! Don’t forget to explore other exciting recipes on my blog to keep the baking spirit alive.
Whether you’re celebrating, simply satisfying a sweet tooth, or reminiscing about childhood memories, this Coconut Cake promises to be a trusty companion in your baking journey. Happy baking!
Coconut Cake
Ingredients
Method
- Preheat your oven to 350°F (175°C). Grease and flour two 9-inch round cake pans.
- In a mixing bowl, cream together the softened butter and granulated sugar using an electric mixer until light and fluffy, about 3-4 minutes.
- Add the eggs one at a time, beating well after each addition.
- Stir in the vanilla extract and coconut milk until well combined.
- In a separate bowl, combine the flour, baking powder, and salt. Gradually fold the dry mix into the wet mixture until just combined.
- Gently fold in 1 cup of shredded coconut.
- Divide the batter evenly between the prepared cake pans. Bake for 25-30 minutes or until a toothpick inserted in the center comes out clean.
- Let the cakes cool in the pans for 10 minutes before transferring them to a wire rack.
- Whip the heavy cream until soft peaks form, then gradually add the powdered sugar and continue beating until stiff peaks form.
- Place one cooled cake layer on a serving plate, spread frosting on top, and sprinkle with shredded coconut.
- Add the second layer and frost the top and sides of the cake with a generous covering.
- Garnish with the remaining shredded coconut.