Irresistible Valentine’s Day Cherry Cookies: A Sweet Treat for Your Loved Ones
Valentine’s Day is just around the corner, and what better way to celebrate love than with something sweet? When I think of this romantic day, memories of baking cherry cookies in my grandmother’s kitchen flood my mind. The fragrant aroma of baked goods wafting through the air was the backdrop to family gatherings filled with laughter and joy. These Valentine’s Day Cherry Cookies took center stage, adorned with vibrant red hues and luscious chocolate kisses nestled in their soft, chewy centers. They’re not just cookies; they’re a symbol of love, warmth, and cherished moments spent with those we care about.
What makes these cookies stand out from the many recipes you might find online is the perfect balance between the sweet and tart flavor of maraschino cherries, complemented by the rich creaminess of almond extract. They are a nostalgic reminder of love and comfort that I’ve enjoyed sharing with friends and family. The best part? This recipe is simple, allowing even novice bakers to create a cookie that feels celebratory.
In this guide, I will walk you through every step to make these delightful cookies, share tips, and even suggest some fun variations! So roll up your sleeves and get ready to impress your loved ones—you’re about to learn how to make the most unforgettable Valentine’s Day Cherry Cookies!
What Are Valentine’s Day Cherry Cookies?
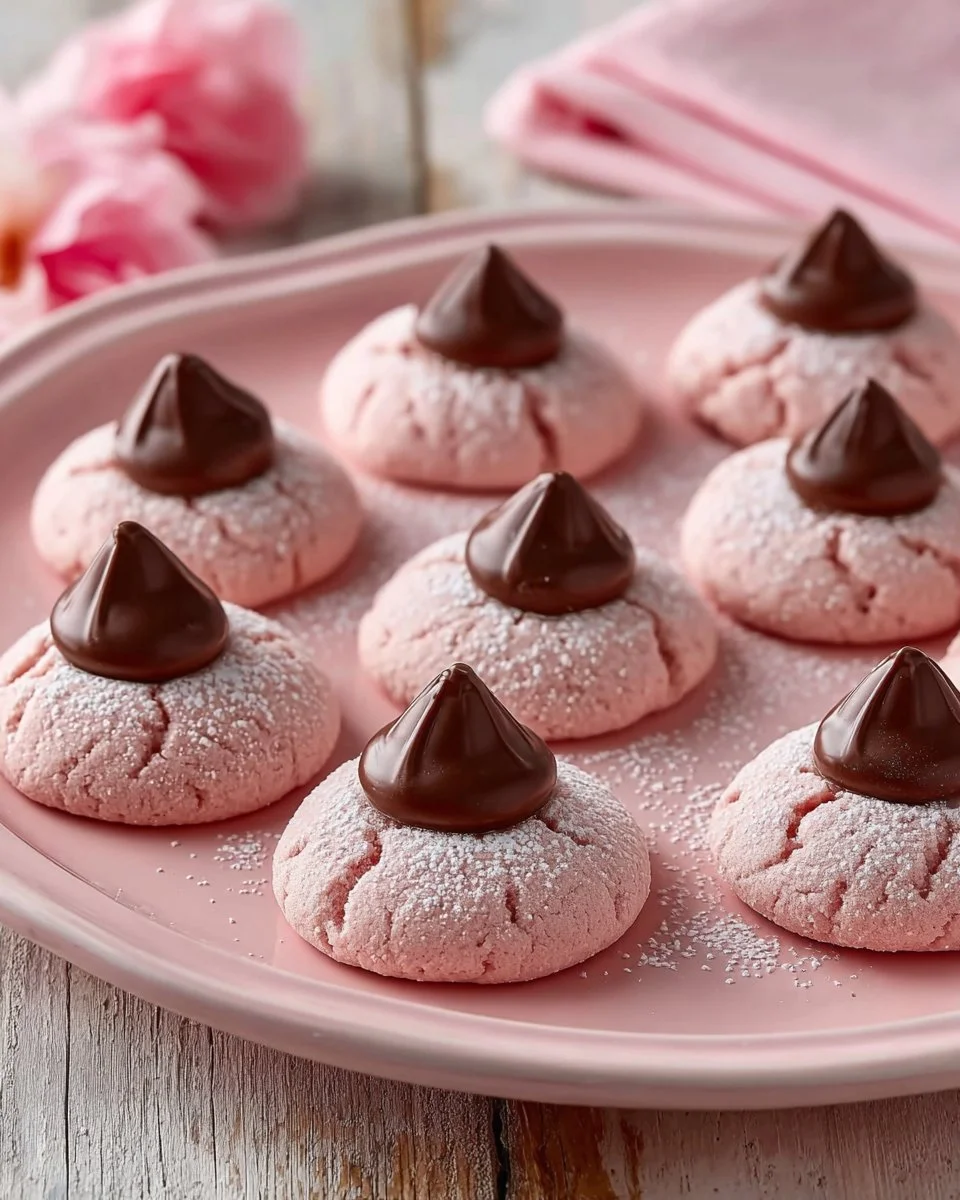
Valentine’s Day Cherry Cookies are a delightful fusion of maraschino cherries and chocolate, creating a unique treat perfect for romantic occasions. As the cookies bake, your kitchen will fill with a sweet, enchanting scent that perfectly captures the essence of love in the air.
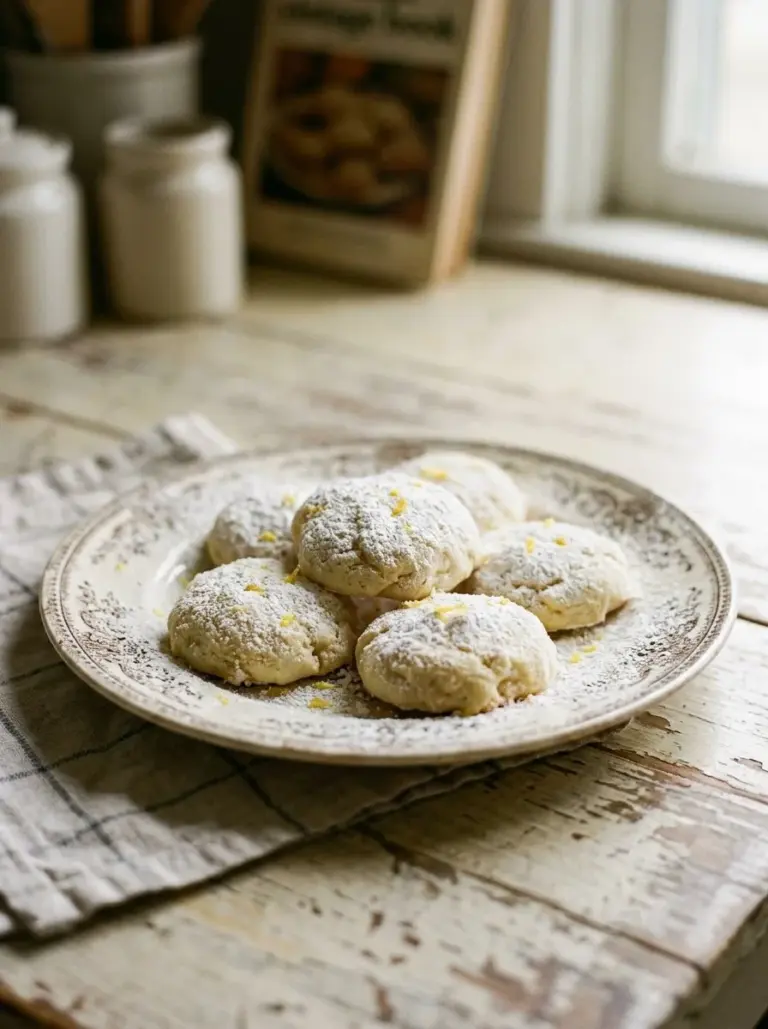
The cookies feature a soft, chewy texture with a subtly sweet flavor accompanied by the distinct tartness of the cherries. Each cookie is crowned with a smooth chocolate kiss, making it not just a treat for the taste buds but a feast for the eyes as well. They are perfect for sharing with your sweetheart or as a thoughtful gift to your favorite friends and family.
What makes these cookies truly special is their vibrant color and unexpected flavor. The sweet cherry and almond flavors blend seamlessly into the soft dough, making them a perfect addition to your Valentine’s Day celebrations or even just a cozy night in with a movie. You’ll want to whip up a batch whenever the mood strikes!
Why You’ll Love This Recipe
Cheaper than Store-Bought: Why pay premium prices for Valentine’s cookies when you can create a batch at home? These cookies are not only cost-effective, but they also taste much better because they are made with love and fresh ingredients.
Customization Options: One of the best parts of baking is how easy it is to make each recipe your own. Want a richer almond flavor? Just add a bit more almond extract! Looking for a nutty crunch? Toss in some chopped walnuts or pecans.
Easy to Make: This recipe is beginner-friendly! You’ll find that it’s straightforward and doesn’t require any fancy equipment. With just a mixing bowl and a baking sheet, you’ll be on your way to creating these delicious cookies.
Perfect for Any Occasion: While they’re ideal for Valentine’s Day, these cookies can easily be adapted for any celebration. Birthdays, anniversaries, or a simple family gathering—they fit right in!
A Crowd-Pleaser: Trust me, everyone—kids and adults alike—will fall head over heels for these cookies. The delightful combination of cherry and chocolate kisses is addictively good.
With just a little bit of time and care, you’ll have a cookie that’s not only delicious but also filled with memories and love.

Ingredients Section
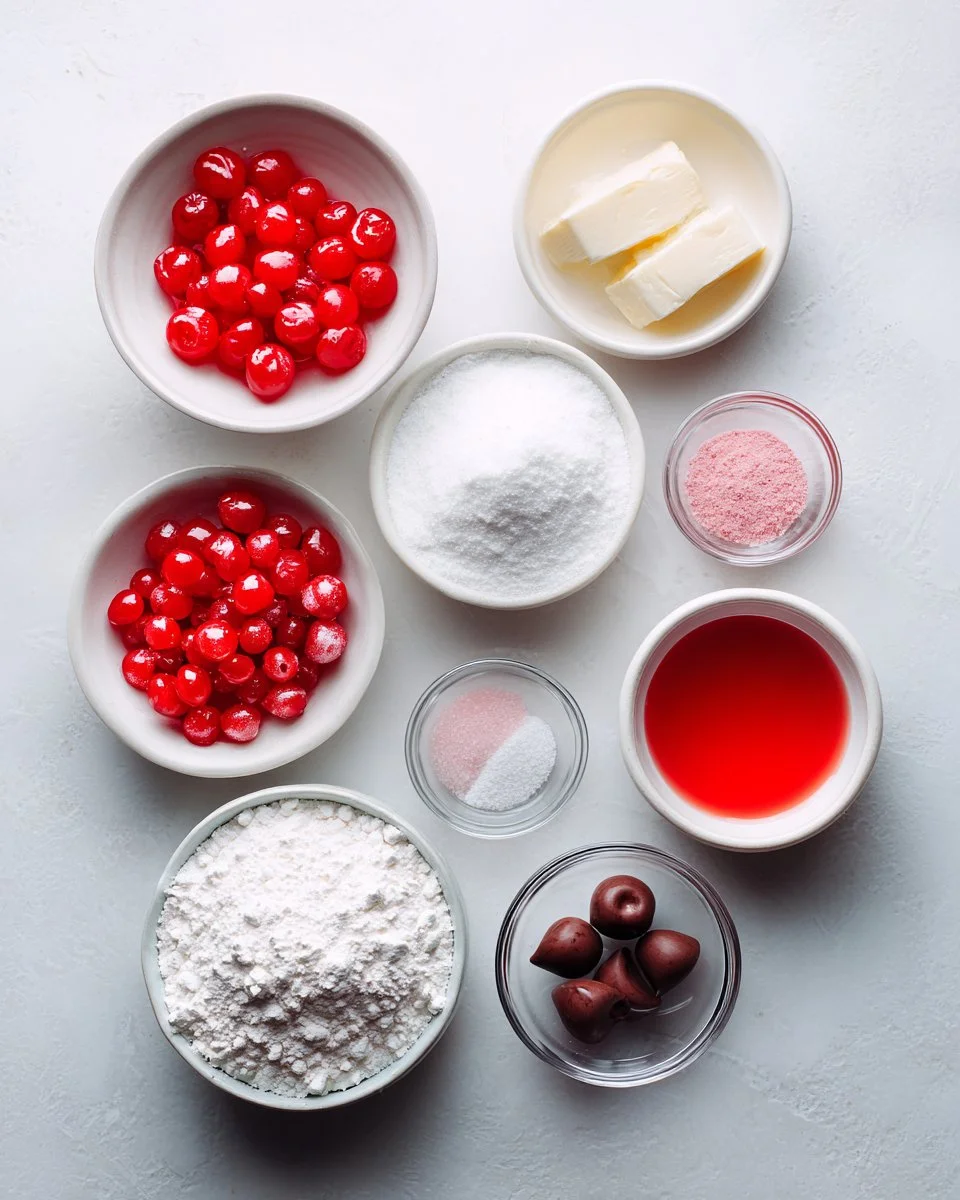
Here’s what you’ll need to whip up these delightful Valentine’s Day Cherry Cookies:
- 1 1/4 cups unsalted butter (at room temperature for easy creaming)
- 1 cup powdered sugar (sifted for the smoothest texture)
- 2.5 cups all-purpose flour (spooned and leveled)
- 6 oz maraschino cherries (finely chopped, with 5 tsp of their juice reserved)
- 5 tsp maraschino cherry juice (from the chopped cherries)
- 1 tsp baking powder (to help the cookies rise)
- 1/2 tsp salt (to balance sweetness)
- 1 1/2 tsp vanilla extract (pure vanilla for the best flavor)
- 8 drops red food coloring (optional, but they look great!)
- 1/4 tsp almond extract (for that lovely nutty aroma)
- 24 chocolate kisses (unwrapped before use, or substitute with chocolate chips)
Ingredient Notes:
- Butter: Use high-quality unsalted butter for the best flavor. Brands like Kerrygold or Land O’Lakes are great choices.
- Flour: All-purpose flour works best for these cookies; however, if you want a lighter texture, you could substitute part of it with cake flour.
- Cherries: Choose maraschino cherries packed in water for a fresher flavor, not those in syrup.
Step-by-Step Instructions
Preheat Your Oven: Start by preheating your oven to 350°F (175°C) and lining a baking sheet with parchment paper. This ensures the cookies bake evenly and don’t stick!
Chop Cherries: Finely chop the maraschino cherries and reserve about 5 teaspoons of the juice. You’ll be amazed at how the burst of flavor transforms the cookies.
Unwrap Chocolate Kisses: Go ahead and unwrap all the chocolate kisses, placing them in the refrigerator to chill. This keeps them from melting too quickly when you press them into the warm cookies.
Cream the Butter and Sugar: In a large bowl, cream together the room temperature butter and powdered sugar until the mixture is light and fluffy—this usually takes about 3-5 minutes. The lighter the mixture, the better your cookies will rise!
Add Flavorings: Stir the reserved cherry juice, vanilla extract, almond extract, and red food coloring into the creamed mixture until well combined. The colors and scents will instantly put you in the mood for love.
Mix in the Flour: Add in 2 cups of flour and mix until a shaggy dough forms. (Pro Tip: Don’t overmix, or you’ll have tough cookies!)
Incorporate Cherries: Gently fold in the chopped cherries and any remaining flour. The dough should hold together without being sticky.
Chill the Dough: Chill the dough for about 10 minutes. This step is crucial as it helps the cookies maintain their shape while baking.
Form Dough Balls: Using your hands or a cookie scoop, roll the dough into 1-inch balls and place them on the prepared baking sheet, leaving a little space in between.
Bake: Bake for 10-12 minutes until they’re set but still soft in the centers. Remember, they will continue to cook slightly as they cool down.
Add Chocolate Kisses: As soon as the cookies come out of the oven, press a cold chocolate kiss into the center of each cookie. The warmth will create a lovely melted center—pure bliss!
Cool on Baking Sheet: Let the cookies rest on the baking sheet for 2 minutes before transferring them to a cooling rack to cool completely.
Refrigerate to Set Chocolate: If you’re in a hurry, you can refrigerate the cookies for about 10 minutes to set the chocolate kisses.
Chef’s Tips:
- Keep an eye on your cookies as they bake; they can go from perfect to overdone quickly!
- Avoid over-mixing your dough after adding the flour to keep the cookies soft.
Expert Tips & Tricks
Baking Sheet Prep: For even cooking, use parchment paper or Silicone baking mats. They prevent sticking and allow for easier cookie removal.
Cool Cookies Properly: Give cookies enough time to cool on the pan before moving them. If they seem too soft to handle, give them another minute or two.
Storage: Store cooled cookies in an airtight container at room temperature for up to a week, or refrigerate for longer freshness.
Make Ahead: You can prepare the dough ahead of time. Shape it into balls and freeze for up to three months. Just bake your cookies straight from the freezer, adding an extra minute or two to the baking time.
Troubleshooting: If your cookies spread too much, consider chilling the dough longer or adding a bit more flour.
Flavor Experimentation: You can experiment with different extracts, such as coconut or hazelnut, for a surprising twist.
Serving Suggestions
These sweet Valentine’s Day Cherry Cookies are best served warm with a glass of milk or hot cocoa. For an extra-special treat, plate them alongside some fresh strawberries or raspberries for a tantalizing fruit pairing. If you’re feeling ambitious, drizzle a bit of melted dark chocolate over the top for that extra touch of elegance. Perfect for a romantic dinner or brunch!
Variations & Substitutions
- Chocolate Lovers: Switch the kisses for chocolate chips for an extra-chocolatey treat.
- Healthier Option: Use coconut oil instead of butter or substitute half the sugar with a natural sweetener like maple syrup or honey.
- Nutty Variance: Add chopped nuts (like walnuts or pecans) for added texture and flavor.
- Seasonal Flair: During the holidays, consider using peppermint extract instead of vanilla for a festive twist!
Nutrition & Storage Info
- Prep time: 20 minutes
- Cook time: 12 minutes
- Total time: 32 minutes
- Yield: 24 cookies
- Estimated calories per serving: About 130 calories
- Storage: Store in an airtight container at room temperature for up to 1 week, in the fridge for 2 weeks, or freeze for up to 3 months.
FAQ Section
Can I use fresh cherries instead of maraschino?
Yes! You can use fresh or frozen cherries, but make sure to chop them finely and adjust the sugar in the recipe.Can I make these cookies gluten-free?
Absolutely! Substitute the all-purpose flour with a gluten-free flour blend. Be sure to check for additional binding agents if the blend requires it.How do I prevent the chocolate kisses from melting too quickly?
Chilling them in the refrigerator beforehand helps to slow any melting when you press them into hot cookies.What’s the best way to store these cookies?
In an airtight container at room temperature for up to a week, or freeze for longer storage.Can I freeze the cookie dough?
Yes! Form dough balls and freeze them. Bake straight from frozen, adding a few extra minutes to the baking time.Is it necessary to use food coloring?
It’s optional! The food coloring adds a nice touch visually, but you can absolutely skip it.Can I replace butter with margarine?
While you can substitute margarine, it may alter the flavor slightly. Stick with unsalted butter for the best results.Why are my cookies spreading too much?
This could be due to warm dough; make sure to chill your dough long enough before baking.Can I add more cherries to the recipe?
Yes! Just adjust the flour accordingly to maintain the dough’s consistency.Are these cookies suitable for mailing?
Yes, but pack them carefully to prevent them from breaking.
Conclusion
These Valentine’s Day Cherry Cookies are more than just a dessert; they’re a symbol of love, warmth, and cherished family moments. I encourage you to try making them for your loved ones this year! I can’t wait to hear what you think, so please share your thoughts and any variations you might try in the comments below. For more sweet inspirations, check out my other beloved recipes on the blog. Happy baking, and here’s to a Valentine’s Day filled with love and sweetness!

Valentine's Day Cherry Cookies
Ingredients
Method
- Preheat your oven to 350°F (175°C) and line a baking sheet with parchment paper.
- Finely chop the maraschino cherries and reserve about 5 teaspoons of the juice.
- Unwrap all the chocolate kisses and place them in the refrigerator to chill.
- In a large bowl, cream together the room temperature butter and powdered sugar until light and fluffy, about 3-5 minutes.
- Stir in the reserved cherry juice, vanilla extract, almond extract, and red food coloring until well combined.
- Add in 2 cups of flour and mix until a shaggy dough forms. Do not overmix!
- Gently fold in the chopped cherries and any remaining flour. The dough should hold together without being sticky.
- Chill the dough for about 10 minutes.
- Using your hands or a cookie scoop, roll the dough into 1-inch balls and place them on the prepared baking sheet.
- Bake for 10-12 minutes until set but still soft in the centers.
- Press a cold chocolate kiss into the center of each cookie as soon as they come out of the oven.
- Let the cookies rest on the baking sheet for 2 minutes before transferring them to a cooling rack.
- If in a hurry, refrigerate the cookies for about 10 minutes to set the chocolate kisses.