Table of Contents
Table of Contents
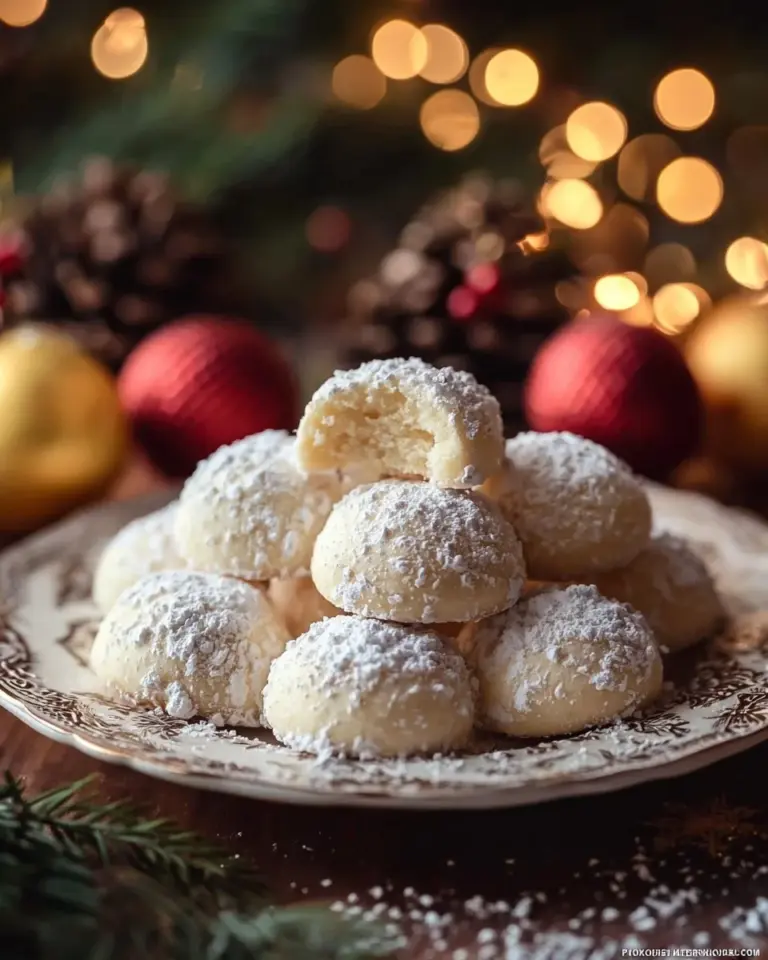
When I think of winter baking, the warmth of my grandmother’s kitchen comes flooding back. The scent of vanilla, sugar, and so much laughter fills the air as we huddle around the table, shaping dough into delightful cookie figures. One of our all-time favorites were these Melting Snowman Cookies. They are not only adorable but also bring back those precious family memories that make the chilly season so cozy and magical.
What truly sets these melting snowman gems apart is their whimsical charm and rich flavor. Unlike store-bought cookies that can be dry or overly sweet, my version offers that homemade touch with a soft, buttery texture that practically melts in your mouth. With just the right balance of sweetness and a hint of nostalgia, these cookies are a simple yet impactful way to celebrate the season.
In this post, I’m thrilled to share my step-by-step recipe for these Melting Snowman Cookies. You’ll learn how to craft these cute treats from scratch, decorate them like a pro, and perhaps create some new family traditions along the way. So, put on your apron, and let’s bake some holiday magic together!
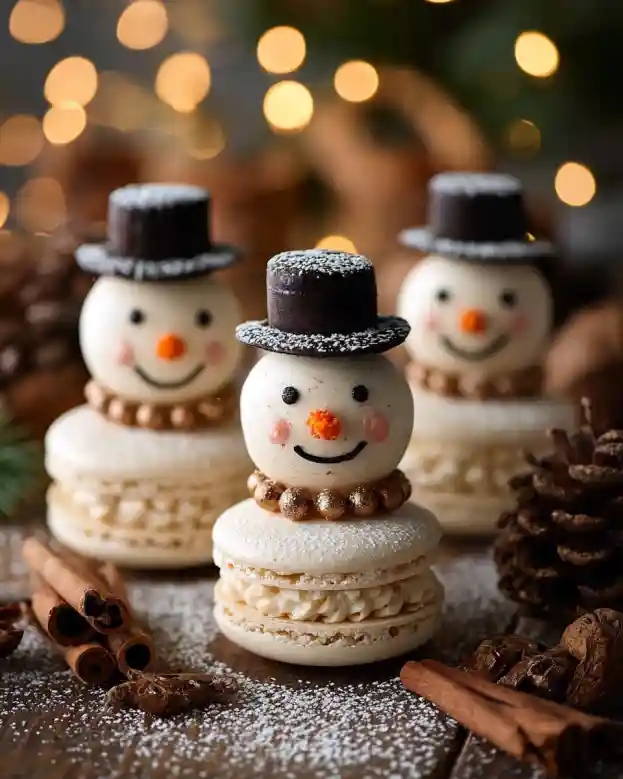
What Are Melting Snowman Cookies?
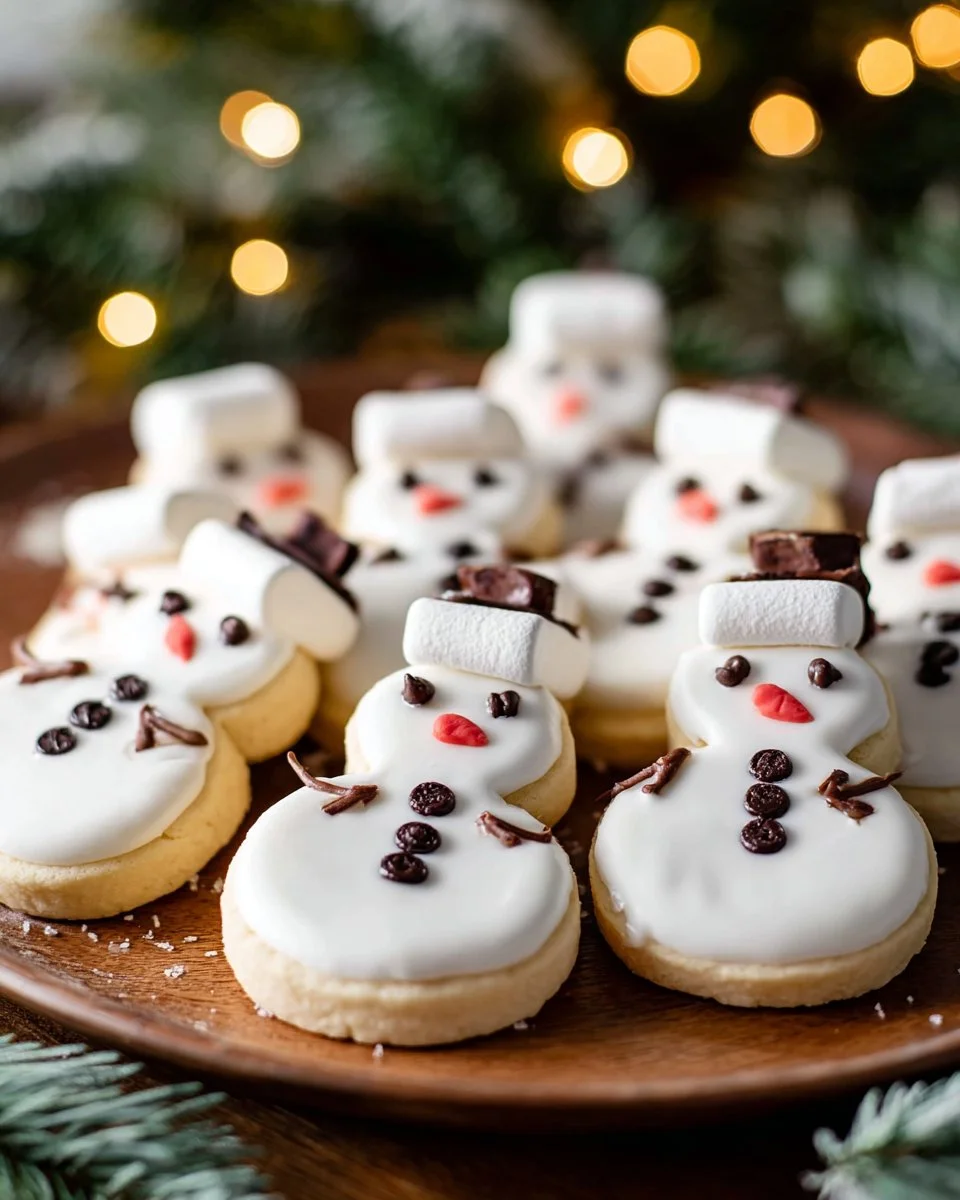
Melting Snowman Cookies are a festive holiday treat that transform traditional sugar cookies into cute, snowy figures that look like they’re happily melting. Originating from the creative minds of home bakers looking to add a fun twist to classic recipes, these cookies typically feature a soft sugar cookie base decorated to resemble snowmen—complete with drippy icing, marshmallow heads, and mini chocolate chip eyes.
These cookies entertain your eyes as much as they delight your taste buds. The soft, cake-like texture of the sugar cookie pairs perfectly with the sweet, creamy icing that drips down, giving the visual impression of a melting snowman. It’s a playful treat that’s perfect for holiday parties, kids’ activities, or just indulging in the winter spirit at home.
You might want to whip these up for festive gatherings, cozy family nights, or even as a delightful surprise for neighbors or friends. Whatever the occasion, these cookies are bound to evoke smiles, spark conversations, and celebrate the joy of togetherness.
Why You’ll Love This Recipe
You’ll fall head over heels for my Melting Snowman Cookies for several reasons:
A Delight to Make Together: This recipe is perfect for getting the whole family involved. Whether little hands are helping roll out dough or adding decorations, there’s fun to share, making this not just a recipe but a joyful experience.
Economical and Fresh: Store-bought cookies often come with a hefty price tag and can be loaded with preservatives. Making these cookies from scratch is not only simple, but it’s also cost-effective, guaranteeing freshness and flavor you won’t find on a grocery shelf.
Customization Galore: You can easily put your creative spin on these cookies. Want to switch up the colors? Go for vibrant gel food coloring! Prefer a different cookie base? Try adding cocoa powder for a chocolatey twist. The options are endless, allowing for a uniquely personalized touch.
Visual Appeal: These cookies are bound to be a hit at any gathering. Picture a platter adorned with these charming melting snowmen—they’re eye-catching and serve as a conversation starter, bringing smiles to all ages.
Beginner-Friendly: Even if you’re a novice baker, this recipe breaks down the process into manageable steps. With easy-to-follow instructions and plenty of tips along the way, you’ll create a show-stopping treat that will have friends and family raving about your baking skills.

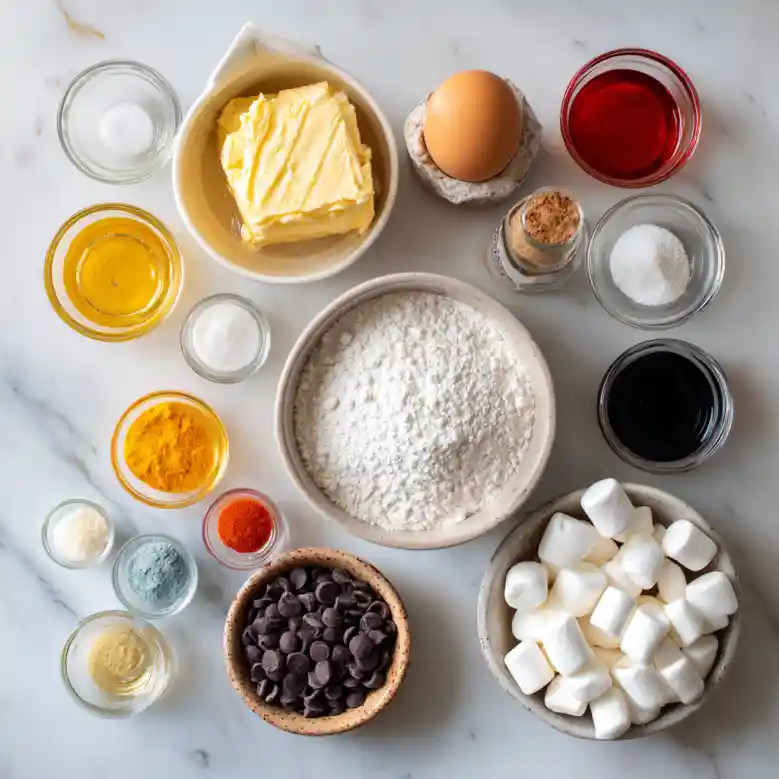
Ingredients Section
Before we dive into baking these delightful Melting Snowman Cookies, let’s gather our ingredients. Here’s what you’ll need:
Cookie Base:
- 1/2 cup (115g) unsalted butter, room temperature (I recommend using European butter for a richer flavor)
- 1/2 cup (100g) granulated sugar
- 1 large egg, room temperature
- 1 teaspoon pure vanilla extract (real vanilla can elevate the flavor from good to amazing)
- 1 3/4 cups (227g) all-purpose flour, spooned and leveled (I prefer King Arthur Flour for consistency)
- 2 tablespoons cornstarch
- 1/2 teaspoon baking powder
- 1/4 teaspoon salt
Icing & Decoration:
- 2 cups (260g) powdered sugar
- 2-4 tablespoons water (start with 2 tablespoons, then adjust for desired icing thickness)
- Black, orange, brown, and red gel food coloring
- 12 large marshmallows (use fresh ones as they’ll melt perfectly on top)
- Mini chocolate chips (for the eyes, and I recommend Ghirardelli for extra smoothness)
Notes:
- Make sure your butter and egg are at room temperature for optimal mixing.
- Visual cues like consistency and color can be very helpful, especially if it’s your first time baking these cookies.
Step-by-Step Instructions
Let’s get our hands doughy! Here’s how to bring those Melting Snowman Cookies to life.
Step 1: Prepare the Dough
- Preheat your oven to 350°F (175°C). You’ll want it nice and hot to achieve perfectly baked cookies.
- In a large mixing bowl, cream together 1/2 cup of room temperature unsalted butter and 1/2 cup of granulated sugar until light and fluffy (about 2-3 minutes). A Chef’s Tip: Use an electric mixer at medium speed for best results.
- Add in one large egg and 1 teaspoon of pure vanilla extract. Mix until well combined.
- In another bowl, whisk together 1 3/4 cups of all-purpose flour, 2 tablespoons of cornstarch, 1/2 teaspoon of baking powder, and 1/4 teaspoon of salt until fully mixed.
- Gradually add the dry mixture to the wet mixture; mix until just combined. Be careful not to over-mix!
Step 2: Shape and Bake the Cookies
- Using your hands or a cookie scoop, form the dough into balls about 1 tablespoon in size. Place them on a parchment-lined baking sheet, leaving about 2 inches between each.
- Flatten each ball slightly to create a rounded shape, ensuring they’ll resemble snowmen once baked.
- Bake in your preheated oven for 10-12 minutes, or until the edges are golden but the centers are still soft. Watch closely—each oven varies!
- Once baked, allow cookies to cool on the sheet for a few minutes before transferring to a wire rack to cool completely.
Step 3: Make the Icing
- In a medium bowl, whisk together 2 cups of powdered sugar with 2-4 tablespoons of water until its glossy and thick but spreadable.
- Add gel food coloring to achieve vibrant shades for your snowman’s accessories. Mix thoroughly and set aside.
Step 4: Assemble Your Melting Snowmen
- Once the cookies are cooled, spread a generous layer of icing on top of each cookie, letting it drip slightly over the edges for that melting effect.
- While the icing is still wet, place a marshmallow on top as a snowman head.
- Use mini chocolate chips for eyes, and pipe or dab on orange, red, and brown gel for details like buttons and a carrot nose. Chef’s Tip: Make a simple piping bag by cutting the corner of a zip-top bag!
Step 5: Finishing Touches
- Allow the cookies to set at room temperature for about 30 minutes. This will ensure the icing hardens slightly but maintains its charming drippy effect.
- Enjoy these Melting Snowman Cookies as a festive treat, and prepare for smiles all around!
Expert Tips & Tricks
- Ingredient Quality: Invest in high-quality ingredients for the best taste. Real vanilla extract and good butter elevate your cookies significantly.
- Chilling the Dough: If you find the dough too soft to work with, chill it for 30 minutes before shaping for easier handling.
- Storage: These cookies can be stored in an airtight container at room temperature for up to 3 days. For longer storage, keep them in the fridge for up to a week.
- Make-Ahead: You can prepare the cookie dough in advance, shape into balls, and freeze them! Simply bake them straight from the freezer, adding an extra minute or two to the baking time.
- Troubleshooting Broken Cookies: If your cookies break during icing, don’t fret! Just cover them creatively with extra icing and toppings.
Serving Suggestions
These Melting Snowman Cookies look delightful on festive platters alongside hot cocoa or spiced cider. Present them on beautiful holiday-themed serving trays for an inviting touch. These cookies are perfect for holiday parties, cookie decorating nights, or even classrooms—any event where joy and creativity are welcomed!
Variations & Substitutions
Looking to shake things up a bit? Here are a few ideas:
- Flavor Variations: Try adding 1 teaspoon of almond extract for a different flavor profile, or use lemon zest for a refreshing twist!
- Dietary Adjustments: Need gluten-free options? Substitute the all-purpose flour with a 1:1 gluten-free blend. For egg-free versions, try using flaxseed meal as an egg replacer (1 tablespoon flaxseed mixed with 2.5 tablespoons water).
- Seasonal Styles: Enchanting for winter, you can easily adjust these cookies for Halloween by using orange frosting and creating jack-o-lantern faces instead!
Nutrition & Storage Info
- Prep Time: 20 minutes
- Cook Time: 12 minutes
- Total Time: 32 minutes
- Yield: Approximately 12 cookies
- Estimated Calories: 120 calories per cookie
- Storage Instructions: Keep at room temperature for up to 3 days, in the fridge for up to a week, or freeze for up to a month.
FAQ Section
Can I use margarine instead of butter?
- While margarine can work, cookies made with real butter typically taste better and have a superior texture.
How can I get my cookies to be more fluffy?
- Make sure you’re not over-mixing once the flour has been added. Overworking the dough can lead to tough cookies.
Can I freeze these cookies?
- Yes! Freeze the baked cookies before icing, and decorate after thawing for best results.
What if I don’t have gel food coloring?
- Liquid food coloring works, but you may need to use more to achieve the desired color intensity.
Can I double the recipe?
- Absolutely! Just ensure to have enough space on your baking sheets.
What other toppings can I use?
- Feel free to get creative! Use candies like M&Ms, Skittles, or edible glitter on top.
Can I use a cookie mix for the dough?
- Sure! But then you’ll lose the unique flavor and texture that homemade offers.
How can I get my icing to set faster?
- You can refrigerate the cookies for about 15 minutes to help speed up the setting process.
Are these cookies suitable for shipping?
- Yes! Pack them carefully in an airtight container with parchment paper in between layers to prevent sticking.
What is the best way to decorate without making a mess?
- Use a squeeze bottle or piping bag to control your icing application better and limit mess.
Conclusion
These Melting Snowman Cookies are more than just a festive treat; they’re a way to create joyful memories with your loved ones. Every bite is a reminder of togetherness and holiday cheer. I encourage you to try making them this season—your family will love the creativity, and you’ll treasure the moments gathered in the kitchen.
Let me know how it goes in the comments. I’d love to hear your thoughts! And for more delicious holiday recipes, check out my other festive treats on the blog.
Happy baking!

Melting Snowman Cookies
Ingredients
Method
- Preheat your oven to 350°F (175°C).
- In a large mixing bowl, cream together 1/2 cup of room temperature unsalted butter and 1/2 cup of granulated sugar until light and fluffy (about 2-3 minutes).
- Add in one large egg and 1 teaspoon of pure vanilla extract. Mix until well combined.
- In another bowl, whisk together 1 3/4 cups of all-purpose flour, 2 tablespoons of cornstarch, 1/2 teaspoon of baking powder, and 1/4 teaspoon of salt until fully mixed.
- Gradually add the dry mixture to the wet mixture; mix until just combined.
- Using your hands or a cookie scoop, form the dough into balls about 1 tablespoon in size.
- Place them on a parchment-lined baking sheet, leaving about 2 inches between each.
- Flatten each ball slightly to create a rounded shape.
- Bake in your preheated oven for 10-12 minutes, or until the edges are golden but the centers are still soft.
- Let cookies cool on the sheet for a few minutes before transferring to a wire rack to cool completely.
- In a medium bowl, whisk together 2 cups of powdered sugar with 2-4 tablespoons of water until glossy and thick but spreadable.
- Add gel food coloring for vibrant shades and mix thoroughly.
- Spread a generous layer of icing on top of each cookie, letting it drip slightly over the edges.
- Place a marshmallow on top as a snowman head.
- Use mini chocolate chips for eyes, and pipe or dab on colored gel for details.
- Allow the cookies to set at room temperature for about 30 minutes.