Table of Contents
Table of Contents
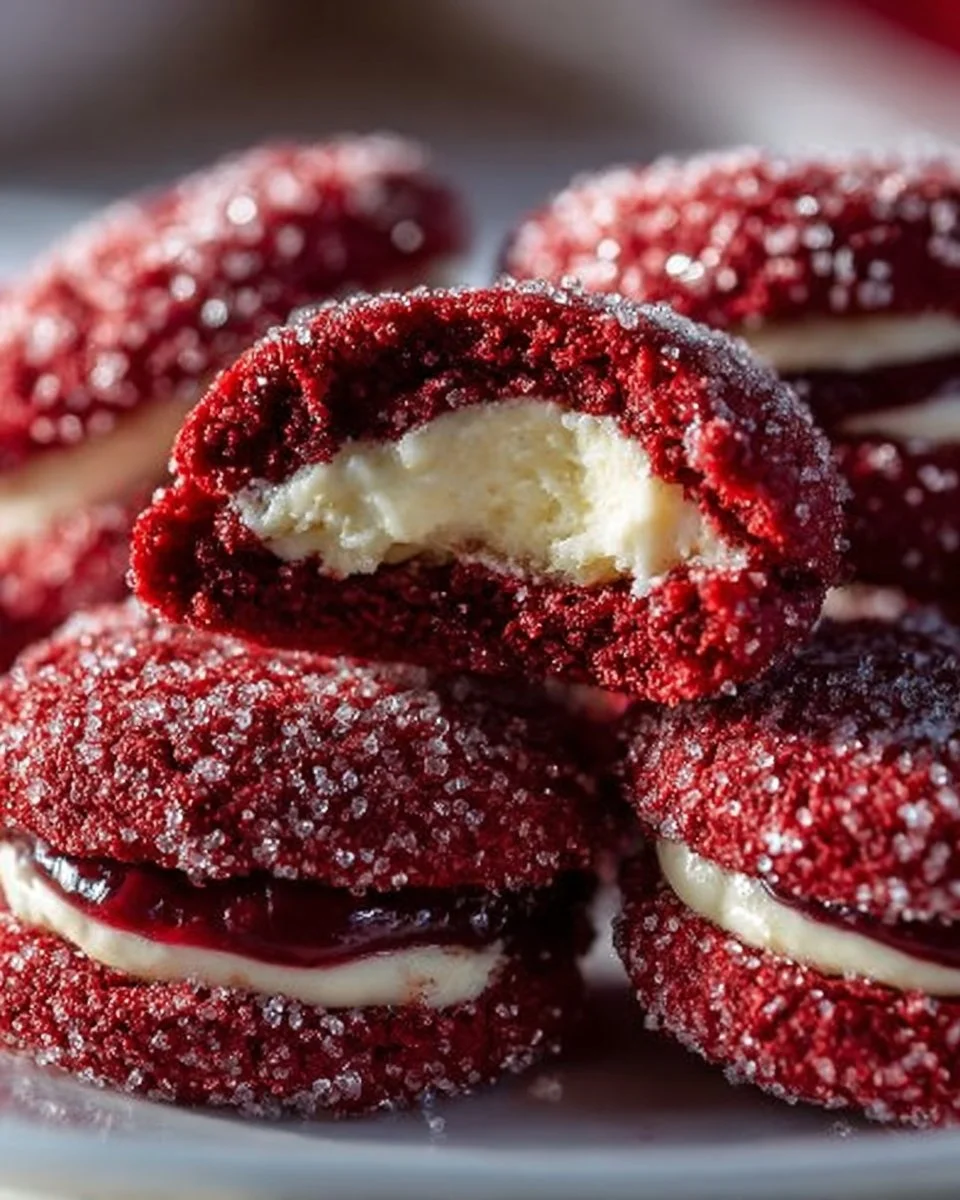
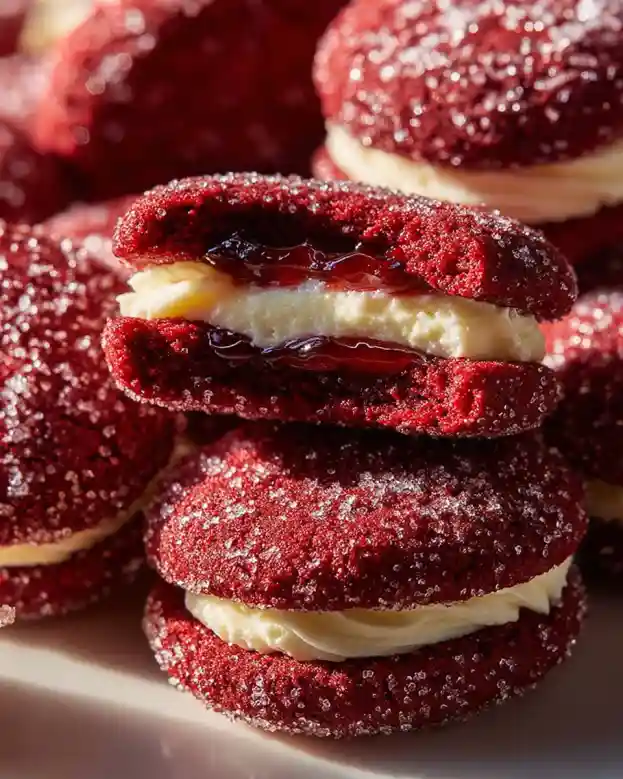
As the delightful scent of freshly baked cookies wafted through my childhood home, I remember my mom bustling around the kitchen, her hands dusted with flour and cocoa powder, as she prepared our favorite treat: Red Velvet Thumbprint Cookies. These cookies aren’t just any dessert; they hold a special place in my heart, like chapters in a sweet family story. I can still picture my younger self, unable to resist the soft, vibrant red cookies, each indented belly fully waiting to be filled with that luscious, creamy center.
What makes these Red Velvet Thumbprint Cookies stand out from the countless cookie recipes out there? Well, it’s the unique blend of soft, velvety cookie texture paired with the rich, tangy cream cheese filling that takes every bite to the next level. Unlike store-bought versions, this homemade recipe guarantees both flavor and freshness without any preservatives.
Baking isn’t just about creating something to fill our stomachs; it’s about creating memories and sharing love. I promise, as you dive into this refreshing, easy recipe, you’ll not only feel the joy of baking but also experience the delightful taste that carries with it a touch of nostalgia. Get ready to impress your friends and family while creating a new favorite tradition!
What Are Red Velvet Thumbprint Cookies?
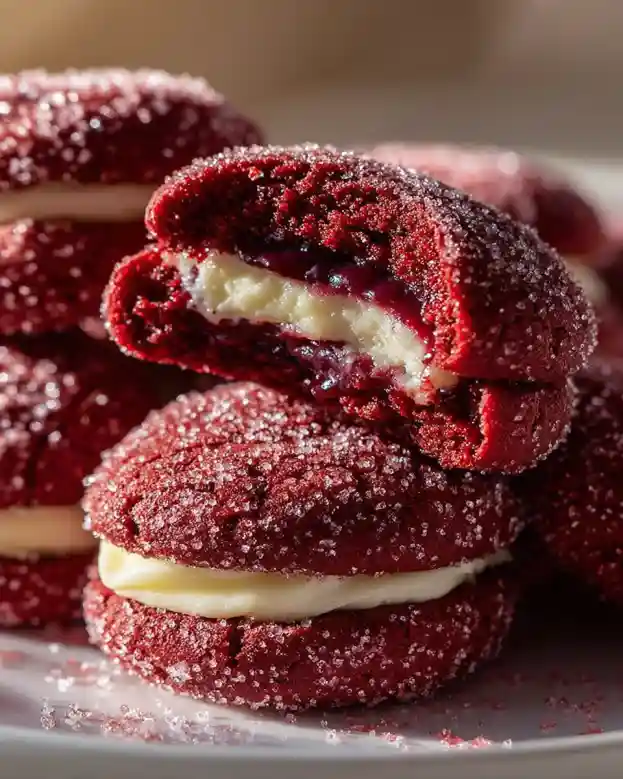
Red Velvet Thumbprint Cookies are a delightful twist on classic thumbprint cookies, combining the rich flavor of red velvet with a sweet cream cheese filling. Originating from the south of the United States, red velvet cake is known for its moistness and subtle chocolate flavor, tinted a vibrant red. This cookie takes all those wonderful attributes and wraps them in a fun and inviting shape, making them perfect for special occasions or just a cozy treat at home.
When you bite into one of these enchanting cookies, you’re met with a rich and tender crumb, a hint of cocoa flavor, and a creamy, slightly tangy filling that melts in your mouth. They’re truly unique because of this dual-textural experience and the playful surprise of the cream cheese filling nestled in the center. Whether you’re making them for Valentine’s Day, Christmas, or simply because it’s a Wednesday, these cookies are sure to serve up smiles all around!
Why You’ll Love This Recipe
Unbeatable Flavor: The explosion of flavors in these Red Velvet Thumbprint Cookies can’t be matched by any store-bought versions. The homemade cream cheese filling is light and fluffy, offering a delightful contrast to the rich, velvety cookie base.
Cost-Effective: For the money spent on a few ingredients—flour, sugar, cocoa, and cream cheese—you get a batch of cookies that tastes gourmet! These cookies are a fraction of the cost of similar bakery treats, allowing you to indulge more often without breaking the bank.
Customization: Love nuts? Add some chopped pecans into the dough or sprinkle them on top! Want to impress with a festive touch? Swirl in some colored sugar or festive sprinkles depending on the season. The possibilities are endless!
Easy to Make: Don’t worry if you’re a baking novice—this recipe is straightforward with clear steps that guide you through the process. You’ll feel like a pro in no time! Plus, you can leave the cookie dough in the fridge and bake whenever you want fresh cookies.
Memorable Experiences: Baking these cookies isn’t just about the end result; it’s about the joy, laughter, and happiness it creates in your kitchen. It’s a perfect opportunity for family bonding.
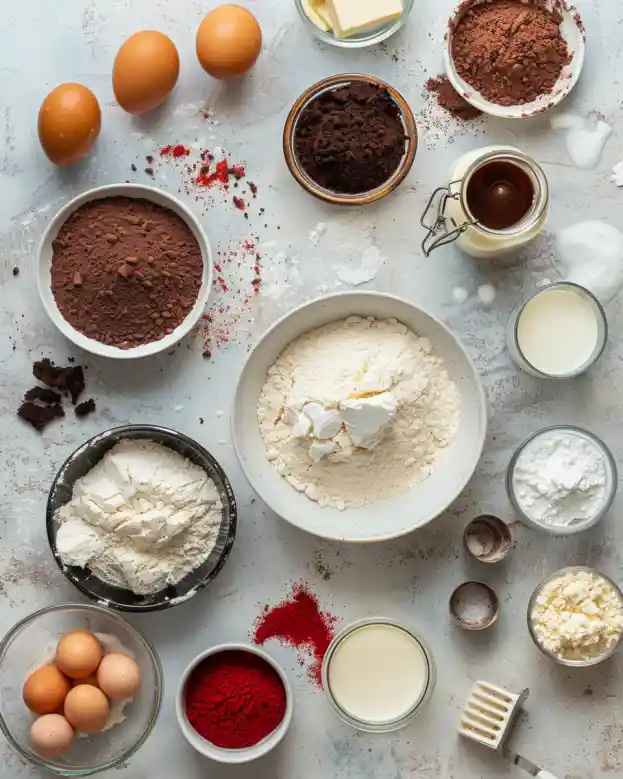
Ingredients
For the Cookies:
- 2 and 1/4 cups all-purpose flour: Use high-quality flour for better texture.
- 1/4 cup unsweetened cocoa powder: I love Ghirardelli for its rich flavor.
- 1 teaspoon baking soda
- 1/2 teaspoon salt
- 1 cup unsalted butter, softened: Make sure the butter is at room temperature for easier mixing.
- 1 and 1/2 cups granulated sugar
- 2 large eggs, at room temperature: This helps to keep your dough well incorporated.
- 1 teaspoon vanilla extract
- 2 tablespoons red food coloring: I recommend gel food coloring for a more vibrant color without extra liquid.
- 1/2 cup buttermilk: You can make your own by mixing milk with a splash of vinegar if needed.
- 1/2 cup granulated sugar (for rolling)
For the Cream Cheese Filling:
- 8 ounces cream cheese, softened: Full-fat cream cheese provides the best flavor.
- 1/2 cup unsalted butter, softened
- 4 cups powdered sugar, sifted
- 1 teaspoon vanilla extract
Notes:
- Ensure your butter and eggs are at room temperature before starting, as this leads to a creamier texture.
- You can substitute the buttermilk with regular milk plus a dash of vinegar or lemon juice.
Step-by-Step Instructions
Prep the Dry Ingredients:
- In a medium bowl, whisk together 2 and 1/4 cups all-purpose flour, 1/4 cup unsweetened cocoa powder, 1 teaspoon baking soda, and 1/2 teaspoon salt. Set aside.
Cream the Butter and Sugar:
- In a large bowl, cream together 1 cup unsalted butter and 1 and 1/2 cups granulated sugar until light and fluffy—this should take about 2 to 3 minutes with an electric mixer.
Incorporate Eggs and Flavoring:
- Beat in 2 large eggs, one at a time, mixing well after each addition. Then stir in 1 teaspoon vanilla extract and 2 tablespoons of red food coloring. Your mixture will now look vibrantly red!
Combine Wet and Dry Ingredients:
- Alternately add the dry mixture and 1/2 cup buttermilk to the wet ingredients, starting and ending with the dry ingredients. Mix on low speed until just combined; be careful not to overmix as this can lead to dense cookies.
Chill the Dough:
- Cover the dough and refrigerate for at least 30 minutes or up to 2 hours. Chilling is key to ensure the cookies hold their shape when baking.
Preheat Oven:
- Preheat your oven to 375°F (190°C) and line baking sheets with parchment paper.
Shape the Cookies:
- Place the additional 1/2 cup granulated sugar in a shallow dish. Scoop rounded tablespoons of dough and roll them into balls, then roll each ball generously in sugar. Place on prepared baking sheets, spaced about 2 inches apart.
Create Indents:
- Using your thumb or the back of a small spoon, gently make an indent in the center of each cookie ball—don’t press all the way through!
Bake:
- Bake for 8 to 10 minutes. The cookies are done when the edges are set and lightly browned while the centers should still look slightly soft. They will continue to cook on the baking sheet once removed. Overbaking, even by a minute, can lead to dryness.
Prepare the Cream Cheese Filling:
- While the cookies cool, in a medium bowl, beat together 8 ounces of softened cream cheese and 1/2 cup unsalted butter until smooth and creamy. Gradually add 4 cups of sifted powdered sugar, one cup at a time, beating until fluffy. Stir in 1 teaspoon vanilla extract.
Fill the Cookies:
- Once the cookies have completely cooled, spoon or pipe the cream cheese filling into the indents of each cookie. Enjoy immediately or store them in an airtight container in the refrigerator.
Chef’s Tips:
- Monitor your baking time carefully. Every oven is different; check them at the 8-minute mark to avoid overbaking.
- Let the cookies cool completely before filling; this prevents the cream cheese from melting.
Expert Tips & Tricks
Storage: These cookies can be stored in an airtight container in the fridge for up to 5 days. You can also freeze unfilled cookies for up to 3 months.
Make-Ahead Instructions: Cookie dough can be made ahead and stored in the fridge for up to 2 days or frozen for up to 3 months. Just let it thaw in the fridge overnight before baking.
Common Problems & Solutions:
- Too crumbly: Ensure you measured your flour correctly and didn’t overmix the dough.
- Too sticky: If the dough is very sticky, a bit more flour can help—just be mindful not to add too much!
Perfect Cream Cheese Filling: For the smoothest filling, ensure the cream cheese is very soft. You might even blend the filling for a fluffier texture.
Flavor Enhancements: Try adding a hint of lemon zest to the cream cheese filling for a refreshing twist.
Serving Suggestions
These quirky cookies are great for any occasion—from birthday parties to romantic dinners. Serve them alongside a glass of fresh milk, a scoop of vanilla ice cream, or a hot cup of coffee. For a delightful presentation, arrange the cookies on a decorative platter and sprinkle with edible glitter or cocoa powder for a festive touch!
Variations & Substitutions
- Chocolate Chip Red Velvet: Add chocolate chips to the dough for a sweet surprise in every bite.
- Nut-Free Option: Omit any potential nut ingredients for a kid-friendly treat.
- Seasonal Spices: Add spices like cinnamon or nutmeg for a holiday twist.
- Gluten-Free Version: Replace all-purpose flour with a gluten-free flour blend.
Nutrition & Storage Info
- Prep Time: 30 minutes (plus chilling time)
- Cook Time: 10 minutes
- Total Time: Approx. 1 hour (if chill time is included)
- Yield: About 24 cookies
- Calories per serving: Approximately 150 calories
- Storage: Keep in an airtight container in the fridge for up to 5 days, or freeze unfilled cookies for up to 3 months.
FAQ Section
Can I use unsweetened cocoa powder?
- Yes, unsweetened cocoa powder adds the ideal chocolate flavor without extra sweetness.
What if I don’t have buttermilk?
- You can easily substitute by adding 1 tablespoon of vinegar or lemon juice to 1/2 cup of regular milk. Let it sit for a few minutes before using.
Can I make these cookies without food coloring?
- Absolutely! You can skip the red food coloring for a classic cocoa flavor, although they won’t have the signature red hue.
How can I prevent overbaking?
- Keep an eye on your cookies while they bake and remove them when they look slightly soft in the center.
Can I freeze the finished cookies?
- Yes, you can freeze the cookies after filling them. Just be sure to layer them with parchment paper to prevent sticking.
What other fillings can I use?
- You could try a chocolate ganache or whipped cream frosting in the center for another delicious twist.
Is there a vegan version of this recipe?
- Yes! Use flax egg substitutes instead of eggs, swap unsweetened applesauce for butter, and use non-dairy cream cheese.
Will they be okay sitting out at room temperature?
- These cookies should be stored in the fridge to keep the cream cheese filling fresh. Room temperature storage for more than a day isn’t recommended.
How long can I store the dough?
- The dough can be kept in the fridge for up to 2 days or frozen for up to 3 months.
Can I add nuts to this recipe?
- Sure! Fold in some chopped pecans or walnuts for a crunchy texture.
Conclusion
These Red Velvet Thumbprint Cookies are more than just cookies; they’re a wonderful way to connect with loved ones, create new memories, and indulge in something truly delicious. Once you try this recipe, I encourage you to share your feedback and let me know how your baking journey went! You might also want to check out related recipes on my blog, like the decadent Classic Chocolate Dipped Butter Cookies or the Caramel Brownie Cheesecake. Happy baking, and may your kitchen be filled with warmth and sweetness!

Red Velvet Thumbprint Cookies
Ingredients
Method
- In a medium bowl, whisk together flour, cocoa powder, baking soda, and salt. Set aside.
- In a large bowl, cream together butter and sugar until light and fluffy (2-3 minutes).
- Beat in eggs one at a time, mixing well after each. Stir in vanilla and red food coloring.
- Alternately add dry mixture and buttermilk, starting and ending with dry ingredients. Mix on low speed until just combined.
- Cover and refrigerate dough for at least 30 minutes or up to 2 hours.
- Preheat oven to 375°F (190°C) and line baking sheets with parchment paper.
- Roll rounded tablespoons of dough into balls and coat in granulated sugar.
- Place balls on baking sheets, spaced 2 inches apart.
- Create indents in each ball with your thumb.
- Bake for 8-10 minutes until edges are set and lightly browned.
- Beat together softened cream cheese and butter until smooth. Gradually add powdered sugar until fluffy. Stir in vanilla.
- Once cookies are cooled, fill the indents with cream cheese filling.