Table of Contents
Table of Contents
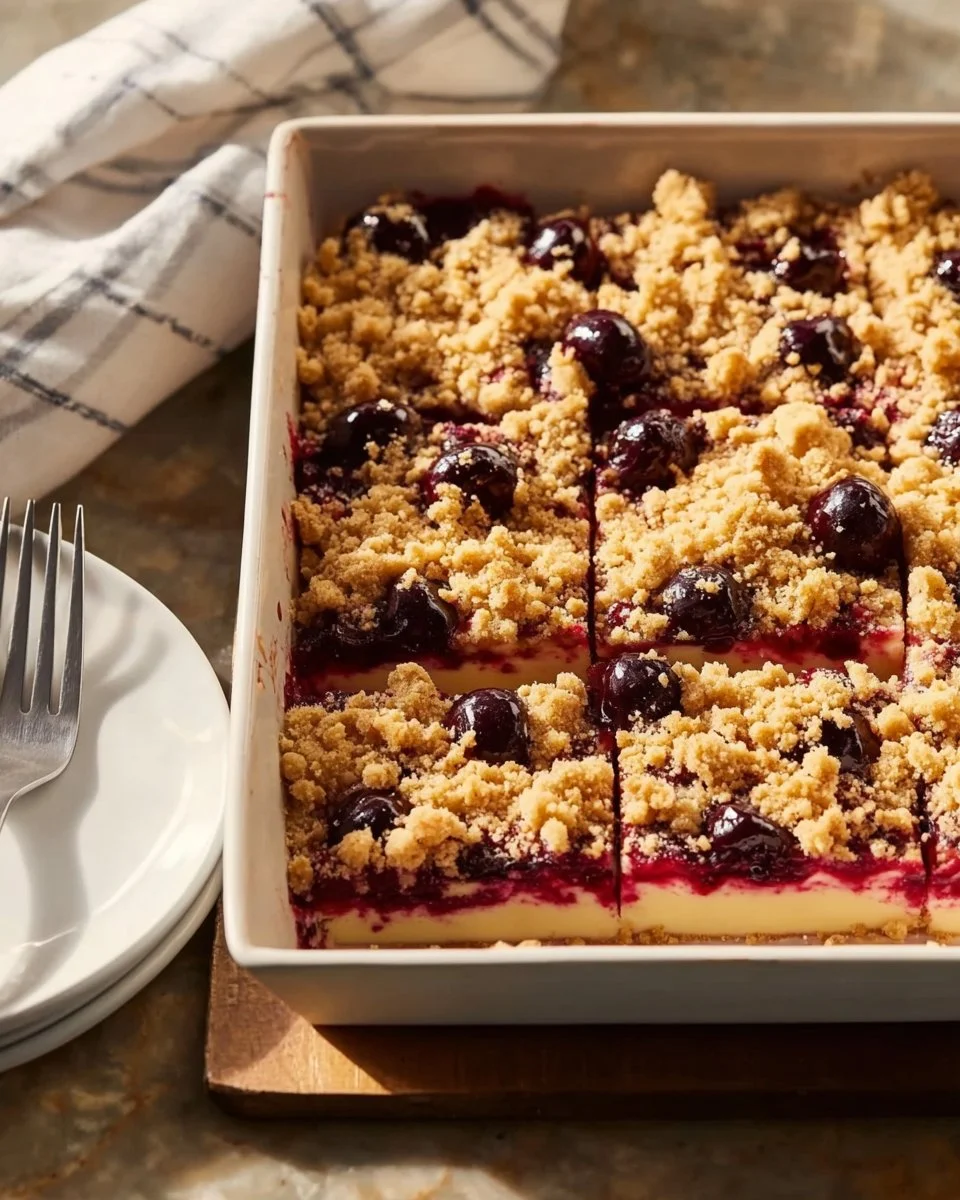
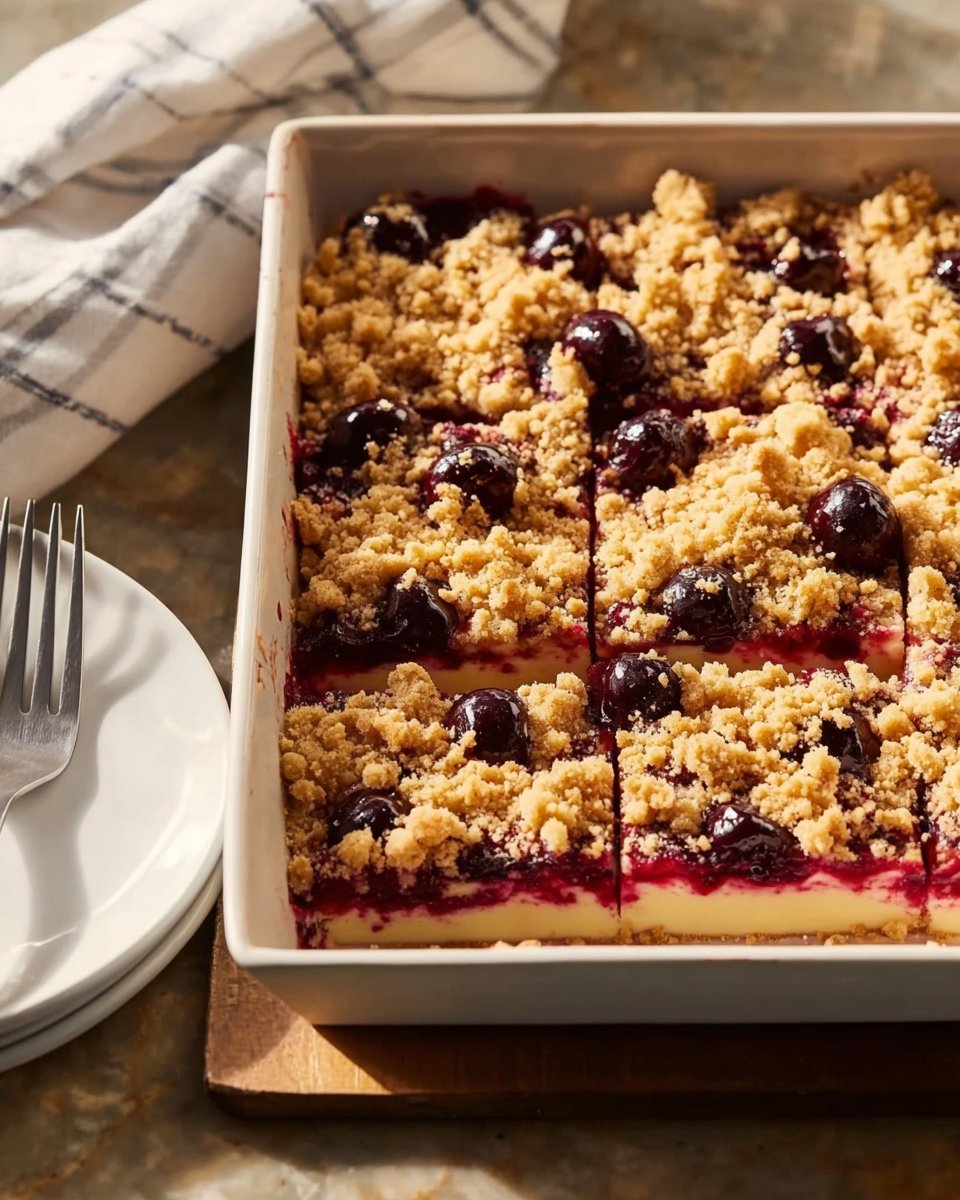
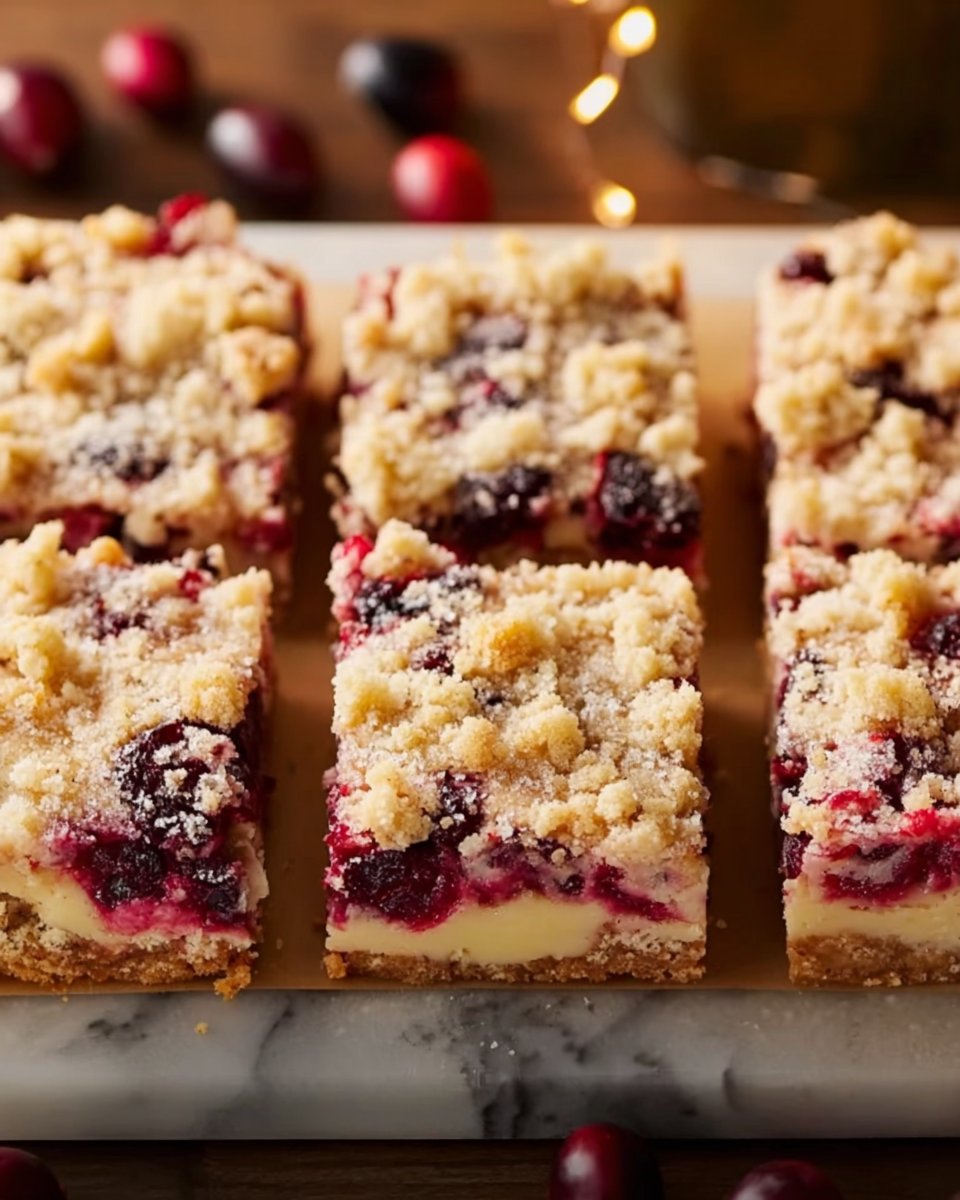
Heavenly Creamy Cranberry Orange Crumb Bars: A Festive Treat That Will Steal Your Heart
Ah, the cozy vibes of winter. Picture this: it’s a chilly Saturday afternoon, and the sweet aroma of orange and cranberry wafts through my kitchen. It reminds me of family gatherings during the holidays, sharing laughter over rich desserts and warm beverages. That’s when I first discovered the magic of Creamy Cranberry Orange Crumb Bars. The moment that buttery crumb crust crumbled apart and revealed the creamy cheesecake and tart cranberry filling, I knew this was something special.
What sets these bars apart from the countless other desserts vying for attention? It’s that dreamy texture, a delightful balance between creamy and crumbly, coupled with the brightness of fresh cranberries and a hint of citrus. These bars are not just dessert; they are a slice of nostalgia that transports me back to childhood kitchen experiments, family hugs, and warm memories wrapped in flavors.
Join me in this delicious journey, and I promise you’ll not only learn how to make these delectable crumb bars but also how to infuse them with your own stories of warmth and joy.
What Are Creamy Cranberry Orange Crumb Bars?
The origins of Creamy Cranberry Orange Crumb Bars are as rich as their flavors. This dessert combines the tartness of cranberries with the warm sweetness of orange, nestled in a buttery crumb crust. Its roots are inspired by traditional crumb cakes but elevate the experience into a layered masterpiece.
When you take a bite, the texture is what dazzles: a golden crumbly base yields to a rich, creamy cheesecake layer that’s then crowned with a burst of cranberry goodness. With its marriage of sweet and tart flavors, these bars are as versatile as they are glorious—suitable for holiday gatherings, cozy family dinners, or even a cheeky treat for yourself after a long week.
So why should you make these bars? They’re a symbol of festive spirit and creativity, perfect for sharing but also ideal for savoring solo. Plus, they freeze beautifully, making them a go-to dessert whenever cravings hit!
Why You’ll Love This Recipe
Flavor Burst: The combination of creamy cheesecake and zesty cranberries is unbeatable—you’ll be hard-pressed to find a store-bought treat that evokes these flavors.
Cost-Effective: With just a few basic ingredients, homemade bars are infinitely more wallet-friendly compared to fancy bakery desserts. Plus, you control the quality!
Customizable: Feel free to swap cranberries for blueberries or even peaches in the offseason. Add spices or zest according to your taste, making it truly your own.
Simple Yet Impressive: While these bars appear fancy, they’re straightforward enough for a beginner. Trust me; if I can do it after a busy day, so can you!
Make-ahead Friendly: Best of all, they can be made a day in advance, giving you more time to relax and enjoy your company without stressing in the kitchen.
This recipe is not just about food; it’s about making memories. Picture a loved one taking that first bite, their eyes lighting up with delight!
Ingredients Section
To create the beloved Creamy Cranberry Orange Crumb Bars, you’ll need the following ingredients, nicely organized based on the order of use. Don’t hesitate to choose organic or local brands for the best quality!
Crust & Topping
- 2 cups (250g) all-purpose flour (or a 1:1 gluten-free blend)
- Note: If using gluten-free flour, ensure it contains xanthan gum for texture.
- 1 cup (200g) granulated sugar
- 1/2 teaspoon baking powder
- 1/4 teaspoon salt
- 1/2 cup (115g) unsalted butter, cold and cubed
- Tip: Keep your butter refrigerated until you’re ready to use it for optimal texture.
- 1 large egg
Cheesecake Layer
- Zest of 1 large orange
- 8 oz (226g) cream cheese, softened
- Brand Recommendation: Philadelphia is a reliable choice for creamy texture.
- 1/3 cup (67g) granulated sugar (for cheesecake layer)
- 1 large egg (for cheesecake layer)
- 1 teaspoon vanilla extract
- 1 tablespoon orange juice (fresh squeezed)
Cranberry Filling
- 1 1/2 cups (150g) fresh or frozen cranberries
- 1/3 cup (67g) granulated sugar (for cranberry filling)
- 1/4 cup (60ml) orange juice (for cranberry filling)
- Zest of 1 orange (for cranberry filling)
Prep Notes
- Ensure all ingredients are at room temperature for better mixing.
- Prepping your pan with parchment paper makes removing the bars effortless after baking!
Step-by-Step Instructions
Let’s dive into the baking process—it’s easier than you think!
Preheat the oven to 350°F (175°C). Line an 8×8-inch baking pan with parchment paper, leaving an overhang for easy removal later.
Prepare the cranberry filling: In a medium saucepan, combine cranberries, 1/3 cup sugar, 1/4 cup orange juice, and zest of 1 orange. Simmer over medium heat until cranberries pop and the mixture thickens, about 8-10 minutes. Let this cool while we move on.
Make the crust: In a large bowl, stir together flour, 1 cup sugar, baking powder, and salt. Next, combine the zest of 1 large orange and rub it into the sugar mixture to release those fragrant oils.
Add cold, cubed butter. Blend everything using a pastry cutter, or your fingers, until coarse crumbs form.
Bind it together: Beat in 1 egg until the mixture clumps but remains crumbly. Reserve 2/3 cup of this mixture for topping later.
Bake the crust: Press the remaining crumb mixture into your prepared pan and bake for 10 minutes, then remove from the oven.
Prepare the cheesecake layer: In a medium bowl, beat softened cream cheese and 1/3 cup sugar until smooth. Beat in 1 egg, vanilla, and 1 tablespoon orange juice until creamy and blended.
Assemble: Spread the cheesecake filling over the baked crust. Dollop the cooled cranberry-orange mixture on top and swirl gently with a knife for that oh-so-beautiful marbled effect!
Top it off: Sprinkle the reserved crumb mixture evenly over the cranberry layer. Bake for another 35-40 minutes until the topping is golden and the center is just set. If it’s browning too quickly, tent with foil.
Cool and serve: Allow the bars to cool in the pan for at least 1 hour, then chill in the fridge for 2-3 hours or overnight for best results. Lift out with parchment, slice into squares, and serve chilled.
Chef’s Tip: Keep an eye on the bars while they bake; they should remain slightly jiggly in the center!
Expert Tips & Tricks
Here are my top five professional tips to ensure your Creamy Cranberry Orange Crumb Bars turn out amazing every time:
Quality Ingredients: Use high-quality cream cheese and fresh cranberries. It may seem trivial, but they make a world of difference!
Room Temperature Ingredients: This will help your cheesecake layer come out smooth and creamy. If you’re short on time, you can microwave your cream cheese for a few seconds (just don’t melt it!).
Storage: These bars can be stored in an airtight container in the fridge for up to a week. They also freeze well for up to 3 months, making them perfect for planning ahead.
Make Ahead: Feel free to prepare the cranberry filling and cheesecake layer ahead of time! Store in containers in the fridge and assemble the bars just before baking.
Common Mistakes: Avoid overmixing the cheesecake layer as it can incorporate too much air, leading to cracks during baking. Mix until just combined.
With these tips, you’ll feel like a pro in your kitchen!
Serving Suggestions
Pair your Creamy Cranberry Orange Crumb Bars with a cup of steaming hot chai tea or a refreshing glass of iced lemonade for a delightful contrast. If you’re feeling fancy, serve them with a dollop of whipped cream or a scoop of vanilla ice cream on the side.
For a beautiful presentation, dust the bars with powdered sugar before serving and garnish with a slice of orange or a sprinkle of fresh cranberries.
These crumb bars fit perfectly into any occasion, whether it’s a holiday gathering, a cozy brunch, or a simple weeknight dessert.
Variations & Substitutions
Feeling adventurous? Here are a few variations to take your Creamy Cranberry Orange Crumb Bars to the next level:
Different Fruits: Swap cranberries for chopped apples, cherries, or peaches for a new twist!
Spice It Up: Add cinnamon or nutmeg to the crumb mixture for a cozy autumn flavor.
Lower Sugar: Substitute sugar with natural sweeteners like honey or maple syrup if you’re looking to cut down on granulated sugar.
Vegan Version: Use a dairy-free cream cheese substitute and flax eggs in place of regular eggs for a vegan-friendly recipe.
Holiday Cheer: During the winter holidays, add finely crushed ginger cookies or pecans to the crumb topping for a festive flair!
Nutrition & Storage Info
- Prep Time: 30 minutes
- Cook Time: 50 minutes
- Total Time: About 1 hour, 20 minutes (plus chilling time)
- Yield: Approximately 16 bar-style servings
- Estimated Calories: Around 180 calories per serving
Storage Instructions:
- Room Temperature: Not recommended after baked; keep them chilled for freshness!
- Refrigerator: Store in an airtight container in the fridge for up to 1 week.
- Freezer: These bars can be frozen for up to 3 months. Thaw in the fridge before serving.
FAQ Section
Can I use frozen cranberries?
Yes! Just be sure to let them thaw fully and drain any excess moisture before cooking.How long do these bars last?
Stored properly in the fridge, they’ll last about a week. They also freeze beautifully for around three months!Can I make these bars gluten-free?
Absolutely! Replace the all-purpose flour with a quality gluten-free 1:1 blend.What can I substitute for cream cheese?
You can use a dairy-free cream cheese alternative for a vegan version.How should I store leftovers?
Make sure to keep them in an airtight container in the fridge to keep them fresh.Can I make this a one-pan recipe?
Yes! Just adjust your baking time slightly if you’re using a larger or smaller pan.Is there a way to make this less sweet?
You can decrease the sugar in both the crust and filling to suit your taste.What can I use instead of orange juice?
Lemon juice would work as a tart substitute, but it will change the flavor profile slightly.Can I make these in advance for a party?
Definitely! They taste even better after chilling for a few hours or overnight.How do I know when the bars are done baking?
The top will be golden and the center should be just set—slightly jiggly but not liquid.
Conclusion
There you have it—your guide to making my cherished Creamy Cranberry Orange Crumb Bars! These bars are not only a treat for the senses, they’re a canvas for creating new family memories. So go ahead, roll up your sleeves, and give this recipe a try!
I would love to hear your thoughts, feedback, or personal tales of baking these bars in the comments below. And don’t forget to check out my other holiday-inspired recipes on the blog for a complete festive experience.
Happy baking!
Creamy Cranberry Orange Crumb Bars
Ingredients
Method
- Preheat the oven to 350°F (175°C). Line an 8×8-inch baking pan with parchment paper, leaving an overhang for easy removal later.
- Prepare the cranberry filling: In a medium saucepan, combine cranberries, 1/3 cup sugar, 1/4 cup orange juice, and zest of 1 orange. Simmer over medium heat until cranberries pop and the mixture thickens, about 8-10 minutes. Let this cool while we move on.
- Make the crust: In a large bowl, stir together flour, 1 cup sugar, baking powder, and salt. Combine the zest of 1 large orange and rub it into the sugar mixture to release those fragrant oils.
- Add cold, cubed butter. Blend everything using a pastry cutter, or your fingers, until coarse crumbs form.
- Bind it together: Beat in 1 egg until the mixture clumps but remains crumbly. Reserve 2/3 cup of this mixture for topping later.
- Bake the crust: Press the remaining crumb mixture into your prepared pan and bake for 10 minutes, then remove from the oven.
- Prepare the cheesecake layer: In a medium bowl, beat softened cream cheese and 1/3 cup sugar until smooth. Beat in 1 egg, vanilla, and 1 tablespoon orange juice until creamy and blended.
- Assemble: Spread the cheesecake filling over the baked crust. Dollop the cooled cranberry-orange mixture on top and swirl gently with a knife for a beautiful marbled effect.
- Top it off: Sprinkle the reserved crumb mixture evenly over the cranberry layer. Bake for another 35-40 minutes until the topping is golden and the center is just set. If it’s browning too quickly, tent with foil.
- Cool and serve: Allow the bars to cool in the pan for at least 1 hour, then chill in the fridge for 2-3 hours or overnight for best results. Lift out with parchment, slice into squares, and serve chilled.