Table of Contents
Table of Contents
There’s something undeniably nostalgic about baking cookies—especially when it involves sweet, fluffy Strawberry Kiss Cookies. I vividly remember summer afternoons spent in my grandmother’s cozy kitchen, the warm scent of vanilla and strawberries wafting through the air while we eagerly awaited our sweet creations. These cookies hold a special place in my heart—not just because they are delicious, but also because they connect me to fond memories with my family.
Unlike other cookie recipes that can be overly complicated or uninspired, this one stands out for its delightful combination of sweet, creamy strawberry flavors and rich chocolate. The addition of strawberry-flavored gelatin creates a soft, melt-in-your-mouth texture that’s simply irresistible. In this post, I’ll take you on a journey through every sweet detail of making Strawberry Kiss Cookies, sharing tips and tricks that will elevate your baking game. Even if you’re a novice in the kitchen, you’ll soon be whipping up these comforting treats with ease. Join me and let’s create some delicious moments together!
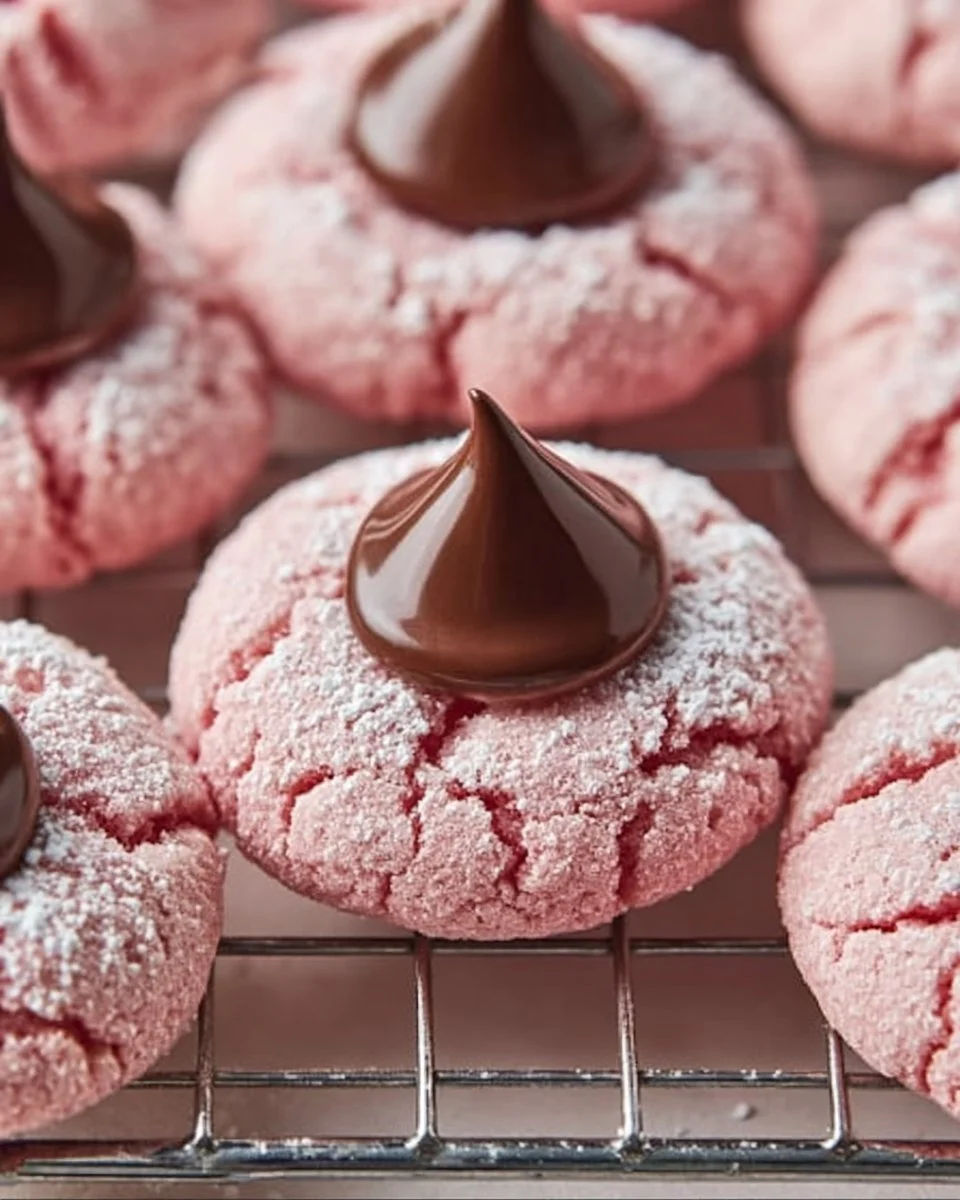
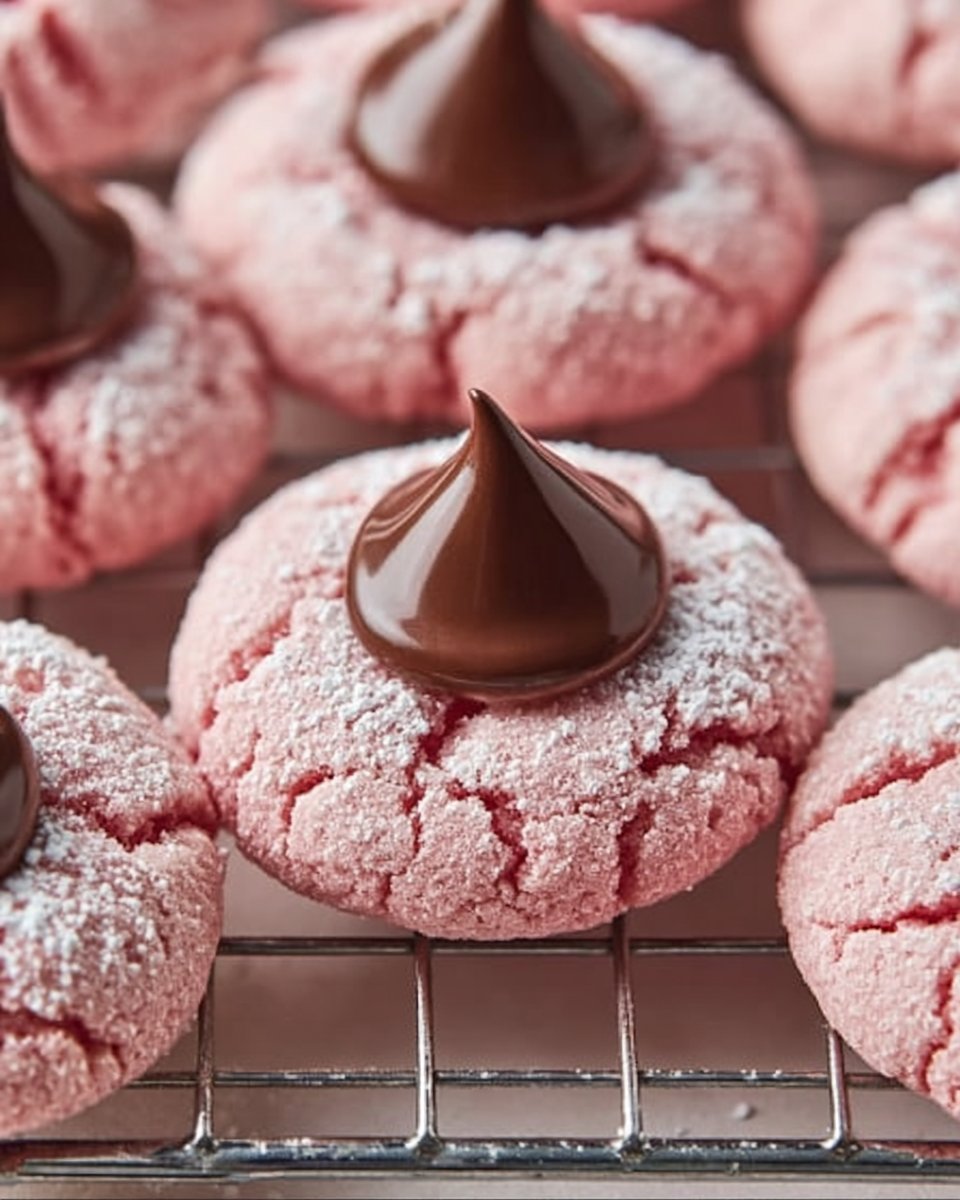
What Are Strawberry Kiss Cookies?
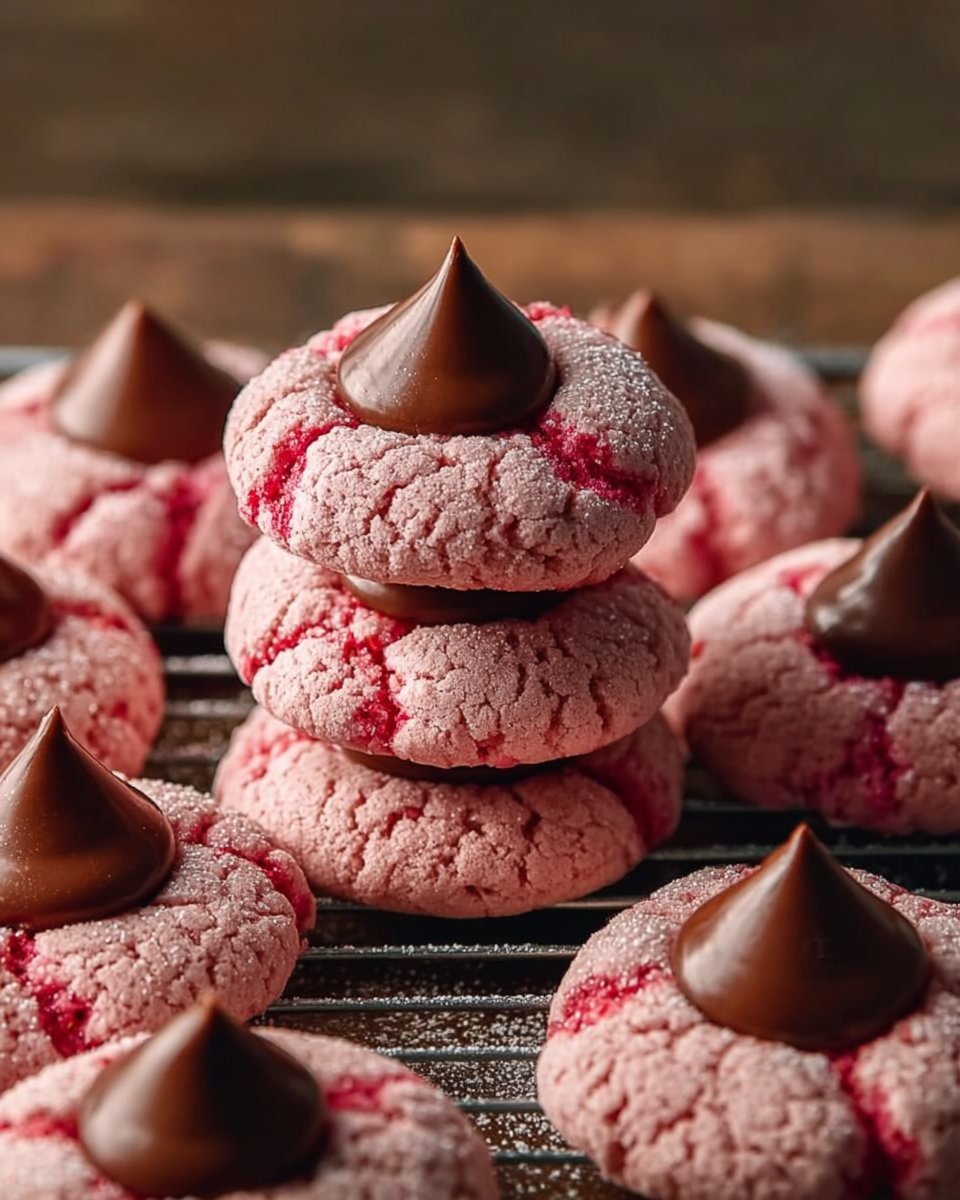
Originating from the classic “kissing” cookie family, Strawberry Kiss Cookies take a beloved tradition and give it a bright, fruity spin. Their delightful texture comes from a carefully crafted blend of buttery dough rolled in powdered sugar, creating a soft, dessert that’s tender and chewy. The signature strawberry flavor, enhanced by the fruity gelatin mix, brings a burst of sweetness that pairs perfectly with the chocolate kiss atop each one.
These cookies are perfect for a variety of occasions—holiday gatherings, birthday celebrations, or even a sweet surprise for yourself. Whether you’re enjoying them with a warm cup of tea or sharing them with loved ones, Strawberry Kiss Cookies will quickly become a go-to favorite.
Why You’ll Love This Recipe
Decadent Taste: The combination of strawberry flavor and smooth chocolate is nothing short of magical. You’ll find it difficult to eat just one!
Ease of Preparation: This recipe is straightforward, making it suitable for bakers of all skill levels. With just a handful of ingredients and minimal prep time, you’ll be amazed at how simple it is to whip up a batch.
Cost-Effective Indulgence: Why spend a fortune on fancy cookies from specialty shops when you can make them at home for a fraction of the price? These cookies are wallet-friendly and homemade with love.
Customizable: Feel free to experiment! You can mix in nuts, swap the chocolate kisses for other candies, or even create mini strawberry-shaped cookies with a bit of creativity.
Quick Baking: With a total time investment of under 30 minutes, you’ll have fresh cookies ready in no time, perfect for unexpected guests or a last-minute sweet fix.
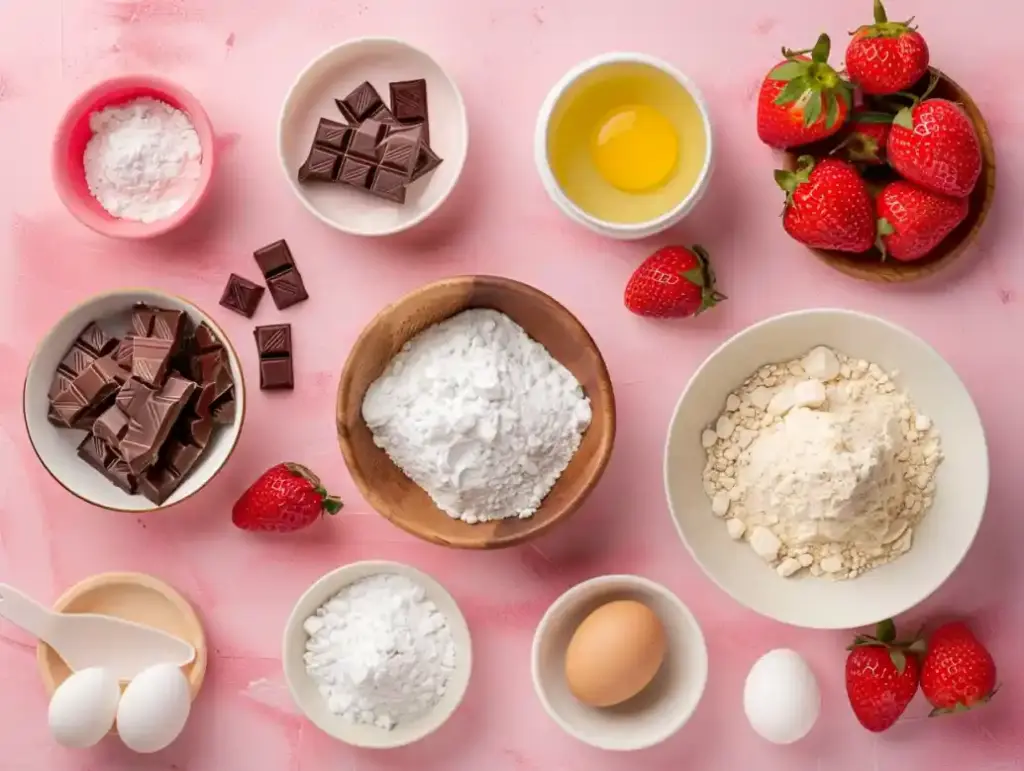
Ingredients
To prepare these mouthwatering Strawberry Kiss Cookies, you will need:
- 1 cup unsalted butter, softened (make sure it’s at room temperature for easier creaming)
- 1 cup powdered sugar, plus more for rolling
- 1 large egg
- 1 tsp vanilla extract (opt for pure vanilla for the best flavor)
- 2 ½ cups all-purpose flour (for a lighter texture, consider using a blend of all-purpose and cake flour)
- 1 tsp baking powder
- ½ tsp salt (a pinch enhances the sweetness)
- 1 cup strawberry-flavored gelatin mix (look for a quality brand, like Jell-O, for an authentic flavor)
- Chocolate kisses, for topping (classic milk chocolate works perfectly)
Step-by-Step Instructions
1. Preheat Your Oven
Begin by preheating your oven to 350°F (175°C) and lining a baking sheet with parchment paper for easy cleanup.
2. Cream Butter and Sugar
In a large mixing bowl, cream together the softened butter and powdered sugar until light and fluffy. This should take about 2-3 minutes on medium speed, and the mixture should appear pale and airy.
3. Add Egg and Vanilla
Beat in the egg and vanilla extract until well combined. Make sure to scrape down the sides of your bowl for even mixing.
4. Mix Dry Ingredients
In another bowl, whisk together the flour, baking powder, salt, and strawberry-flavored gelatin mix until fully combined. This helps to distribute the baking powder for an even rise.
5. Combine Wet and Dry Mixtures
Gradually add the dry ingredients to the wet mixture, mixing until a soft dough forms. Be careful not to over-mix as this can lead to tough cookies.
6. Shape Cookies
Roll the dough into small balls—about 1 inch in diameter. Then, roll each ball in powdered sugar until fully coated.
7. Prepare for Baking
Place the balls on the prepared baking sheet, spacing them about 2 inches apart. Using your thumb, make an indentation in the center of each ball.
8. Bake to Perfection
Bake for 10-12 minutes, or until the edges are lightly golden. Keep an eye on them as baking times may vary slightly based on your oven.
9. Add the Chocolate Kiss
Immediately after removing the cookies from the oven, press a chocolate kiss into each indentation, allowing them to melt slightly. The warm cookies will help the chocolate adhere beautifully.
10. Cool and Serve
Let the cookies cool on the baking sheet for a few minutes before transferring them to a wire rack to cool completely.
Chef’s Tips
- Check for Doneness: The cookies should be lightly golden at the edges. If they puff up slightly, that’s a good sign of fluffiness!
- Avoid Overbaking: Cookies should look just set in the center. They will continue to firm up once cooled.
- Substitutions: If you can’t find strawberry-flavored gelatin, you might try using freeze-dried strawberries crushed into a powder for a more natural flavor.
Expert Tips & Tricks
Storage: To keep your Strawberry Kiss Cookies fresh, store them in an airtight container at room temperature for up to 5 days. You can also refrigerate them for longer shelf life.
Make-Ahead Instructions: Prepare the dough, roll it into balls, and freeze them on a baking sheet. Once frozen, transfer the dough balls to a zipped plastic bag. Bake directly from the freezer, adding an additional minute or two to the baking time.
Troubleshooting: If your dough feels too sticky, chill it in the fridge for 30 minutes before shaping. If you find the cookies are spreading too much during baking, try chilling the dough before baking again.
Presentation: For a festive touch, drizzle your cooled cookies with white chocolate or sprinkle with crushed freeze-dried strawberries before serving.
Taste Test: I’ve tried this recipe with various fruit-flavored gels; strawberry consistently gets the best rave reviews from family and friends!
Serving Suggestions
Strawberry Kiss Cookies are perfect on their own, but consider serving them with a scoop of vanilla ice cream for a delightful dessert. For a beautiful presentation, arrange them on a decorative platter alongside colorful fruit or flower petals, making them ideal for special occasions like bridal showers or birthday parties.
Variations & Substitutions
- Different Flavor Combinations: Experiment with other flavors of gelatin, such as raspberry or lemon, to create a whole new cookie experience.
- Dietary Restrictions: For gluten-free variations, swap out the all-purpose flour with a 1:1 gluten-free baking blend. You can also replace the butter with coconut oil or a vegan butter substitute for dairy-free options.
- Seasonal Variations: During the holidays, how about adding a hint of peppermint extract to the dough? Strawberry Kiss Cookies can easily evolve with the seasons!
Nutrition & Storage Info
- Prep Time: 15 minutes
- Cook Time: 12 minutes
- Total Time: 27 minutes
- Yield: Approximately 24 cookies
- Estimated Calories: About 110 per cookie
Storage Instructions: Keep in an airtight container at room temperature for up to 5 days, or in the fridge for about a week. They can also be frozen for up to 3 months—just thaw them on the counter before serving.
FAQ Section
Can I use fresh strawberries instead of gelatin?
- While fresh strawberries can add flavor, they will alter the dough’s consistency and may prevent cookies from setting properly.
What should I do if my cookies are too dry?
- Ensure you’re measuring your flour correctly. A simple fix is to add a tablespoon of milk or cream to the dough if it feels too dry while mixing.
Can I make these cookies in advance?
- Absolutely! You can prepare the dough ahead of time and freeze it for later baking.
What other toppings can I use?
- Feel free to replace chocolate kisses with peanut butter cups or caramel candies for a different flavor sensation.
Why are my cookies spreading too much?
- This could be due to the butter being too soft. Chilling the dough can help combat this issue.
Can I bake these cookies in a convection oven?
- Yes, but reduce the temperature by about 25°F (15°C) to avoid over-browning.
Do these cookies need to be refrigerated?
- They can be stored at room temperature due to the butter content but refrigerating can extend their shelf life.
What if I don’t have powdered sugar?
- If you find yourself out of powdered sugar, it’s easy to make your own by blending granulated sugar in a blender until fine.
Can these be shaped creatively?
- Absolutely! You can try using cookie cutters for fun shapes before adding your chocolate kiss after baking.
How can I get a stronger strawberry flavor?
- Increase the amount of strawberry gelatin or add a touch of strawberry extract for an extra punch of flavor.
Conclusion
These Strawberry Kiss Cookies embody the warmth and sweetness of cherished childhood memories while being incredibly easy to make. As you embark on this baking adventure, I encourage you to share your results with family and friends; I promise they’ll be a hit! I’d love to hear about your experiences, any variations you tried, or your favorite moments in the kitchen. And don’t forget to check out my blog for other delightful recipes that will fill your home with the sweet aroma of happiness!
Happy baking!