Table of Contents
Table of Contents
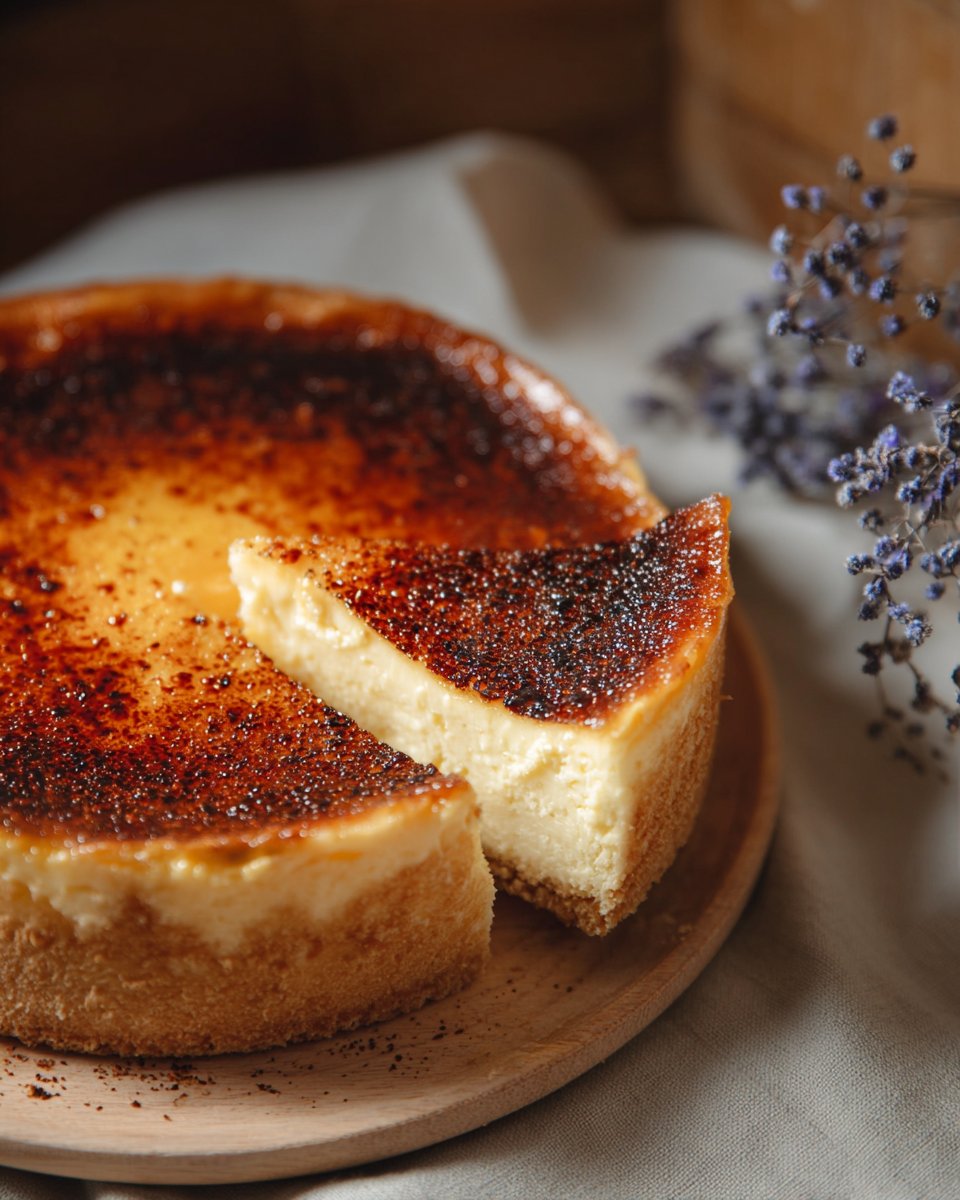
Irresistibly Creamy Burnt Cream Cheesecake: A Slice of Heaven
Picture this: a bustling kitchen filled with laughter and the sweet aroma of vanilla, as I, armed with a trusty whisk, prepare the most magical dessert – Burnt Cream Cheesecake. This recipe is not just a nod to culinary ingenuity; it’s an echo of cherished family memories and a comforting hug in dessert form. Whenever I whip up this delight, I’m transported back to Sunday dinners at my grandma’s table, where her rich, velvety cheesecake stole the show and our hearts.
What makes my Burnt Cream Cheesecake special, you might ask? It’s all about that perfect balance between rich creaminess and a slightly bitter, caramelized sugar topping. Unlike many store-bought options, which can be overly sweet or heavy, my recipe is lighter and beautifully balanced. You’ll discover a heavenly texture that melts on your tongue and a taste that brings back those warm family memories.
In this post, I’m excited to share not just the recipe but the secrets that make this cheesecake a showstopper. Whether you’re hosting a dinner party or simply treating yourself, you’ll learn how to create a Burnt Cream Cheesecake that’ll have everyone begging for seconds and reminiscing about their own treasured memories.
What Are Burnt Cream Cheesecakes?
The origins of Burnt Cream Cheesecake can be traced back to the 19th century in France, where the concept of a creamy custard dessert with a caramelized crust was born. In essence, this cheesecake is a harmonious blend of classic cheesecake rich in cream cheese, and the tantalizing burnt sugar layer reminiscent of crème brûlée – a pairing that transforms a beloved dessert into something extraordinary.
With a luxurious, silky cream cheese filling and a crisp, golden topping, the flavors dance beautifully on your palate. The slight bitterness from the burnt sugar adds a sophisticated touch that perfectly complements the sweetness of the cheesecake, creating a unique dining experience.
Making this dessert is ideal for special occasions, from birthdays to holidays, or simply to treat yourself after a long week. It’s a dessert that not only satisfies the sweet tooth but also holds rich histories, making it the perfect choice for sharing with loved ones.
Why You’ll Love This Recipe
Unmatched Flavor: This Burnt Cream Cheesecake stands out with its creamy interior and perfect caramelized crust. Compared to typical store-bought cheesecakes, this homemade version has a depth of flavor that simply cannot be replicated.
Cost-Effective: Creating this cheesecake at home is much cheaper than splurging at a fancy bakery, especially considering the high-quality ingredients you can select. Plus, you can make it in large batches to share!
Customization Options: This recipe is infinitely adaptable! Want to add a hint of lemon zest or a swirl of raspberry puree? The base recipe holds up beautifully against flavor variations, catering to any palate.
Easy to Make: With clear step-by-step instructions, even beginner bakers will shine with this recipe. It requires minimal skill level while ensuring impressive results. You’ll look like a pro without the stress!
Perfect for Any Occasion: Whether you are celebrating a special event or just having a movie night, this cheesecake is versatile. It pairs wonderfully with fresh berries or a light dusting of cocoa powder, making it a stunning centerpiece for any gathering.
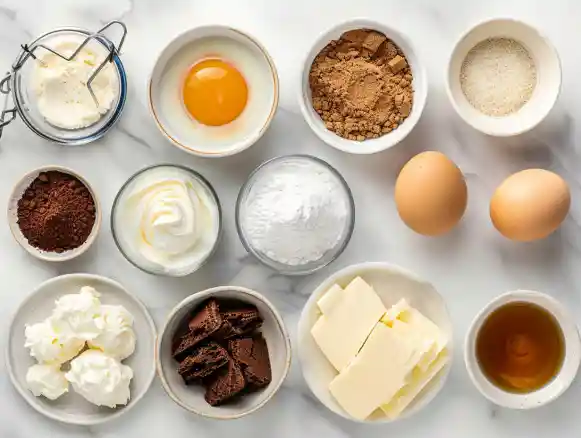
Ingredients
To create this luxurious Burnt Cream Cheesecake, gathering quality ingredients is key. Here’s what you’ll need:
For the Crust:
- 170 g digestive biscuits (or Graham crackers for a slight twist)
- 100 g butter, melted (unsalted for better flavor control)
For the Cheesecake Filling:
- 900 g cream cheese, softened to room temperature (a high-quality brand makes a noticeable difference)
- 200 g caster sugar (choose fine sugar for a smoother texture)
- 160 g sour cream (full-fat works best)
- 1 ½ teaspoons vanilla extract (real vanilla extract is a game-changer)
- Pinch of salt
- 4 large eggs, room temperature, lightly beaten (this really helps in achieving that silky texture)
For the Crème Brûlée Topping:
- 50 g granulated sugar (for that satisfying crunch)
Prep Notes: Make sure your butter and cream cheese are at room temperature to avoid lumps in your batter.
Step-by-Step Instructions
To make the crust:
- Preheat Oven: Preheat your oven to 180°C (350°F).
- Crush Biscuits: In a food processor, crush the digestive biscuits into fine crumbs. (You can also place them in a ziplock bag and crush them with a rolling pin.)
- Combine with Butter: In a mixing bowl, combine the crushed biscuits with the melted butter. Stir until all crumbs are coated.
- Press into Pan: Lightly grease a 23 cm springform pan and press the crust mixture firmly into the bottom and slightly up the sides. Bake in the preheated oven for 10 minutes until lightly golden. Remove and let cool.
To make the cheesecake:
- Beat Cream Cheese: In a large bowl, beat the softened cream cheese until smooth and creamy.
- Add Sugar: Gradually add the caster sugar, mixing until fully incorporated.
- Mix in Sour Cream: Add the sour cream, vanilla extract, and salt, mixing well.
- Incorporate Eggs: Slowly add the lightly beaten eggs, mixing gently until just combined. Avoid overmixing to keep the texture light and airy.
- Pour into Crust: Pour the cheesecake mixture into the cooled biscuit crust. Smooth the top with a spatula.
- Bake: Bake in the oven for about 55-60 minutes or until the edges are set, and the center is slightly jiggly. (It will firm up while cooling.)
- Cool: Allow the cheesecake to cool in the oven with the door ajar for about an hour, then refrigerate for at least 4 hours (or overnight).
Make the crème brûlée topping:
- Sprinkle Sugar: Once the cheesecake is chilled, sprinkle the granulated sugar evenly over the top.
- Caramelize: Use a kitchen torch to melt the sugar until golden and bubbly. If you don’t have a torch, you can place it under a broiler for a couple of minutes, watching closely to prevent burning.
Chef’s Tip: If using the broiler, stay close, as this can go from caramelized to burnt in seconds!
Common Mistakes:
- Overmixing eggs can lead to cracks. Mix until just combined!
- Not letting the cheesecake cool slowly in the oven might result in cracks.

Expert Tips & Tricks
- Quality Ingredients: Always use the best quality ingredients, as the flavors stand out in this recipe.
- Room Temperature Ingredients: Ensuring that cream cheese and eggs are at room temperature helps create a creamy filling without lumps.
- Avoid Overmixing: Mix until just combined to maintain the airy texture, avoiding cracks.
- Storage: Covered in the fridge, this cheesecake will last for up to 5 days. For extended storage, it freezes beautifully for up to 3 months.
- Make-ahead: You can prepare the cheesecake a day in advance – the flavors deepen overnight!
- Troubleshooting: If your burnt topping isn’t crisping, ensure the sugar is evenly spread out and give it a little more time under the flame.
Serving Suggestions
A slice of this Burnt Cream Cheesecake pairs beautifully with a dollop of whipped cream and a handful of fresh berries. For an extra touch, drizzle some berry coulis around the plate for a burst of color. This dessert is perfect for celebrations, dinner parties, or even as a luxurious treat just for yourself. Don’t forget to serve it on your prettiest cake stand to wow your guests!
Variations & Substitutions
- Flavor Combos: Add a swirl of peanut butter or Nutella to the cheesecake filling before baking for a nutty twist.
- Dietary Adaptations: For a gluten-free version, swap out the digestive biscuits for a gluten-free graham cracker alternative.
- Seasonal Variations: Experiment with seasonal fruits, like pumpkin in the fall or fresh berries in the summer, folded into the batter for a refreshing twist.
Nutrition & Storage Info
- Prep Time: 30 minutes
- Cook Time: 60 minutes
- Total Time: 5 hours (including cooling)
- Yield: 12 servings
- Estimated Calories per Serving: 400
Storage Instructions:
- Room Temperature: Not recommended.
- Fridge: Covered, for up to 5 days.
- Freezer: Wrapped tightly, for up to 3 months. Thaw in the fridge before serving.
FAQ Section
Can I use low-fat cream cheese?
- While low-fat cream cheese can be used, the texture and flavor won’t be quite as rich and creamy.
How do I know when the cheesecake is done?
- The edges will be set, but the center should have a slight jiggle. It will continue to firm up as it cools.
Can I make this cheesecake without eggs?
- Yes, you can substitute with a mixture of silken tofu or a commercial egg replacement product, but the texture may differ.
Is it necessary to chill the cheesecake overnight?
- Yes, chilling overnight helps the flavors meld beautifully and the cheese to set up perfectly.
How can I decorate my cheesecake?
- Fresh fruits, a sprig of mint, or a drizzle of caramel sauce add elegance and contrast beautifully against the creamy cheesecake.
What if I don’t have a kitchen torch?
- You can use an oven broiler, placing the cheesecake on the top rack for 1-2 minutes, watching carefully to prevent burning.
Should I cover the cheesecake while cooling?
- Let it cool uncovered to avoid moisture buildup, which can affect the texture.
Why did my cheesecake crack?
- It may be due to overmixing or sudden temperature changes. Slowing cooling in the oven helps prevent this.
Can I freeze leftovers?
- Yes! Just wrap individual slices tightly in plastic wrap and place them in an airtight container before freezing.
What’s the best way to slice a cheesecake?
- Run a knife under hot water, dry it, and then slice. This method gives you clean cuts without pulling at the creamy filling.
Conclusion
This Burnt Cream Cheesecake isn’t just a dessert; it’s a vessel for memories, a comfort food that soothes the soul, and an indulgent treat that brings people together. It’s a recipe that has been cherished in my family, and I hope it finds a place in yours, too.
I encourage you to give it a try – you might discover that you make it for every occasion! As always, I love hearing your feedback, so please let me know how it turns out for you in the comments. For more delicious recipes, don’t forget to check out my other dessert creations on the blog.
Best 10 Cheesecake Recipes That Will Delight Every Sweet Tooth
Happy baking!
Burnt Cream Cheesecake
Ingredients
Method
- Preheat your oven to 180°C (350°F).
- In a food processor, crush the digestive biscuits into fine crumbs.
- In a mixing bowl, combine the crushed biscuits with the melted butter. Stir until all crumbs are coated.
- Lightly grease a 23 cm springform pan and press the crust mixture firmly into the bottom and slightly up the sides.
- Bake in the preheated oven for 10 minutes until lightly golden. Remove and let cool.
- In a large bowl, beat the softened cream cheese until smooth and creamy.
- Gradually add the caster sugar, mixing until fully incorporated.
- Add the sour cream, vanilla extract, and salt, mixing well.
- Slowly add the lightly beaten eggs, mixing gently until just combined.
- Pour the cheesecake mixture into the cooled biscuit crust. Smooth the top with a spatula.
- Bake in the oven for about 55-60 minutes or until the edges are set, and the center is slightly jiggly.
- Allow the cheesecake to cool in the oven with the door ajar for about an hour, then refrigerate for at least 4 hours (or overnight).
- Once the cheesecake is chilled, sprinkle the granulated sugar evenly over the top.
- Use a kitchen torch to melt the sugar until golden and bubbly, or place it under a broiler for a couple of minutes.