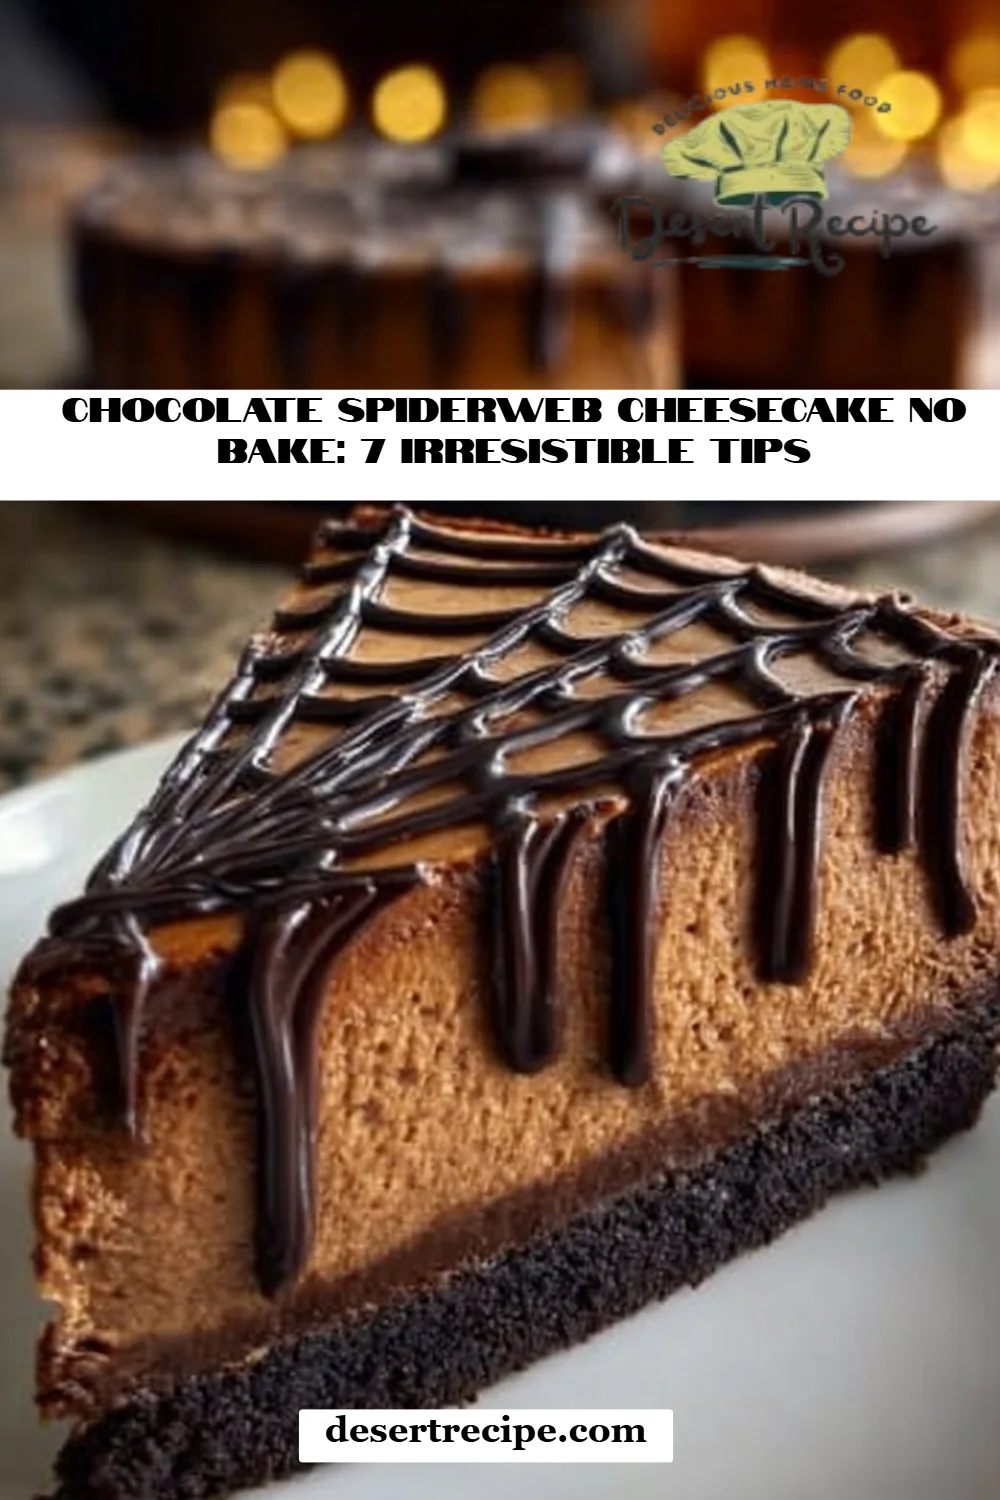
Unleash Your Inner Baker with This Irresistible No-Bake Chocolate Spiderweb Cheesecake: 7 Tips for Ultimate Perfection!
As a passionate home baker, few things thrill me more than surprising family and friends with a dessert that not only looks stunning but tastes amazing too. Growing up, my family had a tradition of gathering around the table for dessert, and there was always room for cheesecake—preferably a creamy, chocolatey one! That’s why I’m excited to share my take on the Chocolate Spiderweb Cheesecake No Bake: 7 Irresistible Tips to ensure your creation is nothing short of spectacular.
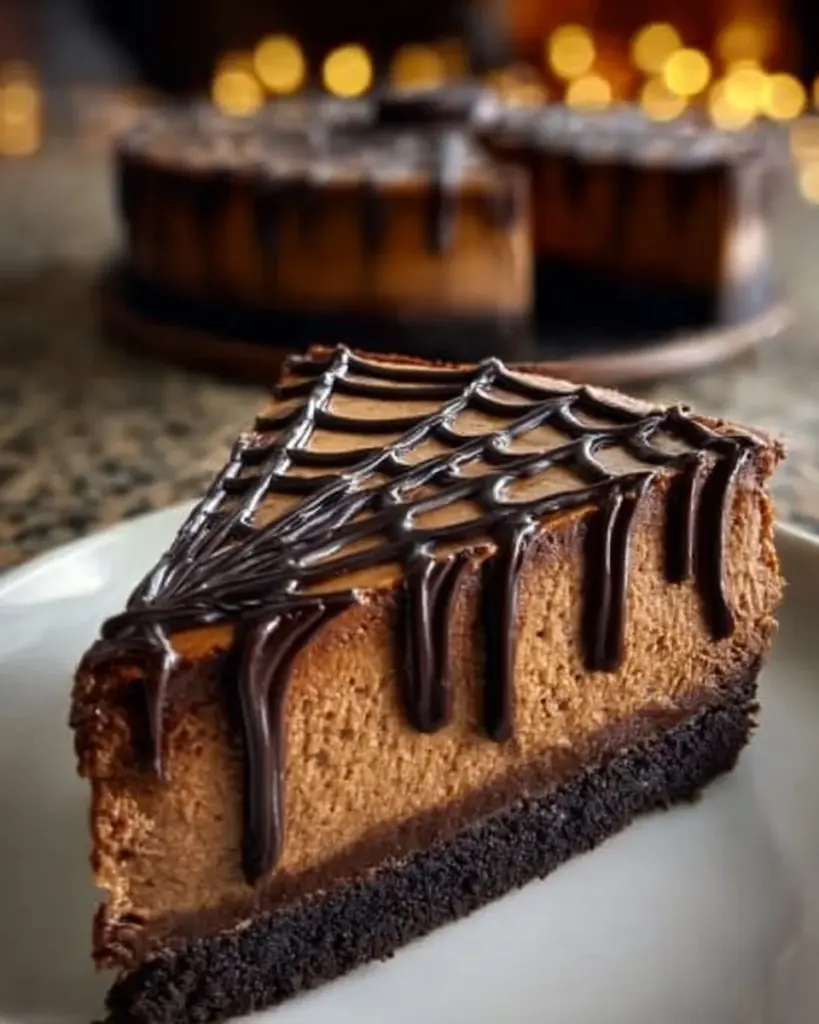
This cheesecake is unique because it combines the devilishly rich flavor of chocolate with a whimsical spiderweb design on top, making it perfect for Halloween or any celebration where you want to impress. What truly sets this recipe apart is that it requires no oven time, allowing the luscious layers of cream cheese and whipped cream to take center stage without the hassle of baking.
Each bite is like a velvety hug, evoking sweet memories of cozy family gatherings and laughter echoing through the house. Stick around, and I promise to share my favorite tips that guarantee success, making your no-bake cheesecake the star of the show!
What Are Chocolate Spiderweb Cheesecake No Bake: 7 Irresistible Tips?
The Chocolate Spiderweb Cheesecake is an enchanting dessert that adds a fun twist to traditional cheesecake recipes. Originating from a mix of classic cheesecake lore and imaginative dessert design, it features a luscious chocolate filling that sits atop a buttery cookie crust.
When you slice into it, the silky texture melts in your mouth, while the layered flavors dance on your palate. It’s not just about taste; it’s an experience. The visual appeal of the spiderweb design adds a playful element that makes it ideal for any Halloween gathering or themed party.
Consider making this cheesecake when you’re pressed for time or when you want a showstopper dessert without the mess of baking. With the right tips, anyone can whip up this dessert and feel like a pro!
Why You’ll Love This Recipe
Ease of Preparation: This no-bake cheesecake is incredibly simple to make—perfect for novice bakers or those short on time. With just a few straightforward steps, you’ll have a gorgeous dessert ready.
Cost-Effective: Compared to store-bought cheesecakes, making this at home is a budget-friendly option. You can whip up this heavenly creation for a fraction of the cost, and it’s a great way to impress without breaking the bank.
Customization Galore: Feel free to jazz it up! Depending on the season, you can switch flavors or toppings; think pumpkin spice for fall or berries in the summer. Your imagination is the limit!
Dinner Party Showstopper: The stunning spiderweb design is not only fun but also makes it a fabulous centerpiece for any gathering. Your guests will be raving about it long after the last slice is gone!
Quick Chill Time: With just a few hours in the fridge, this cheesecake is great for those occasions when you need something delicious in a pinch.
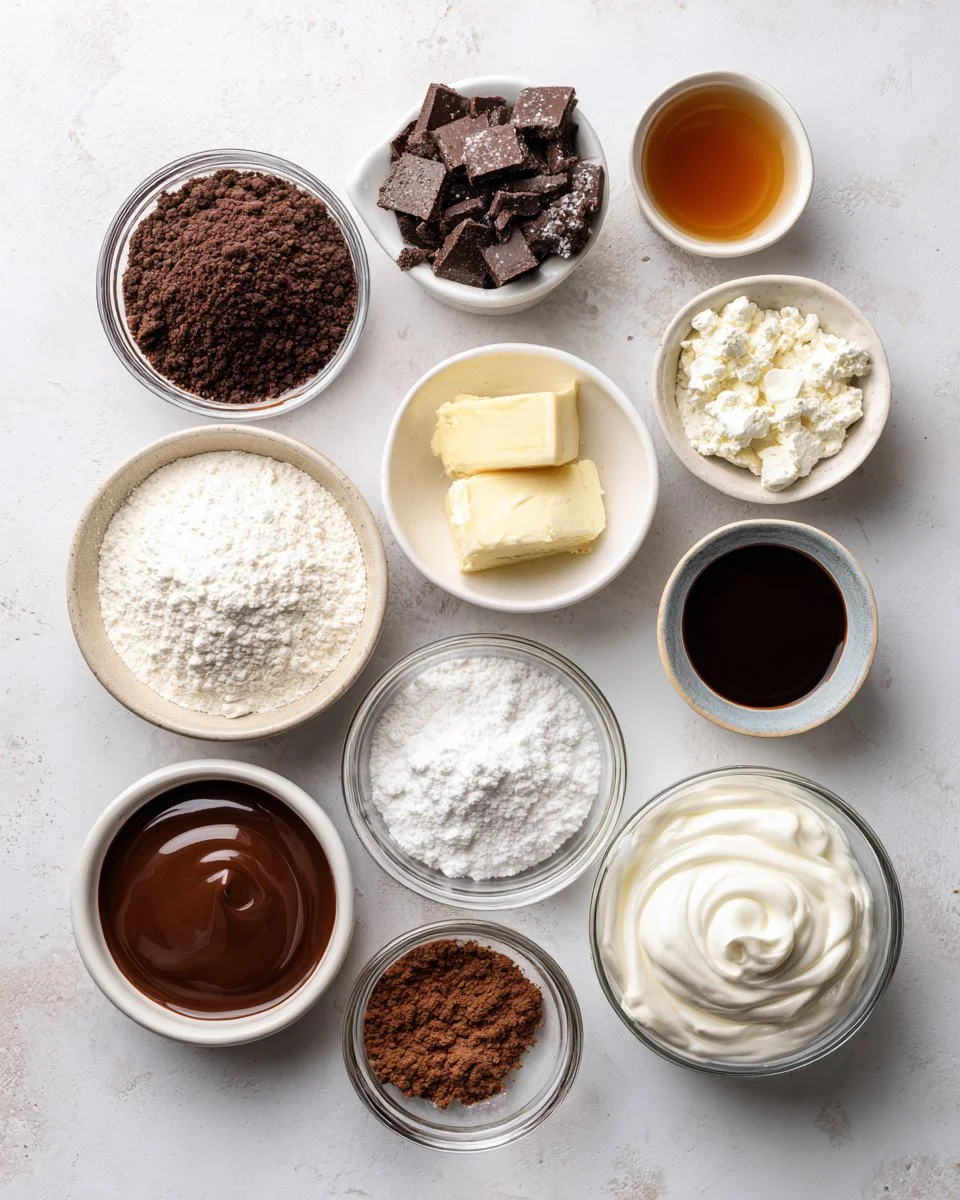
Ingredients
- 2 cups chocolate cookie crumbs – Use high-quality cookies like Oreo for an unbeatable crust.
- 1/2 cup butter, melted – Unsalted works best for controlling the sweetness.
- 3 cups cream cheese, softened – Always use full-fat for that creamy texture; it really makes a difference!
- 1 cup powdered sugar – Sifted to avoid lumps.
- 1 teaspoon vanilla extract – Pure vanilla is the way to go for authentic flavor.
- 1 cup heavy whipping cream – Make sure it’s cold for the best whipping results.
- 1/2 cup chocolate syrup – Use your favorite brand for the best taste.
- 1/4 cup melted chocolate for spiderweb – Good quality chocolate will enhance the overall flavor.
Prep Notes:
- Make sure your cream cheese and butter are at room temperature for easy mixing.
- If you’re gluten-free, consider using gluten-free cookies for the crust.
Step-by-Step Instructions
Prepare the Crust
Mix the chocolate cookie crumbs and melted butter in a large bowl until well combined. It should have a consistency resembling wet sand. Press the mixture firmly into the bottom of a springform pan, using the back of a measuring cup to compact it evenly. Let this set while you prepare the filling.Create the Filling
In another bowl, beat the cream cheese, powdered sugar, and vanilla extract until smooth and creamy—about 2-3 minutes. You want it fluffy and light.Whip the Cream
In a separate bowl, whip the heavy cream using an electric mixer until stiff peaks form—about 3-5 minutes. You want it to hold its shape firmly.Combine with Cream Cheese Mixture
Gently fold the whipped cream into the cream cheese mixture with a rubber spatula. Be careful not to deflate the whipped cream to maintain that airy texture.Fill Your Crust
Pour the cream filling over the cooled crust, smoothing it out with a spatula.Add the Spiderweb Design
Drizzle chocolate syrup over the top of the filling in a spiral pattern. Using a skewer or toothpick, gently drag through the syrup to create a spiderweb effect.Chill and Set
Cover the cheesecake with plastic wrap and chill in the refrigerator for at least 4 hours, or overnight if possible, until set.Serve with Love
Once set, carefully remove the cheesecake from the springform pan. Slice and serve chilled. Watch your guests’ eyes light up with delight!
Chef’s Tips:
- Avoid over-mixing the filling; otherwise, it can become dense.
- To achieve perfect spiderwebs, practice drawing with your skewer before doing it on the cheesecake!
Expert Tips & Tricks
- Storage Recommendations: This cheesecake can be stored in an airtight container in the fridge for up to 5 days. It can also be frozen for up to 2 months; just thaw it overnight in the fridge before serving.
- Make-Ahead Instructions: This dessert is perfect for prepping the day before a gathering. Just assemble, chill, and enjoy the next day.
- Troubleshooting: If your whipped cream doesn’t whip up, make sure your bowl is completely clean and free from any oil or grease; it can affect the whipping process.
Serving Suggestions
This cheesecake pairs wonderfully with a drizzle of extra chocolate syrup and a dollop of whipped cream on the side. For a festive touch, consider garnishing with fresh raspberries or chocolate shavings. This dessert is a fantastic choice for Halloween parties, birthdays, or just a cozy family dinner.
Variations & Substitutions
- Flavor Combos: Swap out chocolate syrup for caramel sauce for a different taste sensation. You could also incorporate crushed peppermint candies for a minty twist during the holidays.
- Dietary Restrictions: Need a gluten-free version? Just use gluten-free chocolate cookies, and substitute the cream cheese with a vegan alternative for a dairy-free option. Consider coconut cream as a lighter alternative for the whipped cream, too!
- Seasonal Variations: During the fall, add spices like cinnamon or nutmeg for a warm flavor profile, or consider a fruit topping significant to the season, like pumpkin pie filling.
Nutrition & Storage Info
- Prep time: 20 minutes
- Cook time: 0 (no-bake)
- Chill time: 4 hours
- Total time: 4 hours 20 minutes
- Yield: 12 servings
- Estimated calories per serving: Approximately 350 calories
- Storage instructions: Keep in the refrigerator for up to 5 days or in the freezer for up to 2 months.
FAQ SECTION
Can I use another type of cookie for the crust?
Absolutely! You can use any cookies you love—Graham crackers, Oreos, or even gluten-free varieties work wonderfully.How do I know when the cheesecake is fully set?
It should feel firm to the touch and hold its shape when you slice into it.Can I make this cheesecake vegan?
Yes! Substitute cream cheese for non-dairy cream cheese and the heavy cream for coconut cream or a vegan whip alternative.What’s the best way to slice the cheesecake?
Dip your knife in warm water and wipe it clean after each cut for smooth slices.Can I make this recipe in advance?
Yes! This cheesecake is perfect for making ahead of time. Just chill overnight and serve the next day.Will this recipe work with low-fat ingredients?
You can use low-fat cream cheese, but the texture may not be as rich and creamy.How should I store leftovers?
Keep any leftover cheesecake covered in the fridge for up to 5 days, or freeze for long-term storage.Can I use flavored chocolate syrup?
Feel free to switch it up with flavors like caramel or strawberry.Will the spiderweb design hold?
Yes, as long as you chill the cheesecake until it’s firm, the design should beautiful hold.What if my whipped cream doesn’t whip up?
Ensure your bowl and whisk/beaters are clean and free from any fat or oil; any residue can prevent proper whipping.

Conclusion
To summarize, this Chocolate Spiderweb Cheesecake No Bake is more than just a dessert; it’s a celebration of creativity, flavor, and family. It’s an easy yet impressive recipe that will surely become a star on your dessert table. I encourage you to try this recipe and let me know how it turns out! Your feedback means so much to me. If you love this, check out my other dessert recipes that will keep your sweet tooth delighted!
Chocolate Spiderweb Cheesecake
Ingredients
Method
- Mix the chocolate cookie crumbs and melted butter in a large bowl until well combined. It should have a consistency resembling wet sand.
- Press the mixture firmly into the bottom of a springform pan, using the back of a measuring cup to compact it evenly. Let this set while you prepare the filling.
- In another bowl, beat the cream cheese, powdered sugar, and vanilla extract until smooth and creamy—about 2-3 minutes.
- In a separate bowl, whip the heavy cream using an electric mixer until stiff peaks form—about 3-5 minutes.
- Gently fold the whipped cream into the cream cheese mixture with a rubber spatula.
- Pour the cream filling over the cooled crust, smoothing it out with a spatula.
- Drizzle chocolate syrup over the top of the filling in a spiral pattern. Using a skewer or toothpick, gently drag through the syrup to create a spiderweb effect.
- Cover the cheesecake with plastic wrap and chill in the refrigerator for at least 4 hours, or overnight if possible, until set.
- Once set, carefully remove the cheesecake from the springform pan. Slice and serve chilled.