Irresistible Grandma Inga’s White Coconut Fudge Recipe: A Sweet Family Tradition
Do you remember the warmth of your grandmother’s kitchen during the holidays, the scents of baking wafting through the air, and the anticipation of treats made with love? That’s how I felt every time I visited Grandma Inga—especially when she made her iconic White Coconut Fudge. As a child, I would perch on a stool, watching her stir the melting ingredients with such care, whispering stories from her youth while we waited for that magical fudge to set. Each soft, sweet bite offered a taste of home, enveloping us in the kind of nostalgia that only comfort food can bring.
What sets Grandma Inga’s White Coconut Fudge apart from every other recipe is not only the unique combination of textures—the creamy, soft fudge that’s studded with bits of sweetened coconut—but also the love and tradition behind it. While many fudge recipes are downright delicious, none can replicate the feeling you get when you serve this delightful treat at family gatherings or enjoy it during cozy nights in.
Get ready, because today I’m going to share this treasured recipe with you! You’ll learn how to master the art of making homemade fudge like Grandma Inga, ensuring that you can recreate those heartwarming memories in your own kitchen.
What Are Grandma Inga’s White Coconut Fudge?
Grandma Inga’s White Coconut Fudge isn’t just a dessert; it’s a celebration of family ties and cherished moments. Originating from her childhood in a quaint village, this fudge recipe has been passed down through generations, each batch crafted with love and tradition.
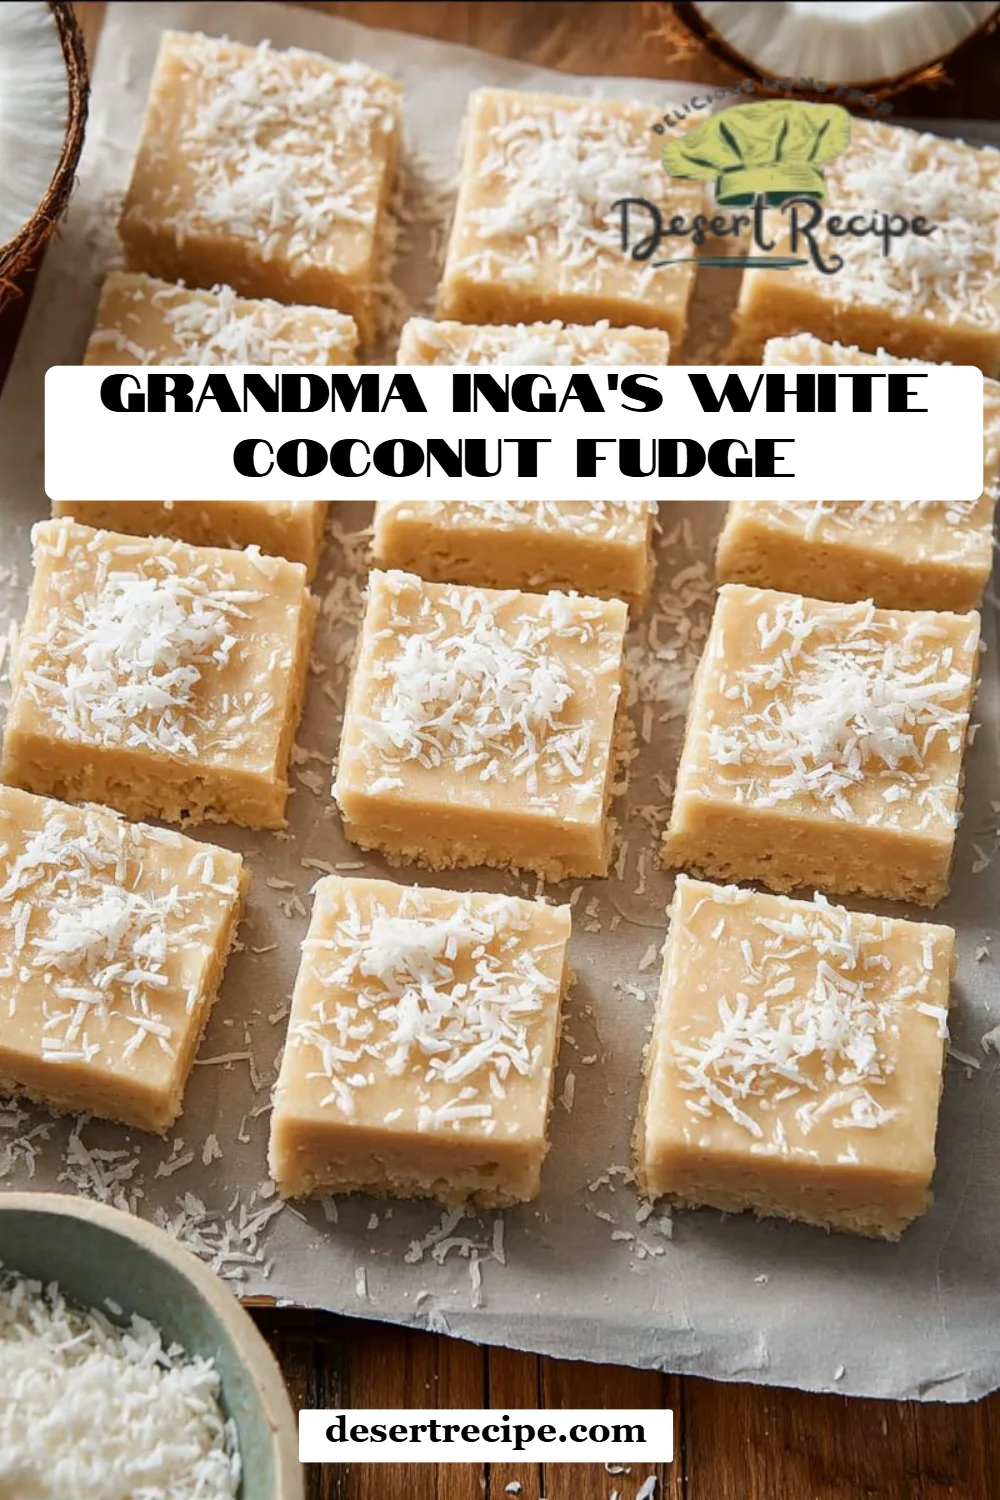
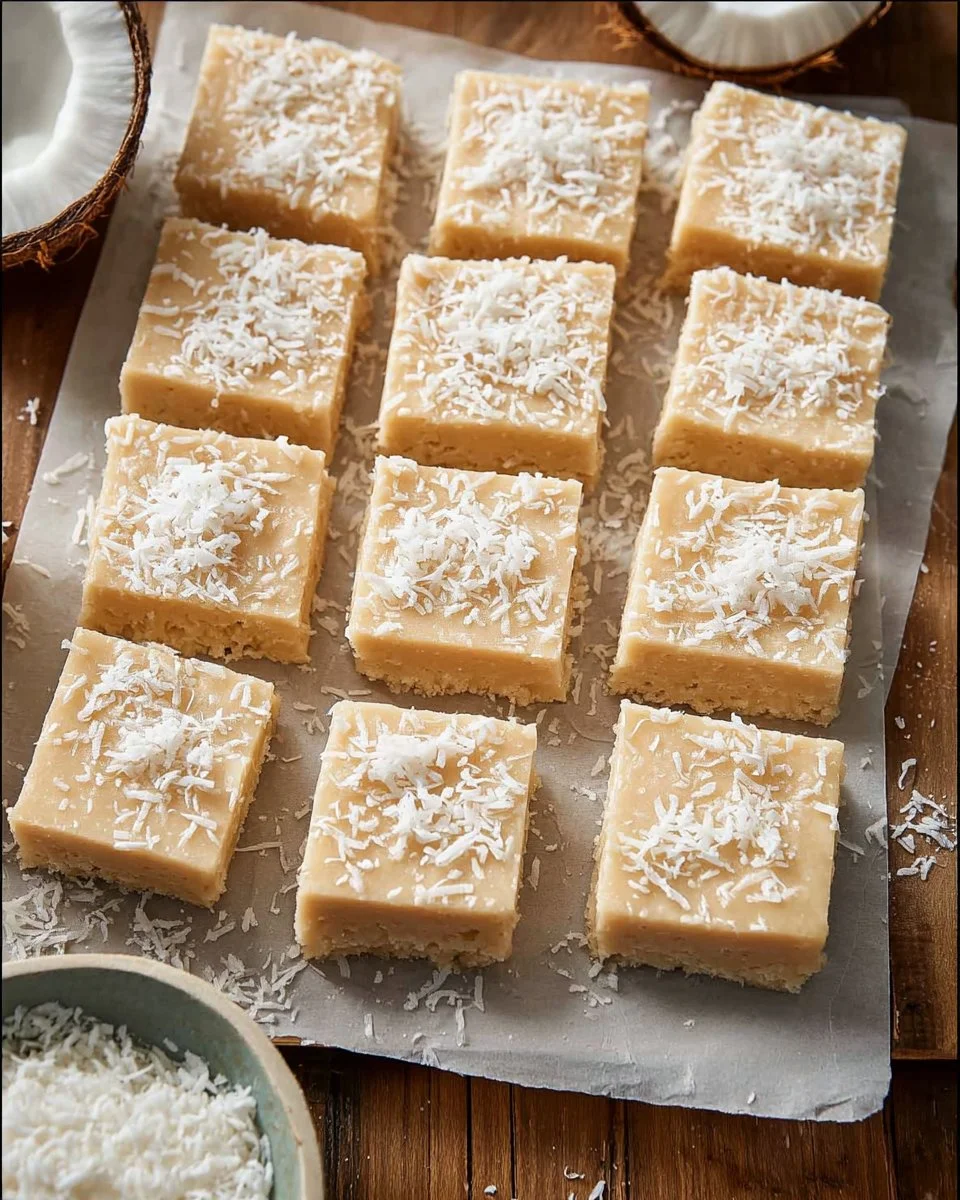
When you take a bite, you’ll be delighted by its creamy texture that melts in your mouth, while the shredded coconut adds a delightful chewiness that elevates the entire experience. The sweetness strikes the perfect balance—not too overpowering, just enough to satisfy any sweet tooth. Unlike store-bought fudge, which can sometimes be gritty or overly sugary, Grandma’s version is smooth and luscious, combining simplicity with nostalgia.
This fudge makes the perfect treat for special occasions—be it birthdays, holidays, or simply a cozy night with family. It’s also a fantastic edible gift, wrapped beautifully to share with loved ones.
Why You’ll Love This Recipe
Nostalgic Comfort: Making Grandma Inga’s White Coconut Fudge is like stepping back into your grandmother’s welcoming kitchen, filled with aromas that evoke love and warmth. Each piece will transport you to those simpler times.
Quality Ingredients: The difference between homemade fudge and store-bought is tangible. This recipe encourages you to use fresh, high-quality ingredients that truly make a difference. You’ll taste the love in every bite!
Cost-Effective Treat: Why break the bank at gourmet sweet shops when you can make a delicious batch at a fraction of the price? This recipe uses basic ingredients you probably already have at home.
Customization Galore: Don’t hesitate to put your spin on the recipe! Whether you want to introduce flavors like almond or mint extract or add in chopped nuts, the possibilities for customization are endless.
Simple To Create: With just a few steps, you’ll find that making this fudge is easy and quick—perfect for both novice bakers and seasoned pros alike. Just a bit of patience is all it takes!
Ingredients
- 4 cups granulated sugar: Ensure it’s not clumpy for best results.
- 1/4 cup corn syrup: This helps prevent sugar crystallization.
- 2/3 cup heavy whipping cream: Use fresh for a rich flavor.
- 2/3 cup whole milk: Adds creaminess; feel free to sub with a non-dairy milk.
- 2 teaspoons unsalted butter: Make sure it’s at room temperature for easy incorporation.
- 1 cup sweetened shredded coconut, divided: I recommend using a good quality brand like Baker’s or Sweetened Coconut Flakes for the best texture.
- 1 teaspoon vanilla extract: Pure vanilla will enhance the fudge’s flavor.
Prep Notes:
- Make sure your butter is at room temperature before you begin, as it melts better into the fudge.
- If you want to use unsweetened coconut, simply add a bit of extra sugar to compensate.
Step-by-Step Instructions
Prep Your Dish: Line an 8×8-inch baking dish with parchment paper, leaving some overhang for easy removal. This step is essential for smooth removal later!
Combine Ingredients: In a large saucepan over medium heat, combine sugar, corn syrup, heavy cream, and milk. Stir until all the sugar is completely dissolved. Chef’s Tip: Patience is key! Ensure there are no granules left.
Boil It: Bring the mixture to a boil, without stirring. Cook it until the temperature reaches 234 degrees F (soft ball stage) on a candy thermometer. You’re looking for a gentle boil here.
Remove From Heat: Once it reaches the right temperature, remove the saucepan from the heat and add in the room temperature butter. Stir until fully melted.
Cool It Down: Let the mixture cool undisturbed to 110-120 degrees F (about an hour). This cooling period is crucial for achieving that perfect fudge texture!
Beat It: Once cooled, using a hand mixer on low speed, beat the mixture until it thickens and becomes cloudy. Mistake to Avoid: Don’t rush this step! Beating it too soon may yield a grainy texture.
Add Coconut & Vanilla: Gently fold in 3/4 cup of shredded coconut and the vanilla extract until well combined.
Pour and Set: Pour the mixture into the prepared pan and spread it evenly. Top with the remaining shredded coconut. Let it sit at room temperature until firm, about 2 hours.
Cut and Enjoy: Once set, lift the fudge out using the parchment overhang, cut into squares, and indulge!
Expert Tips & Tricks
Use a Candy Thermometer: Precision is key! Invest in a good candy thermometer for best results, as every degree counts.
Storage Recommendations: Keep your fudge stored in an airtight container. At room temperature, it will last about a week; in the fridge, you can enjoy it for two weeks. Freeze it for up to three months!
Make-Ahead Instructions: This fudge is perfect for preparing ahead of time. Simply make a batch a few days before an event.
Troubleshooting: If your fudge is too soft, it hasn’t cooked long enough. Return it to the stove on medium heat, simmer until it reaches the correct temperature.
Flavor Variety: Don’t hesitate to explore flavor variations! Add spices like cinnamon or even espresso powder for a delightful twist.
Serving Suggestions
Pair your homemade fudge with a steaming cup of coffee, hot chocolate, or even a scoop of vanilla ice cream for a decadent dessert. Presentation matters—try arranging your fudge pieces on a decorative platter, maybe with a sprinkle of cocoa powder or chocolate shavings for that extra finesse. This fudge is perfect for holiday parties or a cozy rainy day at home!
Variations & Substitutions
Flavor Combinations: Consider adding a layer of almond extract for a nutty flavor or even swirl in some peanut butter before it sets for a chocolate-peanut butter combo.
Dietary Adaptations: For dairy-free options, try substituting full-fat coconut milk for cream and milk. Use vegan butter as a substitute too!
Seasonal Variations: During the holidays, add a pinch of cinnamon or nutmeg, or even mix in some festive sprinkles!
Nutrition & Storage Info
- Prep time: 15 minutes
- Cook time: 15 minutes
- Total time: About 2-2.5 hours (includes cooling)
- Yield: About 36 squares
- Estimated calories: 100 calories per square.
Storage Instructions:
- Room Temperature: Store in an airtight container for up to 1 week.
- Fridge: For longer freshness, keep in the fridge for up to 2 weeks.
- Freezer: Wrap tightly and store for up to 3 months.
FAQ Section
Can I use low-fat milk?
- Yes, but the fudge may not be as creamy. Whole milk is recommended for best results.
Why did my fudge turn out grainy?
- This could happen if the sugar wasn’t fully dissolved before boiling or if it was beaten too soon after cooking.
What if I can’t find shredded coconut?
- You can substitute with coconut flakes, though the texture will be slightly different.
How can I tell if my fudge is done cooking?
- Use a candy thermometer to check for the soft ball stage at 234°F. Alternatively, drop some into cold water; it should form a soft ball.
Can I add nuts?
- Absolutely! Chopped nuts can be folded in along with the coconut before pouring the mixture into the pan.
Can I use artificial sweeteners?
- Yes, though results may vary. Make sure to check the conversion ratios on the package.
Is there a way to make this fudge less sweet?
- You can reduce the amount of sugar slightly, but it may affect the fudge’s texture.
Can I double the recipe?
- Yes, but you’ll need to increase your cooking time and carefully monitor it with a candy thermometer.
What’s the best way to cut the fudge?
- Use a sharp knife and run it under hot water to get clean cuts without sticking.
How do I fix soft fudge without remaking it?
- If your fudge is too soft, try reheating it on the stove until it reaches the soft ball stage, then let it cool and beat again.
Conclusion
Making Grandma Inga’s White Coconut Fudge is more than just a recipe—it’s about family, memories, and the warm embrace of home. I encourage you to give it a try and experience the joys of creating this delicious treat in your own kitchen. Don’t forget to share your batches with family and friends, and I’d love to hear how yours turns out! Feel free to drop your comments below.
And if you enjoy this recipe, check out my other soulful treats on the blog for even more sweet inspirations! Happy baking!

White Coconut Fudge
Ingredients
Method
- Line an 8x8-inch baking dish with parchment paper, leaving some overhang for easy removal.
- In a large saucepan over medium heat, combine sugar, corn syrup, heavy cream, and milk. Stir until all the sugar is completely dissolved.
- Bring the mixture to a boil, without stirring. Cook until the temperature reaches 234 degrees F (soft ball stage) on a candy thermometer.
- Once it reaches the right temperature, remove the saucepan from the heat and add in the room temperature butter. Stir until fully melted.
- Let the mixture cool undisturbed to 110-120 degrees F (about an hour).
- Using a hand mixer on low speed, beat the mixture until it thickens and becomes cloudy.
- Gently fold in 3/4 cup of shredded coconut and the vanilla extract until well combined.
- Pour the mixture into the prepared pan and spread it evenly. Top with the remaining shredded coconut.
- Let it sit at room temperature until firm, about 2 hours.
- Once set, lift the fudge out using the parchment overhang, cut into squares, and indulge.