Table of Contents
Table of Contents
Picture this: it’s the middle of a brisk winter evening, and the world feels like it’s wrapped in a cozy blanket of white snow. The walls of my kitchen are steaming with warmth, and the delightful scent of chocolate fills the air. That’s the moment I decided to embark on a quest to create the ultimate comfort food: Hot Chocolate Rolls. Trust me, these whimsical treats have a way of transforming any chilly night into a cherished memory.
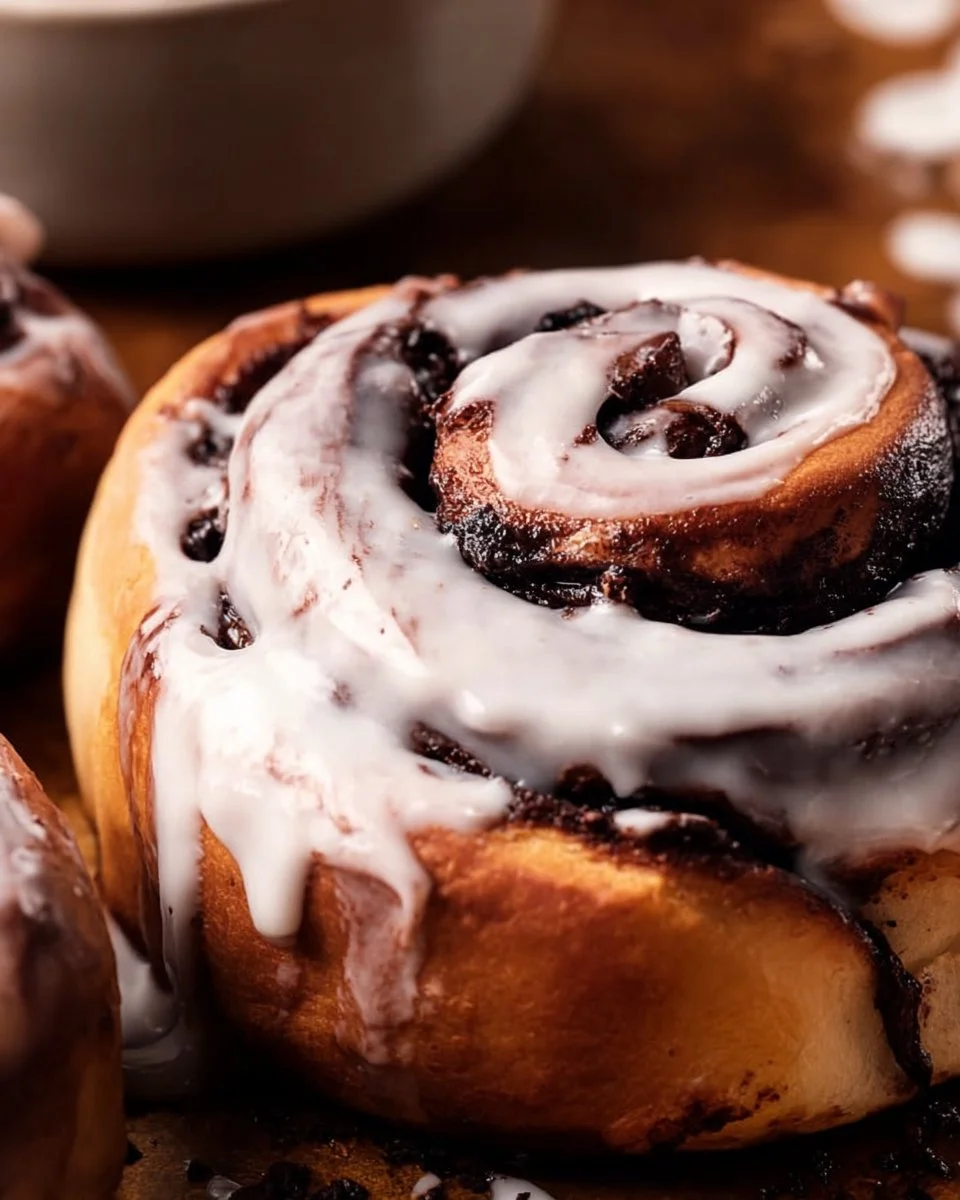
What makes these Hot Chocolate Rolls so special, you ask? They are soft, fluffy rolls lovingly filled with marshmallow fluff and chocolate chips, draped in a silky icing that’ll make your heart skip a beat. My recipe stands out because it not only delivers that indulgent hot cocoa flavor, but it also brings the nostalgic joy of family gatherings into every bite. Growing up, my family always bonded over sweet treats, and every cinnamon roll or pastry was a reminder of our togetherness. And now, I’m excited to share this recipe with you! In just a few simple steps, you’ll learn how to create these delectable rolls, perfect for breakfast, dessert, or any time you need a cozy pick-me-up.
What Are Hot Chocolate Rolls?
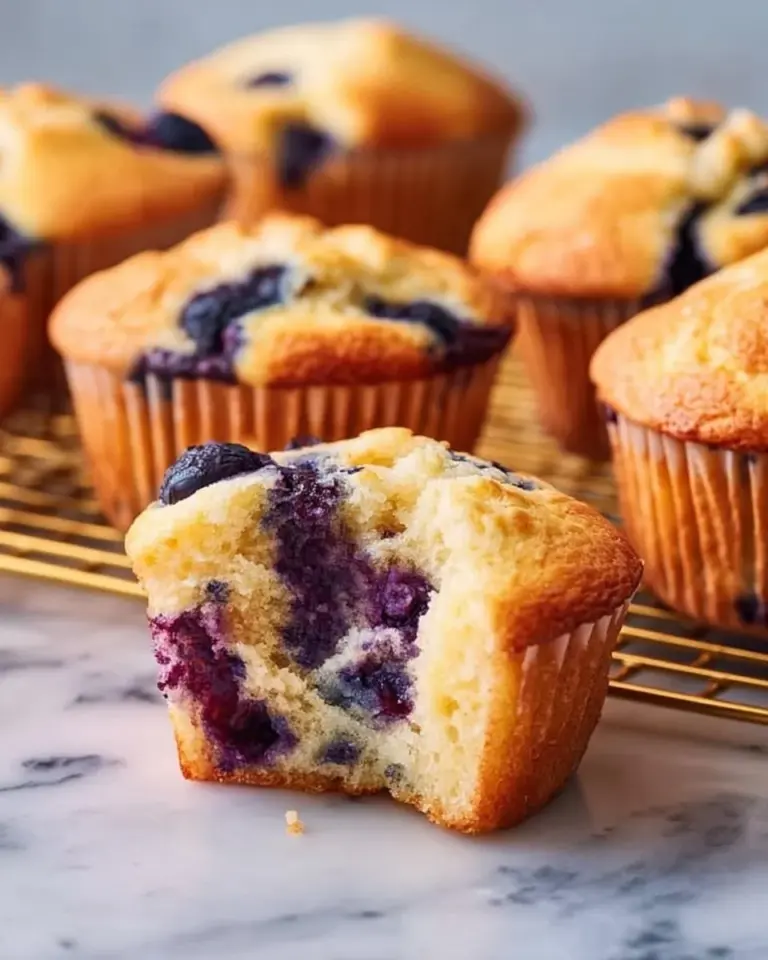
Hot Chocolate Rolls are a delightful cross between cinnamon rolls and the beloved cup of hot cocoa you enjoyed as a child. Originating from the creative minds of home bakers, they take all the flavors of traditional hot chocolate—rich, chocolaty, and marshmallowy—and encapsulate them in a warm, fluffy dough. Imagine biting into a tender roll, the chocolate chips melting and mingling with the sweet marshmallow fluff, creating a symphony of flavor that dances on your palate.
What makes these rolls unique is their combination of textures; soft and fluffy on the outside, gooey and sweet on the inside. They are perfect for chilly days, holiday gatherings, or even just as a special treat to brighten your week. Whether served with a hot mug of cocoa or enjoyed fresh from the oven, these rolls evoke comfort and warmth in every bite.
Why You’ll Love This Recipe
You might wonder why you should invest your time in making Hot Chocolate Rolls at home instead of swinging by the bakery or grabbing a box from the grocery store. Here are 5 compelling reasons that will have you rolling up your sleeves and diving into this recipe:
Homemade Goodness: Unlike store-bought versions loaded with preservatives, these rolls are made from scratch using fresh and wholesome ingredients. You can taste the love baked in each roll.
Cost-Effective: Making a batch of these rolls is not only economical, but it also allows you to indulge without the premium price tag of gourmet bakeries. You’ll be surprised how affordable it is to create magic in your kitchen.
Customization Options: Whether you want to swap out chocolate chips for peanut butter chips or add a sprinkle of espresso powder for a mocha twist, the possibilities are endless! Feel free to make these rolls your own.
Simplicity Meets Flavor: This recipe is deceptively simple! With about an hour and a half of active and rising time, you’ll have a batch of stunning rolls ready to impress your friends and family. Plus, the process is a therapeutic joy to engage in.
Family Tradition Potential: Imagine passing down this recipe to your children or including them in the preparation. They’ll develop a passion for baking while creating sweet moments that become treasured family traditions.
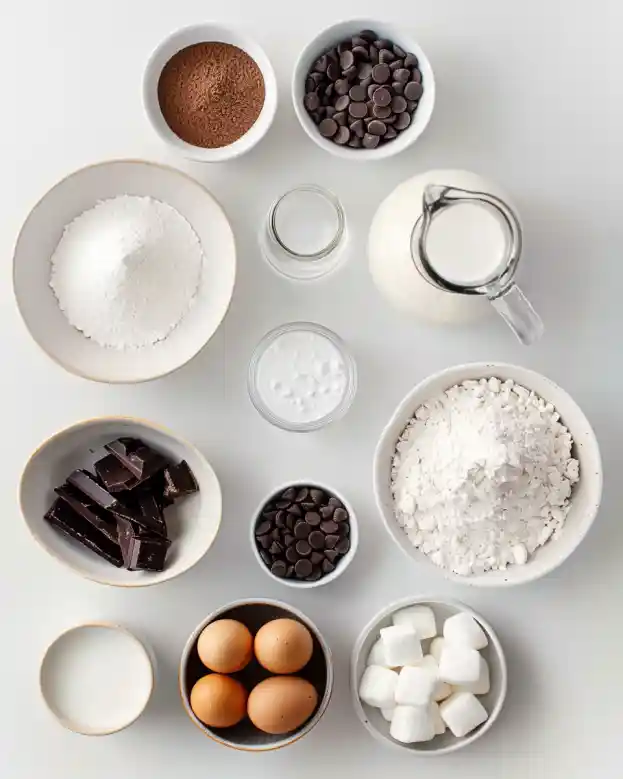
Ingredients Section
Here’s what you’ll need to create your delightful Hot Chocolate Rolls:
- 4 cups all-purpose flour (I recommend King Arthur Flour for its quality)
- 1 packet active dry yeast (look for brands with “instant” for a quick rise)
- 1/2 cup sugar (granulated sugar works perfectly)
- 1 teaspoon salt (kosher salt enhances the flavor)
- 1 cup milk (remember to warm it slightly—no boiling!)
- 1/4 cup butter, melted (for an extra-rich flavor, use unsalted)
- 2 large eggs (happy hens = happy rolls)
- 1 cup chocolate chips (go for semi-sweet or dark for a richer taste—you can never have too much chocolate)
- 1 cup marshmallow fluff (brings a delightful gooeyness)
For the Icing:
- 1/2 cup powdered sugar
- 2 tablespoons cocoa powder
- 1-2 tablespoons milk (adjust for desired consistency)
Prep Notes
- Butter should be at room temperature for easy mixing.
- Eggs should be brought to room temperature so they blend smoothly into the dough.
- Always use fresh yeast for the best rise—check expiration dates on your packet.
Step-by-Step Instructions
Let’s dive into the baking process!
Activate the Yeast: In a medium bowl, dissolve the yeast in 1 cup of warm milk (approximately 110°F) and let it stand for about 5 minutes until frothy. This indicates the yeast is active and ready to do its job!
Mix Dry Ingredients: In a large mixing bowl, combine 4 cups of flour, 1/2 cup of sugar, and 1 teaspoon of salt. Whisk together until evenly mixed.
Combine Wet Ingredients: Carefully add the melted butter, 2 eggs, and the yeast mixture to the dry ingredients. Mix using a wooden spoon until a dough begins to form.
Knead the Dough: Flour your work surface and knead the dough for about 5-10 minutes until it’s smooth and elastic. Tip: Look for that windowpane effect where the dough stretches without breaking.
First Rise: Place the dough in a greased bowl, cover with a damp cloth, and let it rise in a warm place for about 1 hour, or until it has doubled in size. You’ll know it’s ready when you gently poke it, and it springs back slowly.
Roll Out the Dough: Gently punch down the risen dough and roll it out into a rectangle about 1/4 inch thick.
Add the Fillings: Spread 1 cup of marshmallow fluff evenly over the dough, then sprinkle 1 cup of chocolate chips on top. Feel free to go heavy on the chocolate; it’s hard to overdo it!
Shape the Rolls: Starting from the long edge, roll the dough tightly into a log. Slice the log into 12-15 rolls.
Second Rise: Place the rolls in a greased baking pan, cover, and let them rise again for about 30 minutes until puffy.
Bake: Preheat your oven to 350°F (175°C). Bake the rolls for 20-25 minutes or until they are golden brown on top and the chocolate is all melty. Your kitchen will smell divine!
Make the Icing: In a small bowl, whisk together 1/2 cup of powdered sugar, 2 tablespoons of cocoa powder, and 1-2 tablespoons of milk until smooth. Adjust milk as needed for your desired consistency.
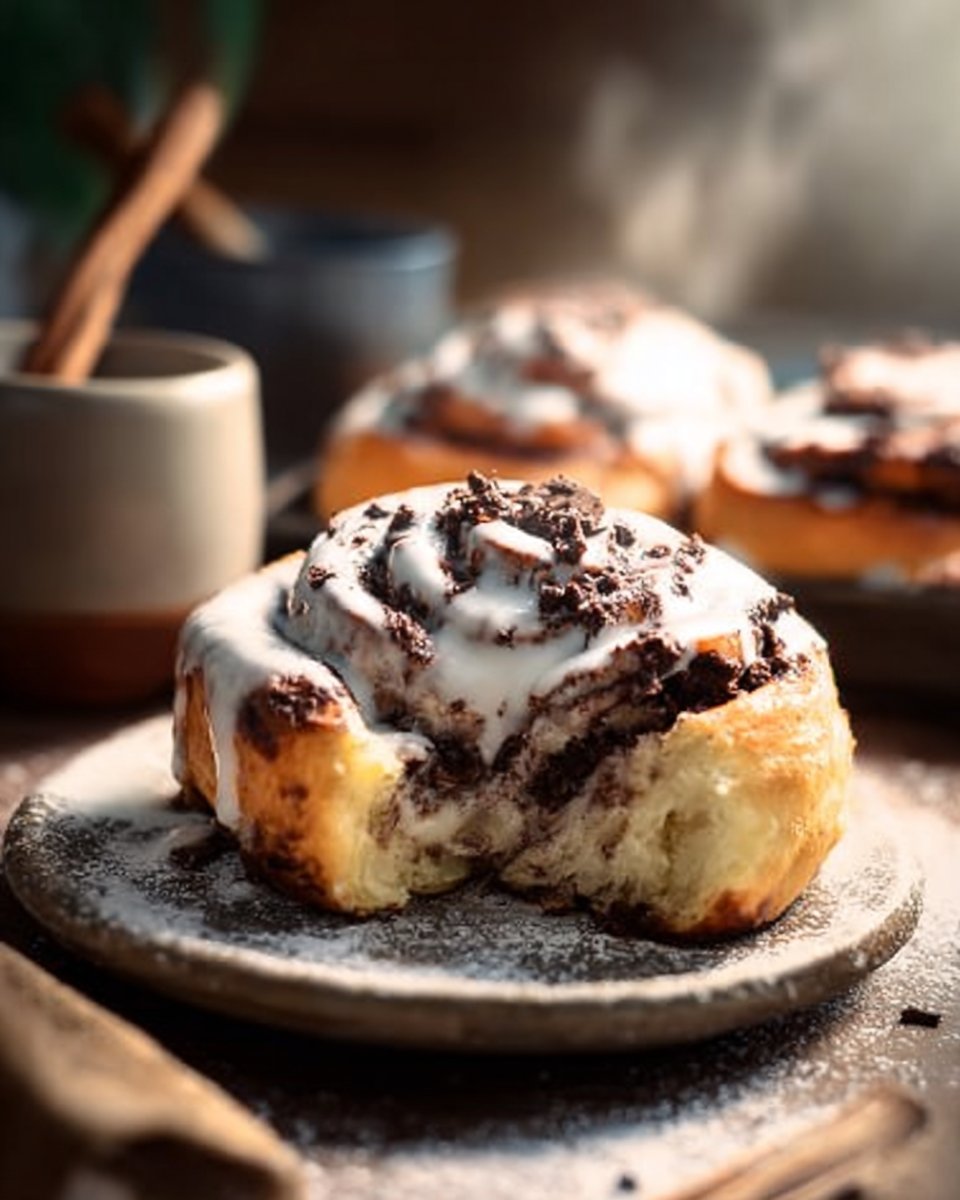
Drizzle Icing: Once the rolls are cool, drizzle the icing over the top. Try not to eat them all at once!
Expert Tips & Tricks
Storage Recommendations: Keep the rolls in an airtight container at room temperature for up to 4 days. If you want to keep them longer, place them in the fridge for up to a week.
Make-Ahead Instructions: You can prepare the dough and fill it a day ahead. Just leave the filled rolls in the fridge, then let them rise at room temperature before baking.
Troubleshooting Common Issues: If your rolls are dense, check your yeast first. Make sure your milk was warm (not hot) to prevent killing the yeast.
Variations: Try experimenting with different fillings, like Nutella, caramel sauce, or seasonal spices such as pumpkin spice in the fall.
Perfecting Your Bake: Look for a pale golden top. If you notice them browning too fast, cover the top loosely with foil halfway through baking.
Serving Suggestions
These Hot Chocolate Rolls are delightful on their own, but why not elevate the experience? Serve them with a steaming cup of rich hot chocolate or a drizzle of chocolate sauce. For brunch gatherings, pair them with whipped cream or a side of fresh berries for a crispy contrast.
Variations & Substitutions
Flavor Combinations: Try adding peppermint extract for a festive touch or swap chocolate chips for white chocolate, peanut butter, or butterscotch for a different flavor profile.
Dietary Restrictions: For a gluten-free option, use a 1-to-1 gluten-free flour blend. Vegan rolls can be made by substituting milk with almond milk and using flax eggs in place of regular eggs.
Seasonal Variations: During the holiday season, sprinkle in some festive spices like cinnamon or nutmeg, or substitute caramel for the marshmallow fluff for a decadent twist!
Nutrition & Storage Info
- Prep Time: 30 minutes
- Cook Time: 25 minutes
- Total Time: 1 hour 55 minutes
- Yield: 12-15 rolls
- Estimated Calories: Approximately 200 calories per roll
- Storage: Room temperature for 4 days, fridge for up to a week, freezer for 2 months.
FAQ Section
Can I freeze these rolls?
Yes! Freeze the baked rolls after cooling completely. To reheat, thaw them in the fridge overnight, then warm them in the oven.How can I make these rolls gluten-free?
Use a gluten-free flour blend in place of all-purpose flour, ensuring it contains xanthan gum for structure.What if I don’t have marshmallow fluff?
You can use a homemade version of fluff or substitute it with a thick chocolate spread.How do I know if my yeast is active?
Your yeast should bubble and foam after 5 minutes in warm milk. If there’s no reaction, your yeast may be expired.Can I use whole wheat flour?
You can, but I recommend staying on the lower side at about half whole wheat and half all-purpose for texture.Is it necessary to let the rolls rise twice?
Yes, this helps develop the texture and lightness of the rolls.Can I skip the icing?
Absolutely! They’re delicious on their own, but who can resist chocolate icing?What’s the best way to warm up day-old rolls?
Lightly cover them with foil and warm them in a preheated oven at 350°F for about 5-10 minutes.How do I prevent my rolls from sticking?
Make sure your baking pan is adequately greased, and you can also use parchment paper for easy cleanup.Can I add spices?
Of course! Adding a pinch of cinnamon or nutmeg can warm up the flavors beautifully.

Conclusion
There you have it—my delightful Hot Chocolate Rolls that perfectly capture the essence of warm winter treats! The combination of fluffy dough, gooey chocolate, and playful marshmallow offers a happiness that’s hard to match. These rolls are more than just a recipe; they’re a way to create joyful memories with loved ones around the table.
I encourage you to try this recipe and discover the pure joy that comes from sharing these decadent rolls. I’d love to hear your thoughts and see your delicious creations, so don’t forget to leave feedback in the comments! If you’re interested in more delightful recipes, check out my posts on cinnamon rolls and chocolate babka that will surely sweeten your day.

Hot Chocolate Rolls
Ingredients
Method
- Activate the Yeast: In a medium bowl, dissolve the yeast in 1 cup of warm milk (approximately 110°F) and let it stand for about 5 minutes until frothy.
- Mix Dry Ingredients: In a large mixing bowl, combine 4 cups of flour, 1/2 cup of sugar, and 1 teaspoon of salt. Whisk together until evenly mixed.
- Combine Wet Ingredients: Carefully add the melted butter, 2 eggs, and the yeast mixture to the dry ingredients. Mix using a wooden spoon until a dough begins to form.
- Knead the Dough: Flour your work surface and knead the dough for about 5-10 minutes until it’s smooth and elastic.
- First Rise: Place the dough in a greased bowl, cover with a damp cloth, and let it rise in a warm place for about 1 hour, or until it has doubled in size.
- Roll Out the Dough: Gently punch down the risen dough and roll it out into a rectangle about 1/4 inch thick.
- Add the Fillings: Spread 1 cup of marshmallow fluff evenly over the dough, then sprinkle 1 cup of chocolate chips on top.
- Shape the Rolls: Starting from the long edge, roll the dough tightly into a log. Slice the log into 12-15 rolls.
- Second Rise: Place the rolls in a greased baking pan, cover, and let them rise again for about 30 minutes until puffy.
- Bake: Preheat your oven to 350°F (175°C). Bake the rolls for 20-25 minutes or until they are golden brown on top.
- Make the Icing: In a small bowl, whisk together 1/2 cup of powdered sugar, 2 tablespoons of cocoa powder, and 1-2 tablespoons of milk until smooth.
- Drizzle Icing: Once the rolls are cool, drizzle the icing over the top.