Table of Contents
Table of Contents
Ah, nothing quite ushers in the holiday spirit like the inviting scent of freshly baked cookies wafting through the house. As a child, I remember my mom and I spending hours together in the kitchen, rolling out dough and meticulously icing each cookie. Those moments bonded us, sprinkled with laughter and little mishaps that turned into cherished memories. Today, I find myself passing on that love for baking with my own family, and nothing is more magical than creating iced Christmas cookies together.
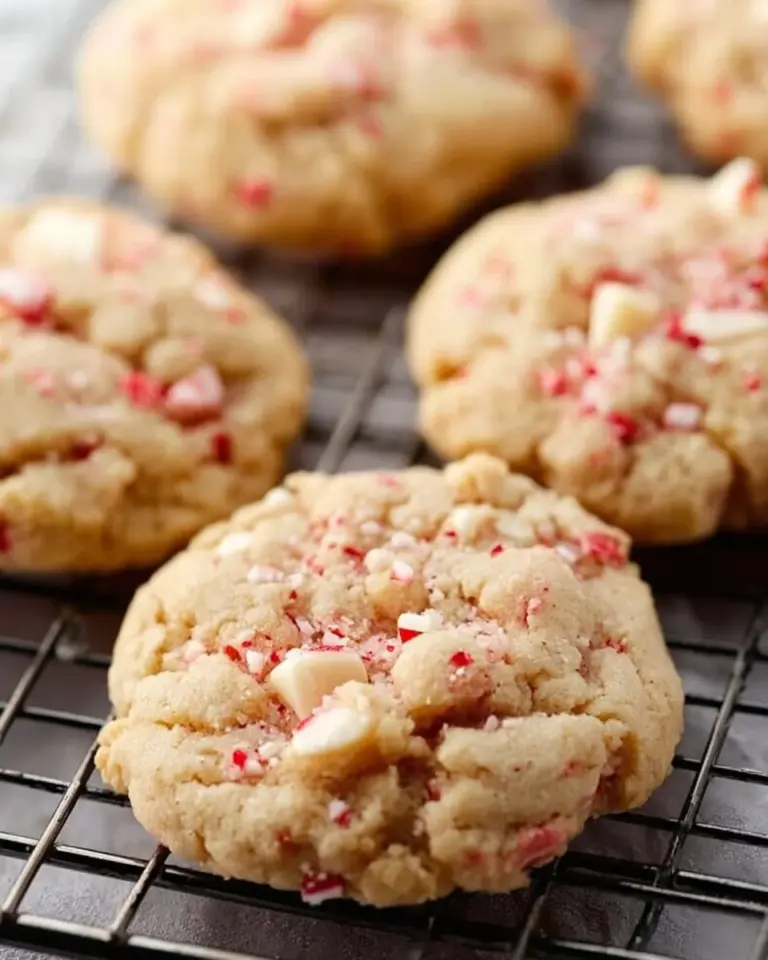
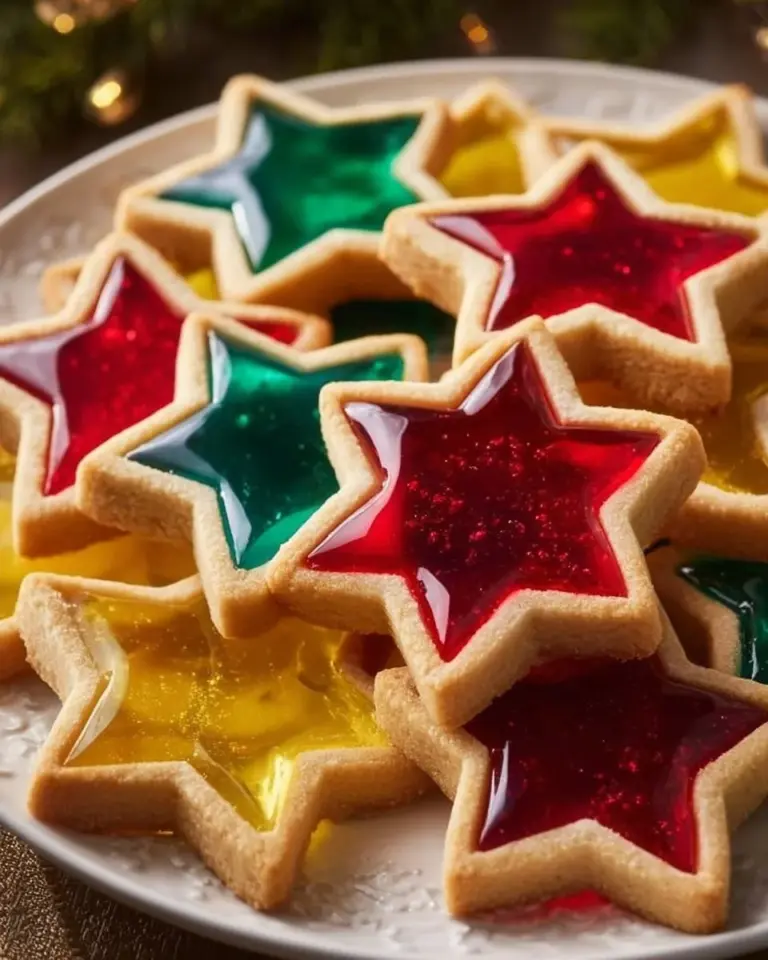
These Iced Christmas Cookies are beyond special—their soft, buttery texture melts in your mouth, while the vibrant icing adds a delightful crunch. Unlike the store-bought versions, where flavor often gets lost in the artificial sweetness, my recipe emphasizes quality ingredients that really shine through. With each bite, you’ll taste the love and nostalgia that comes with holiday baking.
Join me as I share my favorite family recipe, complete with simple guidance and pro tips so you can create amazing iced cookies that will have your loved ones begging for more! You’re not just baking cookies; you’re making memories.
What Are Iced Christmas Cookies?
Iced Christmas Cookies trace their origins to Europe in the 16th century, where decorated gingerbread and sugar cookies first gained popularity during festive celebrations. Today, these charming confections bring joy to countless families during the holidays.
These cookies are soft yet sturdy, making them perfect for intricate icing designs. With a rich buttery flavor and a hint of vanilla, the cookies serve as a delightful canvas for colorful royal icing. What makes them truly unique is the balance between the subtle sweetness of the cookie and the bold flavors of the icing, creating an unforgettable treat that evokes holiday cheer.
You might whip up these beauties for holiday parties, cookie exchanges, or just to make your home feel a little merrier. They truly are a sweet way to spread joy and warmth during the season!
Why You’ll Love This Recipe
Homemade Goodness: There’s something magical about homemade baked goods. Unlike store-bought cookies loaded with preservatives and artificial flavors, these iced Christmas cookies are crafted from scratch using high-quality ingredients. You’ll know exactly what goes into every nibble.
Cost-Effective: When comparing costs, it turns out that making these cookies at home is budget-friendly. A box of fancy iced cookies can run you up to $25, while this recipe yields dozens of cookies for a fraction of the price.
Customization Galore: One of the best parts? You can tailor them to your heart’s content! Want cherry almond-flavored icing or vibrant red and green sprinkles? Go for it! Create your own flavor combinations that reflect your personality and holiday spirit.
Easy to Make: Don’t worry if you’ve never baked cookies before. This recipe is straightforward and beginner-friendly! With just a little practice, you’ll be icing like a pro in no time.
Memorable Experience: Baking these iced cookies is more than food prep; it’s an experience that creates lasting memories with family and friends. Invite your loved ones into the kitchen, crank up some holiday music, and laugh as you decorate!
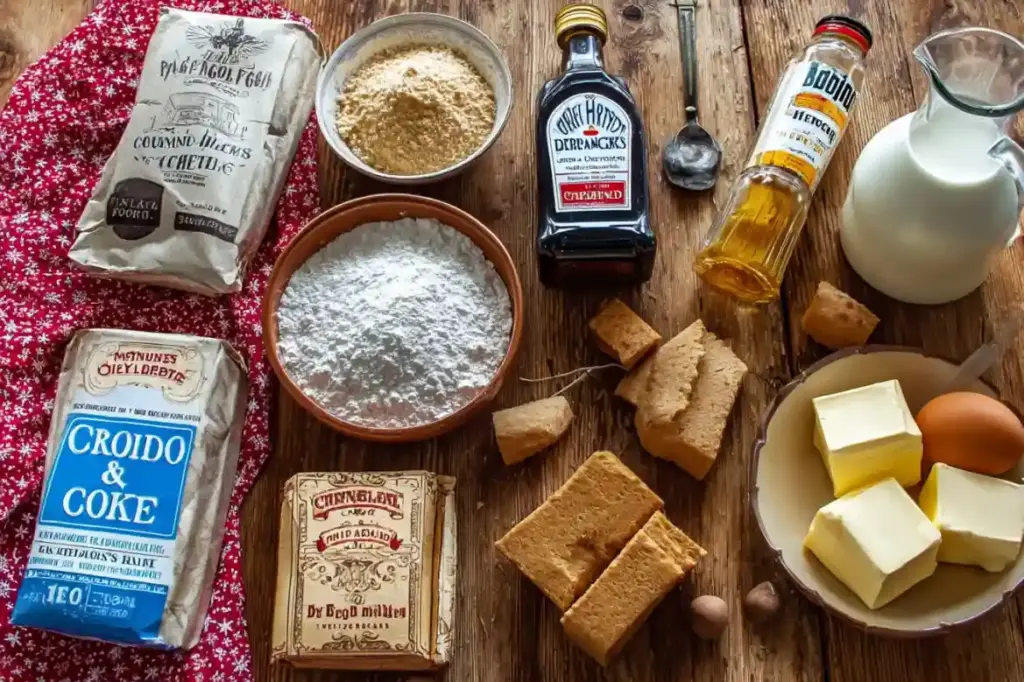
Ingredients
To whip up these delightful iced Christmas cookies, gather the following ingredients:
Cookie Base
- 1 cup unsalted butter (softened): Use high-quality butter for the best flavor. Let it stand at room temperature until soft.
- 1 cup granulated sugar: Brings sweetness and a light texture.
- 1 large egg: An essential binding agent for the dough.
- 1 teaspoon vanilla extract: Opt for pure vanilla extract for an authentic flavor.
- ½ teaspoon almond extract (optional): Adds a delectable layer of flavor.
- 2 ½ cups all-purpose flour: All-purpose flour is perfect for the cookie base.
- ¾ teaspoon baking powder: Helps the cookies rise slightly for that perfect texture.
- ¼ teaspoon salt: Balances the sweetness.
Icing
- 3 cups powdered sugar: The base of the icing, providing sweetness and that luscious texture.
- 2 tablespoons meringue powder: This helps stabilize the icing and gives it a shiny finish; however, it can be substituted with egg whites if preferred.
- 6 tablespoons water: Adjust the amount for your desired icing consistency.
Prep Notes: Be sure to have room temperature butter and eggs for easier mixing, and sift the powdered sugar and meringue powder to avoid lumps in the icing.
Brand Recommendations: I love using Kerrygold butter for its rich flavor. For vanilla, go with Nielsen-Massey for a top-notch experience!
Step-by-Step Instructions
Baking the Cookies
- Preheat Your Oven: Preheat your oven to 350°F (175°C). This is crucial in ensuring even baking.
- Mix the Wet Ingredients: In a mixing bowl, cream together the softened butter and granulated sugar until light and fluffy. This usually takes about 3 minutes.
- Add the Egg and Extracts: Incorporate the egg, vanilla, and almond extracts and mix until well combined.
- Combine Dry Ingredients: In another bowl, whisk together the flour, baking powder, and salt.
- Combine Everything: Gradually add the dry ingredients to the wet mixture, mixing until just combined. Do not overmix!
- Shape Your Cookies: Roll your dough into small balls (about 1 inch), then place them on a lined baking sheet. Space them about 2 inches apart.
- Bake: Bake in your preheated oven for about 8-10 minutes, or until the edges are lightly golden. They might look underbaked, but they will firm up as they cool.
- Cool Completely: Allow the cookies to cool on the baking sheet for 5 minutes before transferring them to a wire rack to cool fully.
Making the Icing
- Prepare the Icing: In a mixing bowl, combine the powdered sugar, meringue powder, and water. Mix well until you achieve a smooth consistency, adjusting the water as needed.
- Color the Icing: If you wish to make different colors of icing, divide your mixture into bowls and add food coloring to each, mixing until vibrant.
- Decorate Your Cookies: Using a piping bag or a clean squeeze bottle, create your designs on the cooled cookies. Let the icing set for a few hours or overnight for best results.
Chef’s Tips:
- Timing is Key: Don’t leave the cookies in the oven for too long; you want them soft in the center.
- Icing Consistency: For outlining, your icing should be slightly thicker, and for flooding, it should be more runny.
Common Mistakes to Avoid
- Overmixing the dough can lead to tougher cookies.
- Skipping the cooling step can result in melted icing.
Expert Tips & Tricks
- Storage Recommendations: Once iced, store your cookies in an airtight container at room temperature for up to a week. If un-iced, they can last longer—up to two weeks!
- Make-Ahead Instructions: You can prepare the cookie dough and refrigerate it for up to three days or freeze it for three months before baking.
- Troubleshooting: If your icing is too runny, add more powdered sugar. If it’s too thick, add a teaspoon of water gradually until you achieve the desired consistency.
- Flavor Infusions: Consider adding spices like cinnamon or nutmeg into your dough for a festive twist!
- Presentation: Dust with edible glitter or sprinkles before the icing sets for an extra festive touch.
- Icing Designs: Don’t be afraid to experiment with different tips and techniques; practice makes perfect!
Serving Suggestions
Pair your iced Christmas cookies with a cozy mug of hot cocoa, a warm cup of spiced tea, or even a classic eggnog. You can present these cookies on a festive platter, dusted with powdered sugar or arranged with cinnamon sticks for an extra holiday cheer. Perfect for cookie swaps, holiday parties, or simply indulging while snuggling up on the couch!
Variations & Substitutions
- Flavor Combinations: Try adding zest from orange or lemon into the dough for a fresh, citrusy kick.
- Dietary Options: For gluten-free cookies, substitute all-purpose flour with a gluten-free blend.
- Seasonal Variations: Turn these into Thanksgiving cookies by adding pumpkin spice; for Easter, pastel colors and spring-themed decorations can make them bright and cheerful!
Nutrition & Storage Info
- Prep Time: 30 minutes
- Cook Time: 10 minutes
- Total Time: 40 minutes hours (not including cooling/setting time)
- Yield: Approximately 24 cookies
- Estimated Calories per Serving: 150 calories
- Storage Instructions: For optimal freshness, store in an airtight container at room temperature for up to one week. They can also be refrigerated for longer storage (2 weeks) or frozen for up to three months.
FAQ Section
Can I use margarine instead of butter?
While it’s not recommended for the best flavor and texture, you can use margarine in a pinch. Just make sure it’s a stick form, not tub margarine.What’s the best way to decorate my iced cookies?
I recommend using piping bags or squeeze bottles for precision. You can also use toothpicks to swirl colors or create designs on the icing.Can I freeze the cookies?
Yes! You can freeze them before or after icing. Just ensure they are well-wrapped to avoid freezer burn.How long should I let the icing set?
For best results, let the icing dry for at least 6-8 hours, or overnight is ideal.Can I use egg whites instead of meringue powder?
Absolutely! Use 1 large egg white for every 2 tablespoons of meringue powder for a similar effect.What type of food coloring should I use?
Gel food coloring is ideal for vibrant colors without thinning your icing. Liquid colorings can alter the icing consistency; if you choose them, use sparingly.How can I make my cookies more festive?
Consider adding holiday-themed sprinkles, edible glitter, or even decorating with fondant for a 3D effect.Can I mix the cookie dough in advance?
Yes, you can prepare and refrigerate the dough for up to 3 days or freeze for 3 months.What if my icing is too runny?
Add a bit more powdered sugar to thicken it up. It’s all about balance!Do these cookies make great gifts?
Definitely! Pack them in festive boxes or tins with a personal note for a lovely handmade gift.

Conclusion
These Irresistibly Iced Christmas Cookies are not just a festive treat—they’re a heartfelt expression of love, laughter, and cherished traditions. I encourage you to gather your ingredients, roll up your sleeves, and create something delightful with your family.
Your feedback fuels my passion for baking, so please share your cookie-making adventures in the comments below! And if you’re looking for more delicious holiday recipes, be sure to check out my other beloved treats on the blog.
Happy baking!