Celebrate with Italian Easter Bread: A Family Recipe for Memorable Gatherings
INTRODUCTION
As the aroma of fresh-baked bread wafts through the house, my heart swells with nostalgia. Growing up, Italian Easter Bread was a cherished tradition in our home. Each spring, my family gathered around the kitchen table, flour dusting our hands and laughter filling the air, as we crafted this lovely bread together. There’s something truly magical about this festive treat—besides its stunning braided shape dotted with colorful dyed eggs and sprinkles, it’s a symbol of love, unity, and the joy of togetherness.
This Italian Easter Bread recipe is not just any recipe; it’s the one that captures the very essence of my childhood. Unlike store-bought versions that are often dry and lack flavor, this homemade version is soft, fluffy, and bursting with sweet, buttery goodness. The zesty hint of citrus elevates every bite, enveloping you in warmth and comfort.
Join me on this culinary journey as I share my tried-and-true recipe. You’ll discover secrets that will make your Italian Easter Bread the star of your holiday table, creating wonderful memories that you and your loved ones will treasure for years to come.
WHAT ARE ITALIAN EASTER BREAD?
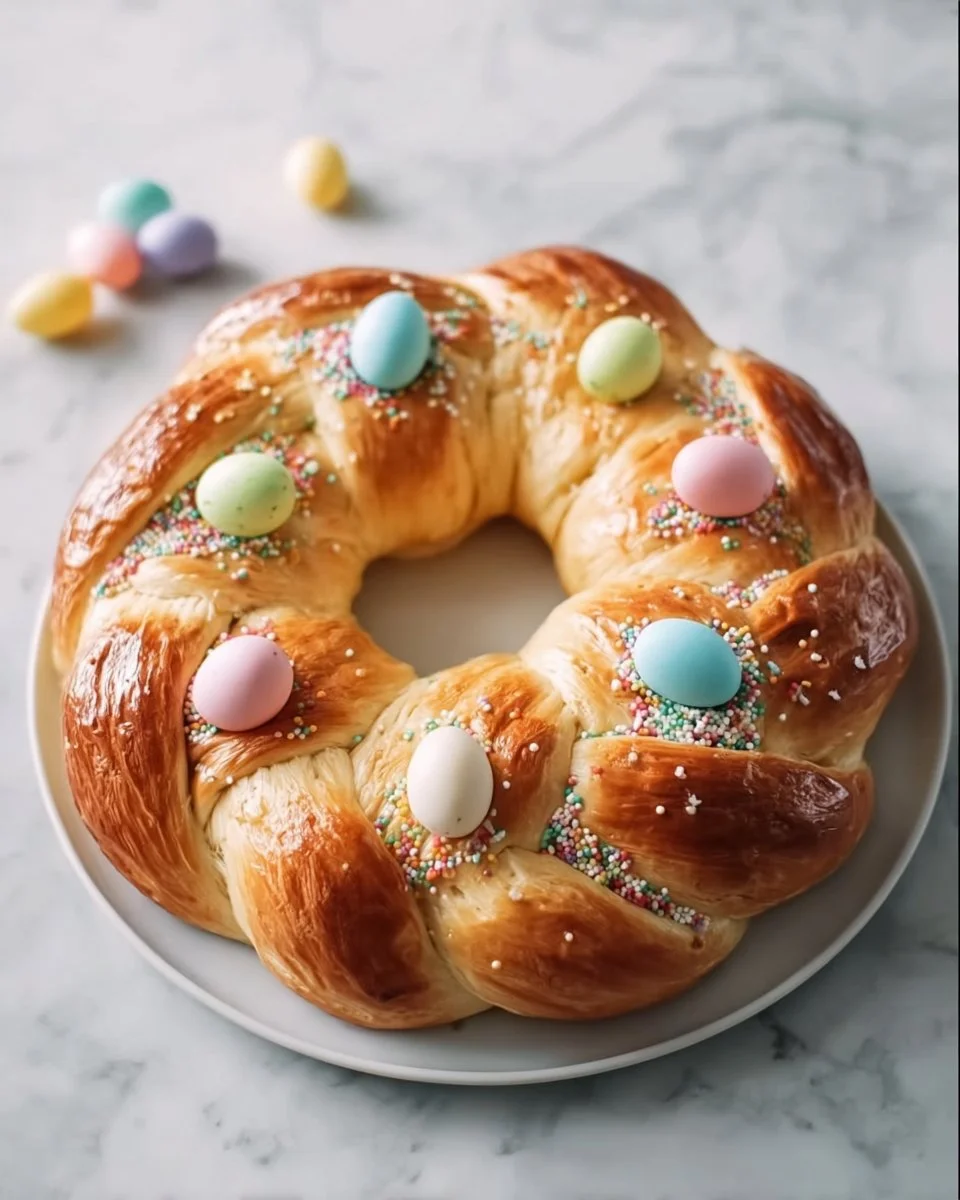
Italian Easter Bread, or "Pane di Pasqua," has roots deeply embedded in customs and traditions, primarily celebrated across Italy and among Italian-American communities. This braided bread is typically enjoyed during Holy Week and Easter festivities. Its striking appearance comes from its colorful toppings—dyed eggs nestled within the braids—and vibrant sprinkles that symbolize the joy of new life after winter.
The taste is something to behold. Picture a soft and slightly sweet bread, enriched with warm notes of vanilla and a hint of citrus zest, giving it a delightfully fragrant appeal. The texture is pillowy, yet strong enough to support the vibrant eggs adorning it. The beauty of Italian Easter Bread lies in its versatility—it can be enjoyed at brunch, dessert, or even as a special treat with coffee.
Bake this beautiful bread when celebrating Easter, family gatherings, or during any occasion that calls for warmth and unity.
WHY YOU’LL LOVE THIS RECIPE
Unforgettable Flavor: This Italian Easter Bread recipe delivers a sweet, rich, and fluffy loaf that far surpasses anything you might buy at the store. The careful balance of ingredients ensures every bite is a delight.
Cost-Effective: Making your own bread is not only more heartfelt than purchasing commercially made, it’s also kinder to your wallet! The ingredients are simple staples you likely already have at home.
Customize to Your Liking: Want to add a hint of lemon? Or perhaps a splash of almond extract instead of vanilla? The beauty of this recipe is that it’s adaptable. You can play with flavors and toppings to suit your taste.
Perfect for All Skill Levels: You don’t need to be a master baker to succeed! With clear step-by-step instructions, even beginners can achieve beautifully braided bread. Plus, the process is rewarding and fun!
Make Ahead and Freezable: You can knead and shape the dough ahead of time, freeing you up to enjoy the celebration. And if you have leftovers (which is unlikely!), you can easily freeze slices for a cozy treat later.
Grab your apron, and prepare to bake your way into a treasured tradition that will have your family gathering around the table, just like mine did.

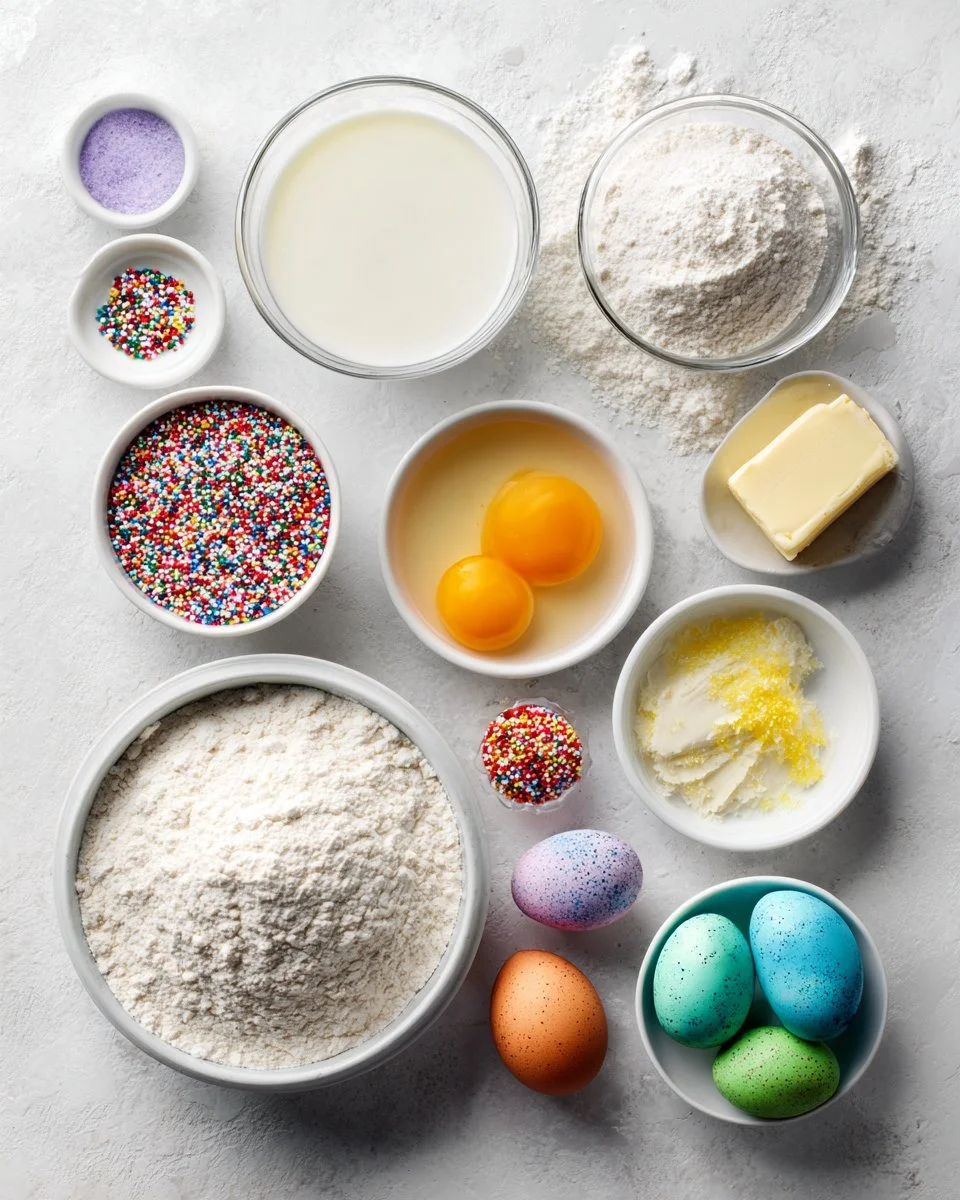
INGREDIENTS
- 4 cups all-purpose flour (plus extra for kneading)
- 1 packet (2 1/4 tsp) active dry yeast
- 1/2 cup whole milk, warmed to 110 degrees F
- 1/4 cup granulated sugar
- 1/4 cup unsalted butter, melted and cooled slightly
- 3 large eggs, room temperature
- 1/2 tsp salt
- 1 tsp pure vanilla extract
- Zest of 1 lemon or 1 orange (optional but recommended)
- 6 dyed raw eggs (these can be left whole or decorated)
- 1 egg + 1 tbsp water, for egg wash
- Colored sprinkles (nonpareils or confetti style)
Ingredient Notes
- Flour: Use high-quality all-purpose flour for the best texture.
- Yeast: Always check the expiration date for freshness.
- Milk: Warm, not hot, milk is key to activating the yeast. A kitchen thermometer is helpful for precise temperature readings.
- Butter: Be sure to let your butter cool slightly after melting to avoid cooking the eggs.
- Citrus Zest: This enhances the aroma and adds wonderful flavor; I recommend using organic lemons or oranges for the best zest.
STEP-BY-STEP INSTRUCTIONS
Activate the Yeast: In a small bowl, stir the yeast and 1 teaspoon of the sugar into the warm milk. Let it sit for 5 to 10 minutes. You’ll know it’s ready when it’s foamy and alive!
Make the Dough: In a large bowl, combine the flour, remaining sugar, and salt. In another bowl, whisk together the eggs, melted butter, vanilla, and citrus zest. Pour both mixtures into the dry ingredients and stir until a shaggy dough forms. Knead on a floured surface for 8 to 10 minutes until the dough is smooth and elastic. Don’t be afraid to use a bit of elbow grease!
First Rise: Lightly grease a bowl, place the dough inside, cover it with a damp cloth, and let it rise in a warm place for 1.5 to 2 hours, or until it doubles in size. Here’s a tip: If your kitchen is cold, place the dough in an oven turned off with the light on.
Shape the Dough: Punch down the risen dough. Divide it into 2 or 3 portions. Roll each piece into long ropes and braid them together. Shape the braid into a circle, and carefully tuck the dyed eggs into the braids.
Second Rise: Transfer the shaped dough to a parchment-lined baking sheet, cover, and let it rise for another 30 to 45 minutes. This is where the magic continues as it fluffs up even more!
Bake: Preheat your oven to 350°F (175°C). Brush the top of the bread with the egg wash (the beaten egg and water mixture), and sprinkle with colored nonpareils to add a festive touch. Bake for 25 to 30 minutes until it’s golden brown and sounds hollow when tapped on the bottom. Let cool before serving.
Chef’s Tips
- Visual Cues: The dough should be smooth and elastic before the first rise. It should puff up nicely during the second rise and turn a beautiful golden brown when baked.
- Common Mistakes: Avoid adding too much flour while kneading; it makes the bread dense. Your dough should be slightly tacky but manageable.
- Professional Techniques: When braiding, don’t worry if your braids aren’t perfect. They add character and rustic charm!
EXPERT TIPS & TRICKS
Storage Recommendations: Store your Italian Easter Bread in an airtight container at room temperature for up to 3 days. If you want to prolong freshness, wrap it tightly in plastic wrap and store it in the fridge; it will last up to a week.
Make Ahead Instructions: Mix and shape the dough a day in advance. After shaping, wrap it tightly in plastic wrap and place it in the refrigerator overnight. Let it sit at room temperature for about 30 minutes before baking to wake it up!
Troubleshooting: If your dough doesn’t rise, ensure that your yeast is fresh and that the milk was no hotter than 110°F. If the oven is too hot, the bread may get too brown on the outside before it’s fully baked in the center.
SERVING SUGGESTIONS
Italian Easter Bread shines at brunch alongside a fresh fruit salad or a sweet ricotta spread. Consider pairing it with strong coffee or tea for an elevated experience. Serve it on a beautiful platter, garnished with additional dyed eggs or a sprinkle of colorful confetti, making it visually stunning. This bread is especially suited for Easter or spring celebrations, lending an air of festivity and cheer to any occasion.
VARIATIONS & SUBSTITUTIONS
Flavor Combinations: Try substituting the vanilla with almond extract for a nutty twist. You can also fold in chocolate chips or dried fruits like cranberries or apricots for an added punch.
Dietary Restrictions: For a dairy-free option, substitute the milk with almond or coconut milk, and use plant-based butter. For gluten-free, you can try a 1:1 gluten-free flour mix, although the texture may vary.
Seasonal Variations: Consider adding pumpkin spice in the fall or cardamom during the winter holidays. You could also use chocolate egg candies in place of dyed raw eggs for a sweet treat that kids will adore!
NUTRITION & STORAGE INFO
- Prep time: 30 minutes
- Cook time: 30 minutes
- Total time: 2-3 hours (including rising times)
- Yield: About 12 servings
- Estimated calories per serving: 180 calories
- Storage instructions: Best enjoyed fresh but can be stored at room temperature for up to 3 days or wrapped and refrigerated for up to a week. It can also be frozen for up to 3 months.
FAQ SECTION
Can I use instant yeast instead of active dry yeast?
Yes! You can substitute them directly, and there’s no need to proof instant yeast in milk. Simply mix it with the dry ingredients.What’s the best way to dye the eggs?
You can either use traditional egg dye kits from the store or natural dyes made from food items like beet juice (for red) or turmeric (for yellow).Can I make the dough in a bread machine?
Absolutely! Follow your machine’s instructions for making dough. Just shape and bake after the rising cycle is completed.Is this recipe suitable for freezing?
Yes, once baked, let the bread cool completely, wrap it tightly in plastic wrap, and store it in an airtight container. Thaw in the fridge or at room temperature before serving.Can I use something other than eggs in the braid?
Yes, you can leave them out if you prefer. Use pastry dough to create your version or make a large loaf without eggs.Why did my bread turn out dense?
It might be due to too much flour added while kneading or not enough rising time. Ensure the milk isn’t too hot when activating the yeast.Can I add nuts to this recipe?
Yes! Toss in some toasted almonds or walnuts for a delightful crunch in the bread.What if I can’t find colored nonpareils?
You can leave them out entirely or use granulated sugar mixed with food coloring for a similar effect.How do I know when the bread is done baking?
Tap the bottom of the loaf; if it sounds hollow, it’s done. The top should also be beautifully golden brown.How can I make my bread sweeter?
Increase the sugar in the dough by a few tablespoons, but keep in mind that it may slightly affect the texture.
CONCLUSION
This Italian Easter Bread recipe holds a special place in my heart, embracing the joy of family and tradition. From the inviting aroma that fills your home to the bright colors embellishing each loaf, it’s a celebration in itself. I encourage you to roll up your sleeves and give this recipe a try—it’s sure to bring friends and family together, just as it did for me.
I’d love to hear about your experiences and any modifications you might try! Also, check out my blog for more related recipes that will surely inspire you to create lasting memories. Happy baking!