Table of Contents
Table of Contents
Growing up in a small town, I would often hear tales of the perfect New York Style bagels—crusty on the outside yet soft and chewy on the inside. The kind that seemed to require a magic touch, reserved for bakers in bustling New York City bakeries. Fast forward years later, and I found myself on a quest to replicate that same iconic bagel experience in my warm little kitchen.
After countless experiments and what felt like thousands of bagels later, I’ve finally perfected my recipe. These New York Style bagels are more than just a breakfast item; they’re a nostalgic bite of comfort. Whether it’s a lazy Sunday morning or a busy weekday, there’s something about fresh bagels that draws family and friends together. But what makes this recipe truly stand out? Unlike those store-bought imitations or even the popular bagel chains, my version guarantees an authentic taste and texture right at home—all without breaking the bank.
By the end of this post, you’ll not only have my tried-and-true bagel recipe but also the confidence to knead, boil, and bake your way to homemade magic—and maybe even some sweet family memories in the process!
What Are New York Style Bagels?
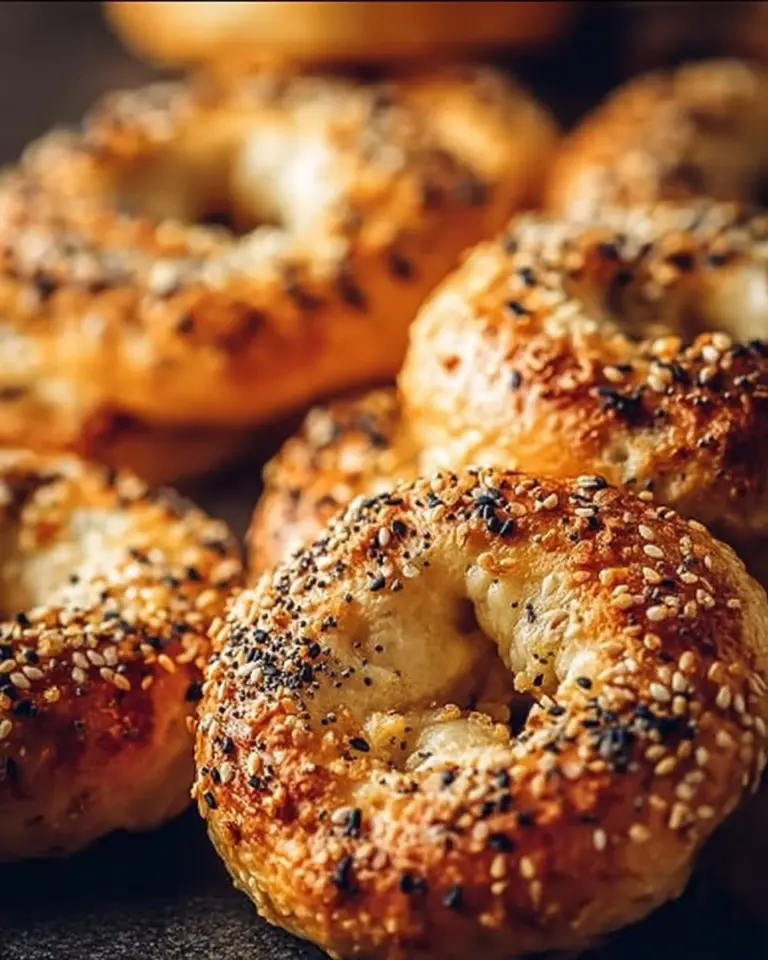
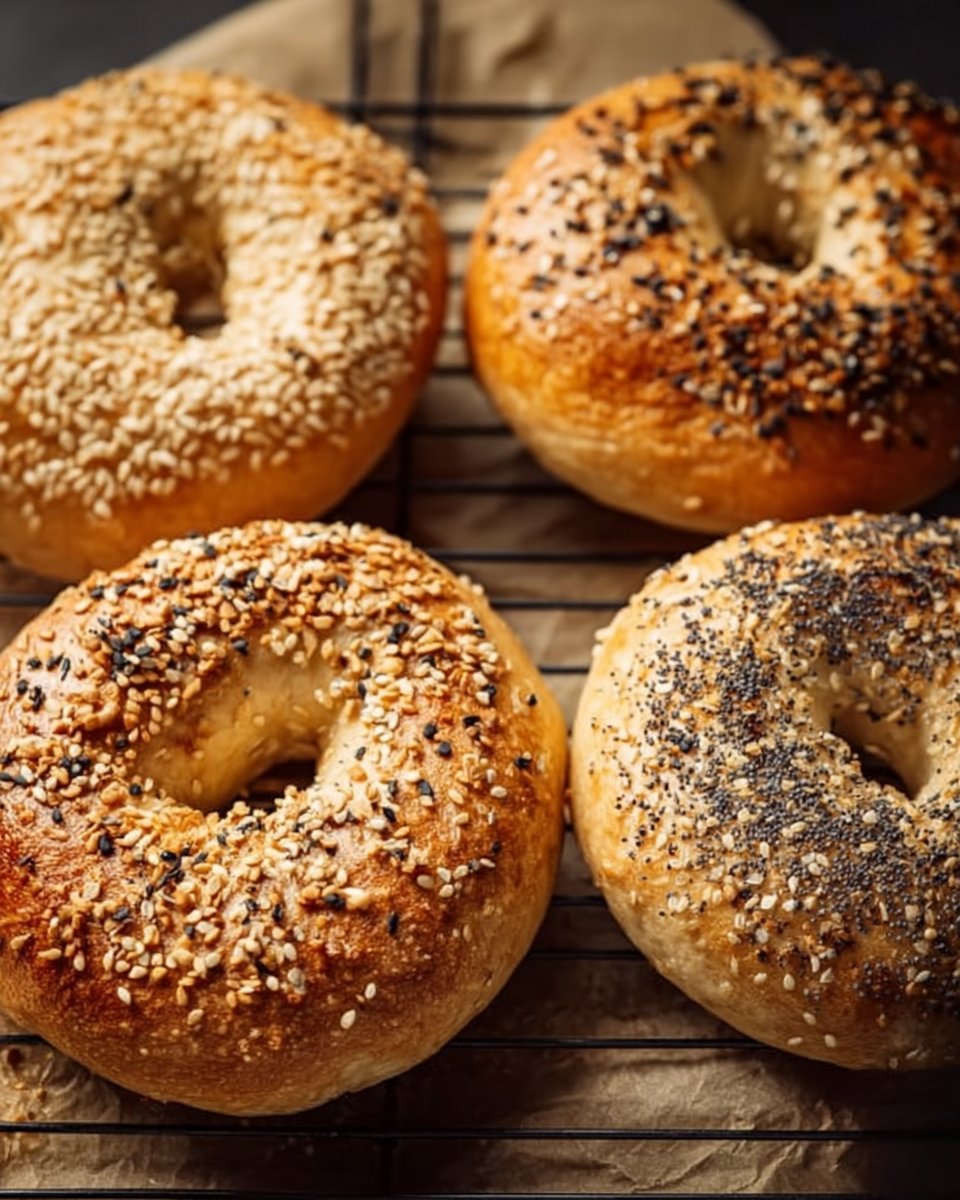
New York Style bagels have a storied history rooted in the cultural melting pot of New York City. These bagels, famed for their delightful chewiness and glossy crust, are typically boiled before baking, which gives them that signature texture. Historically, Jewish immigrants brought the bagel to America, where it evolved into the beloved food we enjoy today!
These bagels are not your average breakfast rolls; their chewy center and slightly crispy exterior make each bite a textural delight. And of course, let’s not forget that coveted crust—so satisfying to crunch into while savoring the warm, soft interior.
When should you make them? Anytime! Sunday brunch, late-night snacks, or just because it’s a Tuesday and you deserve something special. Trust me, once you take that first fluffy bite, you’ll wonder how you lived without making your own New York Style bagels.
Why You’ll Love This Recipe
Unmatched Freshness: Nothing beats the flavor of breads made fresh from your kitchen. Homemade bagels provide a taste that just can’t be replicated in commercial bakeries.
Cost-Effective: Why spend $20 on a dozen bagels that don’t meet your standards when you can make them for a fraction of the cost? This recipe uses basic pantry ingredients, meaning you spend less while enjoying gourmet quality.
Customizable Flavors: Want to add lox, cream cheese, or even festive toppings like everything bagel mix? The sky’s the limit! You can personalize your bagels with toppings that excite your taste buds.
Skill Building: This recipe offers the perfect opportunity to refine your baking skills. It’s straightforward enough for beginners but also satisfying for more seasoned bakers looking for a fun project.
Time Investment Worth Making: Although it takes about 1.5 hours from start to finish, most of that is hands-off rising and baking time, leaving you free to catch up on your favorite shows or enjoy a cup of coffee.
Ingredients
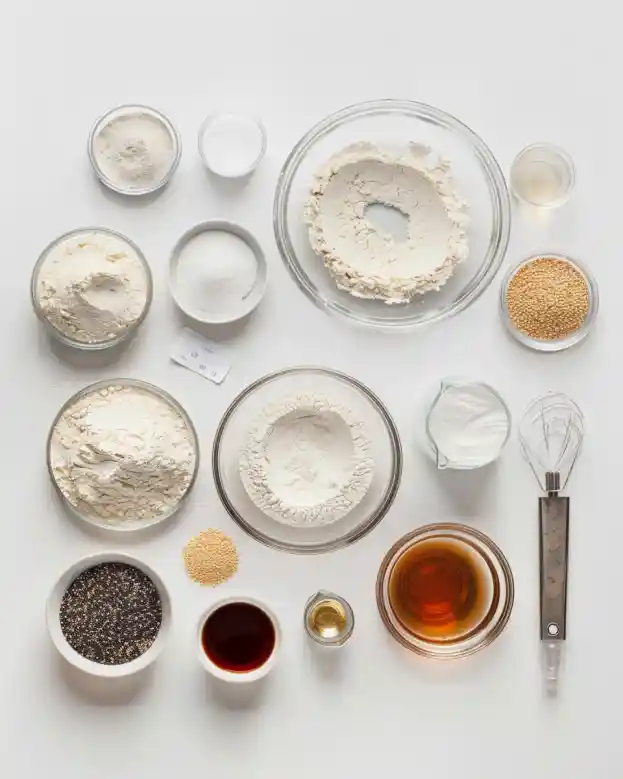
- 4 cups bread flour: High-gluten bread flour will give you that chewiness; I prefer King Arthur.
- 1 tablespoon sugar: This little bit helps to activate the yeast and adds a hint of sweetness.
- 1 tablespoon salt: Enhances the overall flavor and balances the sweetness.
- 1 packet active dry yeast: Instant or active yeast works—just make sure it’s fresh!
- 1 1/2 cups warm water: The temperature should be between 100°F-110°F—think warm but not scalding.
- 1 tablespoon malt syrup (optional): Adds a hint of sweetness and beautiful color. I use Gold Medal Barley Malt.
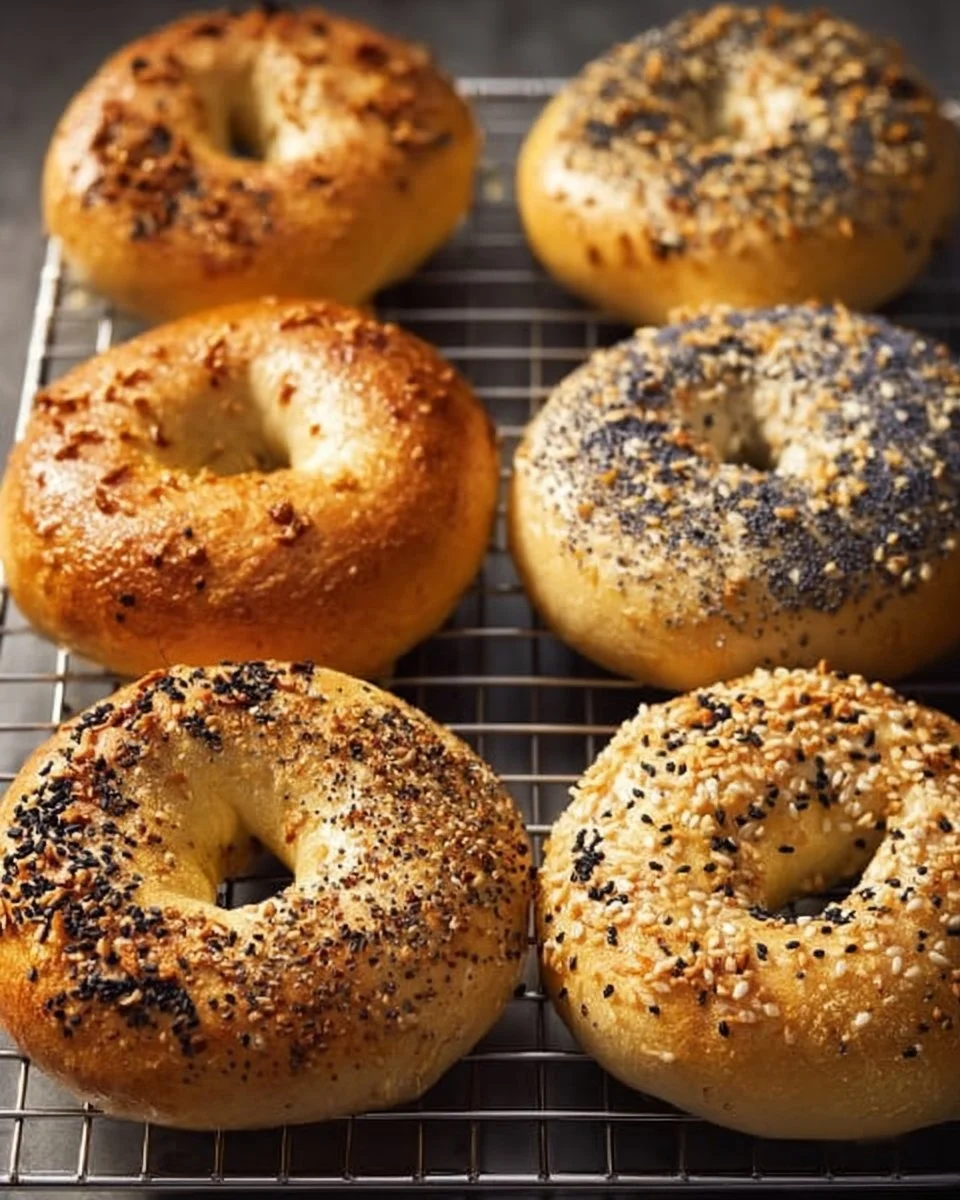
- Poppy seeds or sesame seeds (for topping): Classic toppings that are essential for that authentic look and flavor.
Prep Notes
- Make sure your butter (if adding for creaminess) is at room temperature.
- Ensure your yeast is fresh; it should go frothy when activated.
Step-by-Step Instructions
Activate the Yeast: In a mixing bowl, combine warm water, sugar, and the yeast. Let it sit for about 5 minutes until it becomes frothy—this means your yeast is alive!
Mix the Dough: Add the bread flour and salt to the yeast mixture, then mix until it forms a dough.
Knead the Dough: On a floured surface, knead the dough for about 10 minutes until it’s smooth and elastic. You should be able to stretch it without it tearing.
First Rise: Place the dough in a greased bowl, cover it with a damp cloth, and let it rise for about 1 hour, or until doubled in size. The dough should feel soft and spring back when pressed.
Preheat the Oven: Preheat your oven to 425°F (220°C) during the last 10 minutes of the rise.
Shape the Bagels: Punch down the dough, divide it into 8 equal pieces, shape each piece into a ball, and poke a hole in the center to form the bagel shape.
Boil the Bagels: Boil a large pot of water and add malt syrup if desired. Drop the bagels in two at a time and boil for about 1 minute on each side. Watch for that beautiful sheen forming.
Prepare for Baking: Remove the bagels from the water and place them on a baking sheet lined with parchment paper. Sprinkle them with poppy seeds or sesame seeds as desired.
Bake: Slide the tray into the oven and bake for 20-25 minutes or until golden brown. You’ve hit the sweet spot when you can gently tap them and hear a hollow sound.
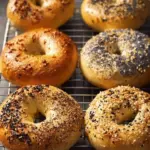
Cool and Enjoy: Allow the bagels to cool on a wire rack before indulging. Enjoy them fresh or with your favorite toppings!

Expert Tips & Tricks
Use Fresh Ingredients: Fresh yeast and high-quality flour make all the difference. Check your yeast’s expiration date!
Cool Completely: Allow bagels to cool fully before storing to avoid sogginess.
Storage: Keep bagels at room temperature in a paper bag for up to 2 days. For longer storage, place them in a sealed freezer bag for up to 3 months.
Make-Ahead Instructions: You can shape the bagels and store them in the fridge overnight for a quick bake in the morning.
Troubleshooting: If your bagels are dense, they may not have risen enough. Allow extra rising time!
Adjust Water Temperature: If your kitchen is chilly, use warmer water (105°F) to promote yeast activity.
Serving Suggestions
Pair your New York Style bagels with a smear of cream cheese, layered with lox, fresh vegetables like capers and red onion; it’s a classic. For a sweet option, try a smear of berry jam or homemade Nutella!
Feeling fancy? Serve these bagels at brunch with mimosas or a fresh fruit platter. They also make for delightful snacks when entertaining guests.
Variations & Substitutions
- Garlic Bagels: Add minced garlic powder for a delicious kick.
- Cheese Bagels: Mix shredded cheese into the dough or sprinkle on top before baking.
- Herb Bagels: Incorporate dried herbs like rosemary or thyme into the dough for a fragrant twist.
For anyone with dietary restrictions, consider using gluten-free flour or reducing the sugar for a lower-calorie option. Create a batch with seasonal toppings, such as pumpkin spice during autumn!
Nutrition & Storage Info
- Prep time: 1 hour
- Cook time: 25 minutes
- Total time: 1 hour 25 minutes
- Yield: 8 bagels
- Estimated calories per serving: Approximately 250 calories (varies by toppings).
- Storage: Room temperature for up to 2 days, refrigeration for up to a week, or freeze for 1-3 months.
FAQ Section
Can I freeze my bagels?
Yes! Once cooled, wrap them tightly in plastic wrap and place them in a freezer bag.What can I do if my dough doesn’t rise?
Always check the freshness of your yeast and ensure that your water is the right temperature.Can I use all-purpose flour instead of bread flour?
You can, but using bread flour will give you that iconic chewy texture.How do I know when my bagels are done baking?
They should be golden brown and sound hollow when tapped.Can I add other flavors to my bagels?
Absolutely! Consider adding cinnamon, raisins, or even chocolate chips for a sweet variation.Why is boiling important?
Boiling bagels before baking gives them their unique texture—crisp outside and chewy inside!How can I customize the toppings?
Feel free to experiment with everything bagel seasoning, cheese, or even fresh herbs.How long do bagels last?
Fresh bagels are best enjoyed within two days but can be stored longer in the freezer.Is malt syrup necessary for bagels?
It enhances flavor and color but isn’t strictly necessary; you can omit it if you need.Do I need any special tools?
While a stand mixer is helpful, you can knead by hand. Just make sure to invest in a good baking sheet!
Conclusion
These New York Style bagels aren’t just about the perfect texture; they embody comfort, nostalgia, and the joy of sharing with loved ones. I invite you to step into the wonderful world of bagel making! Once you try your hand at this recipe, I promise you’ll be hooked.
Please share your experiences, variations, or any tips you’ve discovered along the way! And while you’re here, check out some of my other delightful recipes that celebrate the joy of baking—from classic biscuits toVanilla French Beignets. Happy bagel-making!
New York Style Bagels
Ingredients
Method
- Activate the Yeast: In a mixing bowl, combine warm water, sugar, and the yeast. Let it sit for about 5 minutes until it becomes frothy.
- Mix the Dough: Add the bread flour and salt to the yeast mixture, then mix until it forms a dough.
- Knead the Dough: On a floured surface, knead the dough for about 10 minutes until it’s smooth and elastic.
- First Rise: Place the dough in a greased bowl, cover it, and let it rise for about 1 hour, or until doubled in size.
- Preheat the Oven: Preheat your oven to 425°F (220°C) during the last 10 minutes of the rise.
- Shape the Bagels: Punch down the dough, divide it, shape into balls, and poke a hole in the center.
- Boil the Bagels: Boil water and add malt syrup if desired. Boil bagels for 1 minute on each side.
- Prepare for Baking: Remove from water, place on a baking sheet, and sprinkle with toppings.
- Bake: Bake for 20-25 minutes or until golden brown and hollow-sounding when tapped.
- Cool and Enjoy: Let the bagels cool on a wire rack before serving.