Table of Contents
Table of Contents
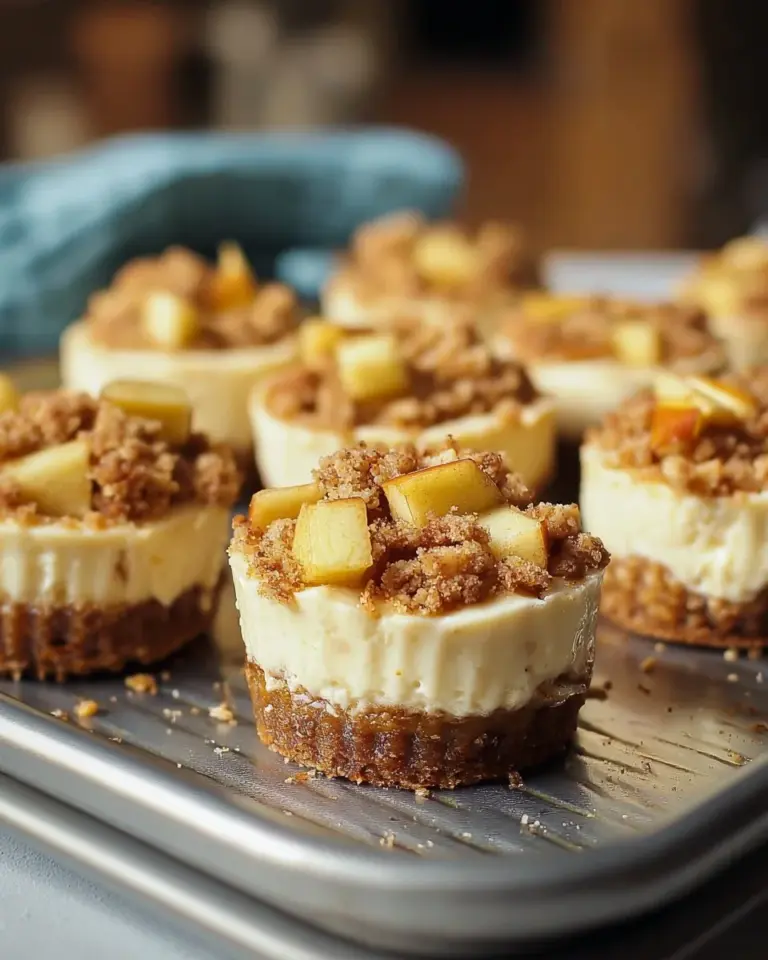
There’s something undeniably rewarding about creating a dessert that brings smiles to family faces, and this Cheesecake Recipe No Bake does just that! I remember the first time I served this creamy delight at a family gathering—the way my grandmother’s eyes lit up when she took her first bite was priceless. This cheesecake is the kind of recipe that evokes warm memories, laughter, and the sweet satisfaction of a well-deserved treat.
What sets this no-bake cheesecake apart is not just its luscious texture but also its simplicity. Unlike many other cheesecakes that require oven time and complex techniques, this one is all about ease without sacrificing flavor. It’s rich, creamy, and oh-so-refreshing, which makes it perfect for any occasion—be it a summer barbecue or a cozy holiday dinner.
In this post, I’ll walk you through how to make this delicious dessert step-by-step. You’ll learn about the best ingredients to use, handy tips for success, and creative ways to customize your cheesecake. Let’s dive into the world of no-bake cheesecakes, and soon you’ll be making your own unforgettable family memories!
What Are Cheesecake Recipe No Bake?
The origin of no-bake cheesecakes might just go back as far as the classic baked versions, but they have since transformed into a go-to for quick desserts. These cheesecakes are creamy, luscious, and tender—blending silky cream cheese with whipped cream for an indulgent filling. The magic lies in the crust: a buttery graham cracker foundation that perfectly contrasts the velvety filling.
Unique to no-bake cheesecakes is their refreshing taste, which is usually lightened by the incorporation of whipped cream, making each slice feel like a hug on a plate. Whether you’re celebrating a milestone or simply rewarding yourself after a long week, a no-bake cheesecake promises to elevate any moment into something special.
These treats shine during hot weather when you don’t want to spend too much time in the kitchen, yet still crave something sweet and satisfying. Plus, who doesn’t love a dessert that requires minimal effort but delivers maximum delight?
Why You’ll Love This Recipe
Simple & Effortless: Unlike traditional cheesecakes that require precise baking, this no bake version comes together in a snap. You can whip it up in under 30 minutes and let the fridge do the rest!
Cost-Effective: Purchasing a slice of cheesecake at a restaurant can set you back quite a bit. This recipe is a fraction of the cost, and you get to serve several generous slices—making it friendly on your wallet.
Customization Galore: Love chocolate? Try adding cocoa powder to the filling. Enjoy fruit toppings? Use fresh strawberries or mango puree for a vibrant finish. The sky’s the limit when it comes to personalizing this cheesecake!
No Complex Techniques: If you’re a novice baker or simply in a hurry, this no-bake cheesecake is smooth sailing. Just mix, pour, and chill—it’s practically foolproof!
Family-Approved: I’ve made this no-bake cheesecake countless times for family gatherings, and it always disappears within minutes. My kids love helping me top it with their favorite pie fillings, making it a delightful family bonding experience.
Ingredients
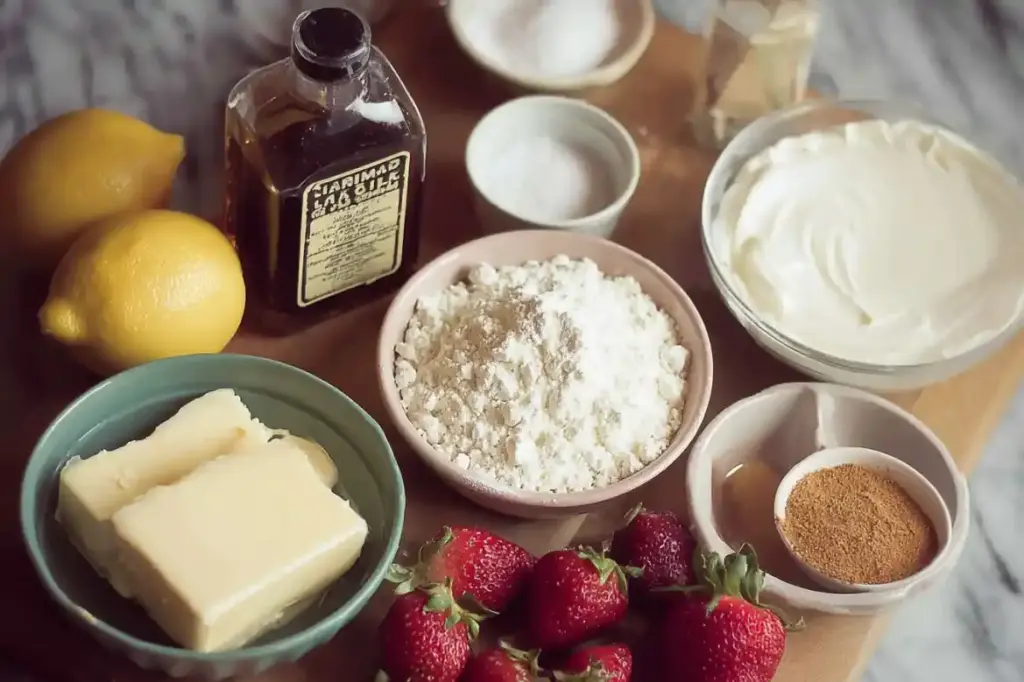
Here’s what you’ll need to create this delightful Cheesecake Recipe No Bake:
- 1 1/4 cups graham cracker crumbs: For that classic cheesecake crust; I recommend using Nabisco Graham Cracker Crumbs for consistency.
- 6 tablespoons butter (melted): Room temperature butter ensures the perfect binding of crumbs.
- 16 oz cream cheese (softened; two 8 oz packages): Use full-fat cream cheese for the creamy consistency; Philadelphia is my go-to brand.
- 1/2 cup granulated sugar: Adjust the sweetness level according to your preference.
- 2 teaspoons vanilla extract: Pure vanilla enhances the flavor remarkably—Madagascar vanilla is my favorite!
- 1 cup heavy cream (cold): Chill this before whipping to achieve perfect peaks.
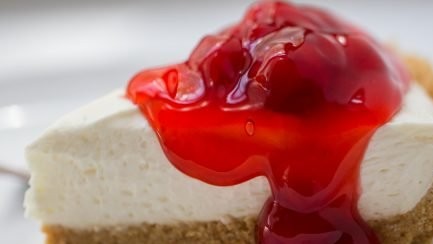
- 1 cup canned pie filling (cherry, blueberry, etc.): You can also use fresh fruit or whipped cream as a topping of choice.
Prep Notes:
- Prepare ingredients in advance—soften cream cheese and chill your heavy cream.
- For an added depth of flavor, consider a pinch of salt in the filling.
Step-by-Step Instructions
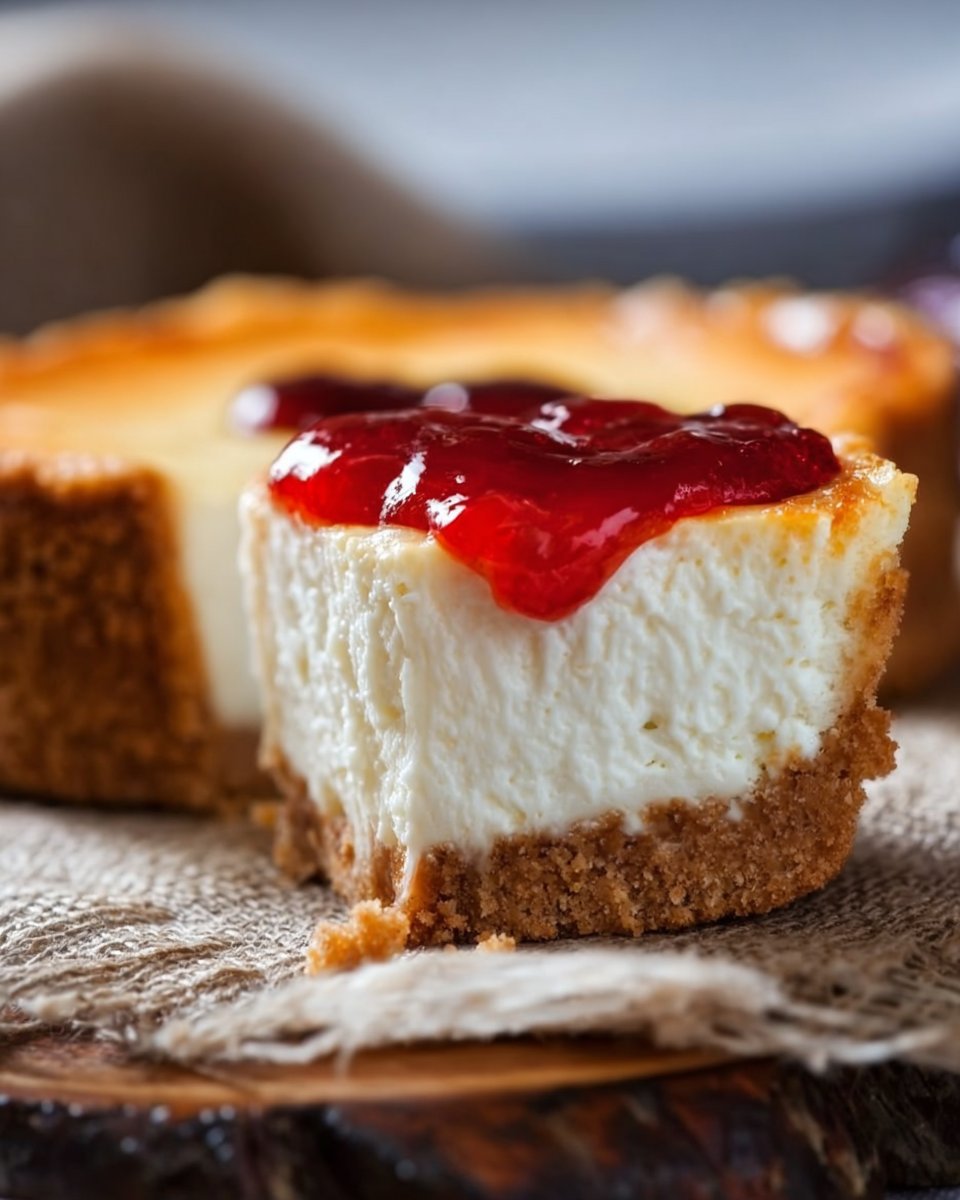
Prepare the Crust: In a small bowl, stir together the graham cracker crumbs and melted butter until fully moistened. Press the mixture firmly into an 8 or 9-inch glass pie plate. Chill in the refrigerator while you prepare the filling.
Make the Filling: In a large mixing bowl, beat the softened cream cheese and granulated sugar together with an electric mixer on medium speed until it’s smooth and free of lumps—about 2 minutes. Scrape down the sides of the bowl halfway through for even mixing.
Incorporate Heavy Cream: With the mixer running, gradually add the cold heavy cream in four increments, allowing it to whip into the cream cheese mixture after each addition. Once all the cream is incorporated, whip for an additional 1-2 minutes until the filling is thick and light—watch for soft peaks.
Assemble the Cheesecake: Pour the creamy filling into your prepared crust and use a spatula to smooth the top. Cover with plastic wrap and refrigerate for at least 2 hours, or overnight for the best results.
Add Toppings & Serve: When ready to serve, cut the cheesecake into slices and top with a generous two tablespoons (or more!) of your favorite pie filling or whipped cream!
Chef’s Tips:
- Timing is Key: Ensure the cream cheese is at room temperature to avoid lumps!
- Whipping Techniques: Be careful not to over-whip the heavy cream; it should be thick but still silky.
Common Mistakes to Avoid:
- Forgetting to chill the cheesecake long enough can lead to a runny texture.
- Not scraping the bowl can leave lumps in your filling.
Expert Tips & Tricks
Storage: Store leftovers in an airtight container in the fridge for up to 5 days. It’s best enjoyed within the first couple of days for optimal freshness.
Make-Ahead Instructions: You can prepare this cheesecake up to a day in advance! Just keep it covered in the fridge until you’re ready to serve.
Freezing: This cheesecake can be frozen for up to 2 months! After it’s set, wrap it tightly in plastic wrap and aluminum foil. Thaw in the fridge overnight before serving.
Troubleshooting: If your filling doesn’t set, it may need more chilling time, or there may not have been enough heavy cream in the mixture.
Ingredient Quality Matters: Using high-quality cream cheese and vanilla will greatly enhance the final taste of your cheesecake.
Serving Suggestions
This no-bake cheesecake is incredibly versatile! Serve it alongside fresh berries or a scoop of your favorite ice cream for a special touch. For a beautiful presentation, consider garnishing with mint leaves or a dusting of powdered sugar.
It’s perfect for summer barbecues, holiday celebrations, or even just a cozy night in with family. A slice of this cheesecake deserves a standout moment on your dessert table!
Variations & Substitutions
- Flavor Combinations: Experiment by folding in melted chocolate for a rich chocolate cheesecake! You can also swap half the cream cheese with mascarpone for a different texture.
- Dietary Restrictions: Use gluten-free graham crackers for a gluten-free option, or a dairy-free cream cheese substitute for a lactose-friendly version.
- Seasonal Variations: In fall, try a pumpkin spice filling, and in winter, a peppermint-infused version will surely delight your guests!
Nutrition & Storage Info
- Prep Time: 30 minutes
- Chill Time: 2 hours (or overnight)
- Total Time: 2 hours 30 minutes (or more)
- Yield: 8-10 servings
- Estimated Calories per Serving: Approximately 300 calories
- Storage Instructions: Refrigerate for up to 5 days; Freezable for 2 months.
FAQs
Can I make this cheesecake in advance?
Yes! It’s actually better when made a day ahead so the flavors can meld together.What’s the best way to serve leftover cheesecake?
Keep it in the fridge and enjoy it cold; top with fresh fruit or whipped cream just before serving.Is there a gluten-free option for the crust?
Certainly! Use gluten-free graham crackers or crushed nuts mixed with butter for a delicious alternative.Can I use homemade whipped cream?
Absolutely! Just ensure it’s stiff enough to hold its shape when mixed into the filling.Why is my cheesecake runny?
This can happen if it hasn’t chilled long enough or if the cream wasn’t whipped adequately.What’s the best way to cut the cheesecake for serving?
Use a warm knife (dip it in hot water and dry) to prevent sticking and get clean slices!Can I add fruit into the filling?
Yes! Fresh berries or purees would be a delightful addition, but make sure to adjust the sugar accordingly.Is this recipe suitable for freezing?
Yes, it freezes well. Be sure to wrap it tightly and consume it within two months.What can I top my cheesecake with?
Options include whipped cream, fruit compote, chocolate sauce, or even caramel!What’s the best way to store this cheesecake?
Store it in an airtight container in the fridge for up to 5 days to maintain freshness.
Conclusion
This Cheesecake Recipe No Bake is more than just a dessert; it’s a heartwarming experience that brings us together. I hope you give this recipe a try and find the same joy in making it as I do. Don’t forget to share your creations and any feedback in the comments below!
For more delicious treats, check out my other easy recipes on the blog. Let’s dive deeper into the sweet world of baking together.
Chocolate Chip Cookie Dough Cheesecake
happy baking!

No-Bake Cheesecake
Ingredients
Method
- In a small bowl, stir together the graham cracker crumbs and melted butter until fully moistened. Press the mixture firmly into an 8 or 9-inch glass pie plate. Chill in the refrigerator while you prepare the filling.
- In a large mixing bowl, beat the softened cream cheese and granulated sugar together with an electric mixer on medium speed until smooth and free of lumps—about 2 minutes. Scrape down the sides of the bowl halfway through for even mixing.
- With the mixer running, gradually add the cold heavy cream in four increments, allowing it to whip into the cream cheese mixture after each addition. Once all the cream is incorporated, whip for an additional 1-2 minutes until thick and light—watch for soft peaks.
- Pour the creamy filling into your prepared crust and use a spatula to smooth the top. Cover with plastic wrap and refrigerate for at least 2 hours, or overnight for the best results.
- When ready to serve, cut the cheesecake into slices and top with a generous two tablespoons (or more!) of your favorite pie filling or whipped cream.