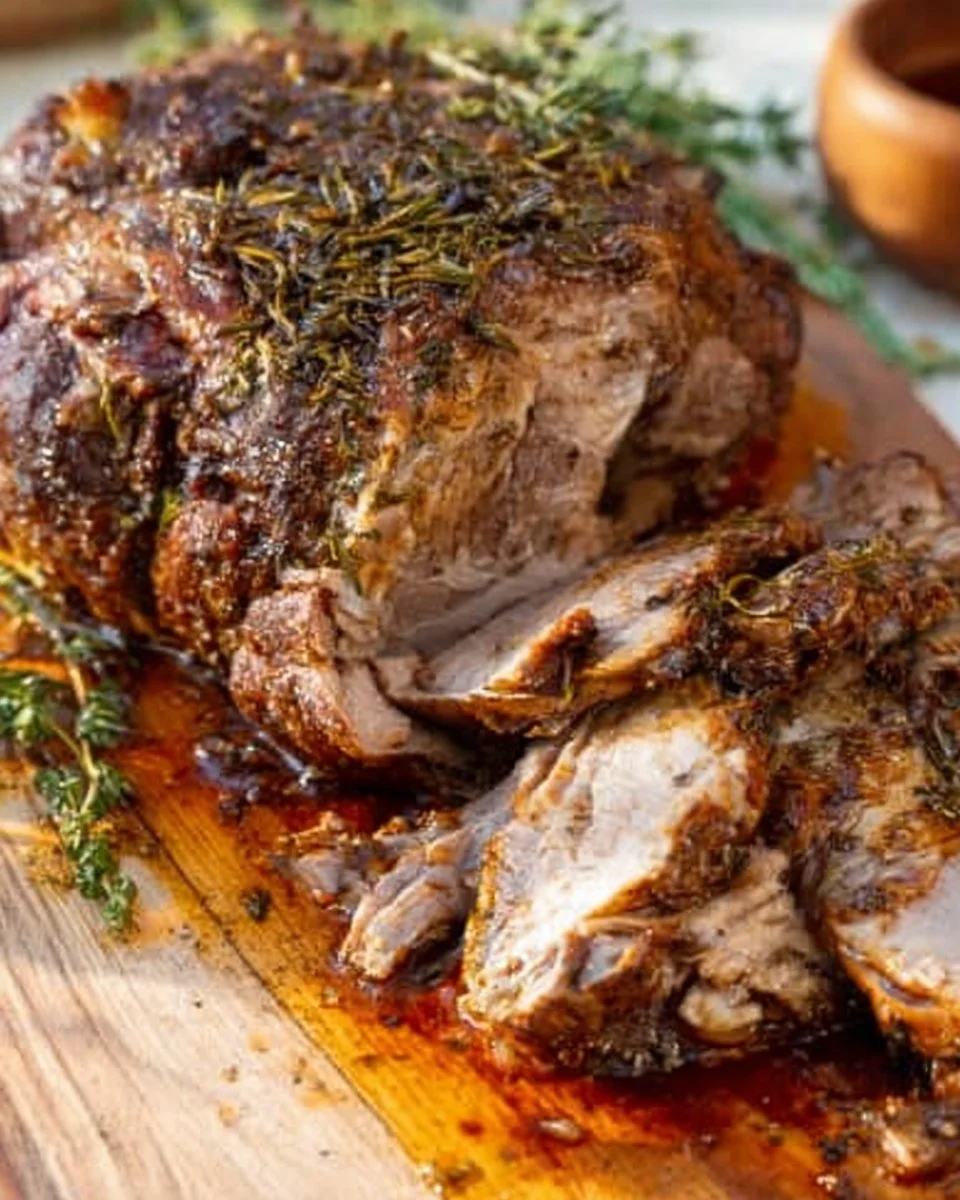
The Ultimate Tender and Flavorful Pork Shoulder Roast Recipe
Have you ever experienced the joyous aroma of a tender pork shoulder roast wafting through your kitchen? Picture this: It’s a cozy Sunday afternoon, the kind where the sun peeks softly through the kitchen window, and you’re gathered with family around the dining table. This is where my passion for cooking truly shines, especially when it comes to my beloved Pork Shoulder Roast.
What makes this recipe special is the beautiful balance of flavors and textures that unfold as the pork slow-cooks, transforming from a humble cut of meat to a show-stopping centerpiece. Unlike other recipes that rush the cooking process or skimp on seasonings, my approach ensures that each bite bursts with succulent flavor, couched in a perfectly crispy crust. Family gatherings are filled with reminiscing over cherished meals, and nothing feels more like a warm embrace than a home-cooked Pork Shoulder Roast—it’s a tradition that I strive to keep alive.
In this blog post, I promise to share my cherished method, combining aromatic herbs and the right cooking techniques so that you can recreate this comforting meal that feels like a hug from your loved ones—whether for a special occasion or just because. Let’s dive in!
What Are Pork Shoulder Roasts?
Pork shoulder roasts, often referred to as "pork butt," are cuts of meat from the upper shoulder of the pig. Once considered a more affordable cut, it has gained accolades for its rich flavor and versatility in various cuisines. Their unique marbling ensures juiciness and tenderness, resulting in melt-in-your-mouth perfection.
These roasts stand out due to their balance of fat and meat, which allows them to be forgiving during the cooking process—perfect for busy home cooks! Whether you’re hosting a family dinner, meal prepping for the week, or seeking the pinnacle of comfort food, this cut of meat shines. Slow-cooked in the oven or smoked on the grill, pork shoulder roasts are the perfect choice for gatherings or cozy nights at home.
Why You’ll Love This Recipe
Unmatched Flavor: Unlike store-bought or restaurant versions, my Pork Shoulder Roast recipe builds layers of flavor through the dry brine and herb rub, elevating it to new heights.
Economical Feasting: Pork shoulder is one of the most cost-effective cuts of meat, allowing you to feed a crowd without breaking the bank. You can turn a humble roast into a feast!
Easy Customization: This recipe is versatile! Want to throw a twist of citrus? Add a splash of apple cider vinegar? The options are vast, allowing you to personalize the flavors to your taste.
Effortless Cooking: As a busy home cook, I appreciate recipes that require minimal hands-on time, and this one fits the bill. Prep it the day before, let it marinate, and let the oven do the work while you enjoy precious moments with family and friends.
The Gift of Leftovers: The beauty of a pork shoulder roast is its ability to stretch, providing delicious leftovers for sandwiches, tacos, or even a hearty breakfast hash.
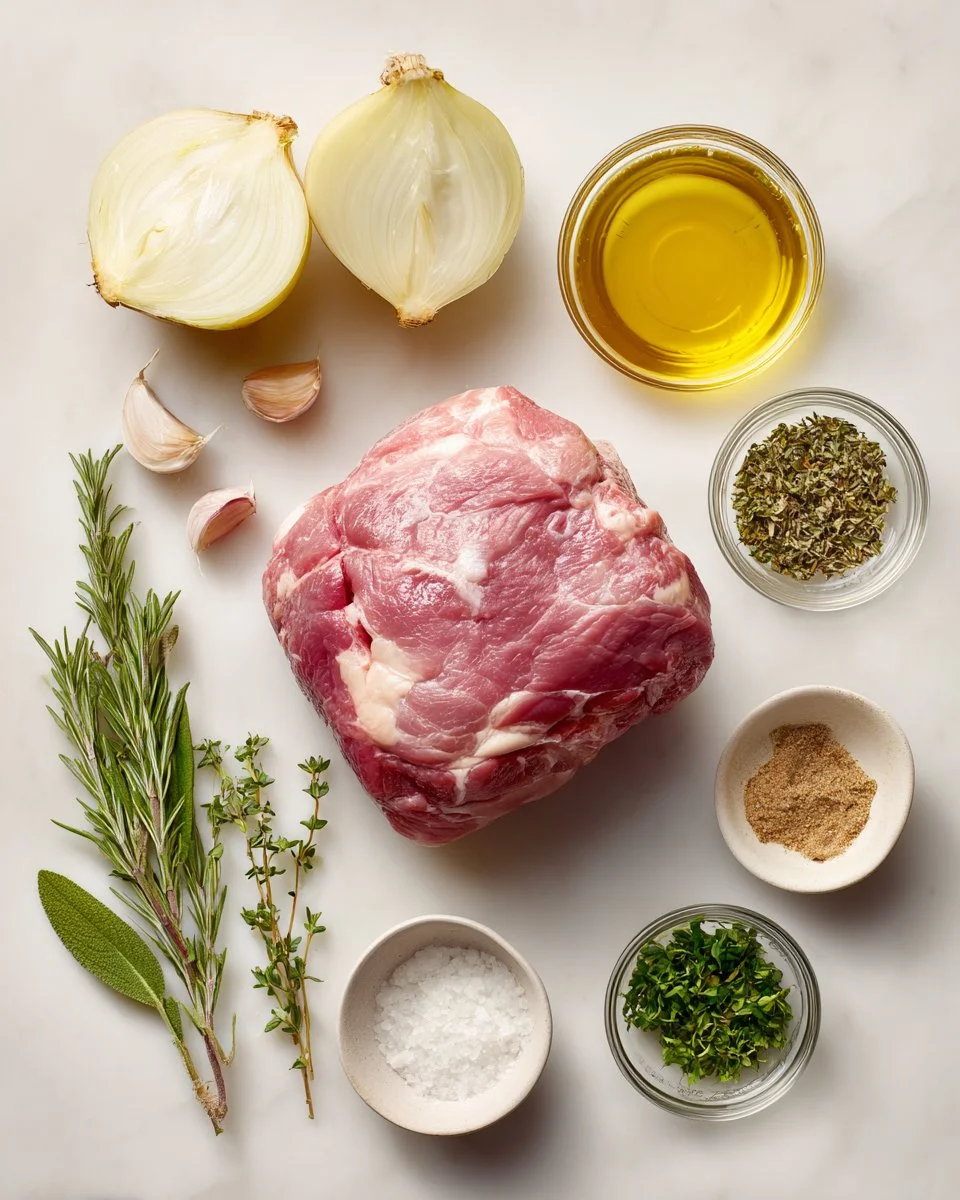
Ingredients
Here’s what you’ll need to create this luscious Pork Shoulder Roast. Please ensure to choose high-quality ingredients for the best flavors.
- 4 pounds boneless pork shoulder (excess fat trimmed): Look for fresh cuts from your local butcher or the meat section of your grocery store.
- Olive oil (as needed): Extra virgin or regular, just make sure it’s fresh.
- 1 large yellow onion (cut into thick slices): Sweet onions work beautifully for their rich flavor.
- 6 sprigs fresh herbs (rosemary, thyme, sage): Fresh herbs are non-negotiable; they truly enhance the flavor!
- Chicken broth for the pan (about ½ cup total): Use homemade if you have it, otherwise a good quality store-bought broth will do.
- 1 tablespoon Kosher salt: Essential for the dry brine.
- 1 tablespoon light brown sugar: Adds a touch of sweetness and helps with browning.
- ½ teaspoon ground black pepper: Freshly ground is best for a robust flavor.
- 1 teaspoon minced fresh herbs (rosemary, thyme, sage): Use the same herbs you chose earlier.
- 6 cloves fresh garlic (minced): A must for aromatic depth and flavor.
- 2 teaspoons minced fresh herbs (rosemary, thyme, sage): More goodness to boldly flavor the roast.
Notes:
- Remember to let your pork shoulder come to room temperature about 30 minutes before cooking. It helps with even cooking.
- Always opt for fresh herbs when possible; they make a noticeable difference.
- Trim the excess fat from your pork shoulder to prevent greasiness but leave some for flavor.
Step-by-Step Instructions
1. Dry Brine Pork Overnight:
- In a small bowl, combine 1 tablespoon Kosher salt, 1 tablespoon brown sugar, ½ teaspoon ground black pepper, and 1 teaspoon minced fresh herbs.
- Rub the mixture all over the pork on all sides, ensuring an even coating. Place on a baking pan, cover, and refrigerate overnight. This allows the flavors to penetrate the meat.
2. Prep Oven:
- The next day, preheat your oven to 425°F.
- Remove the pork from the fridge and let it sit on the counter for 30 minutes to come closer to room temperature. Don’t forget to discard any juices that have pooled at the bottom!
3. Initial Roast:
- Pat dry the pork with paper towels, drizzle a few tablespoons of olive oil, and season generously with ground black pepper.
- Roast uncovered for about 20 minutes; you want to create a beautiful crust on the outer layer.
4. Make the Garlic Herb Rub:
- In a medium bowl, mix 6 minced garlic cloves, ¼ cup olive oil, ¼ teaspoon salt, and ½ teaspoon black pepper. Set aside as the flavors meld.
5. Lower Oven Temperature:
- After the initial roasting, remove the pork from the oven and reduce the temperature to 300°F. This lower heat will help tenderize the meat as it cooks.
6. Add Garlic Herb Rub and Onions:
- Smother the pork shoulder with the garlic herb rub.
- Place the onion slices around the pork, alongside the remaining fresh herb sprigs.
- Add about ½ cup of chicken broth around the pan to prevent burning.
7. Roast Low and Slow:
- Return the pork to the oven and roast it uncovered at 300°F for another 2.5 to 3 hours. The roast is done when its internal temperature reaches 190-200°F. If some parts are browning too quickly, simply tent them with foil.
8. Rest Before Slicing:
- Once done, take the pork out, and let it rest for about 15 minutes before slicing. This allows the juices to redistribute, making it even juicier.
Enjoy Every Bite!
Expert Tips & Tricks
- Quality Matters: Always buy the best quality pork shoulder you can find. Local butchers tend to have better options than mass-produced grocery chains.
- Make-Ahead Wonder: You can prepare the dry brine up to two days in advance to save time on a busy cooking day.
- Storage: Leftovers can be stored in an airtight container in the fridge for up to 3 days or frozen for up to 3 months. Just remember to label them!
- Troubleshooting: If your roast isn’t browning as much as you’d like, increase the oven temperature slightly during the last 30 minutes.
- Cooking with Kids: Get children involved by letting them mix herbs or rub the seasoning on the pork. It’s a fun way to teach them about cooking!
Serving Suggestions
Pair your delectable Pork Shoulder Roast with a side of creamy mashed potatoes, roasted vegetables, or a fresh garden salad. For an impressive presentation, serve the sliced roast on a large platter garnished with the roasted onions and fresh herbs. It’s perfect for family gatherings, holiday feasts, or even a cozy dinner for two!
Variations & Substitutions
- Different Flavors: For a tropical twist, try adding pineapple or mango juice to the marinade. If you’re a fan of spice, feel free to include some chili powder or smoked paprika.
- Diet Adaptations: This recipe naturally suits gluten-free and dairy-free diets, and you can substitute the chicken broth for vegetable broth for a vegetarian option.
- Seasonal Variations: Adjust your herbs according to the season. Fresh sage in the fall, or herbs de Provence in the summer, balance beautifully with the natural sweetness of the pork.
Nutrition & Storage Info
- Prep Time: 15 minutes (plus overnight brining)
- Cook Time: 3-4 hours (depending on desired tenderness)
- Total Time: 24 hours (including brining)
- Yield: Serves 8-10 people
- Estimated Calories: Approximately 375 calories per serving (varies by size)
- Storage Instructions:
- Leftovers can be kept at room temperature for 2 hours after cooking, then stored in the fridge for 3 days or in the freezer for up to 3 months.
FAQ Section
Can I cook a frozen pork shoulder directly?
- It’s best to thaw pork shoulder in the fridge before cooking for even results. However, if you’re short on time, you can cook it from frozen; you just need to extend the cooking time.
How do I know when my pork shoulder is done?
- The internal temperature should reach 190-200°F for tender, shredded meat. Use a meat thermometer for accuracy!
What should I do if my roast is drying out?
- If the roast seems to be drying out, try basting it with the juices or broth during cooking, or cover it with foil.
Can I glaze the pork during cooking?
- Absolutely! If you like a sweet glaze, mix some barbecue sauce or honey with your broth and brush it over the pork in the last hour of cooking.
Can I cut the recipe in half?
- Yes, if you have a smaller roast, just adjust the cooking time accordingly, and check doneness with an internal thermometer earlier.
What if I can’t find fresh herbs?
- Dried herbs can be used in a pinch; use one-third the amount, as dried herbs are more concentrated than fresh.
Is this recipe spicy?
- The recipe itself is not spicy, but you can add crushed red pepper flakes or hot sauce if you prefer some heat!
Can I use a slow cooker for this recipe?
- Yes! After searing in a hot skillet, you can place the pork in a slow cooker, adding onions and broth to cook on low for 8-10 hours.
What are some of your favorite sides to serve with this roast?
- I love serving it with hearty sides like coleslaw, roasted Brussels sprouts, or a tangy apple salad to balance the richness of the pork.
Can the leftovers be used in other dishes?
- Absolutely! Shred the leftover pork and use it for tacos, sandwiches, or even a savory breakfast hash with eggs and potatoes.
Conclusion
This Pork Shoulder Roast recipe isn’t just about satisfying hunger; it’s about creating unforgettable moments with those you love. Each bite brings nostalgia and joy, reminding us of shared meals and laughter. I encourage you to give this recipe a go and create your own memories around the table. Have you tried this recipe? I’d love to hear your thoughts—feel free to drop a comment below! And be sure to check out more of my cozy recipes that celebrate love and togetherness, right here on the blog. Happy cooking!

Pork Shoulder Roast
Ingredients
Method
- In a small bowl, combine 1 tablespoon Kosher salt, 1 tablespoon brown sugar, ½ teaspoon ground black pepper, and 1 teaspoon minced fresh herbs.
- Rub the mixture all over the pork on all sides, ensuring an even coating. Place on a baking pan, cover, and refrigerate overnight.
- The next day, preheat your oven to 425°F.
- Remove the pork from the fridge and let it sit on the counter for 30 minutes to come closer to room temperature.
- Discard any juices that have pooled at the bottom.
- Pat dry the pork with paper towels, drizzle a few tablespoons of olive oil, and season generously with ground black pepper.
- Roast uncovered for about 20 minutes to create a beautiful crust on the outer layer.
- In a medium bowl, mix 6 minced garlic cloves, ¼ cup olive oil, ¼ teaspoon salt, and ½ teaspoon black pepper. Set aside as the flavors meld.
- After the initial roasting, remove the pork from the oven and reduce the temperature to 300°F.
- Smother the pork shoulder with the garlic herb rub.
- Place the onion slices around the pork, alongside the remaining fresh herb sprigs.
- Add about ½ cup of chicken broth around the pan to prevent burning.
- Return the pork to the oven and roast it uncovered at 300°F for another 2.5 to 3 hours.
- The roast is done when its internal temperature reaches 190-200°F. If some parts are browning too quickly, tent them with foil.
- Once done, take the pork out and let it rest for about 15 minutes before slicing.
- This allows the juices to redistribute, making it even juicier.