Table of Contents
Table of Contents
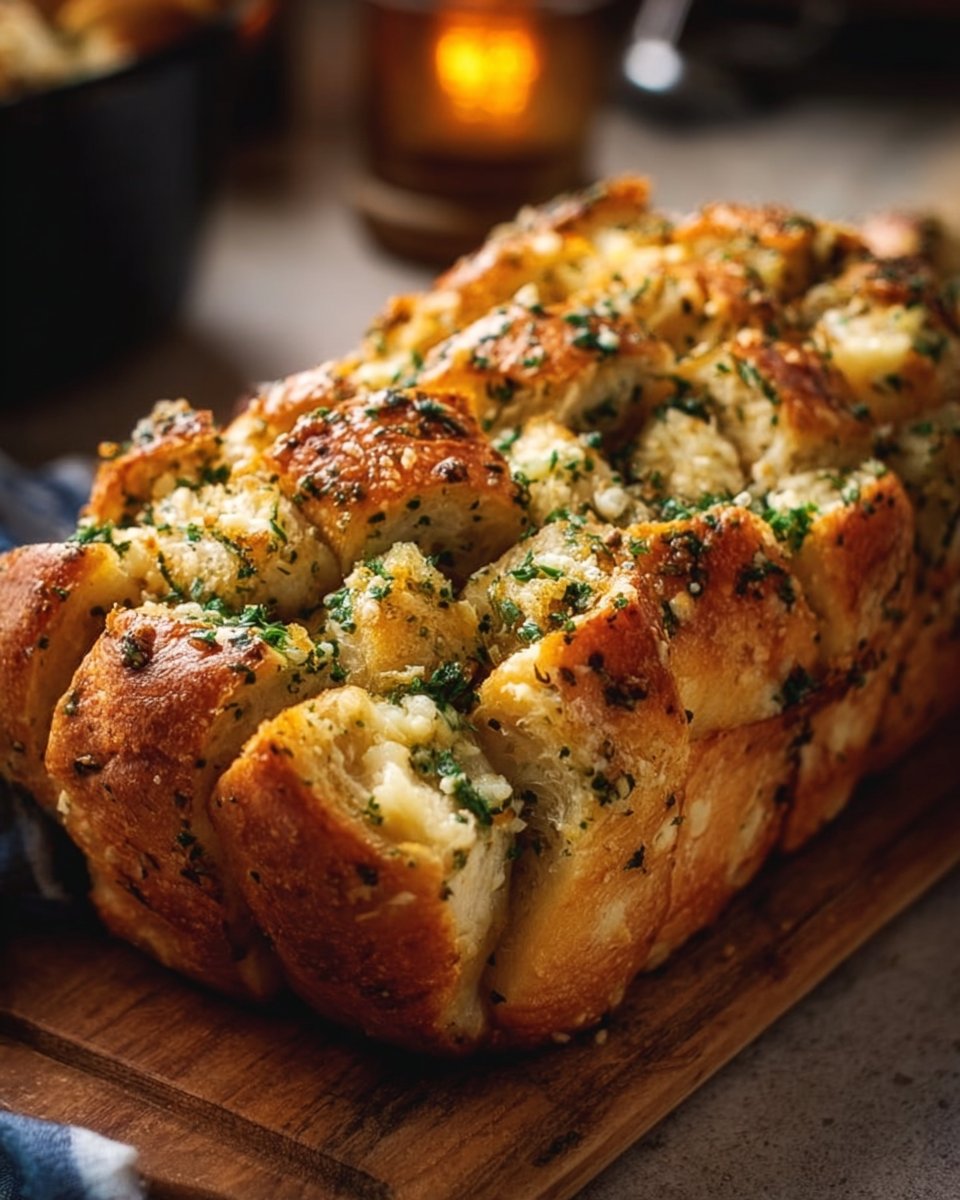
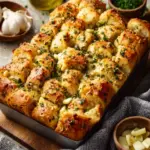
Picture this: it’s a cozy Friday night, the aroma of warm, garlicky butter wafting through the house, drawing family members to the kitchen like a moth to a flame. That’s the magic of Pull Apart Garlic Bread—an ultimate crowd-pleaser that turns any meal into a special occasion. There’s something undeniably delightful about tearing apart a loaf of bread, each pull revealing the gooey, cheesy goodness hidden within. For me, this dish is not just food; it’s a memory-laden comfort that harks back to family gatherings, laughter, and the simple joy of sharing a meal.
What makes this Pull Apart Garlic Bread stand out from others? Well, it’s all in the details. The luscious butter infused with freshly minced garlic and vibrant parsley cloaks the bread, mingling perfectly with melty mozzarella. Unlike the store-bought versions that can be too greasy or bland, my recipe prioritizes quality ingredients, allowing each flavor to shine through. Plus, it’s straightforward enough to encourage even novice bakers to give it a whirl!
In this post, I’ll guide you step-by-step on how to recreate this mouthwatering treat, sharing tips and tricks I’ve learned along the way. Trust me; once you pull this heavenly creation out of your oven, you’ll be the star of the show!
What Are Pull Apart Garlic Bread?
Pull Apart Garlic Bread is a delightful twist on the traditional loaf, meant for easy sharing and enjoyment. Originating from Italian cuisine, pull-apart bread is typically made using soft dough that’s often enriched with butter and garlic. The best part? Each bite offers a heavenly combination of crispy crust and soft, cheesy interior that just melts in your mouth.
The unique element of Pull Apart Garlic Bread lies in its preparation: cut into squares but not all the way through, allowing you to break off chunks without the need for utensils. It’s perfect for entertaining, family dinners, or just cozy nights in. Whether you’re serving it as an appetizer or as a side to soups and pastas, this dish brings warmth and comfort to any table.
Why You’ll Love This Recipe
Taste & Texture: The golden crust is perfectly crispy, while the inside remains irresistibly soft, infused with a rich garlic and herb flavor. Plus, let’s not forget the melty goodness of mozzarella oozing between those warm bites. Talk about indulgence!
Cost-Effective: Why spend money on store-bought options when you can whip up a batch for a fraction of the cost? With just a handful of ingredients that you might already have in your pantry, you can create something truly gourmet.
Customization: One of the best parts about this recipe is that it’s incredibly versatile. You can adapt it to your tastes—add in some spicy jalapeños for a kick, use different herbs like basil or thyme, or swap out the mozzarella for a sharp cheddar.
Quick & Easy: It takes just about 30 minutes of your time from start to finish (including baking time!). Plus, if you’ve got kids, they can help with the assembly, making it a fun family activity.
Impressive Presentation: When you pull this bread from the oven, the melted cheese and golden brown crust will win over anyone’s heart (and stomach). Great for impressing guests during gatherings without breaking a sweat!
Ingredients Section
- 1 loaf of bread: Go for a rich brioche or a rustic French loaf for the best results. They both offer a tender crumb and absorb all that delicious garlic butter.
- 1/2 cup unsalted butter, melted: Always use unsalted butter so you can control the saltiness—in my experience, the flavor balance is key!
- 4 cloves garlic, minced: Freshly minced garlic packs a punch, but if you’re in a pinch, feel free to use pre-minced garlic (though fresh is always better).
- 1/4 cup fresh parsley, chopped: Fresh herbs elevate the dish; dried parsley in a pinch can work, but the flavor won’t be as vibrant.
- 1 cup mozzarella cheese, shredded: Use high-quality whole milk mozzarella for the best melt. I love the brands BelGioioso or Sargento.
- Salt and pepper to taste: Always season well; it makes a noticeable difference.

Prep Notes: Ensure your butter is at room temperature before mixing with the other ingredients. This helps achieve an even distribution throughout the loaf.
Step-by-Step Instructions
Preheat your oven: Set it to 375°F (190°C). This is the perfect temperature to get that golden crust without burning the edges.
Mix the garlic butter: In a bowl, combine the melted butter, minced garlic, chopped parsley, salt, and pepper. You want a fragrant mixture that will coat the bread beautifully.
Prepare the bread: Carefully cut your loaf into squares, making sure to stop just short of cutting all the way through. Think of it as a grid pattern.
Add the deliciousness: Drizzle some of the garlic butter mixture between the cuts and generously on top of the bread, ensuring each section gets that marvelous flavor.
Stuff it with cheese: Next, take handfuls of your shredded mozzarella and stuff it into the cuts of the bread. This is the part where you can really get creative!
Bake the bread: Wrap the loaf in aluminum foil and bake for 15-20 minutes. This will warm up the bread and melt the cheese without browning it too early.
Crisp the crust: For that golden exterior, unwrap the bread and bake for an additional 5-10 minutes. Just watch it closely so it doesn’t over-bake!
Serve warm: Once it’s out of the oven, let the bread cool for a minute. Then, serve immediately—trust me, it’s best enjoyed fresh!
Chef’s Tips:
- Don’t rush the cooling! Letting the bread sit for even a few minutes helps each piece hold its shape when pulled apart.
- If you’ve stuffed it too full, don’t worry! Just enjoy the cheesy spillover.
Expert Tips & Tricks
Storage Recommendations: Store any leftovers in an airtight container at room temperature for up to 2 days. After that, pop it in the fridge for another 2-3 days. You may lose a bit of that crusty texture.
Make-Ahead Instructions: Prepare the garlic butter mixture and cut the bread ahead of time. Keep the bread covered in the fridge and bake it right before serving for fresh, hot pull-apart goodness.
Common Problems: If your cheese isn’t melting, ensure you’re using a good quality mozzarella and that it’s been adequately shredded. I’ve personally found using block cheese and shredding it yourself yields the best results.
Serving Suggestions
Serve your Pull Apart Garlic Bread warm alongside a hearty pasta dish, like spaghetti with marinara, or pair it with a fresh garden salad. For presentation, place the bread on an elegant wooden board with a sprig of fresh parsley for a pop of color. This dish is perfect for casual family dinners or more elaborate gatherings, showcasing your flair for hospitality!
Variations & Substitutions
Flavor Combinations: For a twist, try adding sautéed spinach or caramelized onions. You could even turn your Pull Apart into a pizza version by using marinara sauce and pepperoni instead of garlic and herbs.
Dietary Restrictions: Make it gluten-free by switching to a gluten-free bread option. For dairy-free diets, use vegan butter and cheese alternatives, like cashew cheese.
Seasonal Variations: Come fall, consider incorporating some roasted pumpkin or sage for a festive touch. Around the holidays, a sprinkle of rosemary adds a wonderfully aromatic profile.
Nutrition & Storage Info
- Prep Time: 10 minutes
- Cook Time: 25-30 minutes
- Total Time: 40 minutes
- Yield: Serves 4-6
- Estimated Calories: Approximately 300 calories per serving (based on 6 servings)
- Storage Instructions: At room temperature for 2 days, in the fridge for 3-4 days, or freeze for maximum freshness up to 2 months.
FAQ Section
Can I use garlic powder instead of fresh garlic?
- Yes, but for the best flavor, stick to fresh garlic. If using garlic powder, about 1 teaspoon should suffice.
What type of bread works best?
- Brioche and French bread are both fantastic options. Just ensure it’s soft and has a good crust.
How can I make it spicier?
- Mix in some red pepper flakes with the garlic butter to add a kick!
Can I prepare this in advance?
- Absolutely! Cut the bread and mix the butter beforehand; just bake it when you’re ready to serve.
Can I freeze it?
- Yes! Once baked, let it cool completely, wrap tightly in foil, then freeze. Reheat in the oven for the best results.
What’s the best way to serve it?
- Serve hot with a side of marinara sauce for dipping – it’s a crowd favorite!
Can I substitute other cheeses?
- Yes! Feel free to experiment with cheddar, gouda, or even feta for a tangy twist.
Why is my cheese not melting?
- Ensure you’re using high-quality cheese and shredding it yourself (pre-shredded cheese can have anti-caking agents that affect melting).
Can I add toppings?
- Yes! Consider adding toppings like chopped olives, sun-dried tomatoes, or cooked sausage for extra flavor.
What should I do if the bread is too hard?
- If the outside gets hard, wrap it in foil and bake it briefly to soften the crust.
Conclusion
This Pull Apart Garlic Bread is more than just a delicious recipe; it’s an invitation to come together, share stories, and create lasting memories. It embodies comfort and the love of good food, making it truly special. I can’t wait for you to try it—I promise you won’t find yourself disappointed. If you do, let me know in the comments below!
And if you’re intrigued by this recipe, check out my other comforting recipes on the blog, like my creamy tomato basil soup or cheesy spinach dip—perfect pairings for your garlic bread!
Happy baking!
Pull Apart Garlic Bread
Ingredients
Method
- Preheat your oven to 375°F (190°C).
- In a bowl, combine the melted butter, minced garlic, chopped parsley, salt, and pepper.
- Carefully cut your loaf into squares, stopping just short of cutting all the way through.
- Drizzle some of the garlic butter mixture between the cuts and generously on top of the bread.
- Stuff the cuts of the bread with the shredded mozzarella.
- Wrap the loaf in aluminum foil and bake for 15-20 minutes.
- Unwrap the bread and bake for an additional 5-10 minutes until golden.
- Let the bread cool for a minute before serving.