Sweet Indulgence: Homemade Sugar Raspberry Danish Buns Recipe
There’s something magical about stepping into a bakery on a crisp Saturday morning, the air thick with the warm, sweet scents of freshly baked goods. As a child, I eagerly awaited the glorious moment my mother would bring home a box of delicious Sugar Raspberry Danish Buns, nestled among croissants and éclairs. The moment I sank my teeth into the flaky pastry, bursting with luscious raspberry filling, it ignited a comfort deep within—evoking family gatherings and celebrations of homemade goodness.
Today, I want to share my take on these delightful pastries that’ll whisk you back to those blissful moments, but with a twist that sets this recipe apart from others. Instead of opting for a store-bought version laden with preservatives and artificial flavorings, we’ll create a homemade batch that’s not only fresher but also filled with love and joy. This recipe showcases buttery dough enriched with vibrant raspberry filling, making every bite a heavenly experience.
Join me in diving into the world of these Sugar Raspberry Danish Buns! You’ll learn how to master the art of pastry making while creating treasured memories that you can pass down through generations. Let’s get started on a delicious adventure that your loved ones will thank you for!
What Are Sugar Raspberry Danish Buns?
Originating from Denmark, Danish pastries have evolved over the years, weaving their way into the hearts and kitchens of bakers across the globe. These delightful creations blend buttery, flaky pastry with divine fillings – making them a staple in Scandinavian baking.
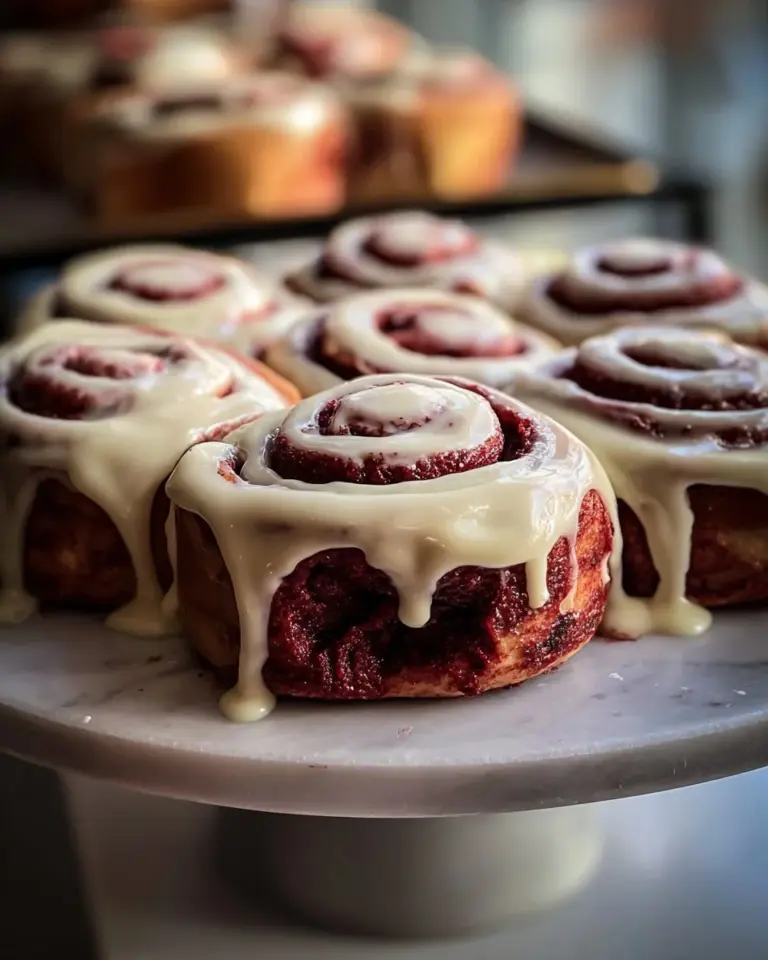
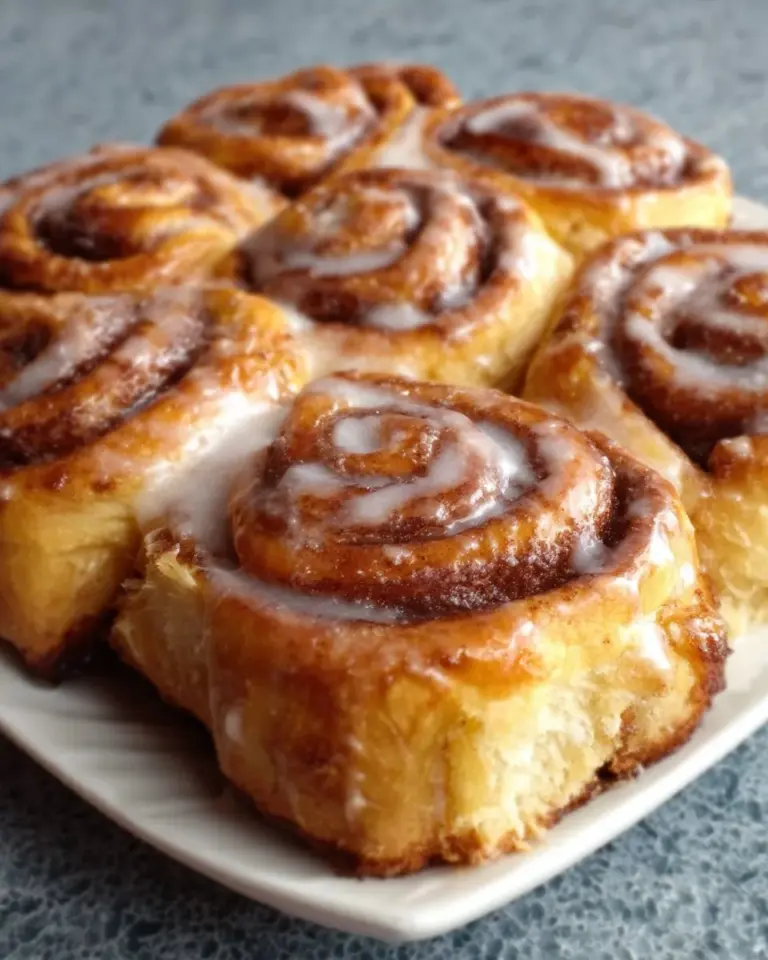
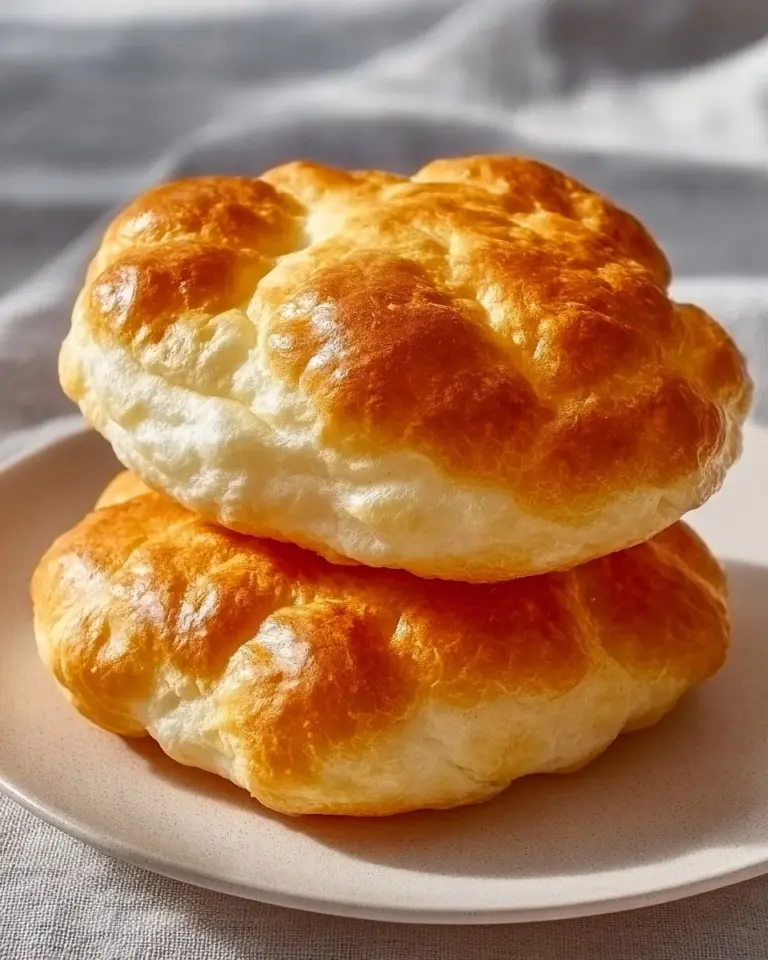
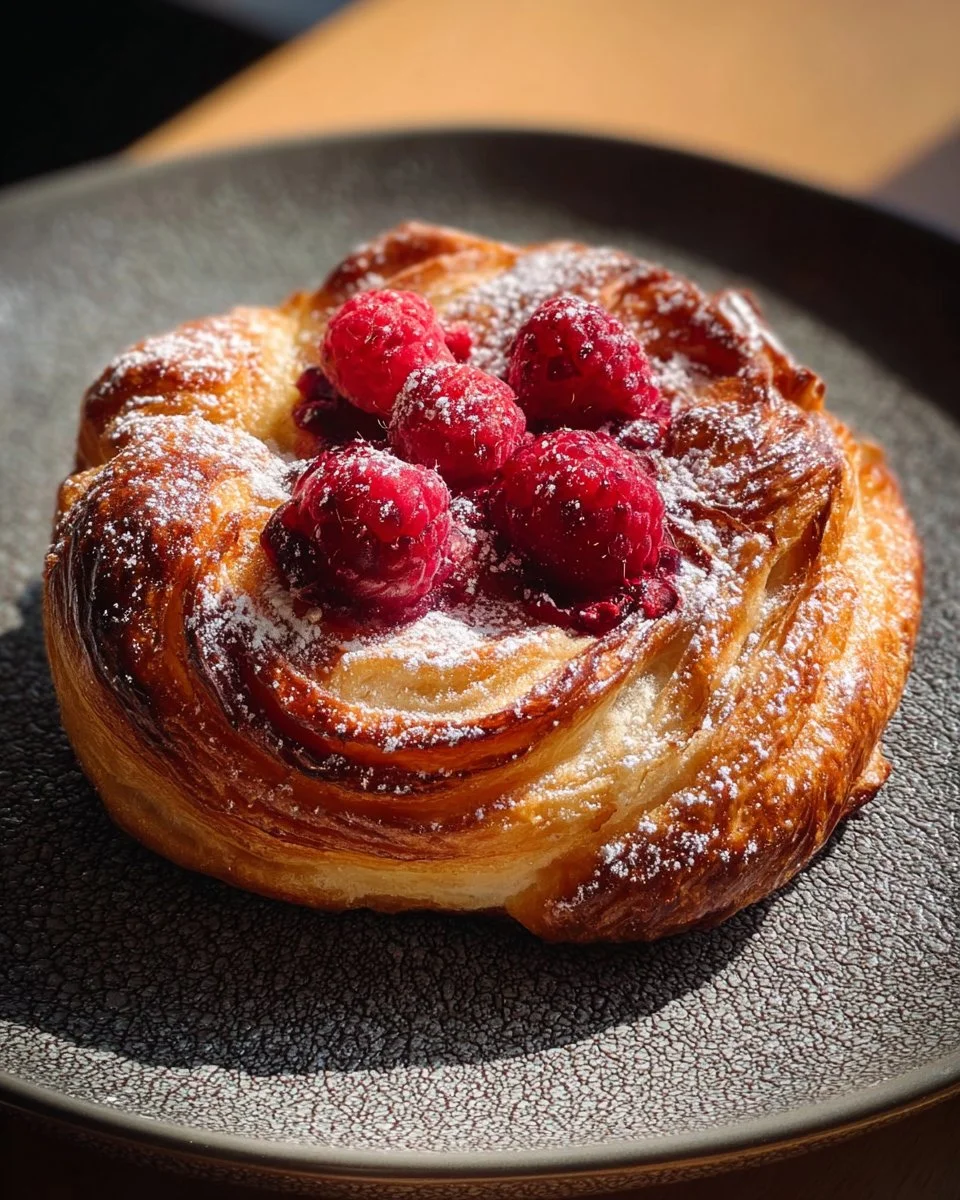
The magic of the Sugar Raspberry Danish Bun lies in its harmonious balance of textures and flavors. The buttery pastry creates a tender, flaky exterior that gives way to a sweet raspberry filling with a hint of tartness, all finished with a drizzle of creamy vanilla glaze that elevates each bite.
There’s no right or wrong time to enjoy these beauties; they’re the perfect breakfast treat, afternoon pick-me-up, or even a delightful dessert after dinner. Whenever you choose to make them, one thing is for sure: these buns will become your new go-to recipe for comfort and joy!
Why You’ll Love This Recipe
Freshness Over Store-Bought: Let’s be real—store-bought pastries often lack the depth of flavor and freshness that only homemade can deliver. With this recipe, you’ll bake up a batch that tastes like it came straight from a charming European boulangerie.
Cost-Effective: Imagine indulging in gourmet pastries for a fraction of the cost! Ingredients like fresh raspberries, which you might already have on hand, allow you to whip up these delightful buns without breaking the bank.
Customization Pros: The beauty of this recipe is that you can easily adapt it to suit your preferences. Want to try strawberries or peaches? Go for it! Consider adding a dash of almond extract or even chocolate chips to your raspberry filling—let your creativity flow.
Simplicity at Its Best: Don’t be intimidated! While the process may seem daunting, I promise it’s simpler than you think. And, once you get the hang of it, you’ll feel like a pro baker! Plus, the soothing rhythm of kneading the dough is almost therapeutic.
Time Well Spent: While there’s a bit of waiting involved for the dough to rise, the active time is minimal. In about two hours, you’ll have a batch of golden, warm Sugar Raspberry Danish Buns ready to share (or keep all to yourself, no judgement here!).
Ingredients

For the Dough:
- 2 1/4 teaspoons active dry yeast
- 1 cup warm milk (110°F/43°C; use whole milk for richness)
- 3 tablespoons sugar (use organic for a cleaner taste)
- 1 teaspoon salt
- 3 cups all-purpose flour (for best results, use King Arthur)
- 2 large eggs (room temperature)
- 1/2 cup unsalted butter, softened (European butter recommended for better flavor)
For the Raspberry Filling:
- 1 cup fresh raspberries (you can substitute with frozen, but thaw before using)
- 1/4 cup sugar
- 2 tablespoons cornstarch
- 1 teaspoon lemon juice (freshly squeezed enhances flavor)
For the Glaze:
- 1 cup powdered sugar
- 2 tablespoons milk (add more for a thinner glaze)
- 1/2 teaspoon vanilla extract
Notes on Ingredients:
- Freshness Matters: For the best taste, opt for fresh raspberries when in season. If you can’t find them, frozen ones will still work beautifully.
- Eggs: Ensure your eggs are at room temperature before using them, as this helps create a smoother dough.
- Butter: A key ingredient for that lovely flaky texture; let it come to room temperature before use.
Step-by-Step Instructions
Activate the Yeast: In a small bowl, combine 2 1/4 teaspoons of active dry yeast with 1 cup of warm milk. Let it stand for about 5 minutes until foamy, which indicates your yeast is alive and ready to work its magic!
Make the Dough: In a large bowl, whisk together 3 cups of all-purpose flour, 3 tablespoons of sugar, and 1 teaspoon of salt. Add in the 2 large eggs, 1/2 cup of softened butter, and the yeast mixture. Stir until a soft dough forms—the dough will be slightly sticky but manageable.
Knead the Dough: Turn the dough onto a lightly floured surface and knead for about 8 minutes until it becomes smooth and elastic. If it’s too sticky, lightly dust with flour; be careful not to over-flour.
First Rise: Place your kneaded dough in a lightly oiled bowl and cover it with a clean kitchen towel. Let it rise in a warm place until doubled in size, about 1 hour. (You can turn on your oven for a minute, then turn it off and place the bowl inside for a cozy rise.)
Prepare the Raspberry Filling: While the dough rises, combine 1 cup of fresh raspberries, 1/4 cup of sugar, 2 tablespoons of cornstarch, and 1 teaspoon of lemon juice in a saucepan over medium heat. Cook while stirring until the mixture thickens—around 5 to 7 minutes. Once thick, let it cool completely.
Shape the Buns: Punch down the risen dough to release air. Roll it out on a lightly floured surface into a 12×18 inch rectangle. Cut the dough into 12 equal squares, about 4×4 inches.
Fill and Pinch: Place a tablespoon of the cooled raspberry filling in the center of each square. Fold the corners towards the center and pinch to seal, creating beautiful little pockets. Arrange the buns seam-side down on a baking sheet lined with parchment paper.
Second Rise: Allow the buns to rise again for about 20 minutes, while you preheat your oven to 375°F (190°C).
Bake: Bake for 15 to 18 minutes, or until the buns are golden brown. The aroma that fills your kitchen will be heavenly, trust me!
Glaze: In a small bowl, whisk together 1 cup of powdered sugar, 2 tablespoons of milk, and 1/2 teaspoon of vanilla extract. Once the buns have cooled, drizzle this sweet mixture over them for an extra touch of bliss.
Chef’s Tips:
- Timing Is Key: Pay attention to the timing for your rises. Letting your dough rise until perfectly doubled is crucial for the fluffiest buns.
- Avoiding Mistakes: Here’s a common one: Don’t add too much flour while kneading! It’s best if the dough is slightly tacky, as it will result in lighter buns.
- Dough Consistency: If your dough feels too dry, introduce a tablespoon of milk at a time until it reaches the right elasticity.
Expert Tips & Tricks
Storage Recommendations: These buns are best enjoyed fresh, but they can be stored in an airtight container at room temperature for up to 2 days. They can also be refrigerated for up to a week or frozen for up to a month.
Make-Ahead Instructions: Prepare the dough in advance and let it rise in the refrigerator overnight for up to 12 hours. In the morning, let it come to room temperature before punching down and filling.
Common Problems: If your buns don’t rise well, check your yeast! Ensure it’s fresh and active. If your dough is too sticky, add flour gradually, a spoonful at a time, during kneading.
Serving Suggestions
Nothing pairs better with these delicious buns than a steaming cup of coffee or tea. You can also serve them with a side of whipped cream or a scoop of vanilla ice cream if you want to take things up a notch. As for presentation, arrange the buns on a lovely wooden board, dusted with powdered sugar, and sprinkled with fresh mint leaves for an eye-popping display! They are perfect for brunch gatherings or as a sweet treat for holidays.
Variations & Substitutions
Different Flavor Combinations: Swap out the raspberries for blueberries, blackberries, or even cherries for a delightful twist. And don’t hesitate to play around with spices—adding cinnamon to your glaze can add a warm depth of flavor.
Dietary Restrictions: If you’re looking for gluten-free options, try using a 1:1 gluten-free flour blend. For a dairy-free version, substitute almond milk and coconut oil for the milk and butter.
Seasonal Variations: In the fall, consider using spiced apple filling instead of raspberries, adding a whole new layer of seasonal goodness.
Nutrition & Storage Info
- Prep Time: 30 minutes
- Cook Time: 15-18 minutes
- Total Time: 2 hours (including rising time)
- Yield: 12 servings
- Estimated Calories: Approximately 210 calories per serving
- Storage Instructions: Store at room temperature for up to 2 days, or refrigerate for a week. Freeze for up to a month.
FAQ Section
Can I make these in advance?
Yes! You can prepare the dough a day ahead and let it rise in the refrigerator overnight. Shape and bake the next day!What if my dough doesn’t rise?
Ensure your yeast is fresh and active. A warm environment (about 75°F-80°F) will help encourage rising.Can I freeze these buns?
Absolutely! After baking, let them cool completely, then freeze in an airtight container. Reheat in the oven or microwave.What are other filling options?
You can use other fruits like cherries, apples, or even a sweet cream cheese filling.Can I use active dry yeast instead of instant yeast?
Yes, reduce the amount to 1 3/4 teaspoons and proof it in warm milk before using.How can I make the dough richer?
Incorporate an extra yolk or substitute some of the milk for heavy cream for more richness.What should I do if my buns are dense?
Ensure you knead the dough enough and let it rise completely; dense buns can result if they aren’t properly aerated.Can I use almond or soy milk?
Yes! Both can be great dairy-free substitutes that won’t affect the flavor much.What can I do with leftover raspberry filling?
Drizzle it over pancakes or yogurt, or even mix it into a smoothie!Can I add nuts to the filling?
Yes! Chopped almonds or walnuts can add a lovely crunch.
Conclusion
These Sugar Raspberry Danish Buns are not just a recipe; they’re a journey back to treasured family moments filled with laughter and warmth. The delightful combination of flaky pastry and sweet-tart raspberry flavor is bound to become a favorite in your home too. I encourage you to try this recipe for a soft, buttery snack that’ll make everyone’s day brighter.
Please share your thoughts and feedback in the comments—I love hearing from you! And don’t forget to check out related recipes on the blog for more delicious baking adventures.

Sugar Raspberry Danish Buns
Ingredients
Method
- Activate the Yeast: In a small bowl, combine 2 1/4 teaspoons of active dry yeast with 1 cup of warm milk. Let it stand for about 5 minutes until foamy.
- Make the Dough: In a large bowl, whisk together 3 cups of all-purpose flour, 3 tablespoons of sugar, and 1 teaspoon of salt. Add in 2 large eggs and 1/2 cup of softened butter, along with the yeast mixture. Stir until a soft dough forms.
- Knead the Dough: Turn the dough onto a lightly floured surface and knead for about 8 minutes until it becomes smooth and elastic.
- First Rise: Place the kneaded dough in a lightly oiled bowl and cover it. Let it rise in a warm place until doubled in size, about 1 hour.
- Prepare the Raspberry Filling: Combine 1 cup of raspberries, 1/4 cup of sugar, 2 tablespoons of cornstarch, and 1 teaspoon of lemon juice in a saucepan over medium heat. Cook while stirring until thickened, about 5 to 7 minutes. Let cool completely.
- Shape the Buns: Roll the dough out into a 12x18 inch rectangle and cut into 12 equal squares.
- Fill and Pinch: Place a tablespoon of the cooled filling in the center of each square. Fold corners towards the center and pinch to seal.
- Second Rise: Allow the buns to rise again for about 20 minutes while preheating the oven to 375°F (190°C).
- Bake: Bake for 15 to 18 minutes, until golden brown.
- Glaze: Whisk together the glaze ingredients and drizzle over the cooled buns.