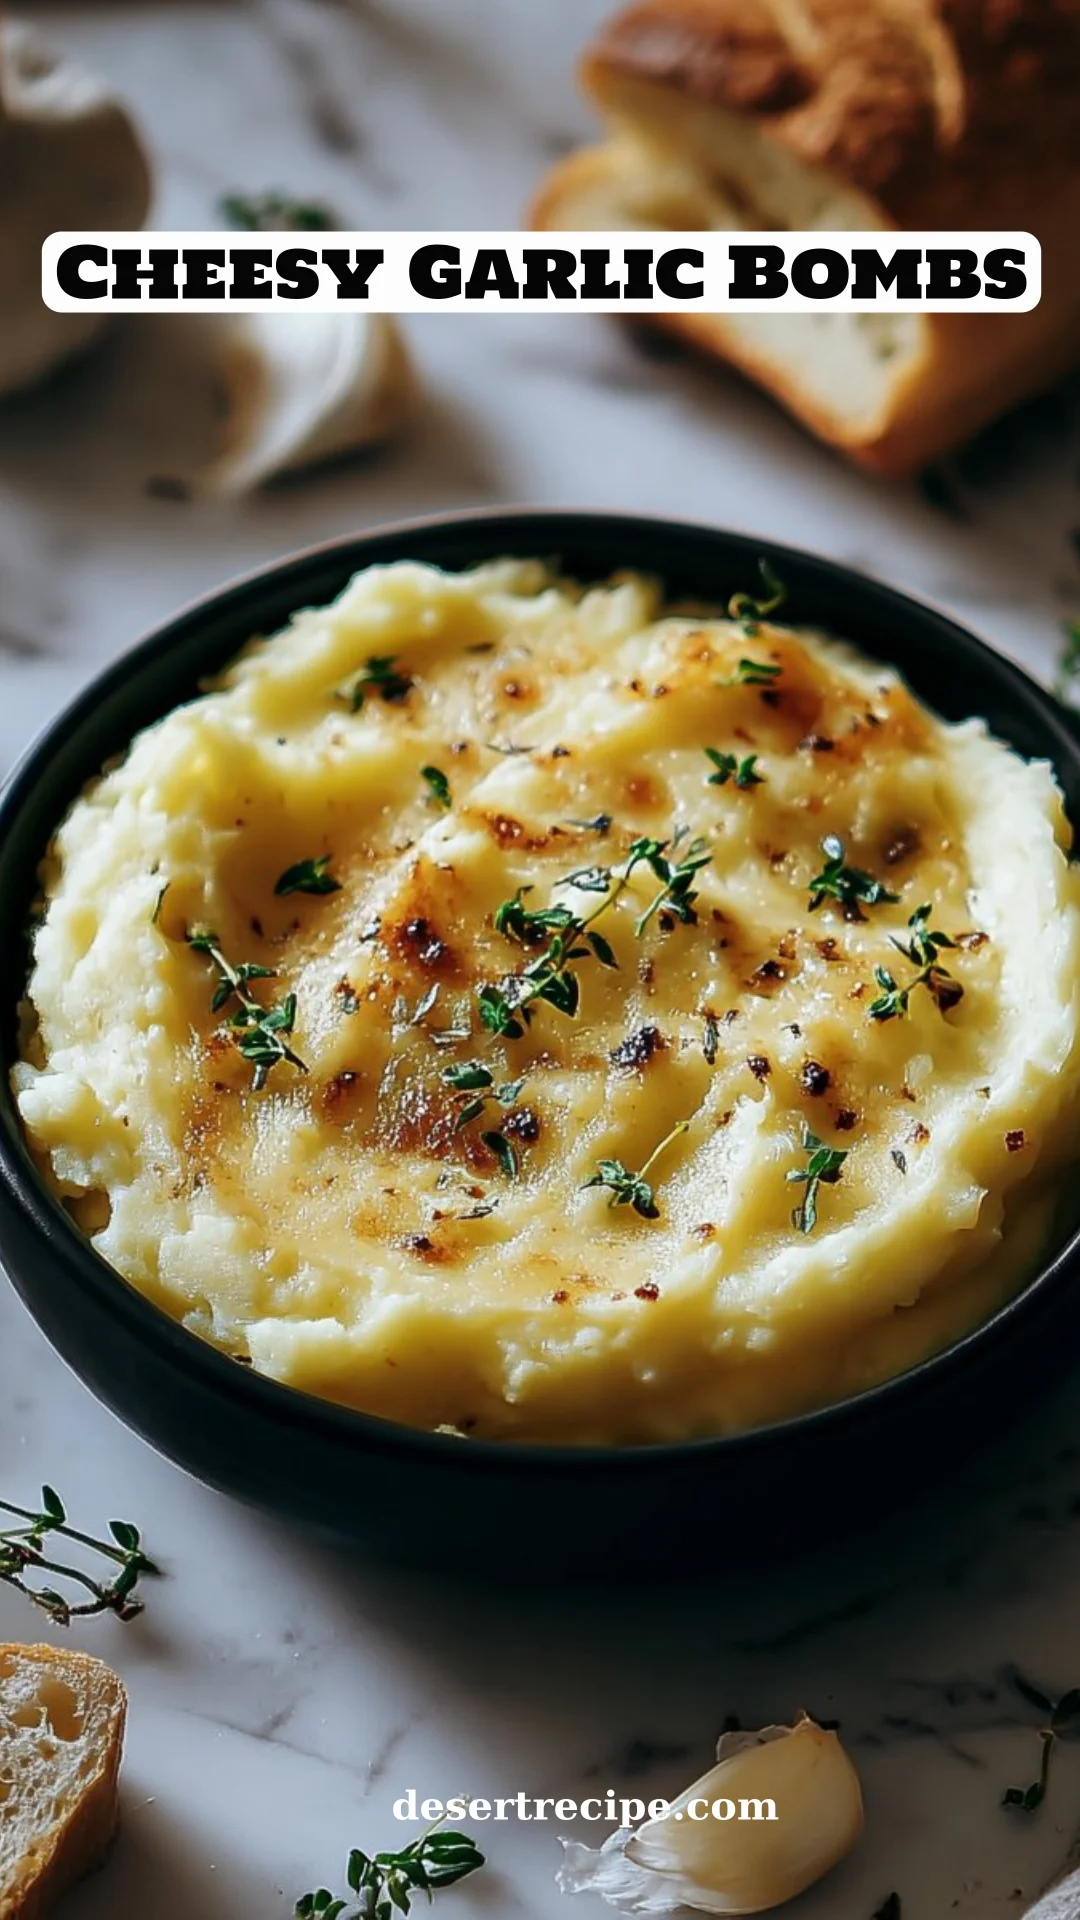
Irresistible Cheesy Garlic Bombs: The Ultimate Comfort Food Delight
There’s something magical about pulling warm, gooey bites of cheesy goodness from the oven; it feels like a hug for your taste buds. I remember the first time I made Cheesy Garlic Bombs—mistakes and all—while my kids excitedly hovered around the kitchen, eagerly waiting for those melty spheres to come out of the oven. The aroma of garlic and cheese wafting through the house seemed to transport us to a cozy Italian bistro right in our humble kitchen.
These Cheesy Garlic Bombs are absolutely special; they bring the perfect balance of a crunchy exterior and a melty, cheesy center—all while being ridiculously easy to make! Unlike many other recipes that require hours of preparation or hard-to-find ingredients, this one is straightforward and accessible. You don’t have to be a master chef to impress your family or friends with this delightful dish. With every bite, you’ll create memories that will last a lifetime, and your loved ones will ask for seconds.
In this post, I’ll share everything you need to know to whip up your own batch of these delectable Cheesy Garlic Bombs, turning your kitchen into a fragrant haven. Let’s dive into the world of cheesy comfort food together!
What Are Cheesy Garlic Bombs?
Cheesy Garlic Bombs are essentially soft biscuit dough balls filled with a delightful mixture of cheeses and garlic, baked to golden perfection. Originating from the combination of Italian flavors and American comfort foods, these little treats are the best of both worlds. The dough is light and fluffy, encasing a melty blend of mozzarella and Parmesan that oozes out with every bite. The explosion of flavor and texture is what makes Cheesy Garlic Bombs stand out—they’re crispy on the outside and gooey on the inside, creating a delightful contrast that your taste buds will crave.
Whether it’s a game night with friends, a party appetizer, or a family movie night, these Cheesy Garlic Bombs are the ultimate bite-sized treat that will have everyone reaching for more. They are perfect for gatherings, holidays, or simply as a snack to indulge in at home while curling up with your favorite show. The best part? You can trust that they’ll always bring people together over cheesy goodness!
Why You’ll Love This Recipe
Flavor Explosion: Each bite of these Cheesy Garlic Bombs is a blend of roasted garlic and melted cheese that will have your taste buds singing. The combination of mozzarella and Parmesan brings a rich, savory flavor that hits all the right notes.
Easy to Make: Unlike other cheesy appetizers that require extensive prep or fancy techniques, this recipe is wonderfully straightforward. You’ll be amazed at how quickly you can whip these up, even on a busy weeknight.
Cost-Effective: You can make these cheesy delights for a fraction of the cost of ordering out or buying pre-made versions. Plus, you can feel good about serving them to your family, knowing every ingredient was chosen by you.
Customizable: Want to add a bit of spice? Try throwing some jalapeños or red pepper flakes in the cheese mixture! You can substitute the cheeses for your favorites, be it cheddar, gouda, or even feta. The possibilities are limitless!
Family-Friendly and Fun: Kids adore these cheesy bites, making them a surefire hit at any family gathering. They’re also a wonderful way to get young chefs involved in the kitchen—let them help flatten the dough or fill each bomb!
Simply put, serving Cheesy Garlic Bombs is going to elevate your snack game to a whole new level, and you can set your mind at ease: they’re a guaranteed crowd-pleaser!
Ingredients Section
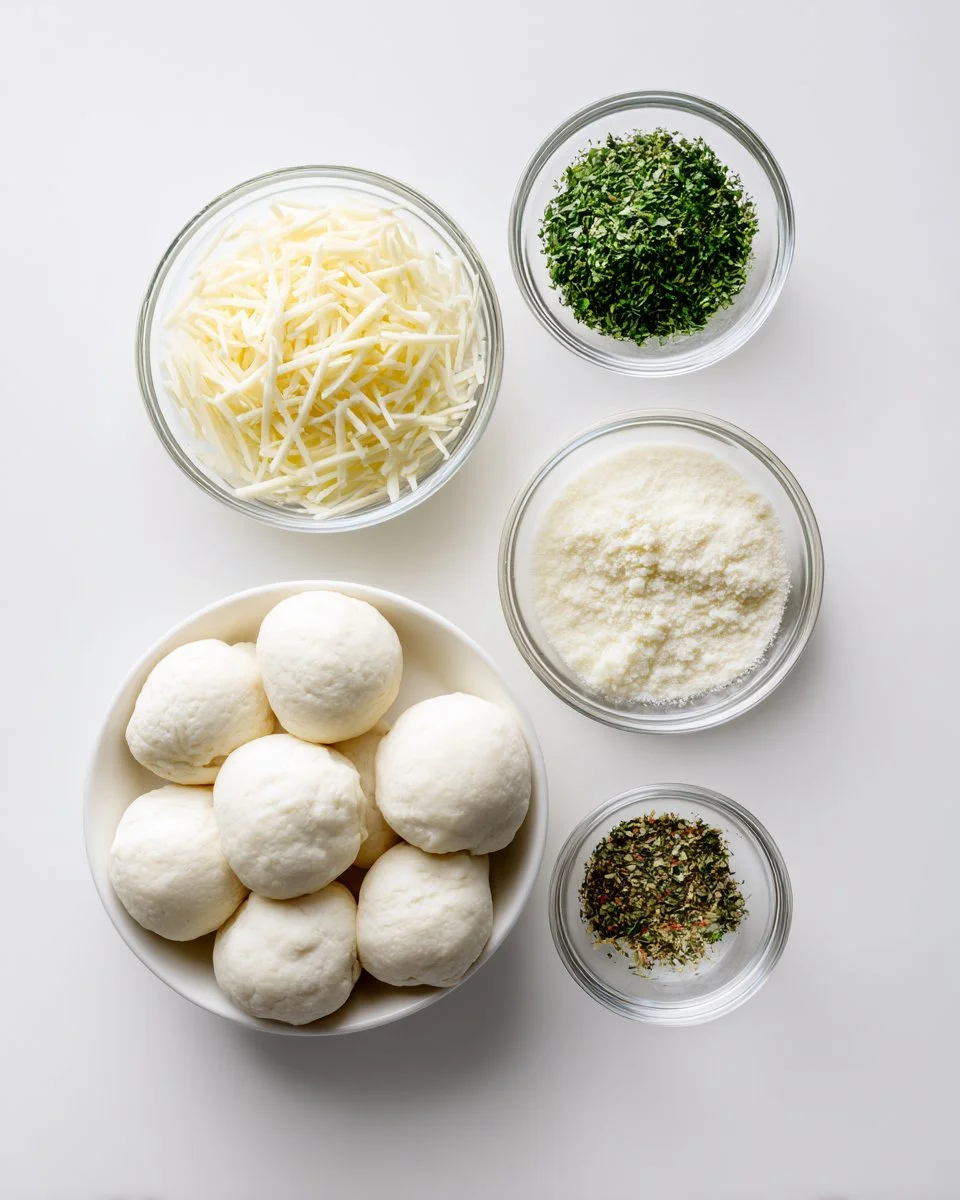
To create your Cheesy Garlic Bombs, gather up the following ingredients:
- 1 cup shredded mozzarella cheese: Opt for block mozzarella that you shred yourself for a fresher flavor and better meltability.
- 1/2 cup grated Parmesan cheese: Always go for fresh when possible, but pre-grated is fine if you’re crunched for time.
- 1/3 cup melted butter: Make sure it’s at room temperature for easier mixing.
- 1 tablespoon garlic powder: This is where the real flavor comes from—feel free to use fresh minced garlic if you prefer.
- 1 tablespoon dried parsley: This adds a touch of color and flavor; feel free to use fresh if you have it available!
- 1 can (16.3 oz) refrigerated biscuit dough: A quick and easy base that cuts down your prep time significantly.
Preparation Tips:
- For the melted butter, I like to melt it gently in the microwave. Just be sure not to get it too hot—it should be melted but not bubbling.
- Use quality ingredients for the best flavor—the fresher, the better!
Step-by-Step Instructions
Preheat the oven: Start by preheating your oven to 375°F (190°C) and lining a baking sheet with parchment paper. This simple step ensures that your Cheesy Garlic Bombs won’t stick when baking.
Prepare the cheese mixture: In a small mixing bowl, combine the shredded mozzarella cheese, grated Parmesan cheese, garlic powder, and dried parsley. This heavenly blend should be harmonious and fragrant!
Open the biscuit dough: Carefully open the can of refrigerated biscuit dough. You’ll find individual biscuits that are ready to be transformed into cheesy delights.
Flatten the biscuits: For each biscuit, take your hands or a rolling pin to flatten it out to about a 4-inch circle. This isn’t an exact science; don’t stress it if they’re not perfectly round!
Fill the dough: Place a generous spoonful of the cheese mixture in the center of each flattened biscuit. Don’t skimp here—go for that cheesy explosion!
Seal the bombs: Gently fold and pinch the edges of the dough together to encase the cheese, forming a ball shape. Ensuring they’re sealed tightly will help keep all that gooey goodness inside.
Place on the baking sheet: Set the filled dough balls seam side down on your prepared baking sheet, ensuring they’re spaced apart to allow for any puffing.
Brush with butter: With the remaining melted butter, brush each dough ball generously—this will help achieve that golden, crispy finish.
Bake: Slide your baking sheet into the preheated oven and bake for 15-20 minutes. Keep an eye on them; they should be golden brown and gorgeous!
Cool and serve: Remove from the oven and allow the Cheesy Garlic Bombs to cool slightly before serving—trust me, you’ll want to avoid cheese burns! Enjoy your warm, gooey treats that are sure to impress!
Chef’s Tip: If you want to add some extra garlic flavor, sprinkle freshly minced garlic on top before baking or mix some into the melted butter!
Expert Tips & Tricks
Storage Recommendations: If you have any leftovers (though I doubt it!), store them in an airtight container in the fridge for up to 3 days. Reheat in the oven for best results.
Make-ahead Instructions: You can prepare these Cheesy Garlic Bombs ahead of time! Assemble the bombs, cover with plastic wrap, and refrigerate for up to 24 hours before baking.
Common Mistakes to Avoid: Ensure that you really pinch those edges well—otherwise, the cheese might ooze out during baking. Also, avoid overcrowding the baking sheet; give each Bomb enough space to rise!
Flavor Boosters: If you’re feeling adventurous, try adding various spices or herbs into the cheese mixture—think Italian seasoning, red pepper flakes, or even a touch of truffle oil for a gourmet twist.
Healthier Options: Consider using whole wheat biscuit dough or adding veggies (like spinach or sun-dried tomatoes) into your cheese mix for a heartier meal.
Revive Old Leftovers: If you ever have Cheesy Garlic Bombs that have gone a little stale, pop them back in the oven for 5-10 minutes to freshen them up!
Serving Suggestions
These Cheesy Garlic Bombs are delightful solo but can be served with a variety of dip options to elevate the experience. A rich marinara or zesty garlic butter sauce pairs beautifully! For a more elegant touch, consider presenting them on a platter with fresh herbs and a side of homemade pesto. They’re fantastic as an appetizer or snack during any gathering, from cozy family dinners to lively game nights.
Variations & Substitutions
Flavor Combinations: Add in cooked and crumbled sausage or crispy bacon bits for a savory hearty bite. Or try a sweet variation using cream cheese and cinnamon sugar for a dessert twist!
Dietary Adaptations: For a gluten-free version, look for gluten-free biscuit alternatives, and for a low-carb option, consider using fathead pizza dough or cauliflower dough.
Seasonal Variations: Incorporate seasonal ingredients, such as fresh herbs in spring or pumpkin puree in fall, to create a fun twist on the classic recipe!
Nutrition & Storage Info
- Prep Time: 15 minutes
- Cook Time: 20 minutes
- Total Time: 35 minutes
- Yield: Approximately 8 Cheesy Garlic Bombs
- Estimated Calories per Serving: About 150 per bomb
- Storage Instructions: Store in an airtight container in the refrigerator for up to 3 days. Alternatively, can freeze for up to 2 months—just reheat in the oven!
FAQ Section
Can I use homemade biscuit dough?
Absolutely! Homemade dough can elevate this recipe even further. Just ensure it’s similar in texture to a refrigerated biscuit dough.Can I add vegetables to the filling?
Yes! Finely chopped spinach, mushrooms, or sun-dried tomatoes can add great flavor and nutrients.How can I make these spicy?
Add jalapeños to the cheese mixture or provide a zesty dipping sauce made with hot sauce or sriracha.What can I serve these with?
A marinara sauce, ranch dressing, or even a creamy garlic dip would complement these bombs beautifully!What’s the best way to reheat leftovers?
Reheat in the oven at 350°F (175°C) for about 10 minutes until warm. This keeps them crispy!Can I make these ahead of time?
Yes, you can assemble them the night before and bake when ready. Just allow them to come to room temperature before placing them in the oven.What if my cheese leaks out while baking?
Ensure you pinch the edges tightly closed. If you still have a leak, it may become part of the dish’s charm!Is this recipe vegetarian?
Yes, all the ingredients used here are vegetarian-friendly!Can I double this recipe?
Of course! Just ensure you use a larger baking tray or multiple trays to give them plenty of room to rise.Are these freezable?
Yes, you can freeze them after baking, just make sure they are completely cooled before wrapping and storing them in an airtight container.

Conclusion
Cheesy Garlic Bombs are not just a recipe; they’re an experience filled with nostalgia, warmth, and flavor. The joy of pulling them from the oven, watching them steam, and sharing them with loved ones is pure bliss. I encourage you to dive into making these delightful bites and enjoy the smiles they bring.
If you love cooking and exploring tasty treats, be sure to check out more recipes on my blog for fantastic options that can complement these cheesy delights. I’d love to hear your thoughts or any tweaks you made to the recipe, so drop a comment and let’s share the love of food together!

Cheesy Garlic Bombs
Ingredients
Method
- Preheat the oven to 375°F (190°C) and line a baking sheet with parchment paper.
- In a small mixing bowl, combine the shredded mozzarella cheese, grated Parmesan cheese, garlic powder, and dried parsley.
- Open the can of refrigerated biscuit dough.
- Flatten each biscuit into a 4-inch circle.
- Place a generous spoonful of the cheese mixture in the center of each flattened biscuit.
- Gently fold and pinch the edges of the dough together to encase the cheese, forming a ball shape.
- Set the filled dough balls seam side down on the prepared baking sheet.
- Brush each dough ball with the remaining melted butter.
- Bake for 15-20 minutes until golden brown.
- Remove from the oven and allow to cool slightly before serving.