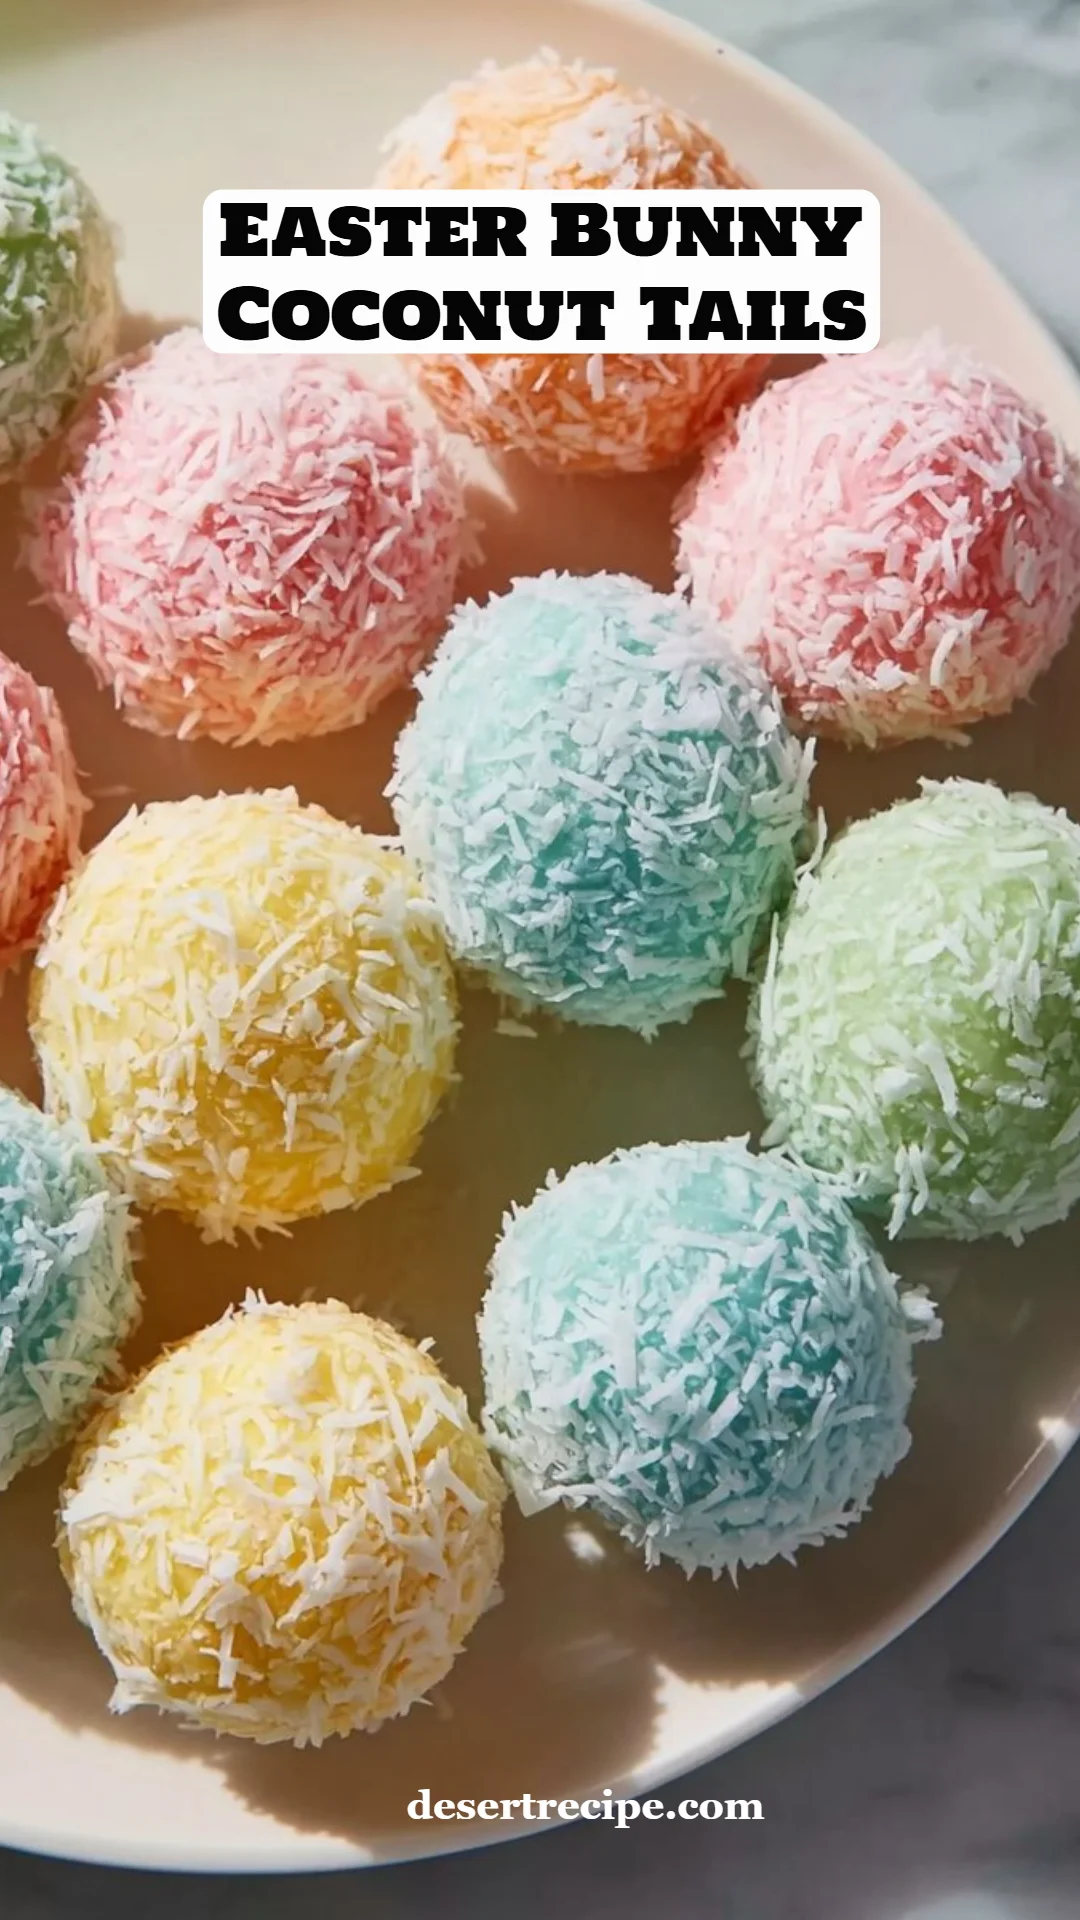
Irresistibly Cute Easter Bunny Coconut Tails: A Sweet Treat for the Holiday
There’s something magical about the arrival of Easter. Every year, as the days grow longer and flowers start to bloom, I find myself reminiscing about the joyful Easter egg hunts of my childhood. Those delightful mornings, accompanied by the tinkling sound of laughter and the scent of fresh flowers, often featured a sweet treat: the adorable Easter Bunny Coconut Tails.
These bite-sized delights hold a special place in my heart. Just imagine them — fluffy coconut balls cloaked in a sweet, pastel candy shell, resembling the fluffy tails of playful bunnies. Better than any store-bought confection, these treats are infused with love and nostalgia, bringing back cherished memories as I adapt the recipe for today’s kitchen.
What makes this recipe truly special? It’s not just the irresistibly sweet taste or the pleasing texture; it’s the connections we create while making them with family. It’s an opportunity to teach the little ones how to roll, dip, and decorate — creating masterpieces together. Through this blog, I promise you’ll learn how easy and fun it is to whip up these festive Easter Bunny Coconut Tails, filling your home with sweetness and warmth this holiday season.
What Are Easter Bunny Coconut Tails?
Easter Bunny Coconut Tails trace back to the tradition of combining festive treats with playful themes around Easter, often linking back to the inspiration of the Easter Bunny itself. As whimsical as they sound, these treats are more than just a novel idea; they encapsulate the flavors of spring with their light, fluffy texture and a smooth candy coating.
Once you take a bite, the sweetened coconut shreds offer a satisfying chewiness, balanced beautifully by the creamy sweetness of the condensed milk. The white chocolate outer layer adds a delightful richness while the pastel colors evoke the fragile beauty of spring blooms. These delightful confections are perfect for Easter celebrations, serving as both fun treats for the kids and charming additions to any dessert table.
With their bright colors and playful designs, they are perfect for family gatherings or even as a thoughtful homemade gift for friends. Why not brighten someone’s Easter with a batch of these cheerful coconut tails? After all, nothing says holiday joy quite like homemade sweets.
Why You’ll Love This Recipe
Unmatched Flavor: Homemade treats always beat out the store-bought ones. You can truly taste the freshness in these Easter Bunny Coconut Tails, with natural coconut that bursts with flavor and texture.
Affordable & Cost-Effective: Making your own sweets is not just satisfying; it’s also budget-friendly! A single batch of these little beauties would cost significantly less than a store-bought equivalent while yielding a larger quantity.
Customization Galore: Want to swap in dark chocolate instead? Or maybe add a splash of almond extract instead of vanilla? The beauty of this recipe is how easily you can change it up to match your taste preferences or dietary needs.
Family Bonding Time: This recipe is incredibly simple and perfect for getting the whole family involved. Kids love rolling the balls and helping with the dipping. It’s an ideal way to create lasting memories and traditions.
Quick and Easy: In just a few hours, you can transform simple ingredients into delightful confections. Whether you’re prepping for a last-minute gathering or just satisfying a sweet tooth, these Bunny Tails are a quick solution.
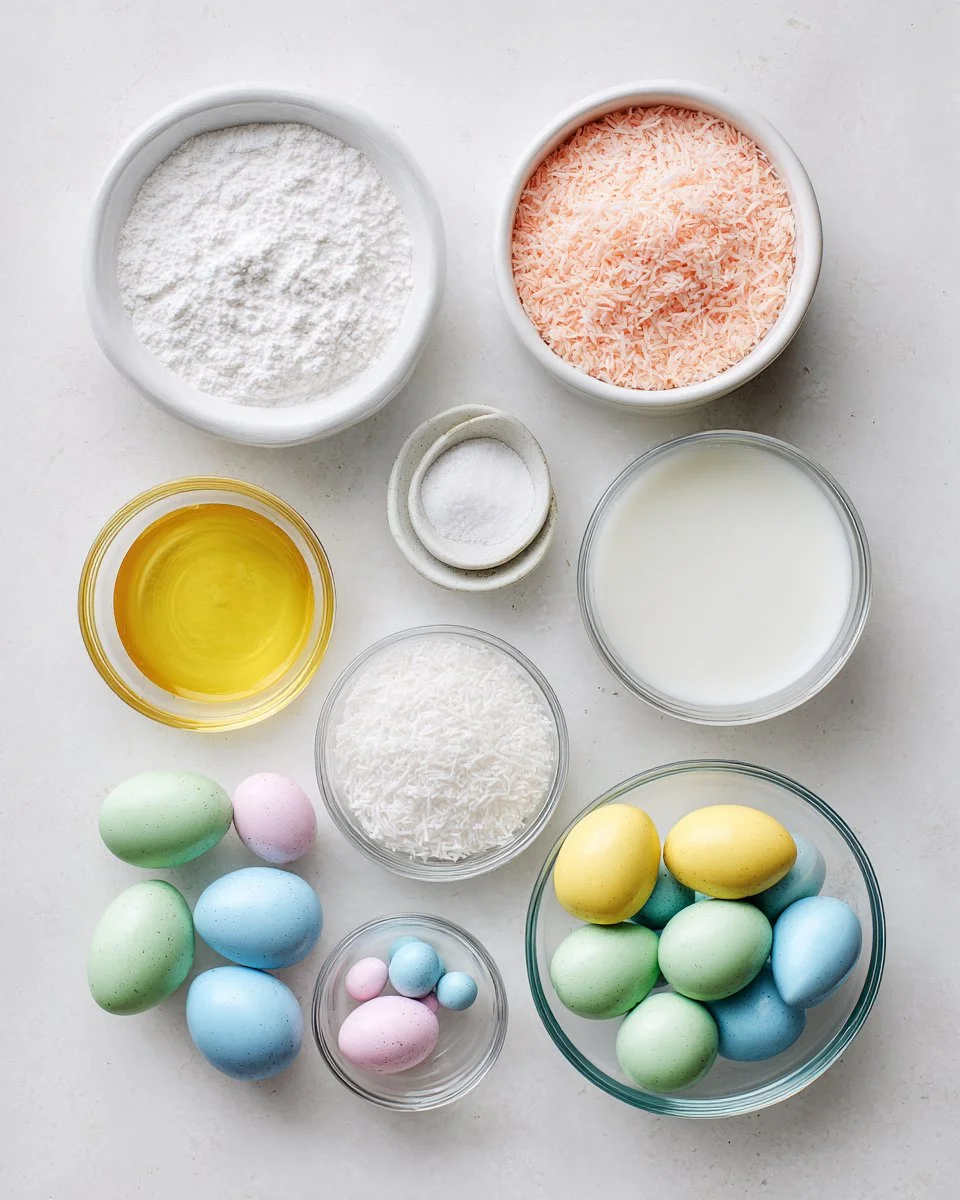
Ingredients
Before we dive into the marshmallowy goodness, let’s gather our ingredients for these adorable Easter Bunny Coconut Tails.
- 3 cups sweetened shredded coconut: Look for high-quality, finely shredded coconut for a better texture. Organic brands are often a fantastic choice!
- 1 can (14 ounces) sweetened condensed milk: It’s best to use a full-fat version for that richness; brands like Eagle Brand are family favorites!
- 1 teaspoon pure vanilla extract: Always opt for pure vanilla for a deeper, more authentic flavor.
- 1/4 teaspoon salt: A pinch of salt enhances the sweetness beautifully.
- 12 to 16 ounces white candy melts or white chocolate: Candy melts are easier to work with, but good-quality white chocolate can also be used – just ensure it’s good for melting!
- Pastel gel food coloring (pink, blue, yellow, green): Gel food coloring provides vibrant hues with a little bit; perfect for creating that cheerful Easter ambiance!
- 1 cup sweetened shredded coconut (for rolling): This will give your Bunny Tails that fluffy coating.
Prep Notes: Make sure your ingredients, especially the butter, are at room temperature. This helps the mixture bind better.
Step-by-Step Instructions
Creating your delightful Easter Bunny Coconut Tails is easier than you think! Follow these simple steps, and you’ll have your treats ready to enjoy.
Combine the Ingredients: In a large mixing bowl, blend the sweetened shredded coconut, sweetened condensed milk, vanilla extract, and salt. Stir until thick and sticky. Chef’s Tip: If your mixture feels too wet, feel free to add more coconut!
Form the Balls: Scoop the mixture into small balls, about 1 inch in diameter, and place them on a parchment-lined baking sheet. Chef’s Note: Wetting your hands slightly can make rolling easier and prevent sticking.
Chill: Cover and chill the balls in the refrigerator for 1-2 hours until they’re firm. Visual Cue: When they hold their shape, they’re ready to be coated!
Melt the Coating: Try melting the white candy melts according to package instructions. Once melted, divide them into separate bowls and add your gel food coloring to create your desired pastel shades.
Dip the Balls: Take each chilled coconut ball and dip it into the colored coating, gently tapping to remove excess. Tip: Work quickly so the chocolate doesn’t harden before you’re done!
Finish the Look: Roll each coated ball into the extra shredded coconut to mimic a fluffy bunny tail.
Allow to Set: Let your Bunny Tails sit on the parchment-lined sheet until the coating hardens. You can speed this up by placing them back in the refrigerator.
Expert Tips & Tricks
To ensure your Easter Bunny Coconut Tails turn out perfectly every time, consider the following tips:
Storage: Keep your finished Bunny Tails in an airtight container at room temperature for up to a week, or in the fridge for up to two weeks.
Make-Ahead: These treats can be made up to a week in advance, making them ideal for busy Easter preparations.
Troubleshooting: If your coating isn’t smooth, try adding a tiny bit of vegetable shortening to the melted chocolate — this will help achieve that luscious, glaze-like finish.
Flavor Varieties: Why not swap out the coconut for crushed nuts or cookie crumbs to make a different version? Get creative with your favorites!
Avoid Melting Issues: If you’re using chocolate chips instead of melts, be sure to temper your chocolate to prevent it from seizing up and losing its nice coatability.
Serving Suggestions
Easter Bunny Coconut Tails are perfect on their own, but they can be even more delightful when you present them as part of a festive spread. Pair them with:
- A fresh fruit platter for a zesty complement.
- A lovely cup of floral tea or coffee to balance the sweetness.
- Consider placing them in decorative cupcake liners and serving in a beautiful basket for that lovely Easter vibe.
These treats are not just delicious; they’re charming additions to any Easter brunch or dinner, bringing smiles to everyone at the table.
Variations & Substitutions
The beauty of these Bunny Tails is how adaptable they are! Here are some variations you might consider:
- Flavor Adjustments: Instead of vanilla, try almond extract for a nutty kick.
- A Little Crunchy: Add some finely chopped nuts or chocolate chips to the coconut mixture for added texture.
- Dietary Adaptations: For a vegan version, substitute sweetened condensed milk with a coconut milk-based version and use vegan chocolate.
- Seasonal Variations: Change colors and decorations for different holidays — think red and green for Christmas or spooky colors for Halloween!
Nutrition & Storage Info
- Prep Time: 15 minutes
- Chill Time: 1-2 hours
- Total Time: 2+ hours
- Yield: Approximately 20-25 Bunny Tails
- Estimated Calories: About 120 calories per tail (calories may vary based on specific brands and ingredients)
- Storage Instructions: Keep in an airtight container; at room temperature for a week or in the fridge for up to two weeks.
FAQ Section
Can I use unsweetened coconut?
- Yes, but be aware that it may result in a less sweet treat. You may want to increase the sweetened condensed milk a little!
How do I store these treats?
- Store them in an airtight container. They can last up to a week at room temperature or two weeks in the fridge.
Can I freeze them?
- Absolutely! These treats freeze well. Just make sure they’re in a freezer-safe container, and they’ll be good for up to three months.
What if my mixture is too wet?
- You can add more shredded coconut or let it chill for a bit to firm up before rolling.
Can I use colors other than pastel?
- Of course! Why not try electric colors for a fun twist? Be creative!
What can I substitute for candy melts?
- High-quality white chocolate works beautifully in place of candy melts, just make sure to temper it properly.
How should I avoid the coating from being too thick?
- Tap off excess coating after dipping the balls; you want a nice, thin layer for visual appeal.
Can I make these gluten-free?
- You bet! All ingredients listed are naturally gluten-free, so you’re good to go.
Is there a way to add a filling?
- Yes! Fill your coconut balls with a chocolate ganache or peanut butter for an exciting surprise.
Are these suitable for kids?
- They are! Just be sure to supervise younger children when dipping and rolling, as the candy coating can be hot.

Conclusion
These Easter Bunny Coconut Tails are not just a treat; they’re a wonderful way to create memories with family and friends. With their charming appearance and delightful taste, they encapsulate the spirit of the holiday beautifully. I encourage you to roll up your sleeves and give this recipe a try—you’re in for a joyous baking journey!
I’d love to hear how your Bunny Tails turn out, so please share your experiences and feedback in the comments! And if you’re looking for more delightful spring recipes, check out my blog for additional sweet ideas that will welcome the season with open arms.
Happy baking!