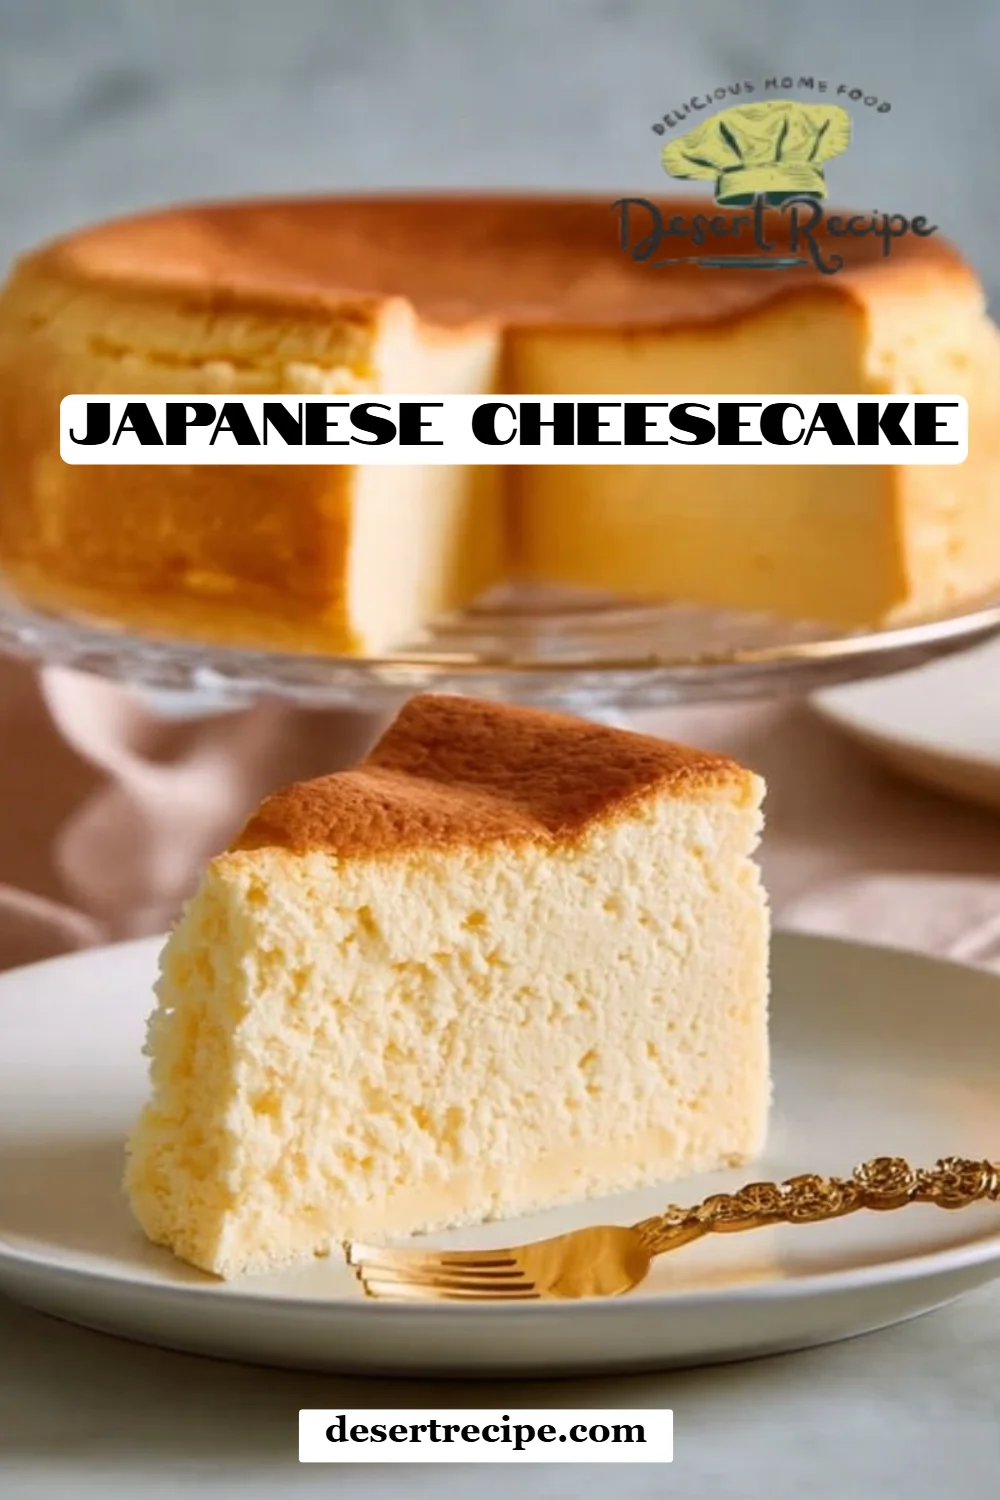
Fluffy Delight: The Best Japanese Cheesecake You’ll Ever Make!
Picture this: a warm afternoon spent in my grandmother’s cozy kitchen, the air thick with the sweet aroma of freshly baked goods. She’d always have a special treat waiting for me, but nothing could quite compare to her Japanese cheesecake. With its airy, cloud-like texture, it was my blissful escape from the world. I remember how my heart raced with delight every time I took a bite; it was truly like tasting a slice of happiness!
What makes Japanese cheesecake so special? It’s the blend of rich creaminess and light fluffiness that dances on your palate and gives traditional cheesecake a run for its money. Unlike its dense counterpart, this cake is made with whipped egg whites, making it a dreamy experience for anyone who loves subtly sweet desserts. My recipe is an homage to my grandmother’s cake, crafted with careful attention to texture and flavor that far surpasses store-bought options. I promise this recipe not only revives those cherished memories but introduces you to the art of baking that will leave your loved ones asking for seconds. So roll up your sleeves, and let’s dive into the world of Japanese cheesecake!
What Are Japanese Cheesecakes?
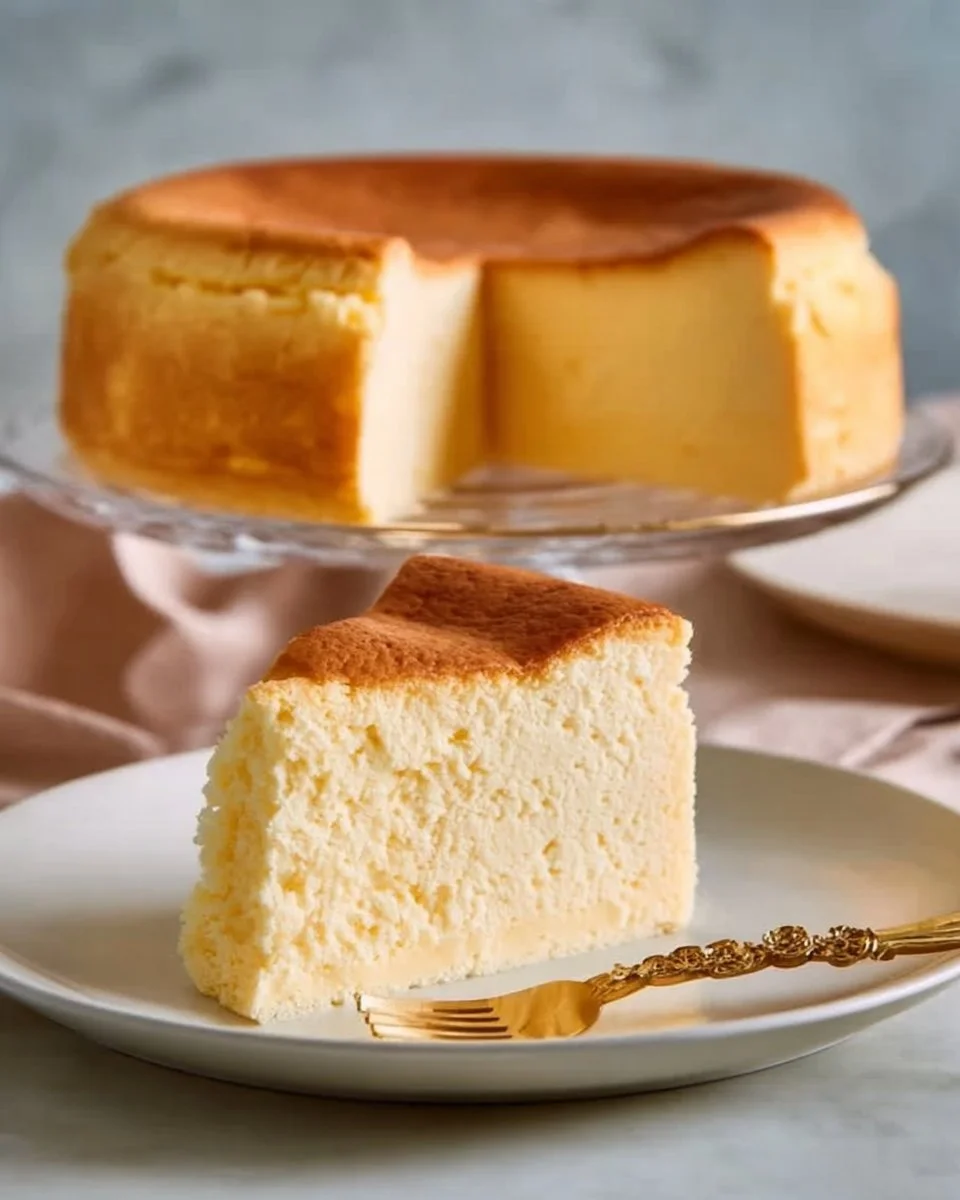
Japanese cheesecake, also known as "soufflé cheesecake," is a fluffy dessert born from a harmonious blend of Western cheesecake and Japanese culinary traditions. Its origins trace back to the Land of the Rising Sun, where it quickly gained popularity for its unique texture and flavor.
Unlike traditional cheesecakes, which are often dense and rich, Japanese cheesecake has an ethereal quality. It has a light, airy texture that melts in your mouth—it’s more akin to a chiffon cake with its soft, delicate crumb. The flavor is beautifully understated, allowing the creamy notes of cream cheese to shine through complemented by a subtle hint of lemon.
This cake is an ideal treat for special occasions, afternoon tea, or when you’re simply looking for a delightful slice of comfort food. Its gorgeous golden exterior and soft, pale interior make it not only a delicious dessert but a stunning centerpiece for any table!
Why You’ll Love This Recipe
Airy Lightness: Imagine sinking your fork into a cheesecake that feels like a fluffy cloud. This recipe guarantees that light-as-air texture everyone craves.
Cost-Effective & Homemade: Why pay premium prices at upscale bakeries when you can whip up this gourmet treat in your own kitchen? All you need are simple pantry staples to create your very own masterpiece.
Perfect for All Occasions: Birthdays, holidays, or just because—this Japanese cheesecake is a delightful way to celebrate any moment. It’s equally impressive for both casual family dinners and fancy gatherings.
Customizable Flavors: Feel free to play with flavors! Whether you want to add a swirl of fruit puree or infuse it with matcha or chocolate, this recipe is your canvas.
Beginner-Friendly: This isn’t an overly complex recipe that requires a culinary degree! With just a bit of timing and care, even novice bakers can achieve incredible results.
With just a bit of patience, you will learn how to bake a show-stopping Japanese cheesecake that will have everyone raving about your newfound skills in the kitchen!
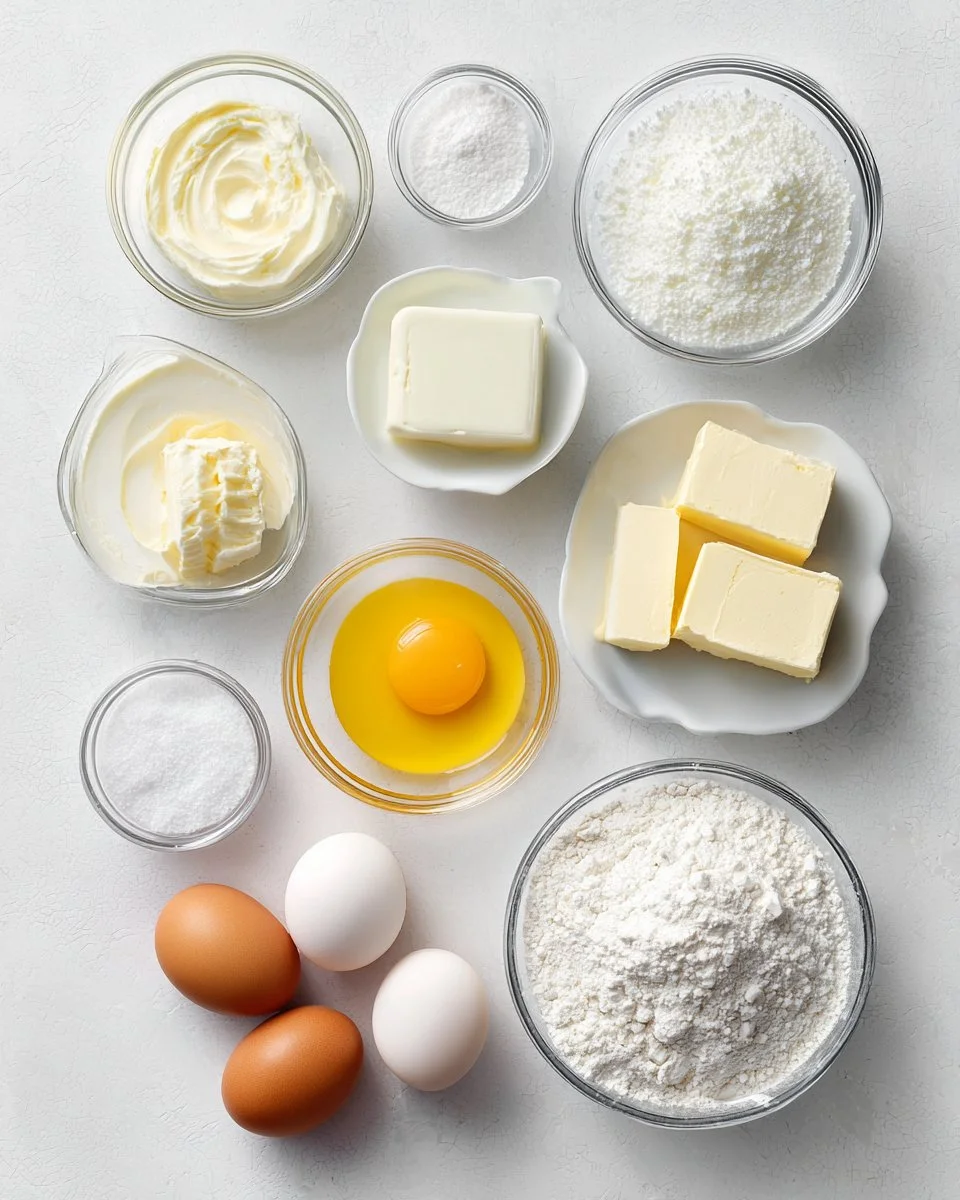
Ingredients Section
- 1 cup cream cheese (softened, full-fat for best texture)
- 1/2 cup milk (any non-dairy milk can be substituted, though flavor will vary)
- 1/4 cup unsalted butter (room temperature for easy mixing; I love using Kerrygold!)
- 3/4 cup granulated sugar (you can use coconut sugar for a healthier twist)
- 4 large eggs (separate yolks and whites)
- 1/2 cup all-purpose flour (for a gluten-free option, use GF flour blend)
- 1/4 cup cornstarch (this helps create that perfect fluffy texture)
- 1 teaspoon lemon juice (freshly squeezed for brightening flavor)
- 1/4 teaspoon salt (balances sweetness)
Note: Make sure your cream cheese and butter are at room temperature before starting for a smoother batter. Trust me, it makes all the difference!
Step-by-Step Instructions
Preheat your oven to 320°F (160°C). Grease a round cake pan with butter and line the bottom with parchment paper for easy release.
In a saucepan over low heat, combine cream cheese, milk, and butter. Stir gently until everything is melted and smooth. Once achieved, remove from heat and allow it to cool slightly (about 5-10 minutes).
In a large bowl, whisk the egg yolks and granulated sugar until pale and fluffy, which should take about 5 minutes. Pour in the cooled cheese mixture, stirring gently to combine.
Sift in the flour and cornstarch, and mix until just combined. Add lemon juice and salt, then mix well, but avoid over-mixing!
In a separate bowl, beat the egg whites until stiff peaks form—this is key to achieving that ultra-light texture. Take care not to overbeat!
Gently fold the egg whites into the batter in three parts, making sure not to deflate the mixture.
Pour the final batter into the prepared cake pan. Place this cake pan in a larger baking dish filled halfway with water (this is the water bath method to prevent cracking).
Bake for 60-70 minutes, until the top is golden brown and a toothpick inserted in the center comes out clean. Keep an eye on it starting around the 50-minute mark for doneness.
When done, turn off the oven, crack the door open, and let the cake cool for 30 minutes inside to prevent sudden temperature changes.
Remove from the oven, let cool completely at room temperature, and then refrigerate for at least 4 hours before serving. I often bake mine the night before for perfect textures!
Chef’s Tips:
- If it’s your first time, check your oven temperature with an oven thermometer to ensure accuracy.
- Avoid opening the oven door while baking to maintain a consistent temperature.
Expert Tips & Tricks
Ingredient Quality Matters: Always choose high-quality cream cheese and eggs for the best flavor and texture.
Room Temperature is Key: Ensuring your ingredients are at room temperature will help create a smooth batter, reducing the risk of lumps.
Don’t Rush the Cooling: Allow the cake to cool gradually to maintain its light structure and prevent cracking.
Storing Your Cheesecake: After cooling, it keeps well in the fridge for about 5 days. It also freezes beautifully if wrapped tightly!
Make-Ahead Magic: This cheesecake can be made two days before serving. Just keep it in the fridge and it gets even better as it chills!
Troubleshooting: If your cheesecake rises too much or cracks, it might be due to overmixing or too much heat. Be gentle when folding in the egg whites and monitor your baking temperature.
Serving Suggestions
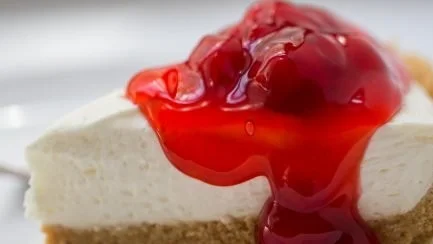
Pair your Japanese cheesecake with a dollop of fresh whipped cream or a drizzle of berry sauce. Fresh strawberries or blueberries complement the cheesecake beautifully. For a festive touch, dust with powdered sugar or decorate with edible flowers.
This cheesecake is suitable for any occasion—think teas, brunches, or simply dessert after dinner. Each fluffy slice will have your guests asking for the recipe!
Variations & Substitutions
Fruit Flavors: Adding a fruit purée like lemon curd, mango, or raspberry can elevate the flavor profile. Just swirl in after mixing!
Chocolate Lovers: Fold in melted dark chocolate to create a chocolate Japanese cheesecake. Trust me; it’s a decadent twist!
Matcha Green Tea: Swirl in matcha powder in place of some flour for an elegant green tea version.
Dietary Adaptations: For a dairy-free version, use vegan cream cheese and milk alternatives without sacrificing flavor.
Seasonal Fun: Infuse flavors that suit the season, such as pumpkin spice in fall or peppermint in winter.
Nutrition & Storage Info
- Prep Time: 20 minutes
- Cook Time: 60-70 minutes
- Total Time: ~4 hours (including cooling)
- Yield: Serves 8-10
- Estimated Calories: Approx. 250 calories per slice
- Storage Instructions:
- Room Temperature: Not ideal; enjoy within the first couple of hours for the best texture.
- Fridge: Up to 5 days. Keep covered to prevent drying out.
- Freezer: Wrap tightly in plastic and foil for up to 2 months.
FAQ Section
Can I skip the water bath?
- No! It helps maintain moisture and prevents cracks in your cheesecake.
How can I tell when my cheesecake is done?
- Look for a golden top and a slight jiggle in the center when you gently shake the pan.
What’s the best way to store leftovers?
- Once cooled, store slices in an airtight container in the fridge.
Can I freeze this cheesecake?
- Yes! Just be sure to wrap it tightly. It can be frozen for up to two months.
Why did my cheesecake crack?
- This can be due to sudden temperature changes or overmixing the batter. Keep the oven door closed and follow step 8 closely!
Do I have to refrigerate the cake?
- For best taste and texture, yes! Refrigerating enhances the flavors.
Can I use low-fat cream cheese?
- Yes, but the texture may not be as creamy and rich as with full-fat.
Is this recipe gluten-free?
- Substitute the all-purpose flour with a gluten-free flour blend for a gluten-free version.
How can I make this ahead of time?
- Make it a day in advance and refrigerate until serving; it tastes fabulous after chilling!
What’s the difference between this and regular cheesecake?
- Japanese cheesecake is fluffier, lighter, and less dense, making it a unique treat on its own.
Conclusion
This Japanese cheesecake is truly special—light, fluffy, and bursting with comforting flavors reminiscent of warm family gatherings. I encourage you to bake it up and share the joy with loved ones; their reactions will warm your heart. Plus, don’t forget to come back and share your feedback or questions in the comments!
Ready to explore more delicious recipes? Check out my other delightful dessert creations on the blog for your next baking adventure!

Japanese Cheesecake
Ingredients
Method
- Preheat your oven to 320°F (160°C). Grease a round cake pan with butter and line the bottom with parchment paper for easy release.
- In a saucepan over low heat, combine cream cheese, milk, and butter. Stir gently until everything is melted and smooth. Once achieved, remove from heat and allow it to cool slightly (about 5-10 minutes).
- In a large bowl, whisk the egg yolks and granulated sugar until pale and fluffy, about 5 minutes. Pour in the cooled cheese mixture, stirring gently to combine.
- Sift in the flour and cornstarch, and mix until just combined. Add lemon juice and salt, then mix well but avoid over-mixing!
- In a separate bowl, beat the egg whites until stiff peaks form—this is key to achieving that ultra-light texture. Take care not to overbeat!
- Gently fold the egg whites into the batter in three parts, making sure not to deflate the mixture.
- Pour the final batter into the prepared cake pan. Place this cake pan in a larger baking dish filled halfway with water (the water bath method prevents cracking).
- Bake for 60-70 minutes, until the top is golden brown and a toothpick inserted in the center comes out clean. Keep an eye on it starting around the 50-minute mark for doneness.
- When done, turn off the oven, crack the door open, and let the cake cool for 30 minutes inside to prevent sudden temperature changes.
- Remove from the oven, let cool completely at room temperature, and then refrigerate for at least 4 hours before serving. It’s often best if baked the night before.