Table of Contents
Table of Contents
Every family has that one recipe that warms the heart and brings back a cascade of sweet memories. For my family, that recipe is undeniably Newfoundland Snowballs. These little chocolatey delights are not just a treat; they’re a nostalgia trip wrapped in every bite. I remember my grandmother rolling them in coconut, her laughter filling the kitchen while stories of her Newfoundland childhood twinkled in her eyes. Christmas was never complete without these gems gracing our dessert table!
What makes Newfoundland Snowballs stand out from the multitude of no-bake treats? Well, it’s all about that creamy chocolate base melding with the soft oats and shredded coconut. While many store-bought versions exist, they can never quite capture the love and warmth you infuse into homemade snowballs. The ease of this recipe means it won’t take much of your time, but the end product will leave your loved ones asking for seconds (and possibly thirds!).
Today, I’m thrilled to share my family’s cherished Newfoundland Snowball recipe with you. By the end, you’ll see just how simple it is to recreate these mouthwatering balls of joy and why they should be a new addition to your treat rotation!
What Are Newfoundland Snowballs?
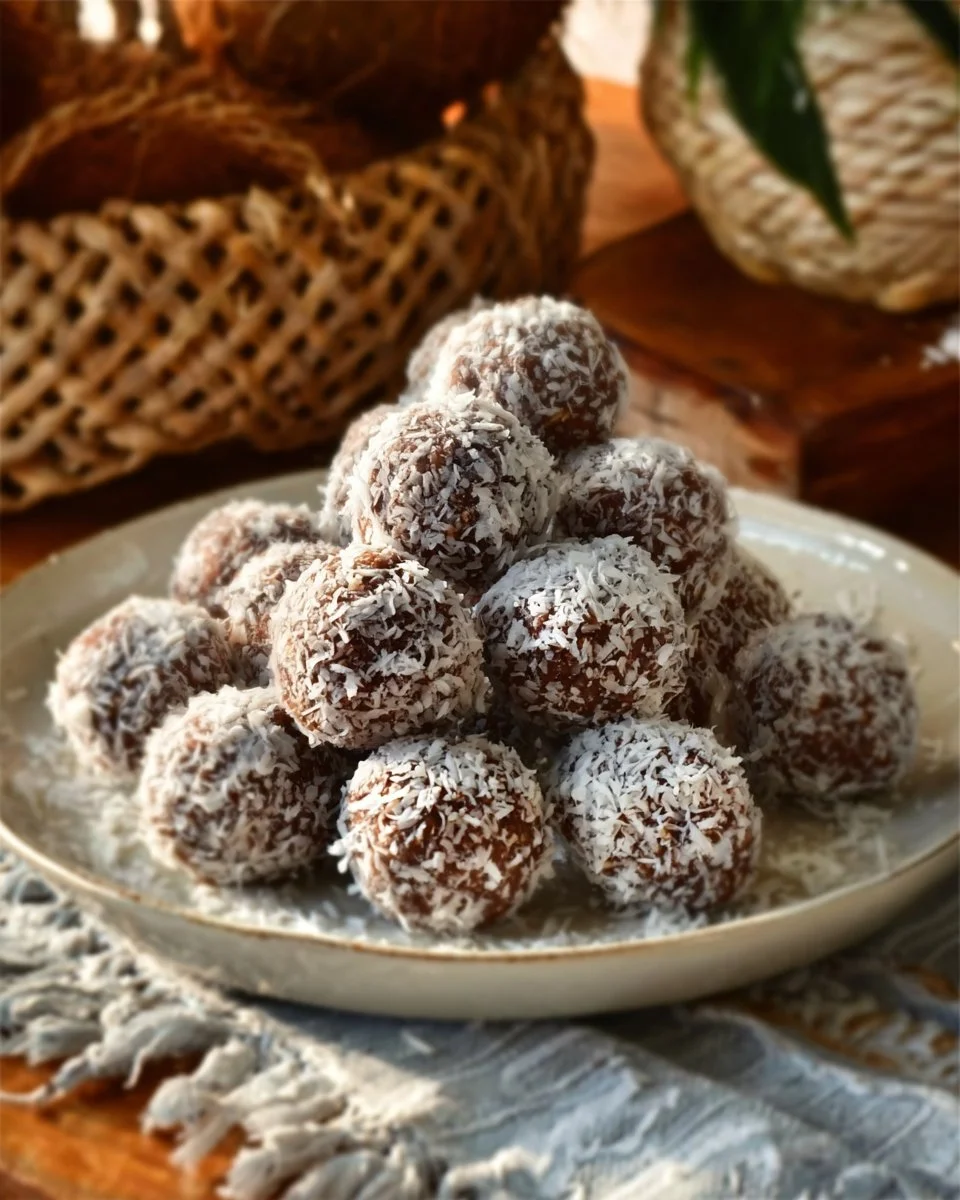
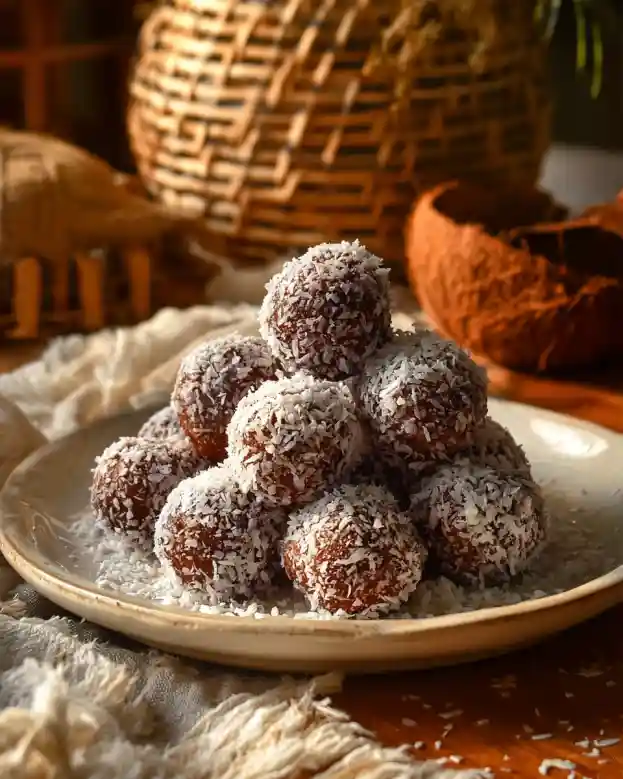
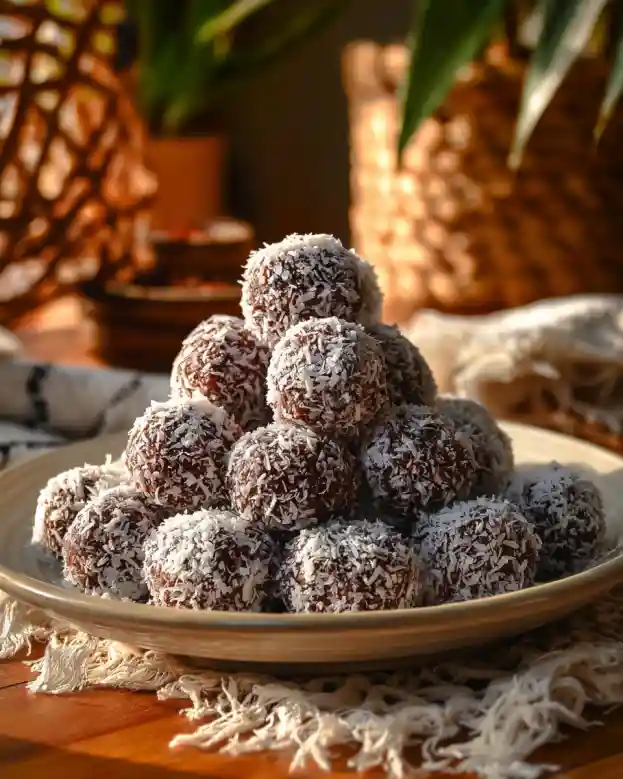
Newfoundland Snowballs are a beloved no-bake dessert in Canada, particularly cherished in Newfoundland. These delightful treats are crafted from a handful of simple ingredients: oats, coconut, cocoa powder, butter, evaporated milk, and sugar. When blended together and rolled into bite-sized spheres, they create a satisfying balance of flavor and texture.
With each bite, you experience the rich, chocolatey sweetness combined with the chewiness of oats and the delicate texture of shredded coconut. What makes them unique is their simplicity—they embody the essence of home baking, where warm memories and delicious flavors meld perfectly together.
These are perfect for potlucks, holiday gatherings, or just as a homey comfort snack after a long day. Trust me, once you make them, they’ll become a staple for every occasion!
Why You’ll Love This Recipe
1. Quick and Simple
This easy recipe is a breeze. With minimal preparation and no need for baking, you can have these delicious snowballs ready in under an hour (not including chilling time). It’s perfect for when you need a last-minute dessert or just a quick sweet fix.
2. Homemade Goodness vs. Store-Bought
If you’ve ever tasted store-bought versions of these treats, you know they pale in comparison. They lack that homemade touch and often contain preservatives. My recipe uses all-natural ingredients you can feel good about serving to your family.
3. Cost-Effective
Making your own Newfoundland Snowballs is pocket-friendly! For the price of a few store-bought treats, you can whip up a whole batch that’s twice as delicious. Plus, the ingredients are pantry staples that you likely already have on hand.
4. Customization Options
Want to add a little flair? You can easily switch up flavors by incorporating peanut butter, nuts, or even dried fruit! The possibilities are endless, and you can make them unique to your taste.
5. Perfect for Sharing
These snowballs are great for parties or gifts. They look adorable on any dessert table and are just the right size for sharing. Your friends and family will love them—and you’ll love being the one to bring a homemade treat!
Ingredients
For these delightful Newfoundland Snowballs, gather the following ingredients:
- 1/2 Cup Butter: Ensure it’s at room temperature to easily blend with other ingredients.
- 1 Cup Evaporated Milk: This adds creaminess and richness to the mixture.
- 1 Cup Granulated White Sugar: Sweetness is key; feel free to adjust according to your taste.
- 1/4 Cup Cocoa Powder: Opt for unsweetened cocoa for that deep chocolate flavor; I recommend Van Houten, which has a great quality.
- 2 Cups Rolled Oats: Use the old-fashioned kind for the best texture.
- 2 Cups Unsweetened Coconut: Shredded or flaked works; just make sure to have some extra for rolling later. I prefer Baker’s brand for its consistent quality.
Prep Notes:
- Always start with room temperature butter for easy mixing.
- If you’re short on time, you can also use sweetened coconut for a sweeter taste!

Step-by-Step Instructions
1. Create the Chocolate Base
In a medium saucepan set over medium heat, melt the 1/2 cup of butter. Once melted, add 1 cup of evaporated milk and 1 cup of granulated white sugar. Stir until fully combined and bring the mixture to a slow boil, continuing to stir. After about 5 minutes, when it reaches a syrup-like consistency, stir in 1/4 cup of cocoa powder and let it simmer for another minute. Remove from heat and allow the mixture to cool slightly—this is crucial for achieving the right texture later.
2. Combine Dry Ingredients
In a large bowl, combine 2 cups of rolled oats and 2 cups of unsweetened coconut. Stir until well mixed.
3. Mix It All Together
Pour the cooled chocolate mixture into the bowl with the oats and coconut. Using a spatula, mix until everything is thoroughly combined. Cover the bowl and refrigerate for at least 1 hour—this helps everything firm up beautifully.
4. Form Your Snowballs
Once set, remove the mixture from the fridge. Using a tablespoon, scoop out portions and roll them into little balls. Repeat until all the dough is used up.
5. Roll in Coconut
On a large plate, pour additional shredded coconut. Roll each ball in the coconut until fully coated.
6. Chill Again
Place the snowballs into an airtight container and refrigerate for another hour to set.
Chef’s Tips:
- Ensure no moisture remains in your mixture before rolling; it needs to be somewhat sticky for coating but should not be wet.
- If your snowballs feel too soft, return them to the fridge for a little longer before rolling.
Expert Tips & Tricks
Storage: Keep your snowballs in an airtight container in the fridge. They hold up well for up to a week, making them perfect for snacking!
Make-ahead: Prep the mixture a day ahead and assemble just before you serve—this saves time and ensures freshness.
Customization: Don’t hesitate to throw in ingredients like mini chocolate chips or chopped nuts for a delightful twist!
Troubleshooting: If your chocolate mixture hardens too much, add a splash more evaporated milk to bring it back to the right consistency.
Perfect Chilling: Make sure to cover your mixture while chilling to avoid it drying out or absorbing odors from the fridge.
Serving Suggestions
Newfoundland Snowballs are perfect on their own, but you can elevate the experience by serving them alongside a scoop of vanilla ice cream or a steaming cup of coffee. They also make a charming addition to any dessert platter for festive occasions—think birthday parties, holiday spreads, or lazy Sunday afternoons.
For presentation, consider placing them in a decorative tin or on a vibrant plate. You could even sprinkle some cocoa powder over them for an elegant touch!
Variations & Substitutions
- Nutty Delight: Fold in 1/2 cup of chopped walnuts or almonds for a delightful crunch.
- Festive Flavors: Add spices like cinnamon or nutmeg during the mixing process for a seasonal twist.
- Diet-Friendly: If you’re looking to go healthier, try substituting the granulated sugar for coconut sugar or using a sugar substitute.
- Gluten-Free: Ensure your oats are certified gluten-free, and voila! You have a gluten-safe treat.
Nutrition & Storage Info
- Prep Time: 15 minutes
- Cook Time: 5 minutes
- Total Time: 1 hour 15 minutes (not including chilling)
- Yield: Approximately 24 snowballs
- Estimated Calories: About 120 calories per snowball
- Storage Instructions: Refrigerate for up to a week, or freeze for longer storage (up to 3 months).
FAQ Section
1. Can I use sweetened coconut instead of unsweetened?
Absolutely! Sweetened coconut will add an extra touch of sweetness.
2. What if my mixture is too runny?
Let it chill longer, and if it’s still too runny, consider adding a bit more oats to absorb some of the moisture.
3. Can I use a different type of milk?
While evaporated milk gives the best taste and texture, you can try coconut milk for a tropical flavor.
4. Can these snowballs be frozen?
Yes, you can freeze them! Arrange them in a single layer on a baking sheet, freeze them solid, then transfer to a freezer-safe container.
5. What other flavorings can I add?
Try almond extract, vanilla extract, or even a splash of coffee for a delightful flavor boost.
6. How do I make them more chocolatey?
Add mini chocolate chips to the mixture for extra chocolate in each bite!
7. Can I make these vegan?
Yes! Substitute the butter with coconut oil, and use a non-dairy milk.
8. What’s the best way to store leftovers?
Keep them in an airtight container in the fridge or freeze them for future treats.
9. How long can they sit at room temperature?
They can be left out for a few hours, but always refrigerate them for longer-term storage to keep them fresh.
10. What occasions are best for serving these?
They’re perfect for holidays, birthdays, and casual get-togethers—or as a sweet snack after dinner!
Conclusion
These Newfoundland Snowballs are more than just a delicious dessert—they’re a heartwarming trip down memory lane, a taste of tradition, and a wonderful way to share love and joy with family and friends. I encourage you to try this recipe and feel the comfort of home baking wrap around you like a cozy blanket.
I’d love to hear how your snowballs turned out! Share your thoughts and any variations you tried in the comments below. And if you enjoyed this recipe, be sure to check out my other delightful sweets on the blog—your taste buds will thank you!
Graving More Recipes?
Happy baking!

Newfoundland Snowballs
Ingredients
Method
- In a medium saucepan over medium heat, melt the butter.
- Add evaporated milk and granulated sugar; stir and bring to a slow boil.
- Once it reaches a syrup-like consistency (about 5 minutes), stir in cocoa powder and simmer for another minute.
- Remove from heat and allow the mixture to cool slightly.
- In a large bowl, combine rolled oats and unsweetened coconut.
- Pour the cooled chocolate mixture into the bowl and mix until thoroughly combined.
- Cover and refrigerate for at least 1 hour.
- Remove chilled mixture from fridge and scoop portions with a tablespoon.
- Roll into balls and repeat until all dough is used.
- Roll each ball in additional shredded coconut until fully coated.
- Refrigerate in an airtight container for another hour.