Table of Contents
Table of Contents
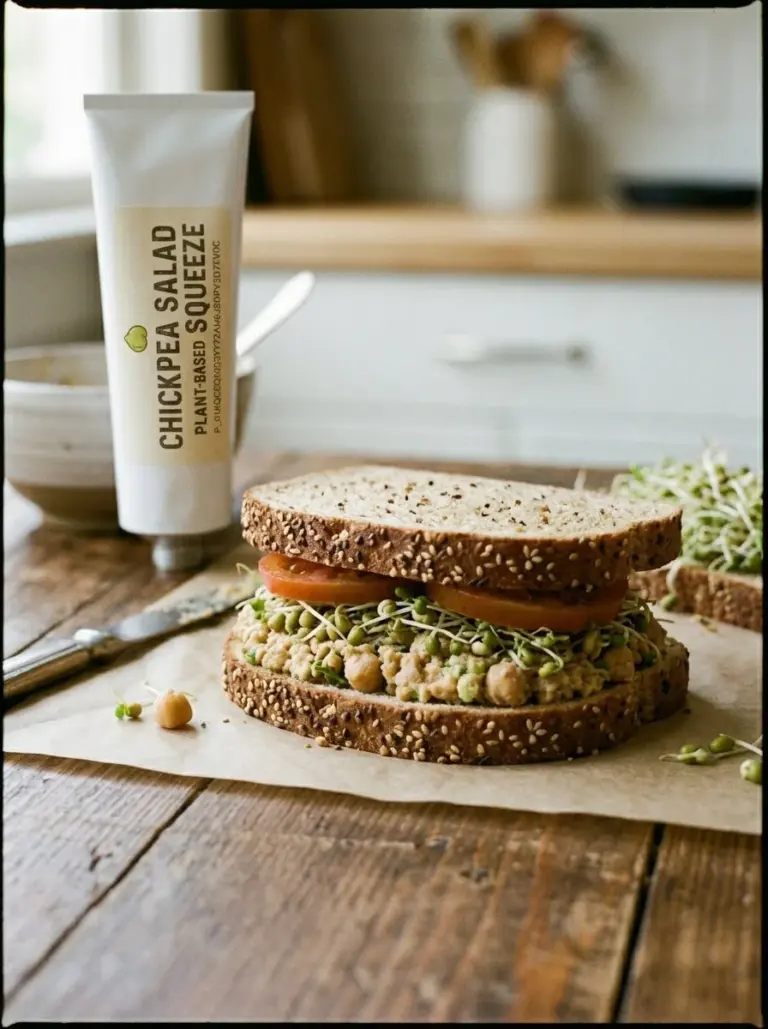
Have you ever opened your fridge to find a sad jar of store-bought mayonnaise that you swear you’ll use someday? I absolutely have! One day, after returning from a delightful picnic with my family, I realized we needed something special for our sandwiches—something that spoke of love, freshness, and a personal touch. That’s when I decided to whip up some DIY mayonnaise! This creamy delight not only transformed our meal but also rekindled family memories wrapped in laughter, messy hands, and the joy of cooking together.
What makes my DIY mayonnaise recipe stand out is its simplicity and versatility. Unlike commercial versions laden with preservatives, my homemade mayonnaise brings a brightness and richness that you truly can’t bottle. Plus, it’s quick to make, taking just about 15 minutes of your time, including clean-up! As you follow along, you’ll not only gain a mastery of this kitchen staple but also a recipe that you can easily customize to suit your taste. Trust me; once you try making your own mayonnaise, you’ll never look back!
So, grab your apron and let’s dive into the creamy world of DIY mayonnaise, where you’ll learn to create a luscious spread that will elevate any sandwich or dish to culinary perfection!
WHAT ARE DIY MAYONNAISE?
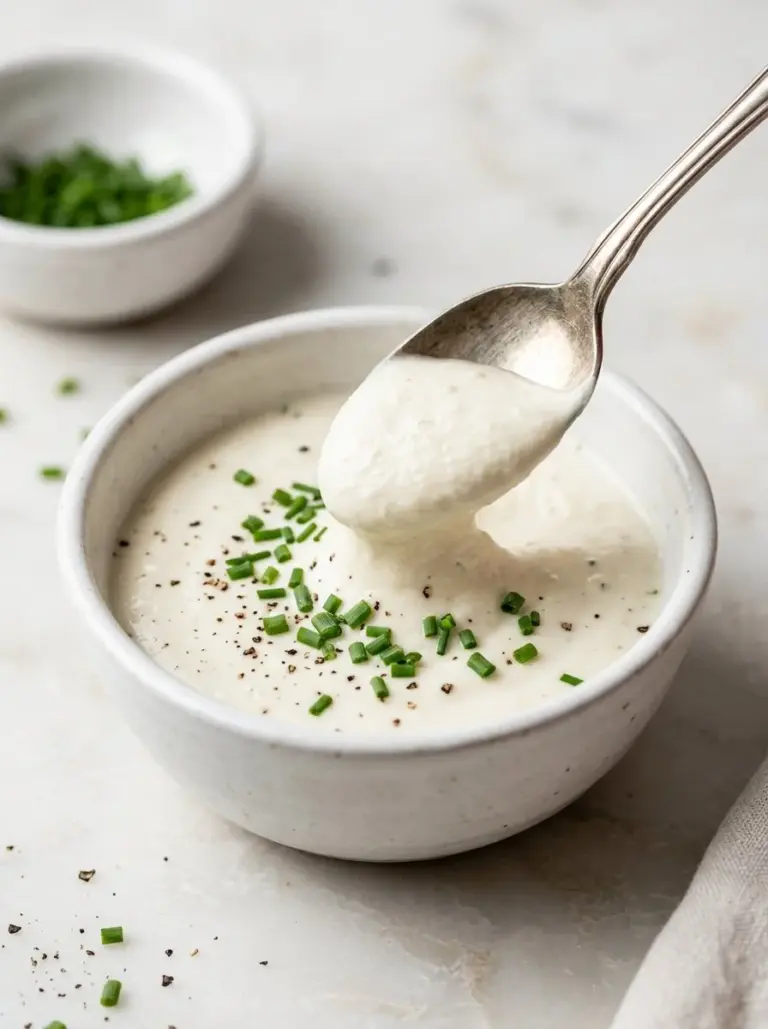
DIY mayonnaise, or homemade mayonnaise, is a creamy emulsion made from just a few simple ingredients: egg, mustard, vinegar, and oil. It’s believed to have originated in the 18th century, with varying tales attributing its invention to chefs at a French noble’s banquet. However it came about, this delightful spread boasts a silky texture and a flavor that dances between tangy and creamy.
What makes homemade mayonnaise unique is the ability to customize it according to your palate. Want it tangier? Add more vinegar or lemon juice. Craving a hint of spice? Infuse it with garlic or chipotle. With DIY mayonnaise, you’re not just making a condiment; you’re creating a personalized flavor experience. Perfect for sandwiches, salads, or dips, this recipe fits seamlessly into everyday cooking, bringing a touch of gourmet crafting to your meals.
WHY YOU’LL LOVE THIS RECIPE
Gourmet Taste Without the Price: Making your own mayonnaise may sound pampered, but it’s incredibly economical! A jar from the grocery store often retails for $3-$5, while this recipe will cost you less than a buck to whip up—however, the taste is gourmet.
Freshness Is Key: The moment you whip up your homemade mayonnaise and smell its fresh aroma, you’ll realize there’s no comparison to the store-bought kind. It’s rich, vibrant, and full of flavor, thanks to the absence of preservatives and artificial ingredients.
Customization Galore: One of the greatest joys of DIY mayonnaise is how you can easily play around with flavors. Can you imagine a zesty lemon-herb mayo or a spicy sriracha version? Your creativity can run wild!
Quick and Easy to Prepare: Even if you’re not a seasoned cook, this mayonnaise is surprisingly foolproof. In about 10 minutes, you’ll have a delicious condiment ready to go, no elaborate culinary skills required.
Perfect for Meal Prepping: If you love meal prepping, this mayonnaise is perfect. You can make it in advance and store it for the week, transforming your weekday lunches into flavorful feasts.
INGREDIENTS SECTION
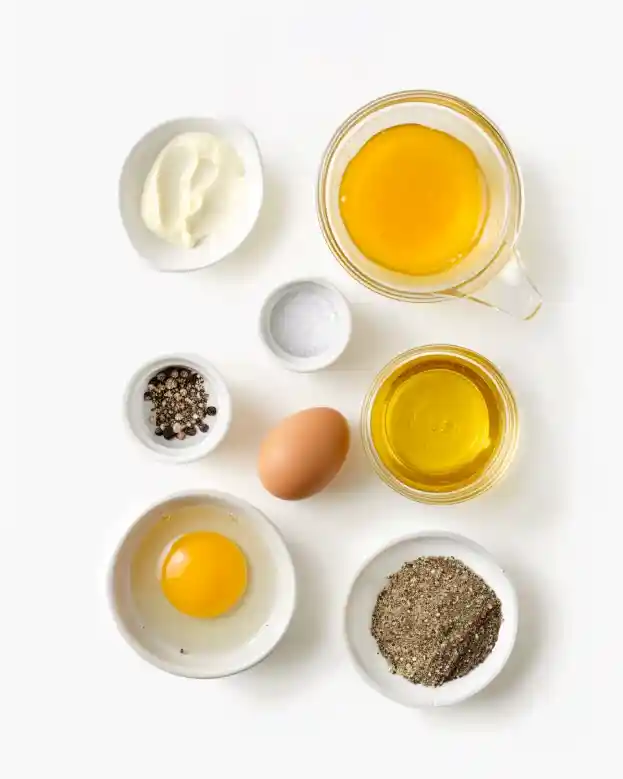
Here’s what you’ll need to create your luscious DIY mayonnaise:
- 1 large egg: Make sure it’s at room temperature for the best emulsion.
- 1 tablespoon Dijon mustard: It adds a delightful tang and depth of flavor. You can swap with yellow mustard if you prefer a milder taste.
- 1 tablespoon white wine vinegar: This adds acidity; feel free to use apple cider vinegar for a sweeter note.
- 1 cup vegetable oil: A neutral oil works best. I recommend grapeseed or canola oil; avoid extra virgin olive oil, as its strong flavor can overshadow the mayo.
- Salt and pepper to taste: Freshly cracked black pepper adds an extra kick.
Chef’s Tip: Use fresh, high-quality ingredients for better flavor!
STEP-BY-STEP INSTRUCTIONS
Combine the Base: In a tall, narrow container, combine the room temperature egg, Dijon mustard, and white wine vinegar. You want to ensure your egg is at room temperature so that it emulsifies well.
Blend the Mixture: Using an immersion blender (my trusty kitchen sidekick!), blend the mixture on high speed for about 30 seconds until it’s frothy and well combined.
Emulsify the Oil: Keeping the blender running, gradually pour in the vegetable oil in a slow, steady stream. This is where the magic happens! As you blend, you’ll see the mixture start to thicken. It should take around 1-2 minutes to reach a creamy consistency.
Season to Perfection: Taste your mayonnaise and season with salt and pepper to your liking. Feel free to add more mustard or vinegar at this point if you want to jazz it up!
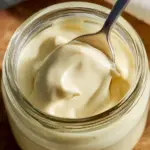
Store It Away: Scoop your beautiful DIY mayonnaise into an airtight container and store it in the refrigerator. It will last up to one week—if it lasts that long!
EXPERT TIPS & TRICKS
Storage Recommendations: Keep your homemade mayonnaise in an airtight container in the fridge. Always use a clean utensil to scoop out mayonnaise to prolong freshness.
Make-Ahead Instructions: Prepare a big batch on the weekend to enjoy throughout the week. It pairs wonderfully with sandwiches, salads, and even as a dip.
Troubleshooting Common Problems: If your mayonnaise doesn’t emulsify, try adding a few drops of warm water and re-blending. If it separates, don’t despair; simply start with a fresh egg and blend in the separated mayonnaise slowly.
For an Extra Kick: Feel free to whisk in herbs, garlic, or spices after your mayonnaise is made for a unique twist!
Don’t Over-Whip: If you blend too long, your mayo might become too thin; keep an eye on the consistency as you pour in the oil.
SERVING SUGGESTIONS
Your DIY mayonnaise pairs beautifully with various dishes! Use it in classic sandwiches, slather it on burgers, or as a dip for crispy vegetables. For a pop of color, place it in a decorative bowl and sprinkle with fresh herbs or paprika. Consider serving it at picnics, barbecues, or brunch gatherings! Your friends and family will be in awe of your homemade flair.
VARIATIONS & SUBSTITUTIONS
- Herbed Mayo: Add chopped fresh herbs like basil, parsley, or cilantro for a burst of flavor.
- Spicy Mayo: Whisk in some sriracha or chipotle for heat.
- Garlic Aioli: Mix in minced garlic, lemon juice, and a pinch of salt for a classic aioli variation.
Dietary Restrictions: If you follow a vegan lifestyle, consider substituting the egg with aquafaba (the liquid from canned chickpeas) for a plant-based version!
NUTRITION & STORAGE INFO
- Prep Time: 10 minutes
- Cook Time: 5 minutes
- Total Time: 15 minutes
- Yield: About 1 cup (approximately 8 servings)
- Estimated Calories: 100 calories per serving
- Storage Instructions: Keep in the refrigerator for up to one week.
FAQ SECTION
Can I use olive oil?
Yes, but it can impart a stronger flavor. Use refined olive oil for a milder taste.Is my mayonnaise safe with raw eggs?
If you’re concerned about bacterial contamination, use pasteurized eggs.What if my mayo is too thin?
Blend in another egg yolk gradually to thicken it up!Can I freeze DIY mayonnaise?
It’s not recommended. Freezing changes the texture of mayonnaise.What can I add for additional flavor?
Try adding lemon juice, garlic, or smoked paprika for different flavor profiles.How do I know if my mayonnaise has gone bad?
If it smells off or has changed color, it’s best to toss it.Can I use a regular blender instead of an immersion blender?
Yes! Just ensure there’s enough space for the oil to be added gradually.What’s the best way to serve homemade mayonnaise?
Use it in sandwiches or as a dip for veggies.How can I make this egg-free?
Use aquafaba as a substitute for the egg to create a vegan mayonnaise.What dishes pair well with mayonnaise?
It’s fantastic on sandwiches, wraps, or as a dressing for potato salad!
CONCLUSION
Homemade DIY mayonnaise is truly a game changer in the kitchen. Each batch is a delicious reminder of the love and creativity you pour into your meals. I invite you to embrace the simplicity and indulgence of whipping up your very own mayo—once you do, you’ll be hooked!
I’d love to hear your thoughts and see your variations, so please leave a comment below! And while you’re here, check out my other delicious recipes for dips and spreads that are sure to inspire your culinary adventures.
Happy cooking!
Homemade Mayonnaise
Ingredients
Method
- In a tall, narrow container, combine the room temperature egg, Dijon mustard, and white wine vinegar.
- Using an immersion blender, blend the mixture on high speed for about 30 seconds until frothy and well combined.
- Keeping the blender running, gradually pour in the vegetable oil in a slow, steady stream until the mixture thickens to a creamy consistency (1-2 minutes).
- Taste and season with salt and pepper as desired; add more mustard or vinegar for extra flavor if needed.
- Transfer your DIY mayonnaise to an airtight container and store in the refrigerator for up to one week.