Table of Contents
Table of Contents
The Ultimate No Knead Seeded Oat Bread: A Simple, Delicious Journey to Homemade Comfort
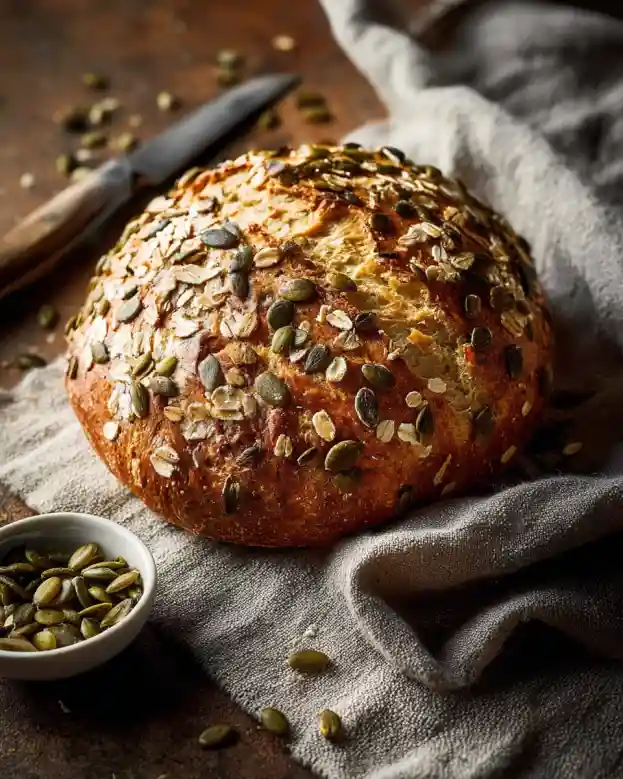
There’s something undeniably magical about the smell of freshly baked bread wafting through the kitchen. I remember one rainy Sunday afternoon, we were gathered as a family, the sound of laughter mingling with the soft patter of raindrops against the window. That day, I decided to try my hand at making No Knead Seeded Oat Bread. I had no idea it would become a staple in our household. The crust was perfectly golden, while the inside was soft and hearty. It was an instant hit, turning our cozy gathering into a feast of comfort.
What makes this No Knead Seeded Oat Bread so special? It’s not just about the ease of preparation (trust me, no one wants to wrestle with dough!). This loaf is filled with wholesome goodness, with its nutty flavor and delightful texture coming from a medley of seeds and oats. It’s packed with nutrients, making it a healthier alternative to the store-bought varieties.
Join me in this journey as I share my tried-and-true recipe! I promise, you’ll learn how to whip up a loaf that not only nourishes the body but also warms the heart—perfect for sharing during family gatherings or quiet nights at home with a good book.
What Are No Knead Seeded Oat Breads?
No Knead Seeded Oat Bread is a game-changer for home bakers everywhere. Originating from a desire to simplify the art of bread-making, this loaf requires minimal effort and no strenuous kneading. With just a few simple ingredients—rolled oats, flour, seeds, and water—you create a wholesome bread that is both easy to make and incredibly delicious.
Imagine biting into a slice of this bread and experiencing a harmonious blend of nutty flavors from the seeds and the slightly chewy texture of oats. The unique combination of rolled oats and assorted seeds gives it a rustic charm, making it a versatile addition to your table. It’s not just a loaf; it’s a comforting reminder that good bread doesn’t have to be complicated.
This recipe shines during those moments when time is short but you want to nourish your loved ones with something homemade. Perfect for brunches, afternoon snacks, or even as a side for cozy dinners, this bread embodies the spirit of simplicity and warmth.
Why You’ll Love This Recipe
Here are five compelling reasons why this No Knead Seeded Oat Bread should be on your baking radar:
Effortlessly Easy: If you’ve ever felt intimidated by bread-making, this recipe is the perfect introduction. With minimal hands-on time, you can produce a beautiful loaf that will impress your family and friends. Just mix, rest, and bake!
Cost-Effective: While artisanal bread can cost a pretty penny at the bakery, this recipe offers an economical solution. With just a few pantry staples, you can create something that tastes even better than store-bought—think of the savings!
Customizable to Your Taste: Want to switch things up? Feel free to experiment with different seeds or even add in nuts, dried fruits, or herbs. The world is your oyster when it comes to flavor combinations!
Healthier Choice: Packed with oats and seeds, this bread boasts essential nutrients and fiber that will fuel your day. It’s a guilt-free indulgence that can be enjoyed guilt-free.
Storage-Friendly: No more wasting loaves! This bread keeps well, and you can even freeze it for those busy days when you need a quick snack or side.
Are you ready to dive into this simple yet delightful recipe? Let’s roll up our sleeves and get started!
Ingredients
Here’s what you’ll need to make this No Knead Seeded Oat Bread:
- 2 cups rolled oats: Choose whole grain or organic for a heartier flavor.
- 1 cup all-purpose flour: For a light texture.
- 1 tablespoon baking powder: This is your leavening agent.
- 1 teaspoon salt: Essential for flavor.
- 1/4 cup mixed seeds: Consider sunflower, pumpkin, and sesame seeds for a delightful crunch.
- 2 cups warm water: Not too hot, just lukewarm to activate the yeast effectively.
- 1 tablespoon olive oil: Adds moisture and enriches the flavor.
Notes on Ingredient Quality/Substitutions
- Oats: For gluten-free bread, use certified gluten-free oats.
- Flour: You can substitute whole wheat flour for a nuttier taste; just adjust the water as needed.
- Seeds: Feel free to use your favorite nuts or seeds based on dietary preferences or seasonal availability.
Prep Notes
- Make sure your water is at room temp. Room temperature ingredients blend better and help create the perfect texture.
Brand Recommendations
I love using Bob’s Red Mill for oats and flour—they offer incredible quality!
Step-by-Step Instructions
Ready to bake? Here’s how you can make this No Knead Seeded Oat Bread:
Mix Dry Ingredients: In a large bowl, combine 2 cups rolled oats, 1 cup all-purpose flour, 1 tablespoon baking powder, 1 teaspoon salt, and 1/4 cup mixed seeds. Stir until well mixed, ensuring that the seeds are evenly distributed.
Add Wet Ingredients: Pour in 2 cups of warm water and 1 tablespoon olive oil. Mix until everything is just combined—don’t overmix, just stir until there are no dry pockets.
Let It Rest: Cover the bowl with plastic wrap and let the dough rest for at least 12 hours at room temperature. The longer, the better! This resting time allows the flavors to develop and the dough to rise.
Preheat the Oven: When you’re ready to bake, preheat your oven to 375°F (190°C). This ensures that your bread will bake evenly and develop that golden crust everyone loves.
Shape and Transfer: After resting, transfer the dough into a greased loaf pan. Shape it as needed—don’t worry if it looks rustic!
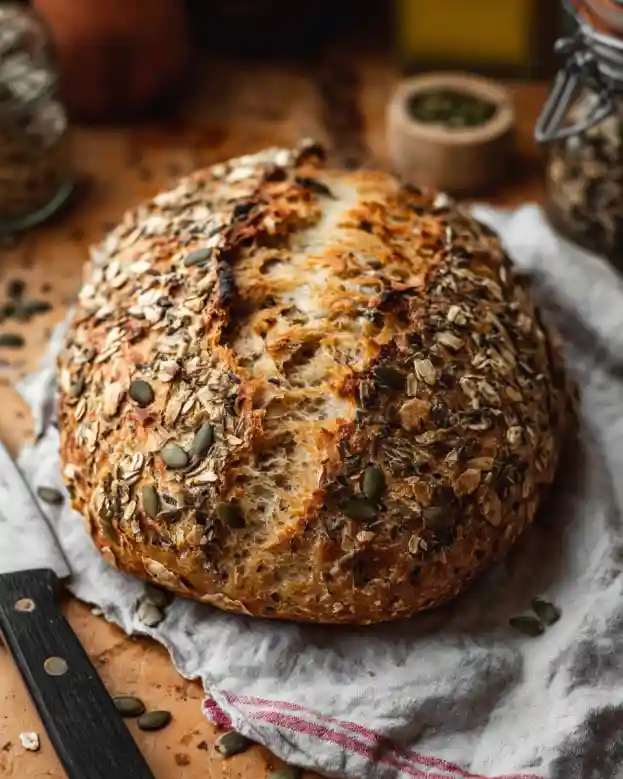
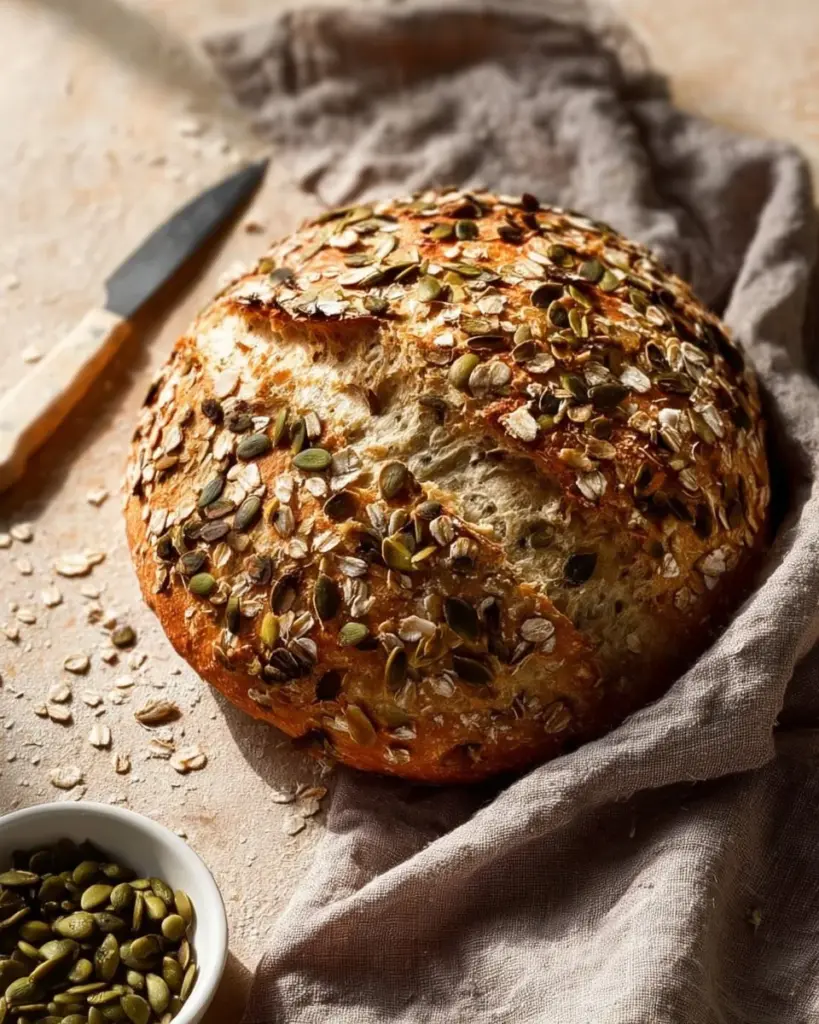
Bake: Place the loaf in the oven and bake for 40-45 minutes. You’ll know it’s ready when the top is golden brown and sounds hollow when tapped.
Cool and Slice: Let the bread cool in the pan for about 10 minutes, then transfer it to a wire rack to cool completely before slicing. This helps maintain the texture and prevents a gummy crust.
Chef’s Tips:
- Timing: Be mindful of the resting period; it’s vital for flavor development!
- Visual Cues: Look for a beautiful golden brown color and remember: the aroma will be irresistible!
- Common Mistakes: Don’t rush the resting time. It’s essential for the bread’s flavor and texture!
Expert Tips & Tricks
Here are some expert tips to ensure your No Knead Seeded Oat Bread turns out perfectly:
Resting Time is Key: Don’t skip the overnight resting period! This allows the gluten to develop and makes the bread lighter.
Storage Recommendations: Store leftover bread at room temperature in a paper bag or wrapped in a dish towel for a couple of days. You can also freeze slices for later enjoyment—just wrap in plastic and toss in a ziplock bag.
Make-Ahead Instructions: Prepare the dough ahead of time and let it rise overnight. You can bake it fresh in the morning for breakfast!
Troubleshooting: If your bread doesn’t seem to rise enough, check that your baking powder is fresh and your water isn’t too hot.
Experiment with Flavors: Add fresh herbs or spices for a unique twist, especially if you want to give it seasonal flair.
Serving Suggestions
This No Knead Seeded Oat Bread is delightful on its own, but let’s elevate the experience! Serve warm with a pat of butter or drizzle of honey for breakfast. Pair it alongside a rich soup or salad for lunch, or enjoy it toasted with smashed avocado and a sprinkle of sea salt for a light dinner.
For presentation, consider slicing it on a rustic wooden board, garnished with fresh herbs or extra seeds to enhance its visual appeal. This bread is perfect for gatherings, picnics, or cozy brunches with good friends.
Variations & Substitutions
The beauty of this No Knead Seeded Oat Bread is its versatility! Here are some fun variations:
Flavor Combinations: Mix in dried cranberries and chopped walnuts for a festive autumn loaf, or add in Italian herbs and sun-dried tomatoes for Mediterranean flair.
Dietary Adaptations: Need it gluten-free? Substitute the all-purpose flour with a gluten-free blend and stick to certified gluten-free oats.
Seasonal Variations: In the spring, consider adding zucchini or carrots for an added boost of nutrients, or come winter, infuse the bread with warming spices like cinnamon or nutmeg.
Nutrition & Storage Info
- Prep Time: 10 minutes
- Cook Time: 45 minutes
- Total Time: Approximately 12 hours + baking
- Yield: About 12 servings
- Estimated Calories per Serving: 180 calories
- Storage Instructions: Keep at room temperature for 2-3 days; refrigerate for up to a week; freeze for up to 3 months.
FAQ Section
Can I make this bread gluten-free?
Yes, by using certified gluten-free oats and a suitable gluten-free flour blend, you can easily make this recipe gluten-free.How long does the dough need to rest?
The dough should rest for at least 12 hours at room temperature for best results.Can I add more seeds?
Absolutely! Feel free to adjust the proportions of seeds to your liking while maintaining a similar consistency.What’s the best way to slice the bread?
Use a serrated bread knife for clean, even slices. Let the bread cool completely for better slicing.Can I double the recipe?
Yes, you can double the recipe to make two loaves. Just make sure to use a larger mixing bowl for the dough.What should I serve this bread with?
It pairs wonderfully with soups, salads, or spread with butter, honey, or avocado for a delicious snack.How can I tell if the bread is done baking?
It should be golden brown on top and sound hollow when tapped on the bottom.Can I add other ingredients like cheese or herbs?
Yes, cheese, garlic powder, or fresh herbs can bring even more flavor to your bread!Is it okay to refrigerate this bread?
While you can refrigerate it, it’s best stored at room temperature to maintain moisture and texture.How long does this bread last?
It can last about 2-3 days at room temperature, up to a week in the fridge, or 3 months in the freezer.
Conclusion
This No Knead Seeded Oat Bread is more than just a loaf; it’s a celebration of simplicity and wholesome goodness. With its easy preparation and endless customization options, it’s sure to become a cherished recipe in your home, just like it did in mine.
I encourage you to give this recipe a try—your kitchen will thank you! Don’t forget to share your baking adventures and feedback in the comments. And for more delicious recipes, check out my other bread creations on the blog!
Graving More Recipes?
Happy baking!
No Knead Seeded Oat Bread
Ingredients
Method
- In a large bowl, combine the rolled oats, all-purpose flour, baking powder, salt, and mixed seeds. Stir until well mixed.
- Pour in the warm water and olive oil. Mix until everything is just combined—don’t overmix.
- Cover the bowl with plastic wrap and let the dough rest for at least 12 hours at room temperature.
- Preheat your oven to 375°F (190°C).
- Transfer the dough into a greased loaf pan and shape as needed.
- Bake for 40-45 minutes until golden brown and sounds hollow when tapped.
- Let the bread cool in the pan for about 10 minutes, then transfer it to a wire rack to cool completely before slicing.