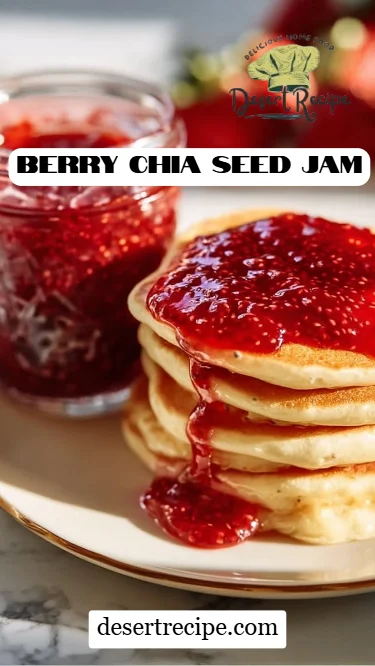
Delicious Berry Chia Seed Jam: A Fresh Twist on a Timeless Classic
Growing up, my grandma always had a jar of homemade jam ready for slathering on toast at breakfast. Those fruity spreads were not only a staple in our kitchen but also a symbol of love and warmth. As an adult, I’ve tried countless jam recipes, but there’s something undeniably special about making my Berry Chia Seed Jam. This jam combines the delightful sweetness of fresh berries with the unique texture of chia seeds, creating a spread that’s both nutritious and incredibly delicious!
What sets this recipe apart from others is not only its easy preparation but also the glorious versatility. You see, unlike store-bought jams loaded with preservatives and artificial sweeteners, this homemade version showcases the natural flavors of fresh fruit along with the added health benefits of chia seeds. Not to mention, it brings back cherished memories of family breakfasts. In just a few simple steps, you can whip up a delicious jam that will evoke nostalgia while satisfying your taste buds.
In this post, I’ll guide you through making the perfect Berry Chia Seed Jam, sharing tips and secrets along the way. Buckle up, because this is going to be delicious!
What Are Berry Chia Seed Jams?
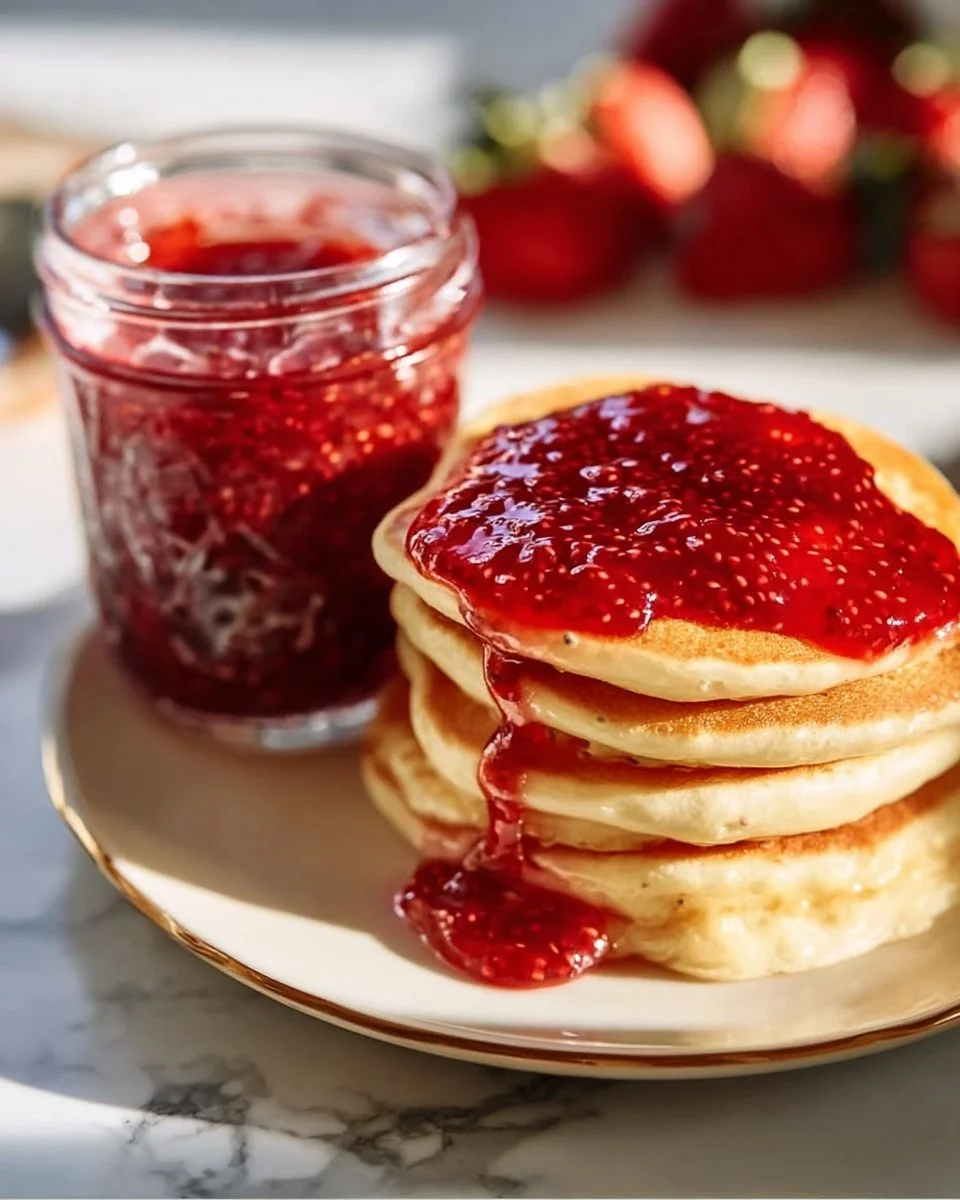
Berry Chia Seed Jam is a delightful, simple spread made from fresh berries and chia seeds, known for their ability to gel and thicken. This recipe is a modern twist on traditional jams, utilizing the natural gelling properties of chia seeds that eliminate the need for pectin. The flavor profile is bright and fruity, with a texture that is slightly chunky yet spreadable.
The concept of chia seed jam sprung from a desire for healthier alternatives to the high-sugar preserves we often find in stores. It’s versatile enough to make with just about any berry you can find—think strawberries, blueberries, or raspberries! Not only is it a fantastic breakfast companion, but it also serves as a topping for yogurt, pancakes, and desserts.
This jam is perfect for summer gatherings, lazy breakfasts, or as a sweet addition to a cheese board. You’ll find that each batch captures the essence of fresh summer berries, making your taste buds dance with joy.
Why You’ll Love This Recipe
Making Berry Chia Seed Jam at home comes with a plethora of benefits that will make you say goodbye to store-bought jams for good. Here are just a few reasons why you’ll fall head over heels for this recipe:
Healthier Choice: Unlike mass-produced jams, this recipe is free from artificial additives and high-fructose corn syrup. You control the sweetness and can use natural sweeteners like honey or maple syrup.
Customizable Flavors: Whether you want to make a classic raspberry jam or experiment with mixed berries, this recipe is adaptable. Want a hint of spice? Throw in some cinnamon or ginger to elevate the flavor!
Cost-Effective: Berries are often available at reasonable prices, especially when in season. You can make several batches of jam for the price of one jar from the store!
Quick Preparation: In less than 30 minutes, you can have a fresh batch of jam ready to enjoy. No canning equipment is needed; just your kitchen stovetop!
Culinary Bonding: Making this jam can be a fun activity to share with family or friends. Gather your loved ones for a jam-making session and create sweet memories together.
Are you convinced yet? This jam not only tastes incredible but also makes you feel good about the ingredients you’re putting on your food!
Ingredients
To make the perfect Berry Chia Seed Jam, you’ll need:
- 1 cup fresh berries (raspberries, blueberries, or strawberries): Pick ripe, juicy berries for the best flavor. Organic is preferable if available.
- 2 tablespoons chia seeds: These tiny seeds are packed with nutrients and help the jam thicken.
- 1-2 tablespoons natural sweetener (honey, maple syrup, or agave syrup): Sweeten to your taste, starting with 1 tablespoon and adjusting as you see fit.
- 1 tablespoon lemon juice (optional): This brightens the flavor and adds a lovely tartness if you fancy!
Prep Notes:
- Ensure your berries are washed and hulled (if using strawberries).
- Room temperature ingredients will blend more smoothly, but since this recipe involves cooking, it’s okay if they’re fresh from the fridge.
Pro Tip: I often use local honey for added flavor. It really makes a difference!
Step-by-Step Instructions
Heat the Berries: In a small saucepan over medium heat, combine your fresh berries. Stir occasionally and watch them as they soften and begin to release their delightful juices—about 5-7 minutes.
- Chef’s Tip: If using larger berries like strawberries, mash them with a fork or ladle as they cook to help them break down.
Add Sweetener & Lemon Juice: Once the berries are softened, stir in your natural sweetener and lemon juice, if desired. Give it a good mix!
- Visual Cue: The mixture will start bubbling slightly—this is a sign you’re on the right track!
Mash to Desired Consistency: Reduce the heat and use a fork or potato masher to mash the berries to your liking. If you prefer a chunkier jam, don’t over-mash—leave plenty of berry goodness intact!
Incorporate Chia Seeds: Stir in the chia seeds to the mixture. Continue cooking for another 5-10 minutes, stirring occasionally until the jam thickens.
- Common Mistake to Avoid: If your jam isn’t thickening, simmer it a bit longer. Chia seeds need time to absorb the liquid.
Cool & Store: Remove from heat and allow the jam to cool. Once cooled, transfer it to a clean glass jar or container.
Refrigerate: Store in the refrigerator for up to 1 week—if it lasts that long!
- Pro Tip: If you’re making a large batch, consider freezing half of it for later enjoyment!
Expert Tips & Tricks
Quality Ingredients Matter: Always choose ripe, fresh fruits for flavor and sweetness. Organic berries will yield better results.
Storage: Your Berry Chia Seed Jam will last about a week in the fridge. You can freeze it in small jars for up to 3 months—just thaw in the fridge before use.
Make-Ahead: This jam is simple enough to make ahead of time for breakfasts or brunches. Just whip it up the night before!
Troubleshooting: If your jam isn’t thickening properly, make sure to let it simmer long enough after adding chia seeds; they need time to gel.
Experiment: Don’t be afraid to try different combinations! Blackberries, peaches, and even citrus fruits can be fun additions.
Taste As You Go: Always taste the jam as it cooks. Adjust sweetness and tartness according to your preference!
Serving Suggestions
Your Berry Chia Seed Jam will elevate any breakfast table. Whether you’re spreading it on warm toast, dolloping it on yogurt, or serving it alongside a cheese platter, the options are endless.
For a sophisticated brunch, pair it with fresh scones and clotted cream. You could even drizzle it over a warm bowl of oatmeal topped with nuts. The vibrant color and fruity flavor make it a perfect addition to summer gatherings and picnics too!
Variations & Substitutions
Get creative with your Berry Chia Seed Jam! Here are some fabulous variations you can try:
- Mixed Berry Medley: Combine multiple berries for a vibrant, flavorful jam.
- Spicy Twist: Add a pinch of cayenne or jalapeño for a sweet and spicy version that’s fantastic on grilled cheese!
- Herbaceous Infusion: Infuse with mint or basil for a fresh twist—great for topping desserts!
Dietary Adaptations
- Vegan/Plant-Based: Replace honey with agave syrup or maple syrup for a vegan-friendly option.
- Lower Sugar: Use ripe berries in peak season; they are naturally sweeter, reducing the need for additional sweeteners.
Nutrition & Storage Info
- Prep Time: 10 minutes
- Cook Time: 15 minutes
- Total Time: 25 minutes
- Yield: Approximately 1 cup of jam
- Estimated Calories: About 30 calories per tablespoon
- Storage: Keep in the fridge for up to 1 week or freeze for up to 3 months.
FAQ Section
Can I use frozen berries for this recipe?
- Yes! Frozen berries work well; just thaw them slightly before cooking.
How can I adjust the sweetness?
- Start with less sweetener and add more to taste. Ripe fruits can also make a big difference in flavor!
Is lemon juice necessary?
- Not necessarily, but it adds a lovely tang that balances the sweetness beautifully.
Can I use other seeds instead of chia?
- Unfortunately, chia seeds are key for thickening. However, flaxseeds could be a substitute—just remember to ground them first!
How do I know when the jam is done?
- The jam will thicken upon cooling, but it should coat the back of a spoon before you take it off the heat.
Can I can this jam for longer storage?
- This recipe isn’t designed for traditional canning, but you can freeze it for up to 3 months.
What if my jam is too thick?
- Just add a little water and stir until you reach your desired consistency.
Will the chia seeds become crunchy?
- No, they will absorb liquid and soften during cooking!
Can I add spices to this jam?
- Absolutely! Cinnamon and nutmeg can add a warm depth of flavor.
What’s the best way to serve this jam?
- It’s perfect on toast, pancakes, yogurt, or even as a filling for pastries.
Conclusion
In making this Berry Chia Seed Jam, you’re not just creating a delicious spread; you’re crafting a memory that will warm your heart for years to come. I encourage you to try this recipe and tailor it to your family’s tastes. The joy of homemade jam is not just in its taste, but in the stories woven into every jar.
I would love to hear how yours turns out, so please drop a comment or share your variations on this recipe! And for more delightful creations, check out my other blog posts for more incredible jam and spread ideas. Happy jam-making!