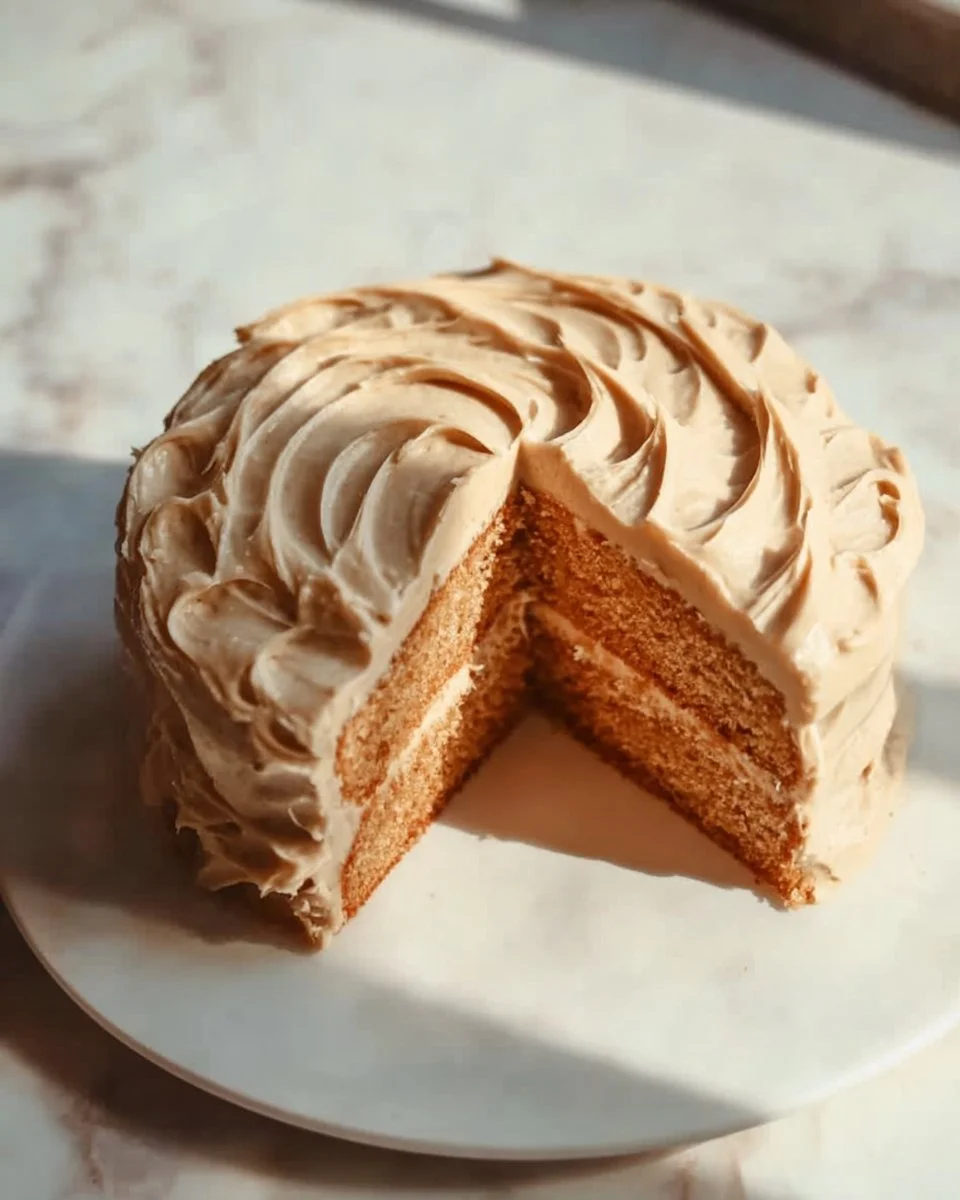
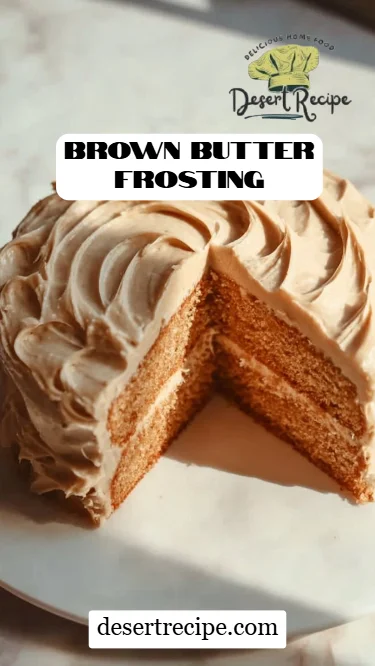
Irresistible Brown Butter Frosting: A Sweet Treat You Can’t Resist!
Imagine standing in your kitchen, the tantalizing aroma of nutty, browned butter filling the air. It instantly takes me back to my childhood, where every family gathering meant my grandmother’s famous vanilla cake slathered with her signature Brown Butter Frosting. It was a frosting that melted in your mouth, adding a warm layer of comfort to every birthday, holiday, and Sunday dinner. I realized that this simple, yet extraordinary frosting holds a special place in my heart, not just for its flavor but for the memories attached to it.
What sets my Brown Butter Frosting apart from the countless recipes out there? The secret lies in the careful browning of the butter, which imparts a rich, toasty flavor that elevates any cake or cupcake to gourmet status. It’s like a warm hug in a frosting! You’ll learn how to master this technique and witness the magic unfold as you whip it all together. Spoiler alert: your friends and family will rave about this treat, and you’ll be their hero!
What Are Brown Butter Frosting?
Brown Butter Frosting, at its core, is a simple yet inventive twist on the classic buttercream. The magic begins with butter, which is slowly melted until it takes on a golden hue and a deep, nutty aroma. This process not only alters the flavor but also creates a silky texture that is hard to replicate.
The taste is unique: rich yet subtle, sweet but balanced with nutty undertones. When combined with fluffy powdered sugar, a touch of milk, and vanilla extract, you get a frosting that is wonderfully creamy and perfect for spreading or piping.
So, when should you make Brown Butter Frosting? The answer is easy—whenever you want to bring joy and comfort to someone (or yourself!) through the delightful experience of homemade baked goods. Whether for special occasions or just a cozy night in, this frosting is your go-to companion.
Why You’ll Love This Recipe
Unmatched Flavor: When compared to store-bought frosts, my Brown Butter Frosting packs an incredible depth because of the browned butter. It’s an instant upgrade from the usual sugary, overly sweet tub of icing we’ve all experienced. Trust me, it’ll transport your taste buds!
Cost-Effective: With just a handful of affordable ingredients, you can create a gourmet frosting that stands up to any café’s offering. No need to splurge on fancy bakery treats when you can whip this up at home.
Customization Galore: This frosting is like a blank canvas! Add flavors like chocolate, coffee, or spices to give it your unique twist. Have leftover Halloween candy? Toss it in for a delicious crunch!
Easy to Make: While it sounds fancy, this recipe is straightforward and can be made in under 30 minutes. If you’re a beginner baker, you’ll feel like a pro in no time.
Versatility: Use it on everything from cupcakes and cakes to brownies and cookies! I even love spreading it on toast for a decadent breakfast treat.
Ingredients Section
Ingredients
- 1 cup unsalted butter: The star of the show! Opt for high-quality butter; it makes a big difference in flavor. I recommend using European-style butter for a richer taste.
- 4 cups powdered sugar: Make sure it’s sifted to avoid lumps. You can use organic powdered sugar for a natural alternative.
- 1/4 cup milk: Whole milk is best for creaminess, but feel free to substitute with almond milk for a dairy-free version.
- 1 teaspoon vanilla extract: Use pure vanilla for an authentic flavor. Your frosting will thank you!
- Pinch of salt: This balances the sweetness and enhances the overall flavor.
Prep Note: Allow your butter to come to room temperature, and have your milk ready at a similar temperature for smoother mixing.
Step-by-Step Instructions
Brown the Butter: In a medium saucepan, melt the unsalted butter over medium heat. Stir frequently for about 5-7 minutes until the butter is golden brown and has a nutty aroma. Pay attention to avoid burning. Remove from heat and let it cool slightly—about 5 minutes will do.
Chef’s Tip: Use a light-colored saucepan to better see the butter’s color change!
Mix the Ingredients: In a mixing bowl, combine the browned butter with all the powdered sugar, milk, vanilla extract, and a pinch of salt.
Beat Until Smooth: With an electric mixer, beat on low speed to blend, then increase to medium speed for about 2-3 minutes until the mixture is smooth and creamy.
Common Mistake to Avoid: Beat on low speed initially to prevent powdered sugar from flying everywhere!
Check Consistency: If the frosting is too thick, add additional milk, one tablespoon at a time, mixing well until you reach your desired consistency.
Frost Away: Use immediately to frost your favorite cupcakes, cakes, or bars.
Tip for Professional Finish: Use a piping bag for more intricate designs!

Expert Tips & Tricks
Storage Recommendations: Store any leftover frosting in an airtight container in the fridge for up to 1 week. Before using, let it soften at room temperature or re-beat to restore its texture.
Make-Ahead Instructions: You can brown the butter and store it separately in the fridge for up to a week. Just make sure to bring it back to room temperature before using.
Troubleshooting Common Problems: If your frosting is too thin, simply add more powdered sugar until you achieve the desired thick consistency.
Flavor Boost: Try using infused oils (like vanilla or almond) for an extra layer of flavor. Testing with different brands of vanilla can lead to delightful surprises!
Serving Suggestions
This delightful Brown Butter Frosting pairs beautifully with a fluffy vanilla cake or rich chocolate cupcakes. For added delight, serve alongside a hot cup of coffee or tea to create a cozy afternoon treat. Consider adding a sprinkling of sea salt on top for an added contrast in flavor and a touch of elegance.
Variations & Substitutions
Flavor Combinations: Try adding a tablespoon of espresso powder for a mocha flavor or a few drops of almond extract for a twist.
Dietary Restrictions: For a vegan version, substitute the butter with a dairy-free alternative, such as coconut oil, and use almond or oat milk.
Seasonal Variations: Add a pinch of cinnamon and nutmeg for a fall-inspired frosting or incorporate some melted peppermint extract for a holiday-inspired treat.
Nutrition & Storage Info
- Prep Time: 10 minutes
- Cook Time: 7 minutes
- Total Time: 17 minutes
- Yield: About 3 cups (sufficient for frosting 24 cupcakes)
- Estimated Calories: Approximately 100 calories per serving (2 tablespoons)
Storage Instructions:
- Room Temperature: Best served fresh but can be left out for a few hours in a cool place.
- Fridge: Lasts up to 1 week.
- Freezer: Can be frozen for up to 3 months in an airtight container; thaw in the fridge before using.
FAQ Section
Can I use salted butter?
- Yes, but consider omitting or reducing the pinch of salt for balance.
How can I make this a chocolate Brown Butter Frosting?
- Replace 1 cup of powdered sugar with unsweetened cocoa powder.
What if I don’t have an electric mixer?
- You can whisk by hand! It may take a bit more effort, but you’ll get a great workout!
Can I double this recipe?
- Yes! Simply double all ingredients for larger batches.
How should I store leftover frosting?
- In an airtight container in the fridge.
Does this frosting harden?
- It will set up somewhat when chilled but remains spreadable.
Can I pipe with this frosting?
- Absolutely! It holds its shape beautifully when piped.
Why is my frosting grainy?
- This can happen if the powdered sugar wasn’t sifted; make sure to sift for a smooth finish.
Can I use brown sugar instead of powdered sugar?
- While it’s possible, the consistency will change and it may not hold up as well.
How long can I keep this frosting in the freezer?
- Up to 3 months; just ensure it’s in an airtight container!
Conclusion
In a world filled with frosting options, this Brown Butter Frosting shines as a cherished recipe passed down through generations. Its rich, nutty flavor can elevate even the simplest of cakes or cupcakes into a delightful treat that evokes warmth and joy. I encourage you to try this recipe, and I’d love to hear how it turned out for you! Don’t forget to check out my other recipes for equally enticing desserts that will surely impress your family and friends. Happy baking!