Table of Contents
Table of Contents
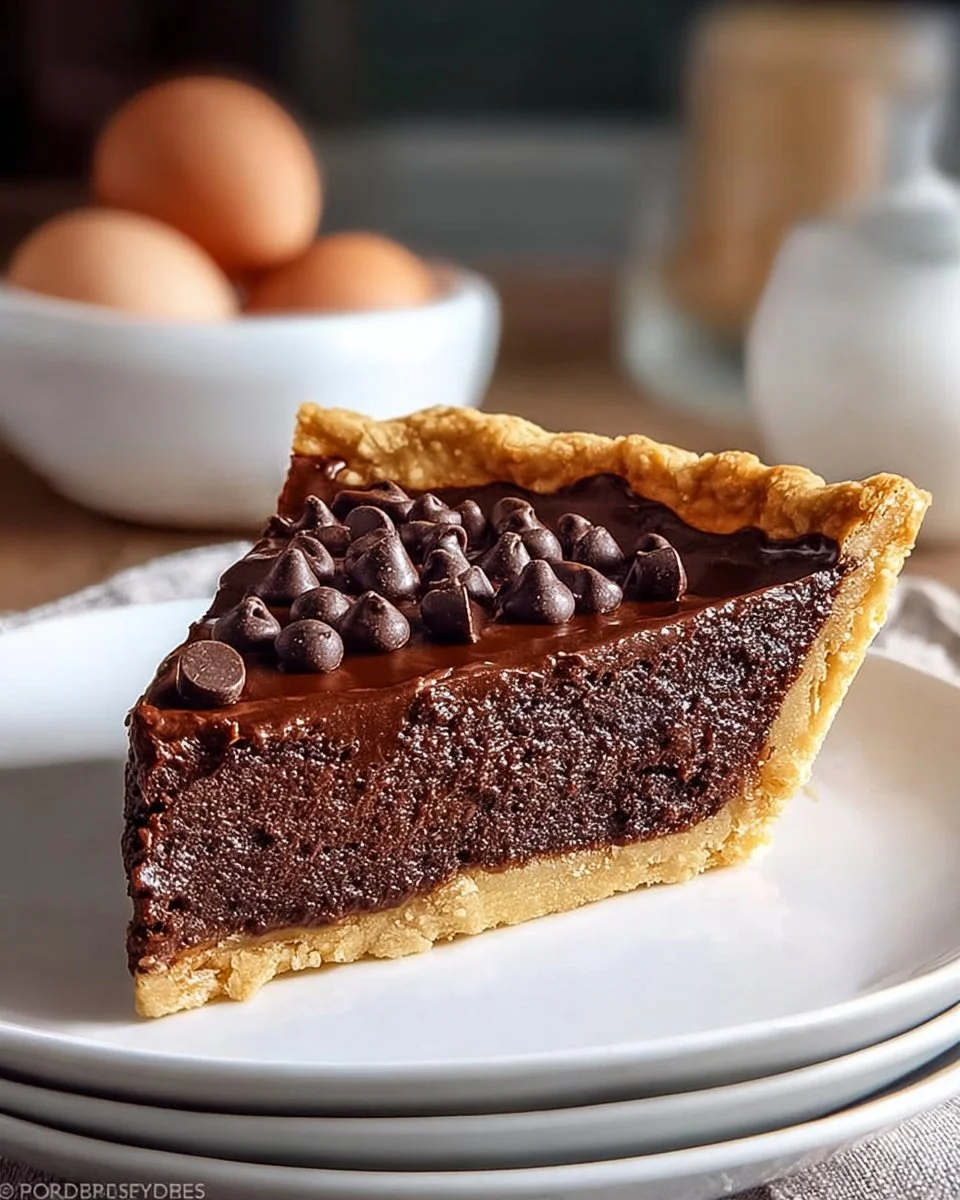
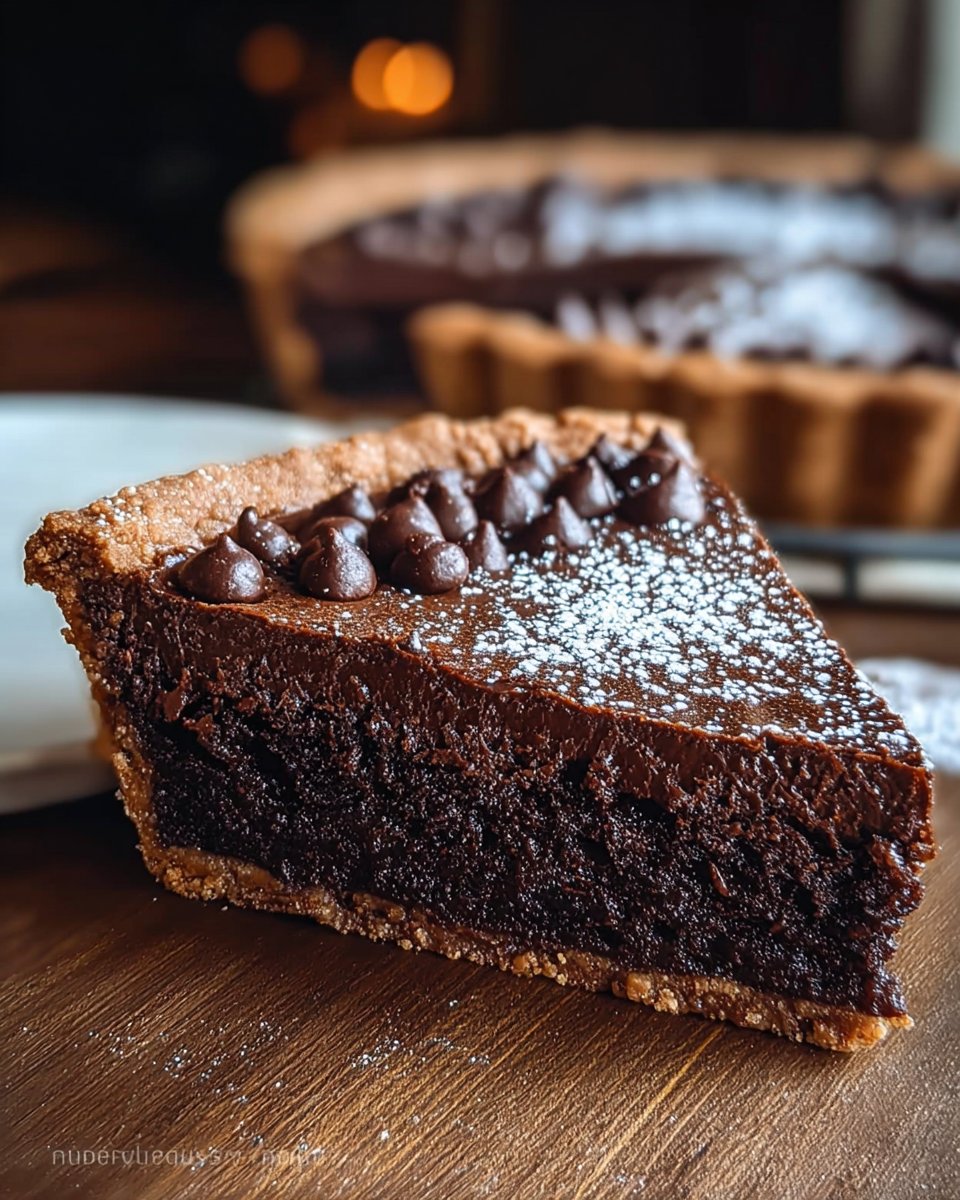
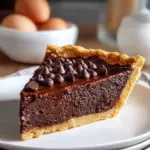
Indulge in Deliciousness: The Ultimate Brownie Pie Recipe
Ah, the sweet memory of family bake days! There I was, a little kid in the kitchen, flour clouds floating in the air, and the irresistible aroma of chocolate enveloping my senses. My mom would whip up her famous brownie pie, a magical concoction that turned an ordinary day into an extraordinary one. Nowadays, that cherished recipe has evolved into my own twist—an indulgent brownie pie that captures the essence of those sweet moments. With a fudgy chocolate core enveloped in a flaky pie crust, I promise you won’t find anything quite like it!
This brownie pie isn’t just desserts; it’s about comfort, nostalgia, and connection. Unlike typical brownie recipes that leave you feeling heavy, this one balances between gooey and flaky, making each bite a luscious experience. In this post, I’ll guide you through making your own brownie pie, revealing my kitchen secrets and unforgettable tips along the way. You’ll be amazed at how simple it is to create a dessert that brings friends and family together while warming your heart. Let’s turn your kitchen into a cozy haven filled with the enchantment of chocolate!
What Are Brownie Pies?
Brownie pies are a delightful hybrid dessert combining the best elements of brownies and pie. Originating from the trend of innovative baking, this pie takes the rich, chocolatey goodness we adore in brownies and cradles it in a tender, flaky pie crust. Their texture is a heavenly mix: the bottom boasts a buttery crunch while the middle envelops a rich, gooey brownie texture that sings of chocolatey bliss with every forkful.
These brownie pies are perfect for any occasion—be it an afternoon dessert, a potluck treat, or a celebratory finish to a holiday meal. You might be asking yourself, “Why would I want to make a brownie pie instead of just brownies?” Well, they beautifully elevate the traditional treat and make for fabulous presentation. When you pull it out of the oven with its glossy top and subtle cracks, it’s sure to impress anyone fortunate enough to share in the culinary magic!
Why You’ll Love This Recipe
Let me tell you why this brownie pie will quickly become the star of your dessert repertoire:
Simple to Make: This isn’t a fussy recipe! Even novice bakers can master it with ease. The steps are straightforward, and before you know it, you’ll have a stunning dessert to showcase.
Versatile Flavor: Want to throw in some nuts, sea salt, or swirls of peanut butter? Go for it! This brownie pie is a blank canvas waiting for your personal touch and favorite combinations.
Cost-Effective: Unlike expensive store-bought desserts that might disappoint, all you need are a few simple ingredients that you probably already have in your pantry.
Impressive Presentation: Store-bought brownies don’t hold a candle to a freshly baked brownie pie. When you slice into it, the decadent chocolate will melt in your mouth while hard-to-resist ooohs and ahhhs emerge from your guests.
Satisfying and Comforting: This pie isn’t just filling; it’s a hug in slice form. Perfect for sharing, it embodies that comforting feeling we all seek from our favorite desserts.
Let’s get started on crafting this delightful brownie pie, and you’ll soon find out why it captures our hearts—and taste buds!
Ingredients
To bring our brownie pie to life, here’s what you’ll need:
6 Tbsp butter – For that melt-in-your-mouth texture. Be sure to use unsalted butter for flavor control. Allow it to come to room temperature for easy melting.
3 cups semi-sweet chocolate chips, divided – Quality matters! I recommend Ghirardelli or Nestlé for a rich, deep chocolate flavor.
3 eggs – Large and fresh, these will bring moisture and richness.
1 cup sugar – Regular granulated sugar works best, but you could substitute with brown sugar for a hint of caramel flavor.
1 tsp vanilla extract – Go for pure vanilla extract if possible; the flavor difference is significant.
1/2 cup flour – All-purpose flour holds everything together. Make sure it’s sifted for lighter texture results!
1/4 tsp baking powder – This little helper provides just enough lift for a perfect rise.
1/4 tsp salt – It enhances the flavors beautifully; don’t skip this step!
1 ready pie crust – You can either make your own or grab a pre-made one. I’ve had great results with Pillsbury’s refrigerated crust.
Step-by-Step Instructions
Now, let’s dive into the fun part—making our brownie pie! Follow these detailed instructions for the best results.
Preheat your oven to 350°F (175°C) and grease a pie plate or a 9-inch springform pan. This will ensure your pie comes out smoothly and doesn’t stick.
Melt the butter and chocolate chips: In a heat-safe bowl, combine the butter and 2 cups of semi-sweet chocolate chips. You can do this using a double boiler or by microwaving in 30-second intervals at 50% power. Stir until nice and smooth. Allow it to cool slightly—this is key so we don’t cook our eggs!
Beat the eggs: Grab your electric mixer and beat the 3 eggs, 1 cup sugar, and 1 tsp vanilla extract on medium-high speed. Whip it for about 3 minutes until it’s light and fluffy. Your arms will thank you later!
Combine with chocolate: Once your chocolate mixture has cooled down (don’t skip this!), mix it into the eggs and sugar until well combined.
Fold in the dry ingredients: Gently fold in the 1/2 cup flour, 1/4 tsp baking powder, and 1/4 tsp salt until just combined. We want a soft batter, and overmixing can lead to a dense texture! Then, stir in the remaining 1 cup of chocolate chips for those glorious pockets of melted chocolate.
Fill the pie crust: Pour the luscious brownie batter into the prepared pie crust. If you’re feeling adventurous, sprinkle some extra chocolate chips on top!
Bake: Place your pie in the oven and bake for about 35-40 minutes. You’ll know it’s done when the center is puffed, and you see some subtle cracks on top. This texture is exactly what we’re going for!
Cool and indulge: Remove it from the oven and allow it to cool completely. Drizzle with hot fudge before serving if you want to take it up a notch.
Chef’s Tips:
To prevent overbaking, check the pie around 30 minutes. We want a fudgy center, not a dry brownie.
If the top is browning too quickly, cover it loosely with aluminum foil.
Allow it to cool completely for the best slicing results!
Common Mistakes to Avoid:
Overmixing: Be gentle when folding in the flour and baking powder to maintain a fluffy texture.
Not cooling chocolate enough: Always let the melted chocolate cool slightly to avoid scrambling the eggs.
Skipping measurements: Baking is science, so get your measuring cups and spoons out for accuracy!

Expert Tips & Tricks
Let’s ensure your brownie pie turns out absolutely perfect! Here are some professional tips I’ve learned over years of baking:
Storage: Store your brownie pie at room temperature covered for up to 3 days. If you want to keep it longer, refrigerate it for up to a week, or freeze it for up to 2 months.
Make-ahead: You can prepare the batter the night before, store it in the refrigerator, then pour it into the crust and bake the next day. Easy peasy!
Use a toothpick for testing: If there’s a little batter clinging to the toothpick when you check for doneness, that’s a sign it’s perfectly fudgy!
Want to make it gluten-free? Just substitute the all-purpose flour with a gluten-free blend, and you’re good to go!
Flavor variations: Try adding a teaspoon of espresso powder to deepen the chocolate flavor or a splash of almond extract for a twist!
Troubleshooting: If your brownie pie sinks in the middle as it cools, it might have been under-baked. Experiment with time, but remember we want that fudgy center!
Serving Suggestions
Your brownie pie is ready to shine, so let’s talk about the best ways to serve it up! Pair it with a scoop of vanilla ice cream for a classic combo that creates an irresistible contrast with the warm pie. Drizzle with caramel sauce or add a sprinkle of sea salt for an extra layer of flavor.
For a fancy finish, whip up some homemade whipped cream and plop a dollop on top—your guests will be begging for seconds! Ideal for birthdays, holidays, or simply a cozy evening in, this dessert transforms any gathering into a sweet celebration.
Variations & Substitutions
Mixing things up keeps baking exciting! Here are some variations on our brownie pie:
Nutty Delight: Add half a cup of chopped walnuts or pecans for crunch.
Mint Chocolate Chip: Stir in some peppermint extract and a handful of chocolate mint chips for a refreshing kick!
Autumn Spice: During the fall, incorporate some pumpkin purée and spices like cinnamon and nutmeg for a seasonal spin.
Vegan Variation: Substitute the eggs with a flaxseed meal (1 tbsp flaxseed + 3 tbsp water per egg) and use vegan butter and chocolate.
With these options, you can sneak a little creativity into every chocolatey bite.
Nutrition & Storage Info
- Prep Time: 15 minutes
- Cook Time: 35-40 minutes
- Total Time: About 1 hour
- Yield: Serves 8
- Estimated Calories per Serving: Approximately 300 calories
Storage Instructions:
- Room Temperature: Up to 3 days covered.
- Fridge: Up to 1 week (best to consume within 3 days for flavor).
- Freezer: Wrap in plastic wrap and foil for up to 2 months. Thaw overnight in the fridge before serving.
FAQ Section
Can I use milk chocolate chips instead of semi-sweet?
Absolutely! Just keep in mind that milk chocolate will result in a sweeter brownie pie.Is this recipe suitable for make-ahead?
Yes, you can prepare the batter ahead of time and bake it the next day!Can I make this brownie pie gluten-free?
Yes! Simply use a gluten-free flour blend for the best results.What if my pie crust gets too brown?
Cover it with foil if it’s browning too quickly while baking.How do I know when my brownie pie is done?
The center should be puffed, and a toothpick should come out with a few moist crumbs.What is the best way to slice brownie pie?
Use a sharp knife dipped in hot water for clean edges!Can I add other flavors to this recipe?
For sure! Try adding peanut butter swirls or mint extract for fun variations!How do I store leftover brownie pie?
Store in an airtight container at room temperature or refrigerate for longer freshness.Is there a way to make it less sweet?
You can cut down the sugar a little, but it will affect the texture slightly.Can I double the recipe?
Yes! Just be sure to adjust your baking time accordingly if you use a larger pan.
Conclusion
This brownie pie is not just a dessert; it’s a slice of nostalgia served warm, filled with rich chocolatey goodness that rekindles sweet memories. Whether shared at family gatherings or enjoyed after a long day, it’s bound to become a cherished recipe in your kitchen, just as it has in mine.
I encourage you to try making this brownie pie and feel the warmth it brings. I would love to hear how yours turned out—so please drop a comment or share your experience below. Looking for more delightful recipes? Check out my blog for other chocolatey treats and family favorites that will resonate with your sweetest memories!
No Bake Easy Coconut Cream Pie Recipe
Happy baking!
Brownie-Pie
Ingredients
Method
- Preheat your oven to 350°F (175°C) and grease a pie plate or a 9-inch springform pan.
- In a heat-safe bowl, combine the butter and 2 cups of semi-sweet chocolate chips. Melt using a double boiler or microwave in 30-second intervals at 50% power until smooth. Allow to cool slightly.
- Beat the eggs, sugar, and vanilla extract on medium-high speed for about 3 minutes until light and fluffy.
- Mix the cooled chocolate mixture into the whipped eggs and sugar until well combined.
- Gently fold in the flour, baking powder, and salt until just combined. Stir in the remaining chocolate chips.
- Pour the brownie batter into the prepared pie crust and sprinkle some extra chocolate chips on top if desired.
- Bake in the oven for about 35-40 minutes, or until the center is puffed and has subtle cracks on top.
- Allow to cool completely before serving. Drizzle with hot fudge if desired.