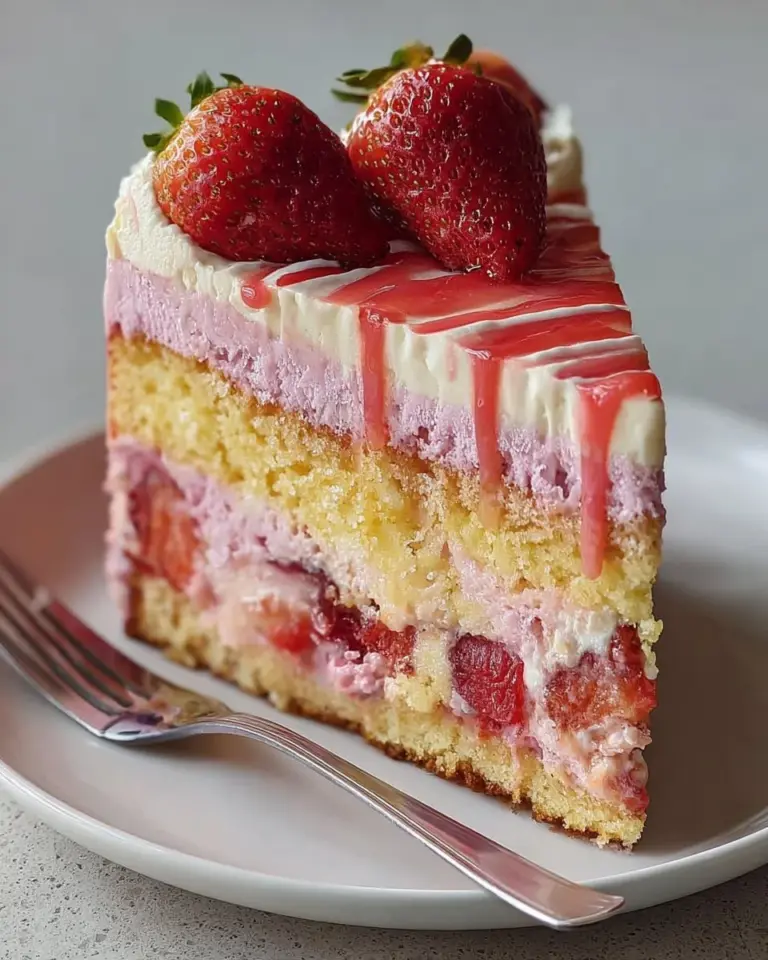
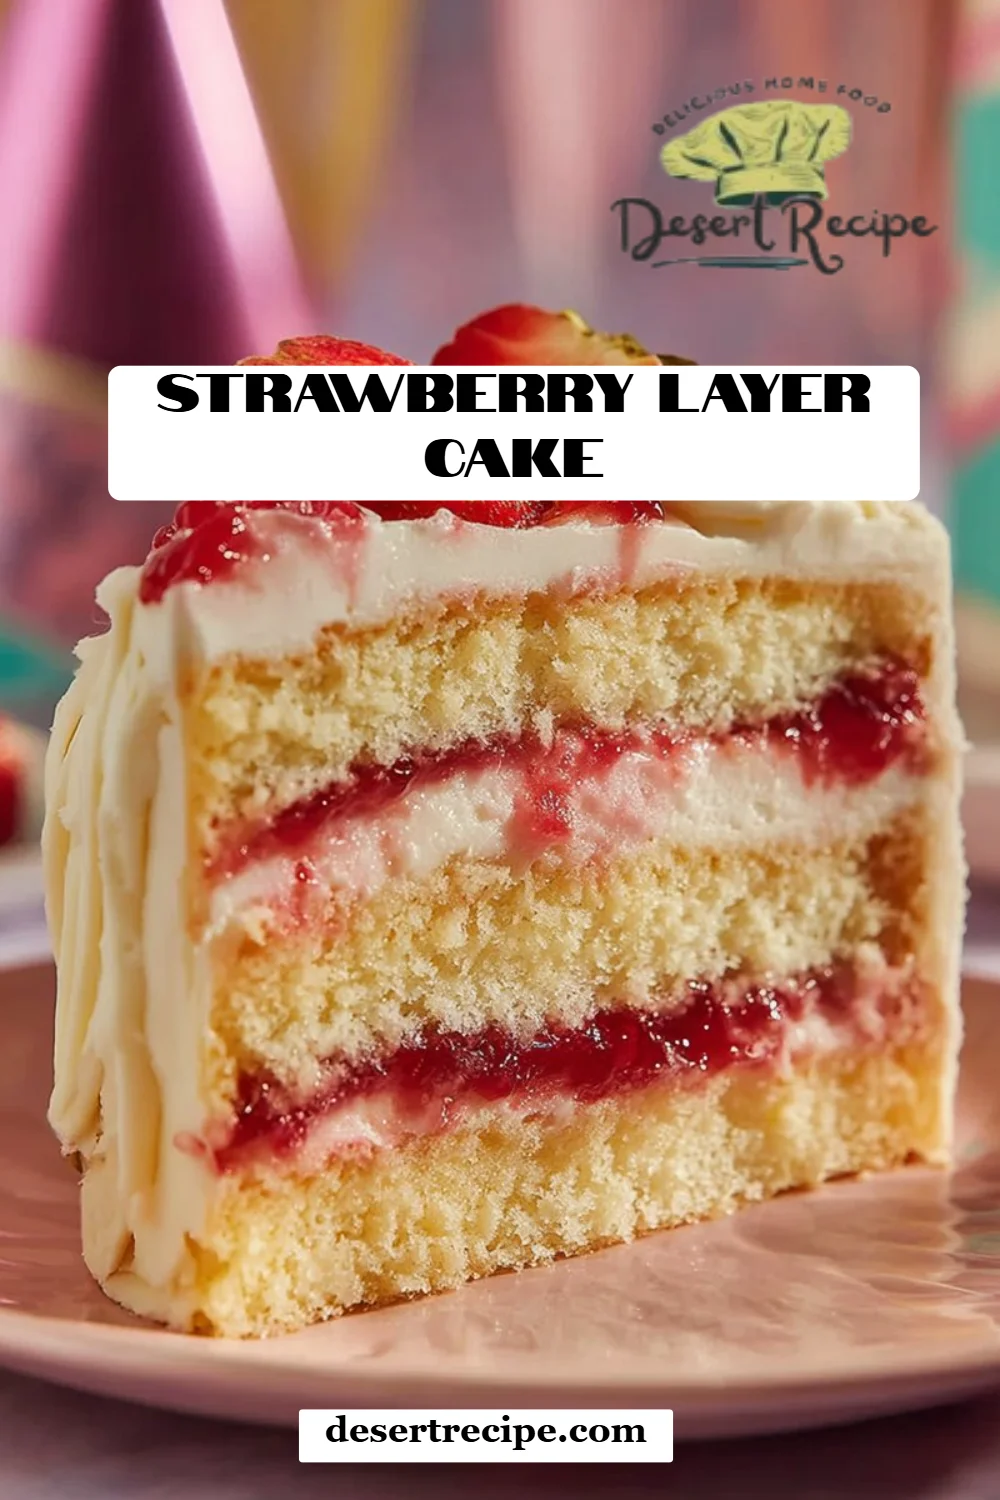
Irresistible Strawberry Layer Cake: The Ultimate Recipe for Family Joy
As a child, summer meant one thing in my house: Grandma’s Strawberry Layer Cake. The sweet scent of fresh strawberries wafting through the kitchen, the chill of whipped cream-topped layers, and that first bite—oh, how it would send my taste buds dancing! I remember rushing home from school, the warm breeze wrapping around me, only to be greeted by the glorious sight of that towering cake, each layer begging to be devoured. It wasn’t just a dessert; it was a celebration, a memory etched in my heart.
Today, I’m sharing my own version of that beloved Strawberry Layer Cake. What sets this recipe apart from others is the simple yet luscious homemade strawberry filling that captures the essence of summer in every bite. You won’t just be baking a cake; you’ll be creating memories, just like my grandma did for me. This cake is a shining centerpiece for birthdays, family gatherings, or even a cozy afternoon tea with friends.
In this post, you’ll learn how to craft this stunning Strawberry Layer Cake step-by-step, ensuring each layer is moist, flavorful, and downright irresistible. Are you ready to bring joy to your kitchen and smiles to your loved ones? Let’s bake!
What Are Strawberry Layer Cakes?
Strawberry Layer Cakes have a delightful history that takes us back to classic American home baking. This iconic treat features beautifully layered sponge cake, subtly flavorful from real strawberries and enriched with creamy frosting. The combination creates an inviting texture—light yet moist, soft yet substantial. Each bite bursts with the freshness of ripe strawberries, perfectly complementing the buttery layers.
What’s unique about Strawberry Layer Cake is its versatility. Not only does it shine in its classic form, but you can also customize it for any occasion, whether dressing it up for a garden party or keeping it simple for a cozy family dinner. Perfect for spring and summer, it’s also a fantastic way to celebrate life’s sweet moments—it’s more than just dessert; it’s a symbolic cake of happiness and connection.
Why You’ll Love This Recipe
1. Home-Baked Goodness
There’s nothing quite like the comfort of a homemade dessert. Unlike store-bought cakes, my Strawberry Layer Cake is made from scratch, with fresh ingredients layered in harmony for a genuine taste of home. You won’t find any preservatives or artificial flavors here!
2. Cost-Effective Delight
Making this cake at home not only saves you money but also gives you complete control over the quality of each ingredient. When you compare the price of store-bought cakes, you’ll see that investing in your own ingredients is both budget-friendly and rewarding.
3. Customization at Its Best
Feel free to get creative! Want a hint of lemon in your frosting? Or perhaps a chocolate layer to surprise your guests? This recipe serves as the perfect base for various flavor profiles, allowing you to impress your family and friends with your unique touch.
4. Perfect for Any Occasion
Whether it’s a birthday bash, a bridal shower, or a casual potluck, this cake fits perfectly into any celebration. Not to mention, it never fails to elicit "oohs" and "aahs" from everyone who lays eyes on its beautiful layers.
5. Easy to Follow
Don’t worry if you’re a novice in the kitchen! This recipe breaks down each step in detail, ensuring that you achieve a beautiful cake that even seasoned bakers will appreciate. Plus, it’s an exciting challenge that’s incredibly satisfying once completed.
Ingredients for Strawberry Layer Cake
- 4.25 cups all-purpose flour
- 3.5 tsp baking powder
- 2 cups sugar
- 0.75 tsp salt
- 1 cup unsalted butter, at room temperature for easy creaming
- 0.5 tsp ground cinnamon
- 4 large eggs, at room temperature (about 70°F)
- 2 cups milk, at room temperature
- 1/3 cup vegetable oil
- 2 tbsp vanilla essence
- 1 cup strawberry preserves
- 2 tbsp fresh lemon juice
- 4.5 cups powdered sugar (sifted to remove lumps)
- 8 oz cream cheese, softened to room temperature for a smooth frosting
- 1/2 cup unsalted butter, for frosting
- 1.5 tsp vanilla essence (for frosting)
- 4 tbsp milk (for frosting)
- Fresh strawberries for decoration
Ingredient Notes:
- Quality Matters: Opt for fresh, ripe strawberries for the best flavor. Local farmers’ markets are ideal for sourcing them.
- Room Temperature Ingredients: This is crucial! It ensures a smoother batter, leading to a fluffier cake.
- Brand Recommendations: For baking essentials, brands like King Arthur Flour for all-purpose flour and Land O Lakes for butter are top-notch choices.
Step-by-Step Instructions
1. Preheat your oven
Start by preheating your oven to 350°F (175°C). Grease and line your 9-inch round cake pans with parchment paper.
2. Prepare the Buttermilk
In a small bowl, combine 2 cups of milk and 2 tbsp of lemon juice. Stir and set aside for 5-10 minutes to create homemade buttermilk.
3. Combine Dry Ingredients
In a large mixing bowl, whisk together 4.25 cups of flour, 3.5 tsp of baking powder, 0.75 tsp of salt, and 0.5 tsp of ground cinnamon until evenly mixed.
4. Cream Butter and Sugar
In another mixing bowl, beat 1 cup of butter and 2 cups of sugar on medium speed until light and fluffy—around 3-5 minutes. Add in 4 eggs, one at a time, ensuring each egg is fully incorporated before moving on. Mix in the 2 tbsp of vanilla essence and 1/3 cup of oil.
5. Mix Dry and Wet Ingredients
Slowly alternate adding the flour mixture and the buttermilk mixture to the butter mixture, starting and ending with the flour. Mix until just combined—do not overmix!
6. Bake the Layers
Divide the batter evenly between the two prepared cake pans and smooth the tops. Bake for 30-35 minutes, or until a toothpick inserted in the center comes out clean. Chef’s Tip: The edges should pull away slightly from the pan when done. Cool the cakes in the pans for about 10 minutes before transferring them to a wire rack to cool completely.
7. Prepare the Strawberry Filling
While the cakes cool, in a small bowl, mix together 1 cup of strawberry preserves and 2 tbsp of lemon juice until well blended. Set aside.
8. Make the Frosting
In a mixing bowl, beat 8 oz of cream cheese and 1/2 cup of butter until smooth. Gradually add 4.5 cups of powdered sugar along with 1.5 tsp of vanilla essence and 4 tbsp of milk, beating until you have a fluffy frosting.
9. Assemble the Cake
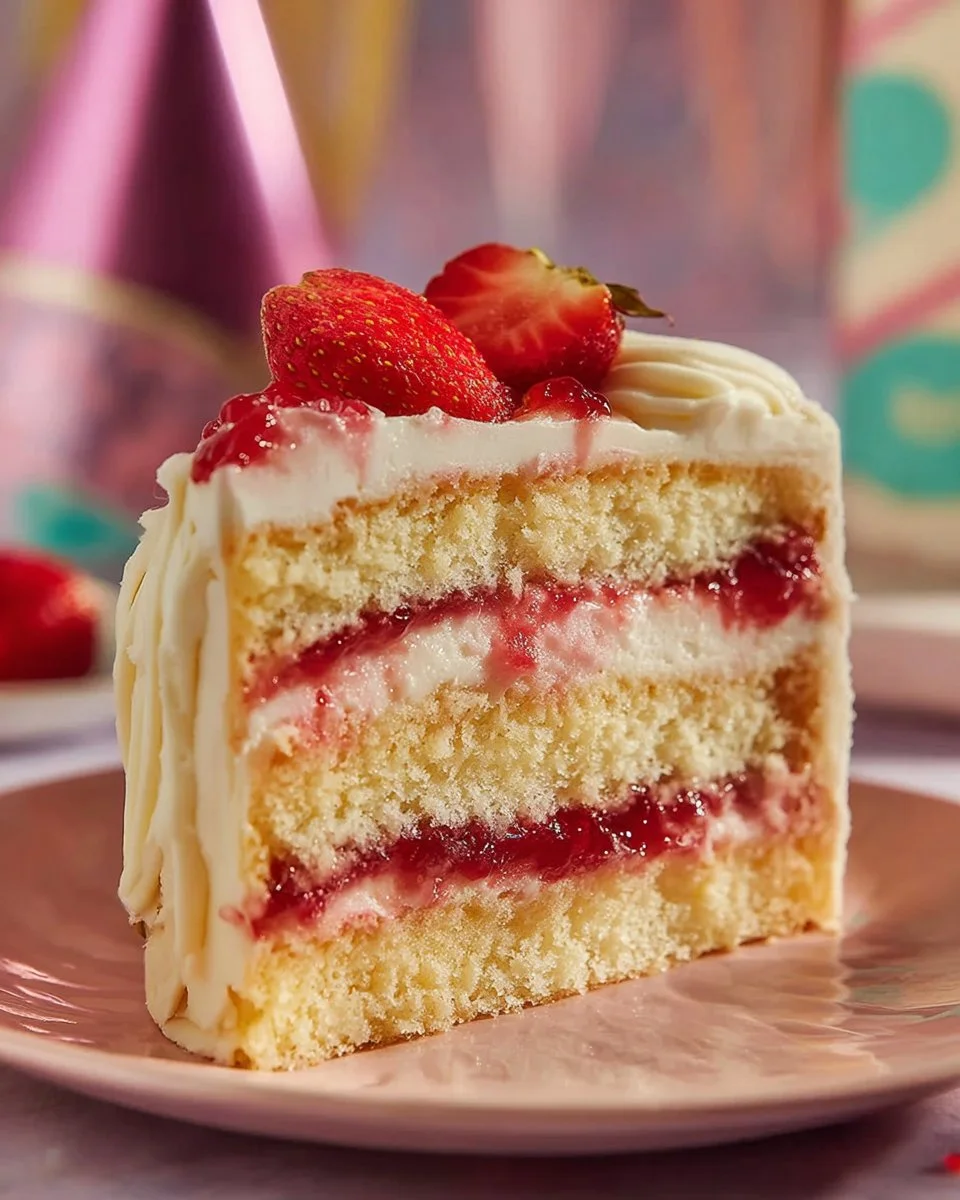
Once the cakes are cool, level the tops if necessary. Place one layer on a serving platter and spread a portion of the strawberry filling over the top. Add a layer of frosting, then carefully place the second cake on top.
10. Decorate
Spread frosting over the top and the sides of the cake. Decorate with fresh strawberries atop the cake and around the base for a stunning presentation. Chef’s Tip: Refrigerate the cake for about 5 minutes before serving to set the frosting.
Expert Tips & Tricks
1. Baking Time Variation
Oven temperatures can vary; check your cake a few minutes early to avoid overbaking.
2. Storage Recommendations
This cake can be stored in the fridge for up to 3 days. It also freezes beautifully for up to three months—simply wrap well in plastic wrap and aluminum foil.
3. Make-Ahead Instructions
You can prepare the cake layers a day in advance, just cool them completely and store them wrapped in plastic wrap on your counter.
4. Troubleshooting
Cake too dry? Ensure you’re measuring your flour correctly—using the spoon and level method helps avoid this common mistake!
5. For Best Results
Allow your eggs and butter to reach room temperature. This simple tip can make a world of difference in consistency!
Serving Suggestions
Pair your Strawberry Layer Cake with a dollop of whipped cream or a scoop of vanilla ice cream for an indulgent treat. Consider serving it alongside a refreshing glass of iced tea or sparkling lemonade—ideal for summer gatherings. For a touch of elegance, plate it with a sprig of mint or a dusting of powdered sugar, elevating it to restaurant quality.
Variations & Substitutions
- Different Flavors: Replace strawberries with blueberries for a delightful twist or try raspberries for a tart kick.
- Dietary Needs: For gluten-free options, substitute with a gluten-free all-purpose flour blend. If you need to veganize the recipe, use flax eggs and a dairy-free butter substitute.
- Seasonal Variations: Incorporate seasonal fruits such as peaches in summer or spiced apples in the fall to celebrate the changing seasons.
Nutrition & Storage Info
- Prep Time: 30 minutes
- Cook Time: 35 minutes
- Total Time: 1 hour 5 minutes
- Yield: 12 servings
- Estimated Calories: About 400 calories per slice
- Storage:
- Room Temperature: 1 day
- Refrigerated: 3 days
- Freezer: Up to 3 months
FAQ Section
Can I use frozen strawberries?
Yes, you can, but make sure to thaw and drain excess water before using them!What can I use instead of cream cheese in the frosting?
Use mascarpone or a dairy-free cream cheese substitute for a different flavor profile.How can I prevent my cake from sticking to the pans?
Make sure to grease and flour your pans properly or use parchment paper for easier release.What if I don’t have lemon juice?
You can substitute with vinegar or replace it with more milk for the buttermilk mixture.Can I bake the cake in a different pan size?
Yes! Adjust baking time according to the size of the pans used—small pans may take less time, larger pans may take more.How do I know when my cake is done baking?
A toothpick inserted in the center should come out clean or with a few moist crumbs.Can I make this cake ahead of time?
Absolutely! The cake layers can be baked a day in advance and frosted when ready to serve.How do I store leftovers?
Store any leftover cake covered in an airtight container in the fridge for freshness.What’s the best way to level my cake?
Use a serrated knife or a cake leveler to trim the dome off your baked layers for even stacking.Can I add food coloring to the frosting?
Certainly! Gel food coloring works best for a more vibrant hue without altering the frosting’s consistency.
Conclusion
This Strawberry Layer Cake isn’t just a dessert—it’s an invitation to gather, celebrate, and create precious memories with loved ones. With each moist layer and delightful frosting, you’ll be reminded that the best flavors come from the heart. Don’t just take my word for it; try this recipe yourself and indulge in the joy it brings. I can’t wait to hear your thoughts after you bake it. Share your feedback in the comments below, and if you’re looking for more delightful recipes, check out my blog for a treasure trove of baking inspirations!

Strawberry Layer Cake
Ingredients
Method
- Preheat your oven to 350°F (175°C). Grease and line your 9-inch round cake pans with parchment paper.
- In a small bowl, combine 2 cups of milk and 2 tbsp of lemon juice. Stir and set aside for 5-10 minutes to create homemade buttermilk.
- In a large mixing bowl, whisk together 4.25 cups of flour, 3.5 tsp of baking powder, 0.75 tsp of salt, and 0.5 tsp of ground cinnamon until evenly mixed.
- In another mixing bowl, beat 1 cup of butter and 2 cups of sugar on medium speed until light and fluffy—around 3-5 minutes. Add in 4 eggs, one at a time, ensuring each egg is fully incorporated before moving on. Mix in the 2 tbsp of vanilla essence and 1/3 cup of oil.
- Slowly alternate adding the flour mixture and the buttermilk mixture to the butter mixture, starting and ending with the flour. Mix until just combined—do not overmix!
- Divide the batter evenly between the two prepared cake pans and smooth the tops. Bake for 30-35 minutes, or until a toothpick inserted in the center comes out clean.
- Cool the cakes in the pans for about 10 minutes before transferring them to a wire rack to cool completely.
- While the cakes cool, in a small bowl, mix together 1 cup of strawberry preserves and 2 tbsp of lemon juice until well blended. Set aside.
- In a mixing bowl, beat 8 oz of cream cheese and 1/2 cup of butter until smooth. Gradually add 4.5 cups of powdered sugar along with 1.5 tsp of vanilla essence and 4 tbsp of milk, beating until you have a fluffy frosting.
- Once the cakes are cool, level the tops if necessary. Place one layer on a serving platter and spread a portion of the strawberry filling over the top. Add a layer of frosting, then carefully place the second cake on top.
- Spread frosting over the top and the sides of the cake. Decorate with fresh strawberries atop the cake and around the base.
- Refrigerate the cake for about 5 minutes before serving to set the frosting.