Table of Contents
Table of Contents
Ah, the warm, buttery aroma of freshly baked cookies wafting from the kitchen! If you’re like me, the holidays just wouldn’t be the same without indulging in those classic Chocolate Chip Christmas Cookies. I fondly remember my mom and I working together in the kitchen, flour dusting our noses, as we chattered about the best holiday traditions while effortlessly mixing up a batch. Those delightful cookies, with their gooey chocolate chips and festive sprinkles, became a staple at our family gatherings, evoking laughter and joy with every bite.
What sets this specific Chocolate Chip Christmas Cookies recipe apart from the rest? It’s that extra layer of love and holiday spirit, along with a few secrets I’m excited to share with you. You’ll learn how to create cookies that are not only deliciously chewy and rich in flavor but also visually captivating, thanks to a sweet chocolate dip and a sprinkle of festive colors. Get ready to create lasting memories in your own kitchen. Let’s dive into this delightful recipe, and trust me, your family and friends will be begging for seconds!
What Are Chocolate Chip Christmas Cookies?
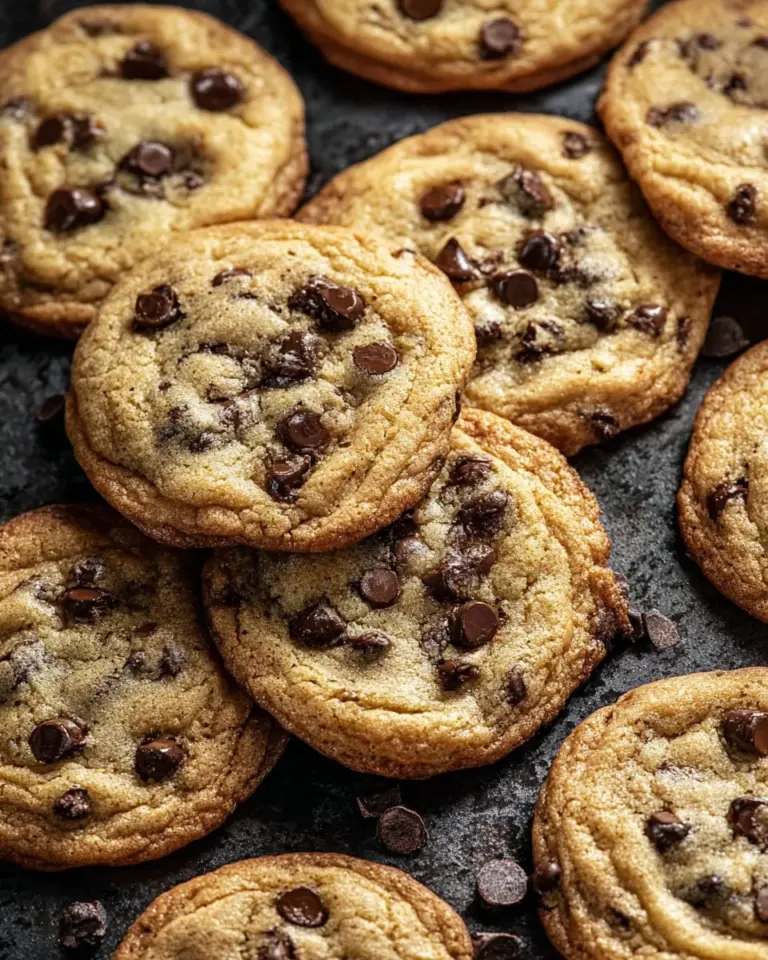
Chocolate Chip Christmas Cookies are a festive twist on the beloved classic cookie that we all know and adore. Originating in the 1930s, these cookies gained popularity with the rise of Nestle Toll House chocolate chips, and they’ve been a holiday staple ever since. What makes them special? The scrumptious combination of chewy dough, melty chocolate, and a hint of nostalgia makes each bite feel like a warm hug.
When properly baked, these cookies boast a golden-brown exterior while remaining soft and gooey on the inside. The balance of sweet and salty flavors paired with rich chocolate chips creates a mouthwatering experience that’s simply irresistible. They’re perfect for holiday gatherings, cookie exchanges, or just cozy nights at home. Whether you’re celebrating with family or sharing with friends, these cookies are sure to bring smiles all around.
Why You’ll Love This Recipe
Unmatched Taste: Locally baked cookies always beat store-bought, and trust me, this recipe takes the crown! You can customize flavors, sprinkle festive colors, or dip in chocolate for that special touch.
Budget-Friendly: Making your own cookies is not only more rewarding but also wallet-friendly. With simple ingredients like butter, sugar, and chocolate chips, you can create a batch that far exceeds store-bought versions.
Customizable Options: Feeling adventurous? Try different types of chocolate, add nuts, or experiment with spices. My favorite addition has to be orange zest; it adds a refreshing holiday twist!
Easy to Make: This cookie recipe is beginner-friendly! You don’t have to be a professional baker; with about 20-30 minutes of actively working, the rest is just waiting for the oven to do its magic.
Memory-Making: Baking these cookies can become a cherished family tradition. I’ve seen firsthand the joy it brings to my kids, eagerly waiting by the oven for that first batch to come out!
Ingredients
To whip up these scrumptious Chocolate Chip Christmas Cookies, gather the following ingredients:
- 1 cup butter, softened (I recommend using unsalted for better control over sweetness)
- 3/4 cup granulated sugar
- 3/4 cup brown sugar, packed (for that caramel-like flavor)
- 1 teaspoon vanilla extract (use pure vanilla for an extra depth of flavor)
- 2 large eggs (make sure they’re at room temperature for better mixing)
- 2 1/4 cups all-purpose flour
- 1 teaspoon baking soda
- 1/2 teaspoon salt (this enhances the chocolate flavor)
- 2 cups chocolate chips (semi-sweet or dark, depending on your preference)
- 1 cup colored sprinkles (for that festive touch!)
- 2 cups melted chocolate (for dipping; I love Ghirardelli for its rich flavor)
Prep Notes:
- Room Temperature Ingredients: Allow your butter and eggs to sit out for about 30 minutes before starting to ensure they blend well.
- Flour Measurement: Spoon the flour into your measuring cup and level it off; don’t scoop directly from the bag, or you risk using too much.

Step-by-Step Instructions
Preheat Your Oven: Begin by preheating your oven to 350°F (175°C). Make sure it’s at the right temperature for perfect baking!
Cream Together: In a large bowl, cream together the softened butter, granulated sugar, brown sugar, and vanilla extract until smooth and fluffy—about 2-3 minutes. You’re looking for a light texture here!
Add Eggs: Beat in the eggs one at a time, ensuring they’re fully incorporated before adding the next—for about another minute or so.
Dry Ingredients: In another bowl, combine the flour, baking soda, and salt; gradually blend this dry mixture into the creamed mixture. It’s important to mix gently to avoid tough cookies!
Fold in Chocolate Chips: Stir in the chocolate chips until evenly distributed throughout the dough. The raw dough is already heavenly!
Scoop the Dough: Drop rounded tablespoons of dough onto ungreased baking sheets (leave about 2 inches of space between each cookie).
Bake to Perfection: Bake in your preheated oven for 9 to 11 minutes, or until the edges are golden brown. They might look underbaked in the center—this is okay!
Cool Down: Allow the cookies to cool on the baking sheet for about 5 minutes before transferring them to wire racks to finish cooling.
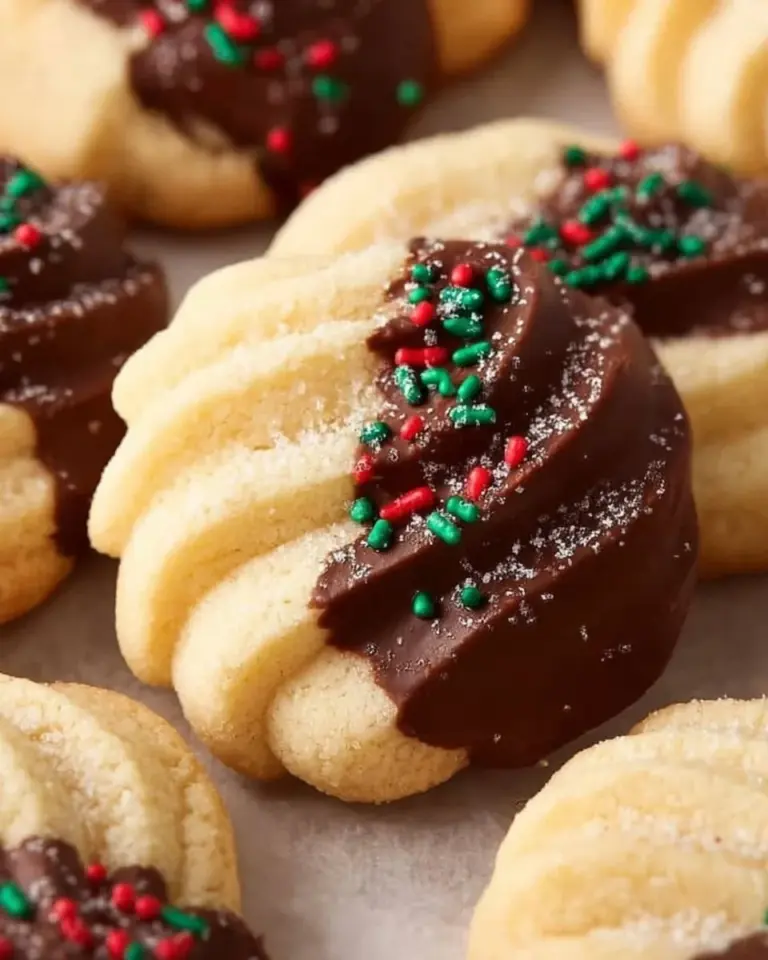
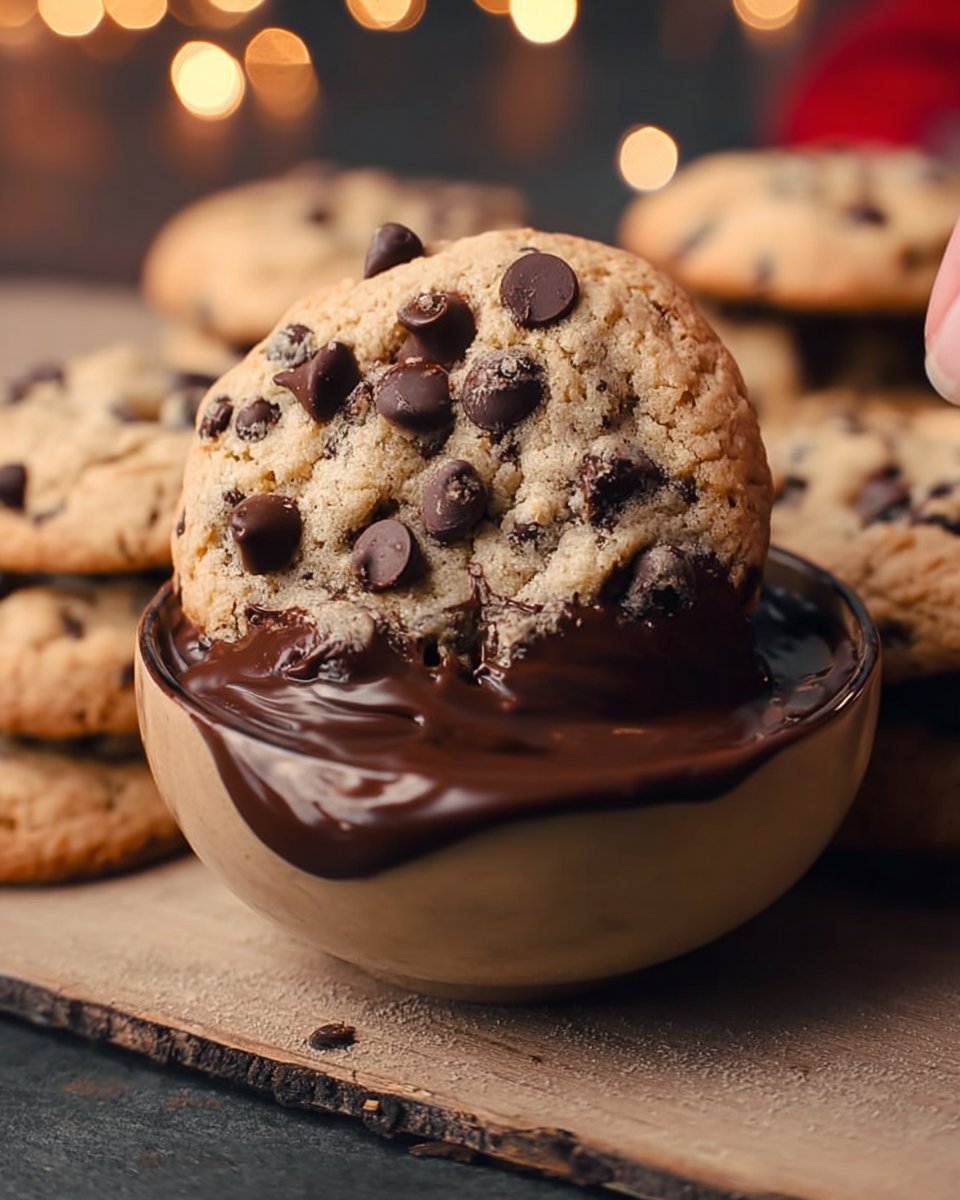
Chocolate Dip: Once cooled, dip the cookies halfway into the melted chocolate and then sprinkle with colored sprinkles for that festive look.
Set and Enjoy: Let the chocolate set at room temperature before serving or packaging them as gifts.
Chef’s Tips: Keep an eye on them while baking—overbaked cookies are a tragedy in the making! And always taste a little bit of the dough (with caution about raw eggs) for quality control!

Expert Tips & Tricks
Storage: These cookies can be stored in an airtight container at room temperature for up to a week. They also freeze beautifully—just stack a piece of parchment between layers, and they’ll last for several months.
Make Ahead: You can make the dough ahead of time, scoop the cookies, and freeze them on a baking sheet. Once frozen, pop them into a ziplock bag and bake straight from the freezer—just add a minute to the baking time.
Common Issues: If your cookies are spreading too much, it might be due to overly soft butter or too much flour. Ensure butter is softened but not melted, and always measure flour correctly.
Serving Suggestions
These Chocolate Chip Christmas Cookies are delightful on their own, but pairing them with a cold glass of milk or warm hot cocoa creates a cozy experience. For a festive presentation, lay them out on a decorative platter and sprinkle some extra holiday sprinkles over the top. Perfect for cookie swaps, office parties, or holiday gatherings, these cookies are bound to wow everyone with their charm!
Variations & Substitutions
Feeling creative? Here are some ideas to switch things up:
- Peppermint Crunch: Add crushed peppermint candies for a holiday twist.
- Nutty Goodness: Incorporate chopped nuts like walnuts or pecans for added texture.
- Vegan Version: Substitute the butter with coconut oil and use flax eggs for a plant-based option.
Don’t forget, you can also personalize them for dietary restrictions, like gluten-free with a 1:1 baking blend!
Nutrition & Storage Info
- Prep Time: 20 minutes
- Cook Time: 11 minutes
- Total Time: 30 minutes
- Yield: About 24 cookies
- Estimated Calories: Approximately 150 calories per cookie (this can vary based on ingredients and portion sizes).
Storage Instructions
- Room Temperature: Up to 1 week in an airtight container.
- Fridge: Store sealed for freshness; up to 2 weeks.
- Freezer: Freeze in an airtight container for up to 3 months. Thaw or bake straight from the freezer.
FAQ Section
Can I use different types of chocolate chips?
Absolutely! Feel free to experiment with dark, milk, or even white chocolate chips.Why are my cookies flat?
Cookies may flatten if the butter is overly soft. Always ensure it’s just soft, not melted!Can I freeze the cookie dough?
Yes, you can freeze the unbaked dough. Just scoop onto a baking sheet and freeze until solid.How long does it take for the melted chocolate to set?
This typically takes about 30 minutes at room temperature.How can I make these cookies chewy rather than cakey?
Avoid overmixing the dough, and be careful not to overbake. Chewy cookies come from underbaking just a tad!What can I do with leftover melted chocolate?
You can drizzle it over fruits, pretzels, or use it to dip other sweets!Are these cookies good for gifting?
Absolutely! Pack them in festive bags or containers, and they make wonderful gifts.What’s the best way to serve them?
A warm cookie with a scoop of vanilla ice cream is pure bliss!Can I add flavors other than vanilla?
Yes! Almond extract or even a hint of orange zest can add some delightful flavors!How can I ensure my cookies still taste fresh after a few days?
Store them in an airtight container with a slice of bread to keep them soft and moist!
Conclusion
These Chocolate Chip Christmas Cookies are not just a dessert; they’re an invitation to make memories, create connections, and savor the joys of the season. With their unique combination of flavor, nostalgia, and festive colors, it’s no wonder they’re a beloved holiday treat. I encourage you to try this recipe, share it with your loved ones, and feel the warmth it brings. I’d love to hear your thoughts or any tweaks you’ve made along the way! For more delightful recipes, check out the festive section of my blog.
Happy baking!

Chocolate Chip Christmas Cookies
Ingredients
Method
- Preheat your oven to 350°F (175°C).
- In a large bowl, cream together the softened butter, granulated sugar, brown sugar, and vanilla extract until smooth and fluffy (about 2-3 minutes).
- Beat in the eggs one at a time, ensuring they’re fully incorporated before adding the next (about another minute).
- In another bowl, combine the flour, baking soda, and salt; gradually blend this dry mixture into the creamed mixture.
- Fold in the chocolate chips until evenly distributed throughout the dough.
- Drop rounded tablespoons of dough onto ungreased baking sheets, leaving about 2 inches of space between each cookie.
- Bake in your preheated oven for 9 to 11 minutes, or until the edges are golden brown.
- Allow the cookies to cool on the baking sheet for about 5 minutes before transferring them to wire racks to finish cooling.
- Once cooled, dip the cookies halfway into the melted chocolate and sprinkle with colored sprinkles.
- Let the chocolate set at room temperature before serving or packaging them as gifts.