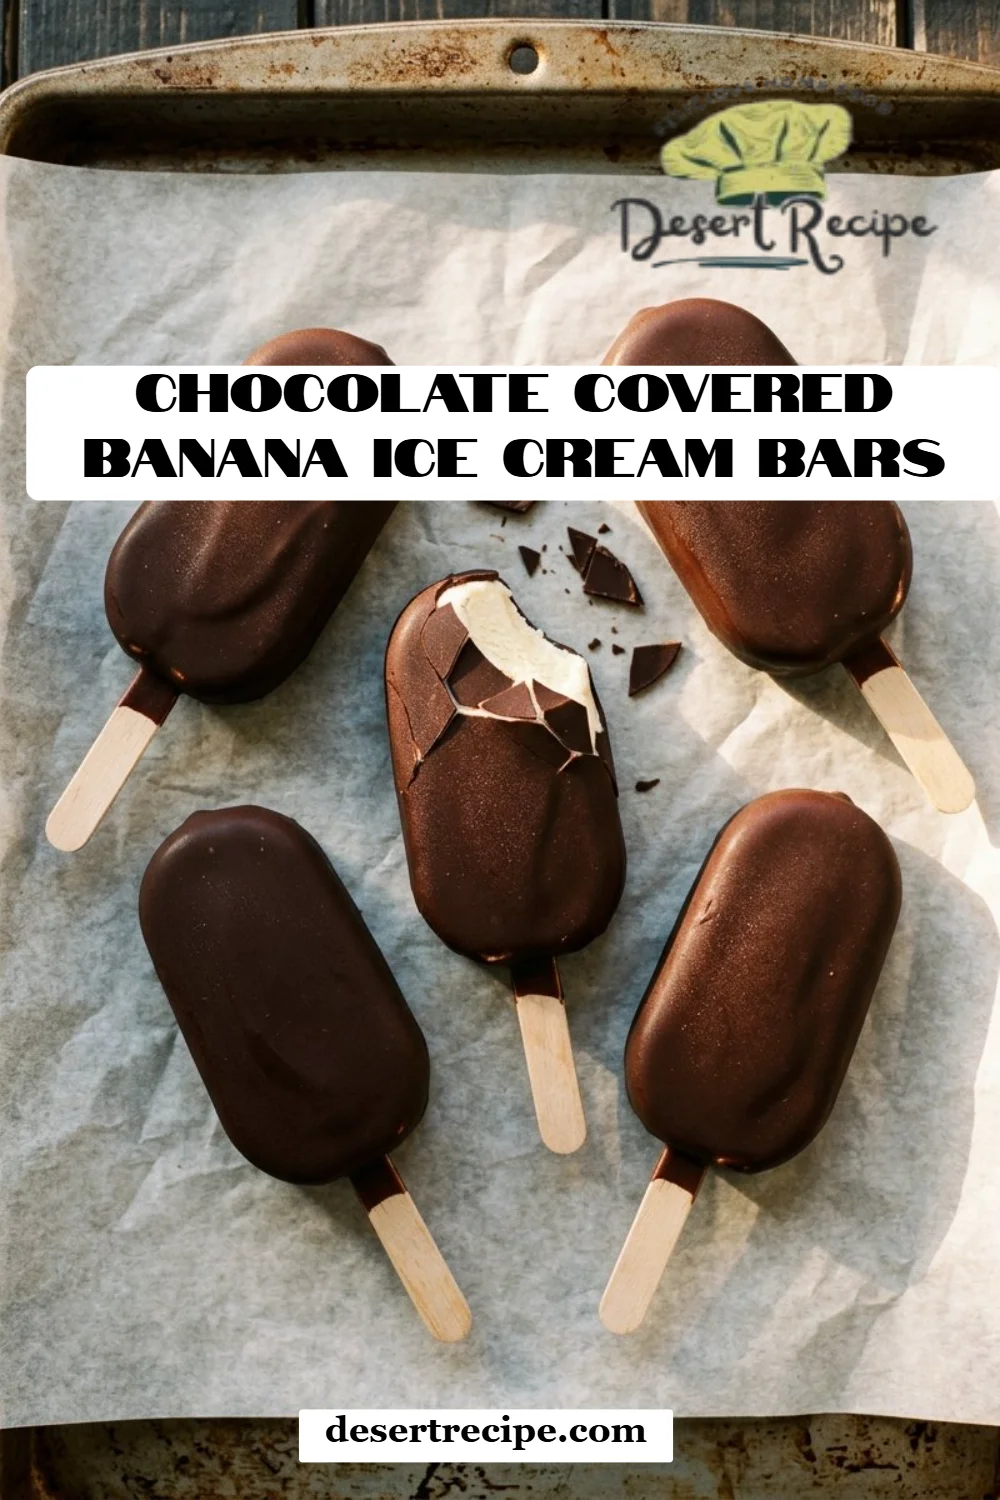
Irresistible Chocolate Covered Banana Ice Cream Bars: A Sweet Treat for All Ages
Introduction
Growing up, summer days were filled with the sweet aromas of my mom’s kitchen – the chatter of family, splashes of laughter, and most importantly, the unmistakable sound of my favorite ice cream truck. Among all the delightful treats that rolled around our neighborhood, nothing compared to the bliss of a chocolate covered banana ice cream bar. I can still remember the first time I took a bite; the smooth banana goodness enveloped in rich, creamy chocolate sent me over the moon! Fast forward to today, I found myself craving that nostalgic flavor, and I decided it was time to create my own homemade version.
These homemade Chocolate Covered Banana Ice Cream Bars are special because they marry the creaminess of frozen bananas with the delightful crunch of chocolate. What sets my recipe apart from others is the addition of sunbutter, which brings a nutty depth without the risks of allergies. Plus, the option of adding collagen gives your dessert an extra health boost! With simple ingredients and a mix of nostalgia, these bars are perfect for a summertime treat, a comforting snack, or to impress guests at your next gathering. By the end of this post, you’ll learn exactly how to whip up these homemade delights that will not only evoke sweet summer memories but also create new ones to cherish!
What Are Chocolate Covered Banana Ice Cream Bars?
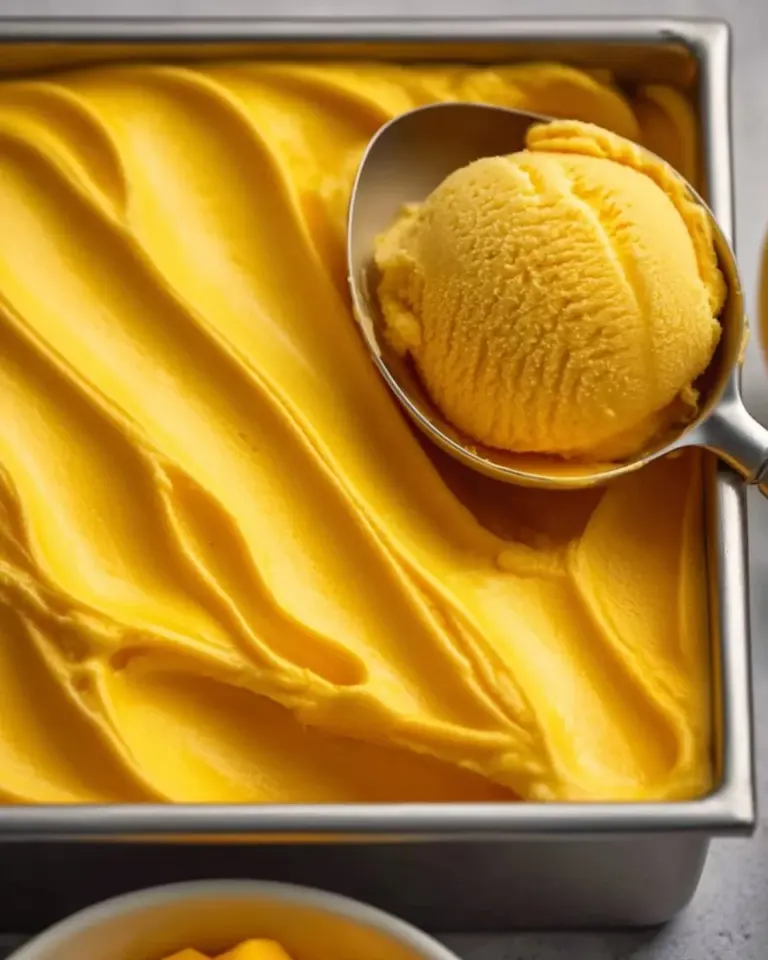
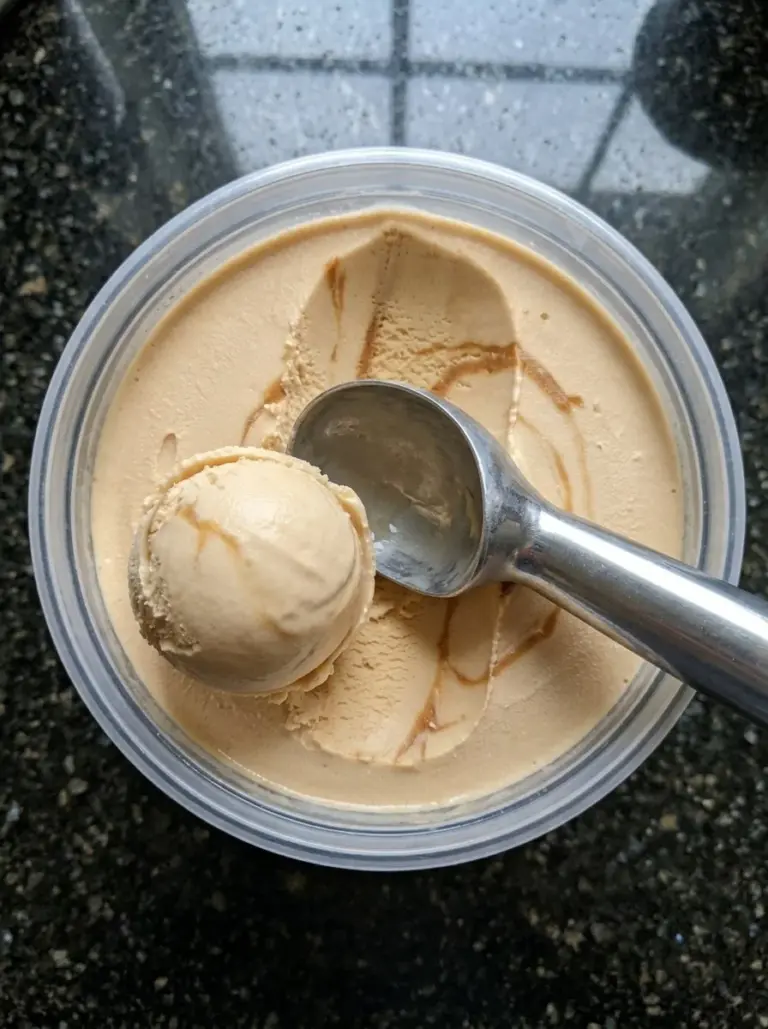
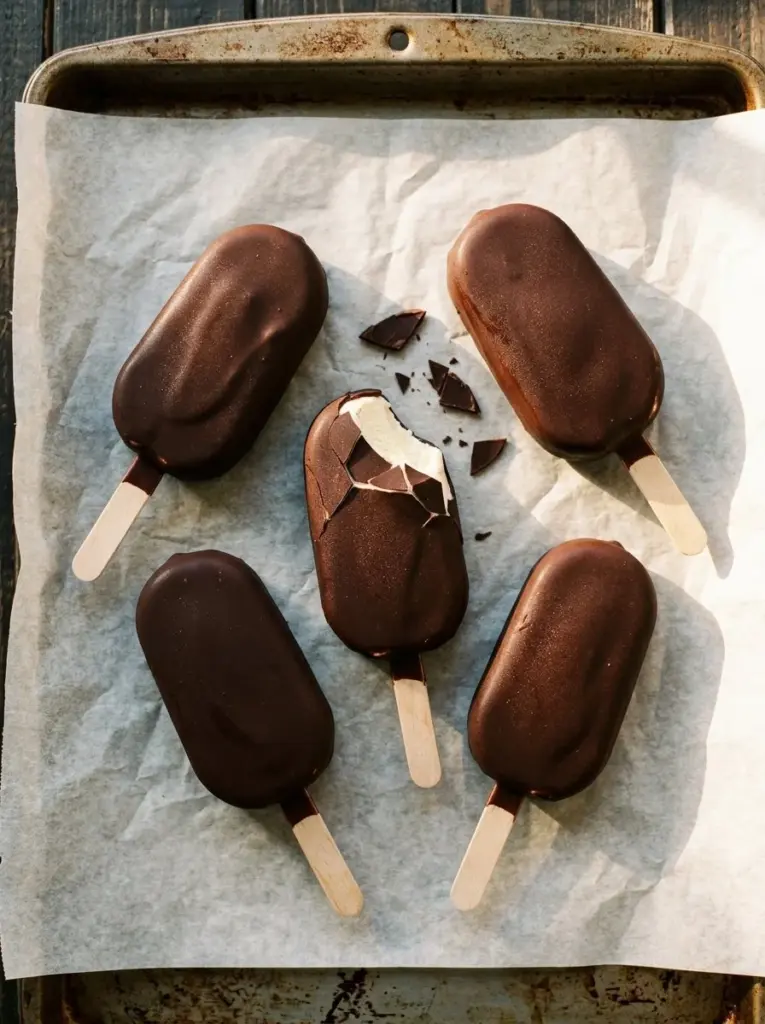
Chocolate Covered Banana Ice Cream Bars, as the name suggests, are a luscious combination of creamy banana ice cream, subtly infused with nut butter, and features a rich chocolate coating that adds the perfect crunch. Originating as a classic summer treat, these bars have gained popularity in dessert circles – cleverly combining health-conscious ingredients with decadent flavors.
The unique pairing of fluffy banana ice cream and a luxurious chocolate shell creates a delightful contrast in both taste and texture. With just the right amount of sweetness and a creamy interior, every bite is a delightful journey of flavors. Make these bars during summer to cool down after a hot day, or regardless of the season, they can be your go-to comfort food; it’s a chocolate-coated hug in dessert form after a long day!
Why You’ll Love This Recipe
1. Homemade Goodness
Unlike store-bought versions, my chocolate covered banana ice cream bars are made with fresh, high-quality ingredients without any questionable additives or preservatives. You’ll know exactly what goes into these treats, and that’s part of what makes them special!
2. Budget-Friendly
Creating your own frozen desserts can save a significant amount of money compared to purchasing similar gourmet treats from the store, especially when you’re feeding a crowd. With just a few easy ingredients, you can whip up a whole batch for less than the price of one bar from the shop!
3. Customization Galore
Feel free to personalize these bars to your heart’s desire! Experiment with different nut butters like almond or cashew, swap out the chocolate for white chocolate or melted dark chocolate, or even add toppings like crushed nuts or coconut for an extra layer of flavor.
4. Simple Steps & Quick Prep
This recipe is straightforward and beginner-friendly. With just a bit of blending and freezing involved, you’ll have these delightful bars ready in no time, making it perfect for both novice and experienced bakers.
5. Healthy Indulgence
A luscious treat that’s also good for you? Yes, please! Thanks to the sweet and nutritious banana base, along with the potential health benefits of collagen (if you choose to use it), you get a dessert that doesn’t just satisfy your sweet tooth but makes you feel good, too!
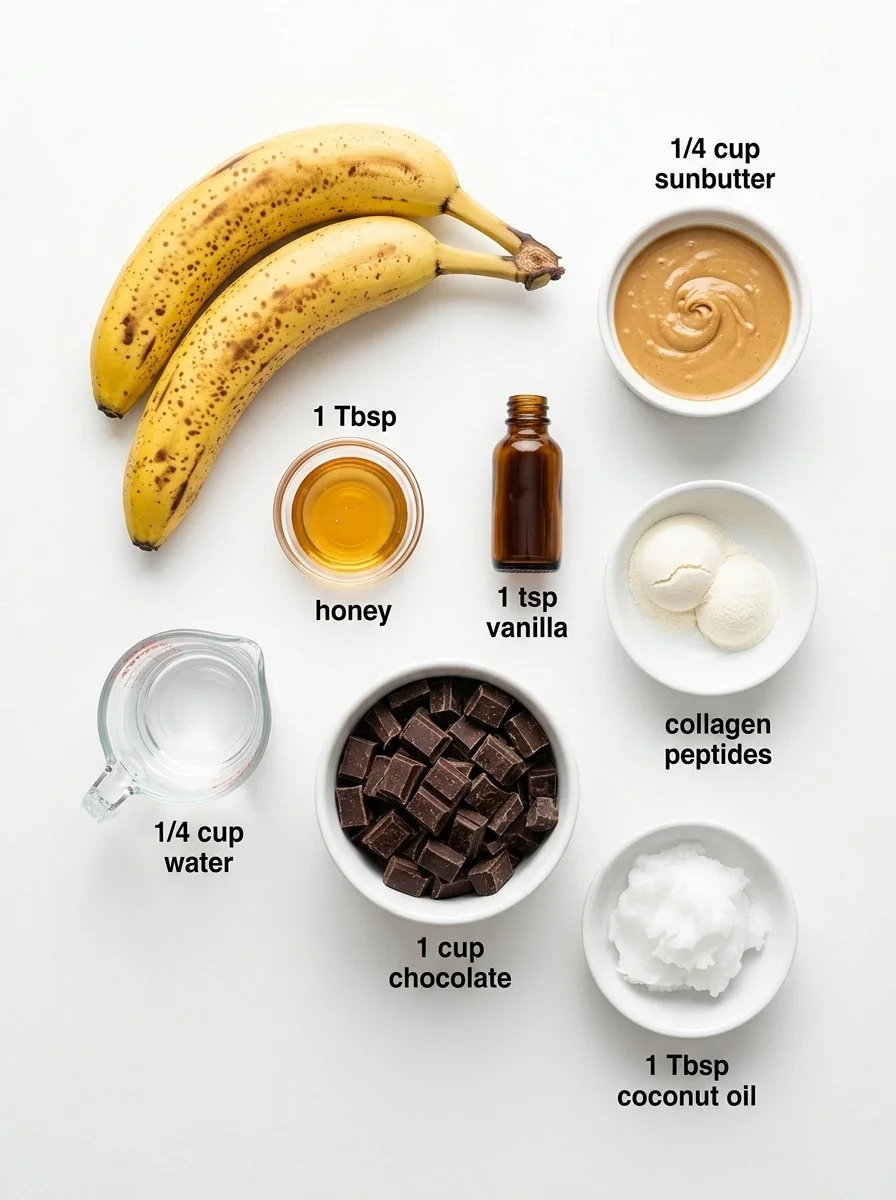
Ingredients
- 2 large, ripe bananas (Look for ones with speckles for optimal sweetness.)
- 1/4 cup sunbutter (or any creamy nut/seed butter like almond or peanut butter)
- 1 Tbsp honey (or maple syrup for a vegan option)
- 1 tsp vanilla extract
- 2 scoops collagen (optional, for that added health benefit!)
- 1/4 cup water (to adjust the consistency)
- 1 cup dark chocolate chunks (or chips, whatever you have on hand)
- 1 Tbsp coconut oil (to give the chocolate a smooth texture)
Quality and Substitutions
Using ripe bananas will yield the best sweetness and texture, and I personally love using SunButter for its creamy consistency and nut allergy friendliness. If you’re in a nut-free household, stick with the sunbutter; trust me, it’s delicious without being overly nutty!
Make sure to use quality chocolate; I recommend brands like Ghirardelli or Guittard for their rich cocoa content. As for honey, opt for local suppliers if possible to support your community!
Prep Notes: Ensure that your bananas are at room temperature. This makes blending much easier and smoother.
Step-by-Step Instructions
Blend the Filling: Add the ripe bananas, sunbutter, honey, vanilla extract, collagen, and water into your blender. Blend until smooth (about 1-2 minutes). Make sure to scrape down the sides as needed to get everything combined.
Chef’s Tip: If your bananas are too thick, add a splash more water to attain the desired creamy consistency.
Mold the Bars: Place a popsicle stick into each slot of the silicone popsicle mold. Carefully pour the ice cream filling into the molds, leaving a little room at the top as the mixture will expand while freezing.
Freeze Until Solid: Place the molds on a baking sheet and pop them into the freezer. Freeze for at least 4 hours, or until they are completely solid.
Make the Chocolate Coating: In a saucepan over low heat or using the microwave, melt the chocolate chunks and coconut oil together. Stir frequently until smooth and glossy.
Dip the Bars: Once the ice cream bars are completely set, gently wiggle them out of the molds. Dip each bar into the melted chocolate, allowing the excess to drip off, then place them on a parchment-lined baking sheet to set.
Set the Chocolate: Allow the bars to sit at room temperature for about 5-10 minutes to set or place them back in the freezer for quicker hardening.
Common Mistakes to Avoid: Make sure your banana mixture is smooth to avoid chunks of ice once frozen. Also, ensure your melted chocolate isn’t too hot; otherwise, it can melt the ice cream as you dip them.
Expert Tips & Troubleshooting
Storage Recommendations: Store any leftover bars in an airtight container in the freezer. If wrapped individually, they can last for up to 2 months!
Make-Ahead Instructions: Prepare your filling and mold the bars a day in advance. They’ll be ready whenever your sweet cravings strike!
Troubleshooting Common Problems: If your bars are difficult to remove from the mold, run warm water over the outside of the mold for a few seconds – this will loosen them up for easy pops!
Serving Suggestions: Before serving, let them thaw for a few minutes at room temperature to soften slightly for the perfect bite.
Letting Kids Help: Involve the kiddos in dipping the bars in chocolate; it’s a fun activity and helps to create lasting memories in the kitchen!
Serving Suggestions
These Chocolate Covered Banana Ice Cream Bars are a delightful way to wrap up a summer barbecue or serve at a birthday party. Pair them with a light fruit salad drizzled with honey for an extra refreshing treat. For a whimsical presentation, slice the bars in half to reveal the creamy interior and serve on colorful plates to impress your guests!
Whether you’re enjoying these popsicles under the sun or making them for a cozy family movie night, they’re sure to bring smiles and satisfied taste buds!
Variations & Substitutions
Chocolate Hazelnut Twist: Swap out the sunbutter for chocolate hazelnut spread. You’ll then have a nutty chocolate sensation in every bite!
Coconut Lover’s Dream: Stir in some toasted coconut flakes into the banana mixture before freezing to introduce a tropical flair.
Mint Chocolate Chip: Mix in some peppermint extract into your chocolate coating for a refreshing mint chocolate chip version!
Vegan & Gluten-Free: Use maple syrup for sweetness and ensure that all chocolate used is dairy-free to keep this recipe compliant for various dietary restrictions.
Seasonal Flavors: As the seasons change, don’t hesitate to introduce seasonal fruits like strawberries or peaches for a delightful twist on classic flavors.
Nutrition & Storage Info
- Prep Time: 10 minutes
- Cook Time: 5 minutes (for melting chocolate)
- Total Time: 4 hours 15 minutes (primarily for freezing)
- Yield: 6-8 bars
- Estimated Calories per Serving: 150 calories (varies based on ingredients used)
- Storage: Keep in the freezer for best freshness. They’ll last up to 2 months.
FAQ Section
Can I use frozen bananas instead of fresh?
Absolutely! Just ensure they are fully thawed and blended smoothly before pouring into molds.What can I use instead of sunbutter?
You can use any creamy nut or seed butter, but be mindful of allergies; for nut-free, stick with sunbutter!Can I make these without collagen?
Yes! The bars will still be delicious without it, making them suitable for vegan diets if using maple syrup.How do I prevent ice crystals in my bars?
Make sure to properly blend the filling until smooth and freeze them at the correct temperature.Can I add fruits to the banana mixture?
Yes! Chunks of strawberries or other fruits can be blended in for extra flavor.What kind of molds should I use?
Silicone molds work best for easy removal. You can also use paper cups for individual servings!How do I store the leftover bars?
Wrap them individually or store them in an airtight container in the freezer to prevent freezer burn.How long do these take to freeze?
They should freeze for at least 4 hours or until solid. Overnight is even better!What if my chocolate coating is too thick?
You can add a splash of coconut oil to the melted chocolate for easy dipping.Can I use milk chocolate instead of dark chocolate?
Definitely! Use your favorite chocolate types for a more customized flavor.

Conclusion
These Chocolate Covered Banana Ice Cream Bars are not just a fabulous summer treat; they are bursting with flavor, nostalgia, and a hint of adventure. The blend of creamy banana with rich chocolate paired with your favorite nut butter creates a dreamy dessert that is sure to please everyone.
Give this recipe a try and let me know what you think! I’d love to hear your stories or variations you’ve come up with. And keep your eyes peeled for more delightful recipes and personal stories about my culinary adventures right here on the blog. Happy baking!
Chocolate Covered Banana Ice Cream Bars
Ingredients
Method
- Blend the Filling: Add the ripe bananas, sunbutter, honey, vanilla extract, collagen, and water into your blender. Blend until smooth (about 1-2 minutes). Make sure to scrape down the sides as needed to get everything combined.
- Mold the Bars: Place a popsicle stick into each slot of the silicone popsicle mold. Carefully pour the ice cream filling into the molds, leaving a little room at the top as the mixture will expand while freezing.
- Freeze Until Solid: Place the molds on a baking sheet and pop them into the freezer. Freeze for at least 4 hours, or until they are completely solid.
- Make the Chocolate Coating: In a saucepan over low heat or using the microwave, melt the chocolate chunks and coconut oil together. Stir frequently until smooth and glossy.
- Dip the Bars: Once the ice cream bars are completely set, gently wiggle them out of the molds. Dip each bar into the melted chocolate, allowing the excess to drip off, then place them on a parchment-lined baking sheet to set.
- Set the Chocolate: Allow the bars to sit at room temperature for about 5-10 minutes to set or place them back in the freezer for quicker hardening.