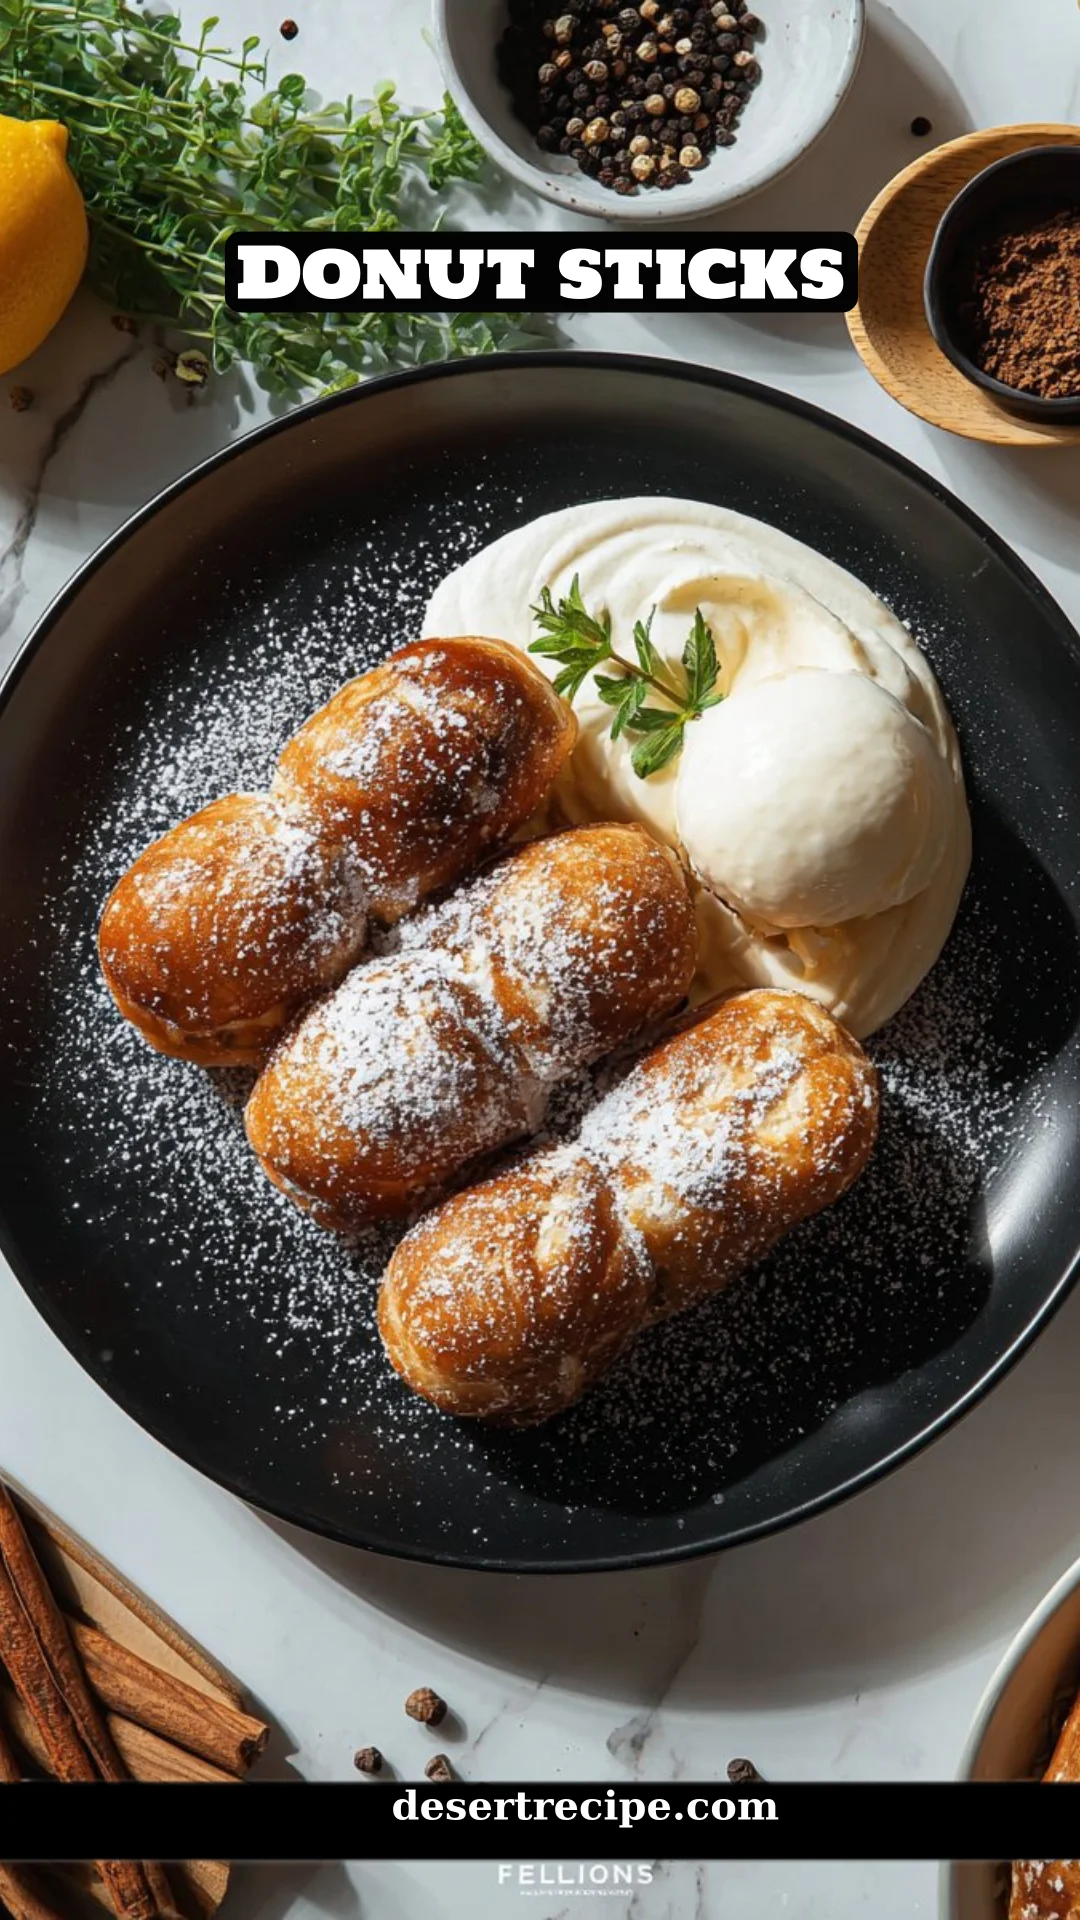
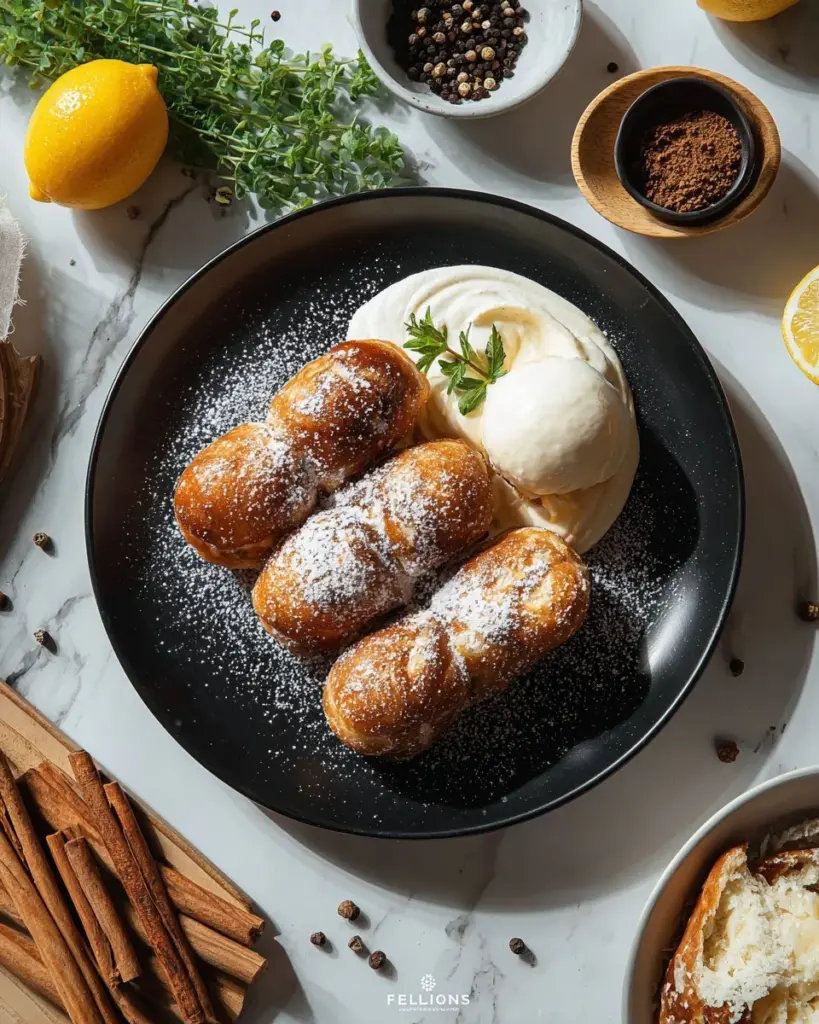
Indulge Your Sweet Tooth with Irresistible Donut Sticks: A Magical Recipe
Whenever I think of comfort food, my mind drifts back to my childhood days spent in the cozy kitchen of my grandmother. The sweet aroma of something fried would waft through the air, making my stomach rumble like thunder. One of our cherished family traditions was making donut sticks together. These delectable treats became our Sunday ritual, where flour dust danced in the sunlight and laughter harmonized with the sizzling sound of batter hitting hot oil.
What makes these donut sticks so special? They’re not just your average sweet treat; they’re perfectly crispy on the outside with a soft, pillowy inside, and they’re rolled in sugar that glistens like sunshine. Best of all, this recipe is healthier and can be made at home with a fraction of the cost compared to café versions.
As we whip up our batch of dough today, I promise you’ll learn how to create light, airy, and perfectly sweet donut sticks that are sure to evoke those heartwarming memories of family gatherings. So tie on your apron, and let’s bake something magical!
What Are Donut Sticks?
Donut sticks have an enchanting story that dates back to classic, deep-fried pastries loved by many. Think of them as the playful cousin of the traditional donut. Crisp and golden, these delightful treats are shaped into easy-to-dip sticks that make them perfect companions for coffee, milk, or even chocolate sauce.
The taste is heavenly, with the sweet aroma of vanilla mixed with the satisfaction of that first bite. Imagine the contrasting textures: a crunch from the outside, giving way to a fluffy and tender inside. What makes donut sticks unique is their versatility—we can enjoy them plain, dusted in cinnamon sugar, or smothered in glaze.
These sweet treats are ideal for any occasion. Whether you’re celebrating a holiday breakfast or just indulging on a lazy Sunday morning, they’ll bring joy to your heart and bellies. It’s always a good time for donut sticks!
Why You’ll Love This Recipe
If you’re wondering why you should skip the store-bought versions and whip up your homemade donut sticks, here are five compelling reasons:
Cost-Effective: Making these at home is not only more rewarding but also much cheaper than paying for overpriced pastries at your favorite café.
Customizable: You can let your creativity run wild by adding various flavors to the dough, rolling them in different toppings, or glazing them in seasonal delights like pumpkin spice or peppermint.
Quality Ingredients: You control what goes into your donut sticks. No preservatives or hidden sugars; just pure, simple, and delicious ingredients that you can trust.
Quick and Easy: This is a straightforward recipe, and even if you’ve never fried anything before, you’ll find it easy and fun! You’ll have a batch ready in about 30 minutes.
Perfect for Sharing: These donut sticks are a hit at family gatherings or casual get-togethers. Imagine the smiles on your loved ones’ faces as they dip into the warm sweetness of your homemade treats!
Ingredients
To create your delightful donut sticks, here’s what you’ll need:
- 1 cup all-purpose flour: For a lighter texture, consider using a high-quality, finely milled flour like King Arthur.
- 1/4 cup granulated sugar: Sweetness is key; feel free to use coconut sugar for a healthier option.
- 1 teaspoon baking powder: A must for fluffiness!
- 1/2 teaspoon salt: Enhances the flavor.
- 1/2 cup milk: Whole milk or buttermilk will give a richer taste; if lactose-sensitive, use almond or oat milk.
- 1 large egg: Ensure it’s at room temperature for smooth mixing.
- 1 teaspoon vanilla extract: Use pure vanilla for the best flavor.
- Vegetable oil, for frying: Canola oil works well, or you can use peanut oil for a different flavor.
- 1/2 cup sugar (for coating): You can mix in cinnamon here for extra excitement!
Pro Tip: Make sure all your ingredients are at room temperature; it makes for a smoother batter and better bake!
Step-by-Step Instructions
Now, let’s roll up our sleeves and dive into the frying fun:
Preheat the Oil: Start by preheating vegetable oil in a deep fryer or a heavy pot to 350°F (175°C). Use a candy thermometer for accuracy, or test it with a small piece of dough—it should sizzle upon contact.
Mix Dry Ingredients: In a large mixing bowl, combine the flour, 1/4 cup of sugar, baking powder, and salt. Whisk well until incorporated.
Combine Wet Ingredients: In another bowl, whisk together the milk, egg, and vanilla extract until smooth.
Bring it Together: Gradually stir the wet ingredients into the dry ones until just combined. Don’t overmix; a few lumps are perfectly fine!
Roll Out: Transfer the dough to a floured surface and gently roll it out to 1/2 inch thickness.
Cut into Sticks: Use a sharp knife or a pizza cutter to cut the dough into strips about 1 inch wide and 4 inches long.
Fry with Care: Carefully drop a few strips at a time into the hot oil. Fry them for 2-3 minutes, turning occasionally, until golden brown.
Drain and Coat: Remove the donut sticks from the oil with tongs and let them drain on a paper towel-lined plate. While they’re still warm, roll them in the remaining 1/2 cup of sugar to coat.
Serve Warm: These are best served immediately, so gather your friends and family, and enjoy these delightful donut sticks fresh from the fryer!
Pro Tip: Monitor the oil temperature closely to avoid burning your treats. It’s essential for achieving that perfect golden color.
Expert Tips & Tricks
To ensure your donut sticks are a triumph every time, consider the following expert tips:
Use Fresh Ingredients: Baking powder and flour can lose their potency over time. Always check expiration dates and store them properly.
Perfectly Crisp: For extra crispiness, fry in small batches and give each stick space in the oil.
Flavor Variants: Experiment with adding spices like cinnamon or nutmeg into the dough for different flavors. You can also dip them in melted chocolate or a simple glaze after frying!
Store Wisely: If you have leftovers, store them in an airtight container at room temperature for up to 2 days. They also freeze well; just defrost and reheat in the oven to restore their crispiness.
Troubleshooting: If your donut sticks seem too oily, your oil wasn’t hot enough. If they’re too hard, try reducing frying time slightly.
Serving Suggestions
Donut sticks are a delightful treat on their own, but they’re even better with a few accompaniments. Consider serving them alongside:
- A cup of coffee or hot chocolate to dip for that perfect pairing.
- Fruit preserves or honey for a lovely, sweet contrast.
- For a festive twist, serve with syrups or whipped cream during the holidays.
Presentation is key! Stack them in a tall mason jar or on a pretty plate with a sprinkle of powdered sugar on top for that Instagram-worthy moment. Perfect for brunches, birthday parties, or cozy evening snacks!
Variations & Substitutions
Get creative with your donut sticks by trying out these variations:
- Flavoring: Add lemon zest or almond extract to change the flavor profile.
- Healthier Options: Substitute half of the flour with whole wheat flour for an added nutrient boost.
- Gluten-Free: Use a gluten-free flour blend and ensure your baking powder is gluten-free.
- Holiday Treats: Consider spicing things up for the holidays by adding peppermint extract or nutmeg.
Nutrition & Storage Info
- Prep Time: 10 minutes
- Cook Time: 15 minutes
- Total Time: 25 minutes
- Yield: Approximately 12 donut sticks
- Calories: Estimated 120 per serving
- Storage Instructions: Keep in an airtight container at room temperature for up to 2 days, or freeze in a sealed bag for up to 1 month.
FAQ Section
Can I use whole wheat flour?
- Absolutely! For a nuttier flavor and healthier version, feel free to substitute half of the all-purpose flour with whole wheat flour.
What can I use instead of milk?
- If you’re lactose intolerant, almond milk or oat milk are great alternatives and won’t compromise the dough’s integrity.
How do I store leftover donut sticks?
- Allow them to cool completely, then store them in an airtight container. They last up to 2 days at room temperature or can be frozen for longer storage.
Can I make donut sticks in advance?
- Yes, you can prepare the dough and store it in the fridge for up to 24 hours before frying them fresh!
What should I serve with donut sticks?
- They pair well with coffee, tea, chocolate sauce, or fruit preserves. Feel free to get creative!
Can I fry them in an air fryer?
- Yes, for a healthier version, you can use an air fryer, but be sure to adjust the cooking time and temperature for optimal results.
How do I prevent them from being greasy?
- Ensure your oil is adequately heated before frying, as this quickly seals the outside and prevents oil absorption.
Can I use a different type of pan?
- If you don’t have a deep fryer, a heavy pot or a dutch oven works just as well for frying.
How can I make them special for holidays?
- Try rolling them in colored sprinkles or flavored sugar related to the holiday theme, or glaze them with seasonal flavors.
Can these be baked instead of fried?
- You can experiment with baking them at 350°F, but they won’t have the same texture and flavor as the fried version.

Conclusion
These homemade donut sticks are more than just a recipe; they’re a journey back to cherished memories, a delightful treat perfect for sharing, and a way to bring sweetness to any day. I can’t wait for you to experience the joy these treats will bring, both in crafting them and with every delicious bite.
Let me know how your baking adventure goes, and feel free to drop your comments or any personal twists you introduced to the recipe! For more delightful treats, check out my other recipes on the blog—you might just discover your next favorite!
Donut Sticks
Ingredients
Method
- Preheat the vegetable oil in a deep fryer or heavy pot to 350°F (175°C).
- In a large mixing bowl, combine flour, 1/4 cup sugar, baking powder, and salt. Whisk together.
- In another bowl, whisk together milk, egg, and vanilla extract until smooth.
- Gradually stir the wet ingredients into the dry ingredients until just combined. Do not overmix; lumps are fine.
- Transfer dough to a floured surface and roll to 1/2 inch thickness.
- Use a sharp knife or pizza cutter to cut into strips about 1 inch wide and 4 inches long.
- Drop a few strips into the hot oil, frying for 2-3 minutes or until golden brown, turning occasionally.
- Remove the donut sticks with tongs and drain on a paper towel-lined plate.
- While still warm, roll in remaining 1/2 cup of sugar to coat.
- Serve warm with coffee, hot chocolate, or fruit preserves.