Table of Contents
Table of Contents
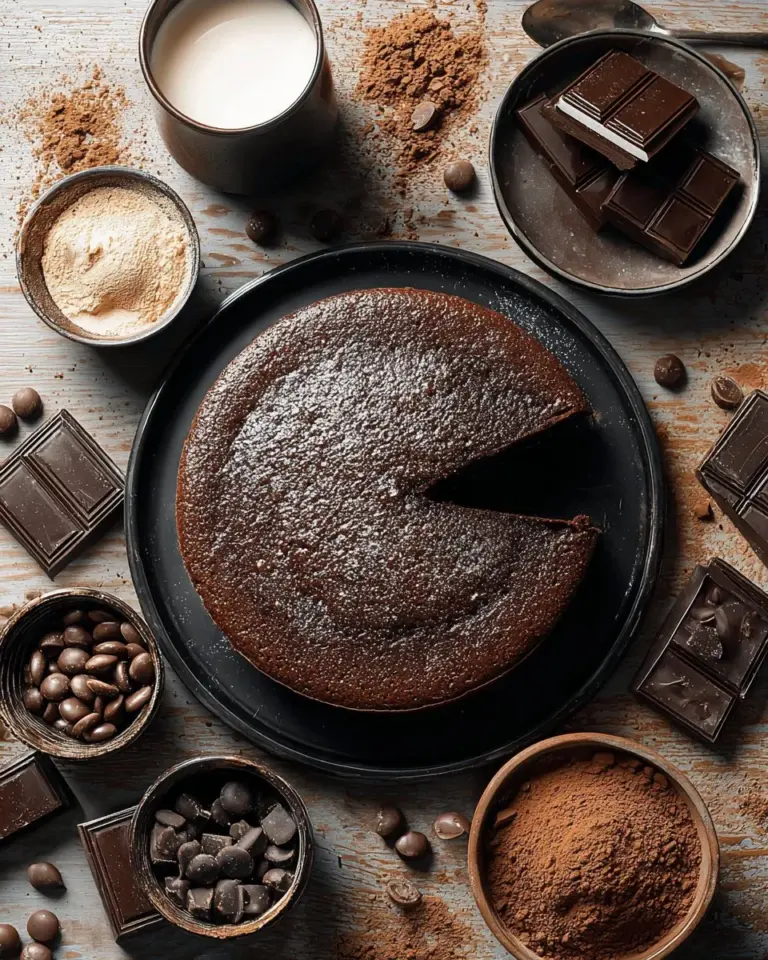
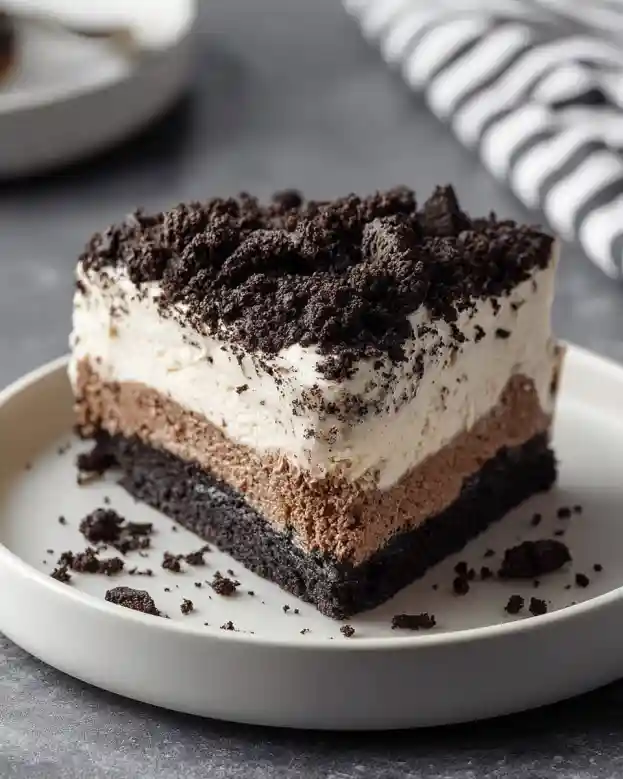
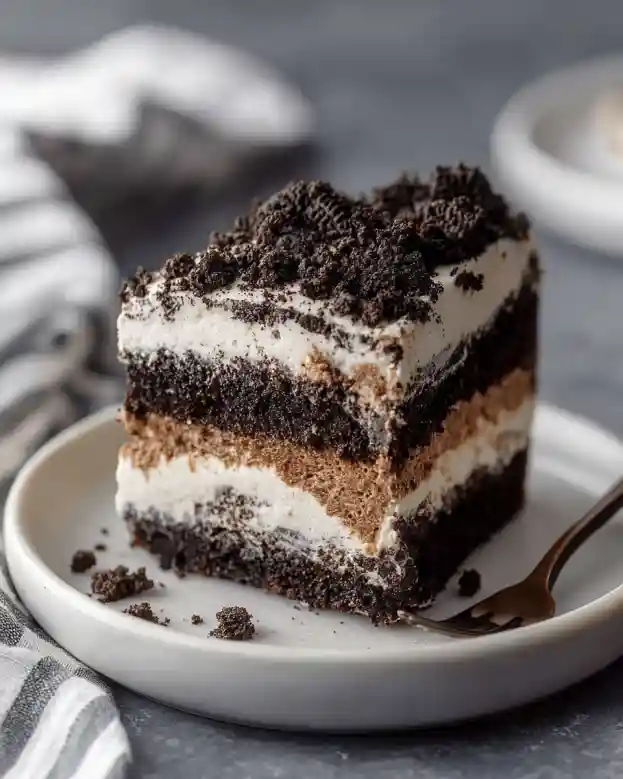
Picture this: a chilly Saturday evening, the scent of baking chocolate wafting through the house, and laughter ringing out as family and friends gather around the table. There’s something about the comforting embrace of a well-loved dessert that just brings people together — and that’s precisely what my Oreo Dump Cake Recipe is all about. It only takes five simple ingredients and a little bit of love to create a dessert that not only satisfies your sweet tooth but also sparks beautiful memories.
What sets this Oreo dump cake apart from others is the unique layering of flavors and textures. The crunch of the chopped Oreos combined with the creamy instant pudding and decadent chocolate cake mix sends your taste buds on an exciting journey. Plus, let’s not forget how easy it is to whip up! In just under an hour, you’ll have a show-stopping dessert that even your busiest weeknights need.
As you dive into this recipe, I promise you’ll be equipped with all the tips and tricks you need to make your Oreo dump cake a hit. Whether it’s a last-minute invitation or a special occasion, this dessert will steal the spotlight. Let’s get started!
What Are Oreo Dump Cakes?
Dump cakes have a fascinating origin that dates back to the late 1980s when busy home cooks needed a simpler way to satisfy their dessert cravings. The idea? Toss together a few ingredients, bake, and voila! You’ve got yourself a delicious treat in no time. The Oreo Dump Cake Recipe embodies this very concept, making it a staple in many households across the country.
When it comes to taste and texture, this dessert is truly a dream. Imagine rich creamy layers, an abundance of cookie crunch, and a hint of chocolate that’s both deep and comforting. It’s like a hug in dessert form — the perfect way to pamper yourself at the end of a long day. Whether served warm with a scoop of vanilla ice cream or cool with a dollop of whipped topping, each bite is a delightful experience.
You’ll want to whip this up during family gatherings, potlucks, or just when you want to treat yourself to something special. Trust me, once you try this recipe, it’ll become a favorite for any occasion!
Why You’ll Love This Recipe
Simplicity at Its Best: With just five simple ingredients, this Oreo dump cake is quick and easy to make, even for beginner bakers. You can throw it together in about 15 minutes and let the oven do the work while you relax or entertain.
Cost-Effective: Instead of splurging on expensive desserts at a bakery, you can create a show-stopping treat at home for a fraction of the cost. Plus, any extras you might need — like chocolate chips or whipped topping — won’t break the bank.
Customizable Goodness: This recipe is as versatile as it gets. Feel free to switch up flavors using different types of pudding mixes like vanilla, cookies and cream, or even a hint of peanut butter. Trust me; the possibilities are endless!
Crowd-Pleaser: Whether you’re hosting a gathering or simply looking to indulge, this Oreo dump cake is sure to impress. It’s rich, creamy, and absolutely satisfying, making it a favorite among kids and adults alike.
Minimal Effort, Maximum Reward: Why spend hours in the kitchen when you can bring a delightful dessert to life with minimal effort? This cake not only saves you time but also ensures you have some quality relaxation moments to enjoy your creation.
Ingredients
Essential Ingredients
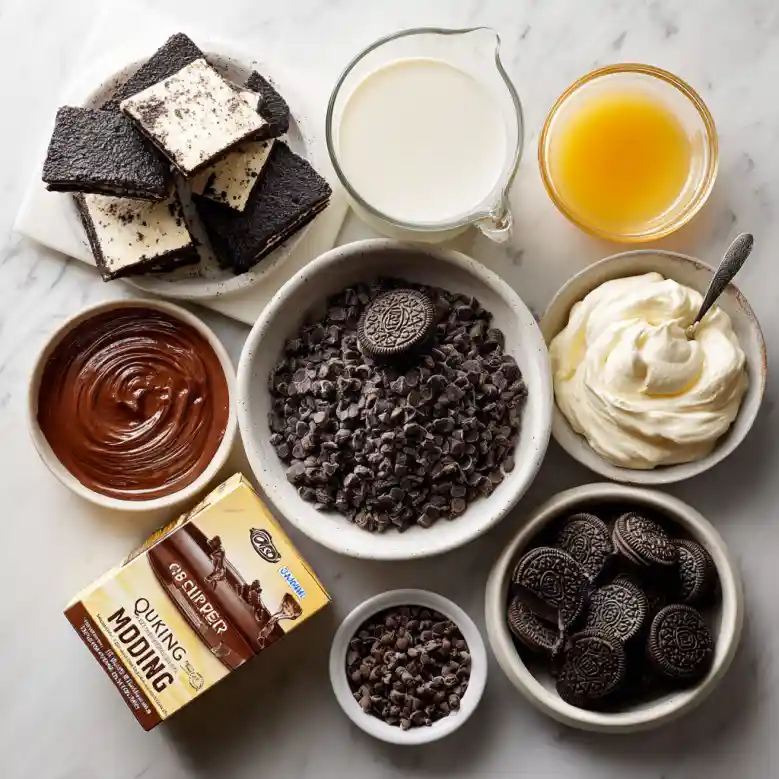
- 24 Oreo cookies: Roughly chopped. You can use regular or double-stuffed Oreos depending on how indulgent you want to be!
- 1 box (3.9 oz) instant chocolate pudding mix: Provides a creamy layer with incredible flavor.
- 2 cups cold milk: Ensure the milk is really cold for the pudding to thicken nicely.
- 1 box (15.25 oz) chocolate cake mix: Any brand you prefer will work; I’ve had success with Duncan Hines and Betty Crocker.
- 1/2 cup unsalted butter, melted: Make sure this is at room temperature for easier distribution.
- 1 cup whipped topping (like Cool Whip): Adds a light, creamy finish.
- 1/2 cup mini chocolate chips (optional): For some extra chocolaty goodness.
- Extra Oreos for garnish (optional): Perfect for decoration and added crunch.
Ingredient Notes
- Ingredient Quality: For the best flavor, opt for fresh Oreos and high-quality pudding and cake mixes.
- Substitutions: If you’re gluten-free, look for gluten-free cake mixes to ensure everyone can enjoy.
- Prep Notes: For best results, use room temperature butter and cold milk, which aid in achieving the perfect texture.
Step-by-Step Instructions
Preheat your oven to 350°F (175°C). This ensures your cake bakes evenly right from the start.
Grease the baking dish: Lightly grease a 9×13-inch baking dish. I like to use non-stick cooking spray for a hassle-free experience.
Layer the Oreos: Spread the chopped Oreo cookies evenly over the bottom of the prepared baking dish. Make sure they cover the surface well — this is where all the magic starts!
Prepare the pudding: In a medium bowl, whisk together the instant chocolate pudding mix and cold milk until thickened, about 2 minutes. Pour the pudding evenly over the Oreos.
Add cake mix: Sprinkle the dry chocolate cake mix evenly over the pudding layer. Don’t stress about being perfect — just spread it as evenly as you can.
Drizzle the melted butter: Make sure to cover as much of the surface as possible with the melted butter. This will ensure a crispy top!
Bake it: Place your dish in the preheated oven and bake for about 35 minutes, or until the top is set and slightly crisp. You’ll know it’s done when the edges pull away from the sides.
Cool it down: After baking, remove from the oven and let it cool for at least 10 minutes. This helps the layers to set.
Top it off: Finish by spreading the whipped topping over the cooled cake. Add mini chocolate chips and extra Oreo cookies for garnish if you’re feeling fancy.
Serve and enjoy: You can serve this warm or at room temperature. Just scoop and dig in!
Chef’s Tips
- Timing: Keep a close eye on your cake after the 30-minute mark to avoid overbaking.
- Visual Cues: The top should be golden-brown and slightly pulling away from the sides when done.
- Common Mistakes: Avoid mixing the wet and dry ingredients before layering. The “dump” method is what gives this cake its unique texture!
Expert Tips & Tricks
Storage: Store any leftovers covered in the fridge for up to 3 days. The flavors only get better with time!
Make-Ahead Instructions: If you’re prepping for a gathering, you can assemble this cake ahead of time (up to 24 hours) but wait to add the whipped topping until just before serving for best results.
Troubleshooting: If your cake is too dense, it could be overmixed or overbaked. Always stick to the instructions for that perfect gooey texture.
Leftover Ideas: If you have leftover crumbs or pieces, use them as a topping for ice cream or yogurt for a delicious twist.
Taste Enhancements: Add a dash of vanilla extract to the pudding for an extra flavor dimension.
Festive Twists: You can theme this cake based on holidays by adding colored sprinkles or themed toppings to match an occasion!
Serving Suggestions
Pair this delectable Oreo dump cake with a scoop of vanilla ice cream or a drizzle of chocolate syrup for an over-the-top dessert experience. If you’re feeling festive, a sprinkle of crushed peppermint or seasonal fruits makes for festive embellishments. This dish works wonderfully at birthday parties, holiday gatherings, or just as a sweet end to a family dinner!
Variations & Substitutions
Flavor Combinations: Swap the chocolate pudding for vanilla or butterscotch for a different flavor profile. Oreos are versatile, so experiment with flavored Oreos, like mint or peanut butter!
Dietary Adaptations: For a healthier spin, consider using low-fat pudding and cake mix alternatives or replace Oreos with a gluten-free version.
Seasonal Twists: Incorporate spices like cinnamon in the pudding or top with seasonal fruits in the summer months for a fresh touch.
Nutrition & Storage Info
- Prep time: 15 minutes
- Cook time: 35 minutes
- Total time: 50 minutes
- Yield: 12 servings
- Estimated calories per serving: 350-400 calories depending on toppings and ingredients used.
- Storage instructions: Store in the fridge for up to 3 days, or freeze for up to 3 months. Thaw in the fridge overnight before serving.
FAQ Section
Can I use other types of cookies?
Yes! While Oreos provide a classic taste, feel free to use your favorite chocolate cookies.Can this dessert be made dairy-free?
Absolutely! You can substitute non-dairy milk and whipped topping to make it suitable for a dairy-free diet.How can I make this gluten-free?
Opt for gluten-free cake mix and double-check that your Oreos are certified gluten-free.What should I do if my pudding isn’t thickening?
Make sure you’re using instant pudding and cold milk. If it still doesn’t set, whisk longer or consider remaking it.Can I make this in advance?
Yes! You can assemble the layers and bake it ahead of time, but add the whipped topping just before serving.How do I prevent my cake from sticking?
Always grease your baking dish well and let it cool for a few minutes before serving.Can I add fruit to this recipe?
Yes! Layer fruit like cherries or strawberries on top before adding whipped topping for an added fresh touch.What’s the best way to reheat leftovers?
Microwave individual portions for about 10-15 seconds until warm or enjoy it cold directly from the fridge.What if I can’t find the pudding mix?
If you can’t find chocolate pudding, you can use vanilla and mix in cocoa powder to taste.What’s the best way to serve this?
In squares directly from the pan or plated with a scoop of ice cream on the side!
Conclusion
This Oreo Dump Cake Recipe is not just a dessert; it’s a celebration of simplicity, comfort, and delightful flavors bundled up in every bite. Encouraging readers to explore this easy, crowd-pleasing recipe, I hope you’re just as smitten as I am with its chocolatey goodness. Don’t forget to leave your feedback and let me know how it turns out for you! For more sweet inspirations, check out my other dessert recipes on the blog—you won’t want to miss them!
Graving More Recipes?

Oreo Dump Cake
Ingredients
Method
- Preheat your oven to 350°F (175°C).
- Lightly grease a 9×13-inch baking dish.
- Spread the chopped Oreo cookies evenly over the bottom of the prepared baking dish.
- In a medium bowl, whisk together the instant chocolate pudding mix and cold milk until thickened, about 2 minutes. Pour the pudding evenly over the Oreos.
- Sprinkle the dry chocolate cake mix evenly over the pudding layer.
- Drizzle the melted butter over the top, ensuring as much of the surface is covered as possible.
- Bake in the preheated oven for about 35 minutes, or until the top is set and slightly crisp.
- Remove from the oven and let it cool for at least 10 minutes.
- Spread the whipped topping over the cooled cake. Add mini chocolate chips and extra Oreo cookies for garnish.
- Serve warm or at room temperature.