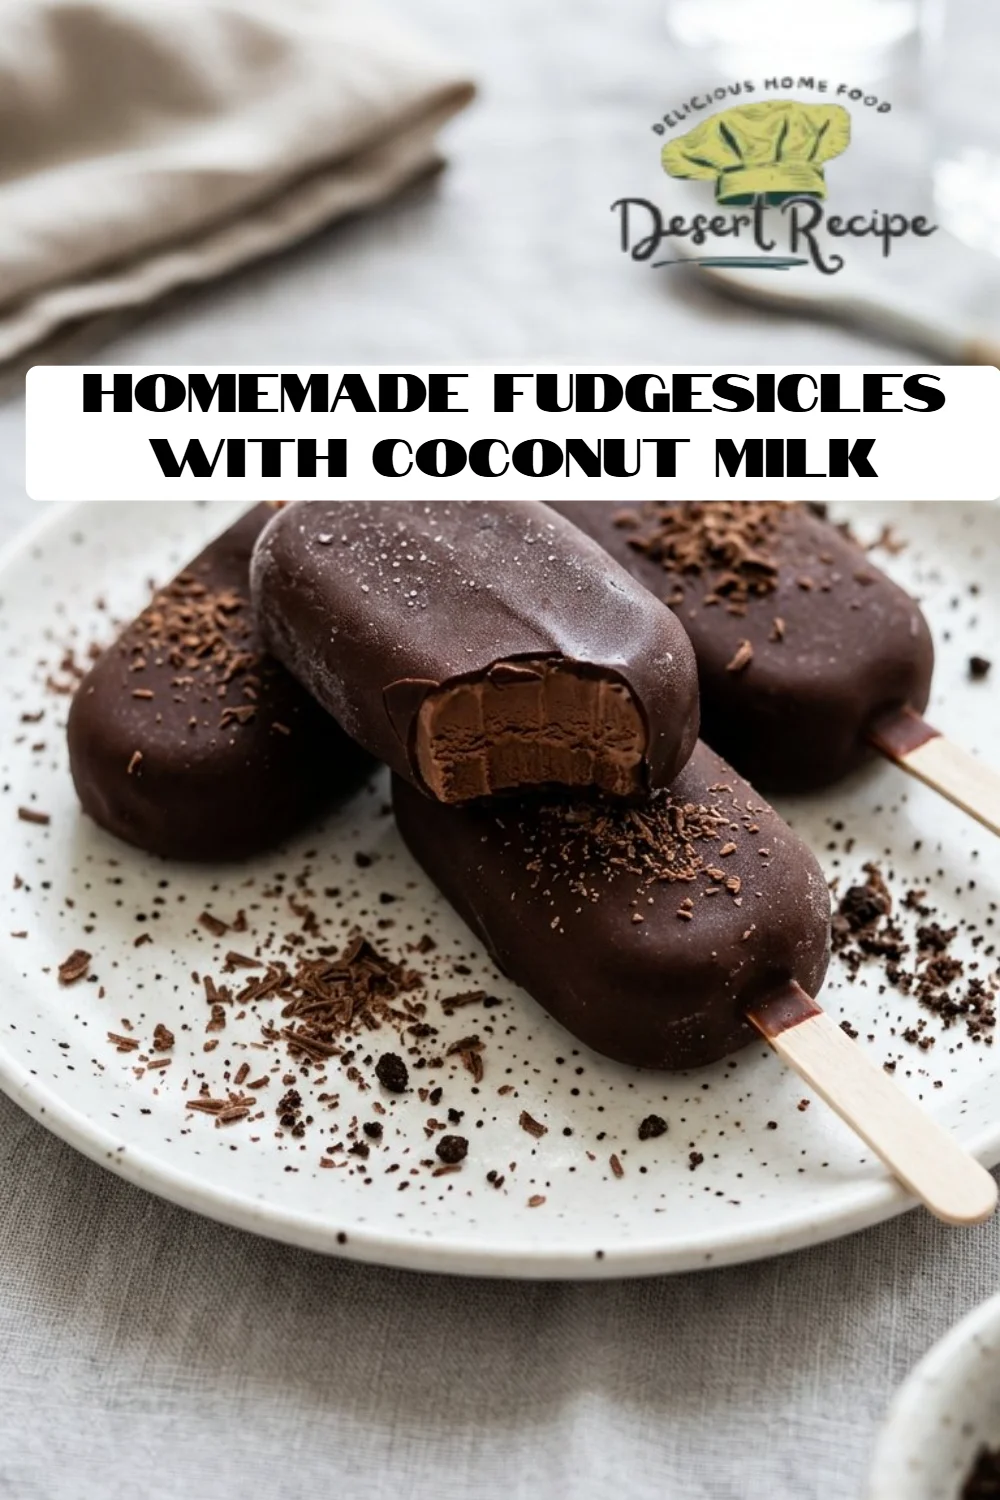
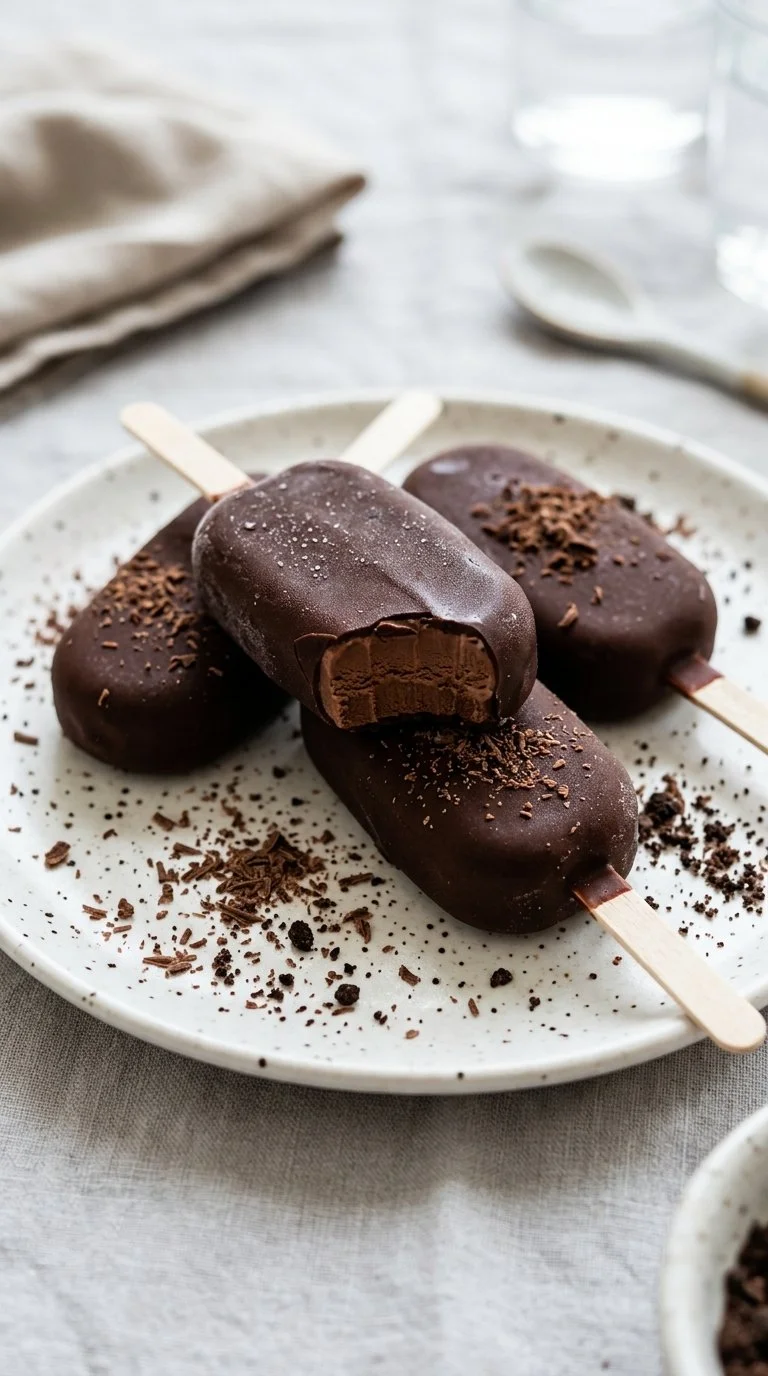
Homemade Fudgesicles with Coconut Milk: A Dairy-Free Dream You Must Try!
I still remember the sultry summer afternoons of my childhood, running barefoot across the grass, my hands sticky with the remnants of popsicles from the ice cream truck. There was nothing quite like those chilly treats to cool off and bring a smile on a hot day. Now, as an adult and a passionate home cook, I’ve created a healthier, more delicious twist on those nostalgic delights: Homemade Fudgesicles with Coconut Milk. These fudgesicles aren’t just your average frozen treat; they are creamy, luscious nuggets of chocolate heaven, made with rich coconut milk that gives them a delightful tropical flair.
You might be wondering, what makes these fudgesicles so special? Well, the secret’s in the creamy coconut milk and the dark chocolate, which meld together to create a luscious texture that’s simply irresistible. What’s more, making them at home means I can skip the preservatives and artificial flavors found in the store-bought versions—all while saving some hard-earned cash. These fudgesicles are not just a sweet treat; they’re a way to connect to childhood memories, indulging in comfort food that brings joy with every bite.
In this recipe, I’ll guide you through the steps to creating these decadent fudgesicles, sharing pro tips, tricks, and even some variations for dietary needs. Get ready to indulge your sweet tooth while reveling in a homemade experience you won’t regret!
What Are Homemade Fudgesicles with Coconut Milk?
Homemade fudgesicles with coconut milk are a dreamy combination of two of the most satisfying ingredients: rich chocolate and creamy coconut. Traditionally, fudgesicles are made with heavy cream or milk, but by swapping in coconut milk, we create a dairy-free delight that everyone can enjoy, including those with lactose intolerance. The result? An indulgent frozen treat that’s smooth, velvety, and offset by the subtle sweetness of maple syrup.
In terms of taste and texture, think of biting into a bar of luxurious dark chocolate—only cooler and even more satisfying. With each bite, you can expect creamy richness accompanied by a hint of tropical flavor from the coconut, making it a perfect summer treat.
These fudgesicles are perfect for hot afternoons, family gatherings, or simply when you want a guilt-free dessert that also tastes indulgent.
Why You’ll Love This Recipe
Easy to Make: This recipe is super simple and requires minimal ingredients! With just a few pantry staples and 15 minutes of your time, you can whip up a sweet batch of fudgesicles that will impress your family and friends.
Nutritious and Natural: Unlike many store-bought frozen treats that are loaded with artificial ingredients, this recipe uses natural sweeteners like maple syrup and healthy fats from coconut milk, making it a wholesome choice.
Customizable: Want to add a little flair? You can swap in different flavors like almond or mint extract, or toss in some chopped nuts or fruits for added texture and sweetness. The options are endless!
Cost-Effective: Making your own fudgesicles is far less expensive than buying gourmet pops from the store. Imagine getting 6-8 fudgesicles for a fraction of the price!
Fun for the Whole Family: Involve your kids and partner in the process! They’ll love helping to mix the ingredients and will certainly enjoy decorating and enjoying their fudgesicles together.
Making these homemade fudgesicles with coconut milk is as rewarding as it is delicious. You’ll feel good about treating yourself (and others) to a refreshing homemade dessert!
Ingredients
- 1 ½ cups coconut cream: I recommend using full-fat coconut cream for the richest flavor. Brands like Thai Kitchen or Aroy-D are great choices. Ensure it’s room temperature for easy mixing!
- 1/3 cup dark chocolate chips: Look for high-quality chocolate chips (70% cacao or higher) for a rich chocolate flavor. I love Ghirardelli chips for their creaminess.
- 1/4 cup maple syrup: A natural sweetener that provides a lovely flavor profile. You can substitute with agave syrup if you’re looking to make it vegan-friendly.
- 1 tsp vanilla extract: Pure vanilla extract adds a delightful aroma and taste that effortlessly complements the chocolate.
- 1 Tbsp tapioca starch (optional): This thickener gives a creamier consistency, but feel free to omit if you’re avoiding it.
- 1/8 tsp salt (optional): A pinch of salt enhances the chocolate flavor and balances sweetness.
With your ingredients ready, let’s dive into the delightful process of creating these fudgesicles!
Step-by-Step Instructions
Heat the Base: In a small saucepan over low heat, combine the coconut cream, dark chocolate chips, maple syrup, and vanilla extract. Stir frequently for about 5-7 minutes until the chocolate has melted and everything is well combined. The mixture should be smooth and glossy.
Chef’s Tip: Keep the heat low to prevent burning! You just want the chocolate to melt gradually.
Incorporate Thickeners: If using, whisk in the tapioca starch and salt until smooth and uniform. This helps to thicken the mixture and gives it that creaminess we love.
Mold the Fudgesicles: Carefully pour the mixture into silicone popsicle molds, filling them about three-quarters full. Tap the molds gently on the countertop to remove any air bubbles.
Initial Freeze: Place the molds in the freezer for about an hour to set slightly.
Insert Sticks: Once the fudgesicles are partially frozen, carefully insert popsicle sticks. This will help them stay upright as they freeze completely. Return to the freezer for an additional 6-8 hours or overnight for best results.
Release and Enjoy: To release your fudgesicles, run warm water over the outside of the molds for a few seconds. Gently pull them out and enjoy immediately or store them in a zip-top bag for later!
Expert Tips & Troubleshooting
Storage Recommendations: Store any leftover fudgesicles in a zip-top freezer bag. They can be kept in the freezer for up to 2 months without losing flavor.
Make-Ahead Instructions: Prepare a batch ahead of time and enjoy them all summer long! You can easily double the recipe for a larger batch.
Troubleshooting Texture: If your fudgesicles are too icy after freezing, ensure your coconut cream is well combined and free of excess air before freezing. No one likes a grainy popsicle!
Flavor Ideas: Consider experimenting with flavor variations like cocoa powder for extra depth or adding a dash of cinnamon for warmth.
Serving Suggestion: Serve these fudgesicles topped with a sprinkle of chopped nuts or fresh coconut flakes for added texture and visual appeal!
Common Mistakes: Avoid overfilling the molds, as the mixture will expand while freezing.
Serving Suggestions
You can enjoy these homemade fudgesicles by themselves, but they pair beautifully with summer favorites like fresh berries and whipped coconut cream. For a fun twist, consider serving them alongside a scoop of your favorite dairy-free ice cream for an indulgent sundae! Ideal for birthday parties, family gatherings, or even a midnight snack, these fudgesicles bring joy to any occasion.
Variations & Substitutions
- Different Flavor Combinations: Experiment with different extracts like almond or coconut. Toss in mini chocolate chips, crushed nuts, or even fresh fruit purees for a delightful surprise!
- Dietary Restrictions: This recipe is naturally gluten-free and can be made vegan by ensuring your chocolate chips and sweeteners are vegan-friendly.
- Seasonal Variations: Add seasonal flavors like pumpkin spice for fall or mint for summer to keep things fresh and exciting!
Nutrition & Storage Info
- Prep Time: 15 minutes
- Cook Time: 7 minutes
- Total Time: 24 hours (including freezing)
- Yield: 6-8 fudgesicles
- Estimated Calories: 120 kcal per serving
- Storage Instructions: Keep in the freezer for optimal freshness, up to 2 months.
FAQ Section
1. Can I use regular milk instead of coconut milk?
Yes, but it will alter the flavor and texture. Coconut milk gives a creamy and tropical flavor that complements the chocolate well!
2. How do I know if the fudgesicles are fully frozen?
They should feel firm to the touch and hold their shape when you remove them from the molds.
3. Can I use other sweeteners?
Absolutely! You can swap maple syrup for honey or agave, but adjustments may need to be made to achieve the right level of sweetness.
4. What can I do if my fudgesicles stick to the mold?
Running warm water over the outside of the molds usually does the trick. If they’re still stubborn, try using a butter knife to gently loosen the edges.
5. How can I add more chocolate flavor?
Consider adding cocoa powder to the mixture or coating the outside of the fudgesicles in melted chocolate before freezing.
6. Can I make these fudgesicles without the chocolate?
Sure! You can create fruit-based pops by swapping out the chocolate for fruit purees, yogurt, or juices.
7. How long do these fudgesicles last in the freezer?
They can be safely stored for up to 2 months, but they’re best enjoyed within the first month for optimal flavor and texture!
8. Can I use different flavors of chocolate?
Yes! Feel free to experiment with milk chocolate, white chocolate, or flavored chocolate varieties.
9. Is it necessary to add the tapioca starch?
No, it’s completely optional. It’s there for creaminess, but you’ll get a nice texture without it, too!
10. Can I make mini fudgesicles?
Absolutely! Just adjust the freezing time accordingly. Mini molds generally need less time to freeze.
Conclusion
These Homemade Fudgesicles with Coconut Milk are not just an indulgence; they are a celebration of flavor, texture, and nostalgia rolled into a convenient treat. I encourage you to give this recipe a try—it may just become a summer staple in your household! Don’t forget to share your feedback or any creative tweaks you make; I’d love to hear how your own creations turn out! And if you’re on the hunt for more delicious desserts, be sure to check out my blog for other sweet recipes that will brighten your day.

Homemade Fudgesicles with Coconut Milk
Ingredients
Method
- In a small saucepan over low heat, combine coconut cream, dark chocolate chips, maple syrup, and vanilla extract. Stir frequently for about 5-7 minutes until the chocolate has melted and the mixture is smooth.
- If using, whisk in tapioca starch and salt until smooth and uniform.
- Carefully pour the mixture into silicone popsicle molds, filling them about three-quarters full. Tap gently on the countertop to remove air bubbles.
- Place in the freezer for about an hour to set slightly.
- Once partially frozen, insert popsicle sticks and return to the freezer for an additional 6-8 hours or overnight.
- To release, run warm water over the outside of the molds for a few seconds, then gently pull out the fudgesicles.
- Enjoy immediately or store in a zip-top bag for later.