Table of Contents
Table of Contents
Homemade Vanilla Icing: The Secret to Sweetening Every Moment!
Growing up, the bright smell of buttercream wafting through the kitchen was the soundtrack to my fondest childhood memories. My grandmother would whip up her famous cakes, and it was her Homemade Vanilla Icing that truly made them unforgettable. You know those moments—friends gathered around the table, laughter mingling with sweet whispers of nostalgia? That’s what this icing brings to any gathering.
I’ve experimented with countless versions of vanilla icing over the years, but the magic of this simple Homemade Vanilla Icing lies in its creamy texture and rich flavor. Unlike store-bought varieties that can often taste too artificial, my homemade recipe strikes the perfect balance between sweetness and vanilla essence, creating a comforting frosting that elevates any dessert.
What makes this icing special is its versatility—whether you’re drizzling it over a moist cake or using it to ice freshly baked cookies, it’s sure to be a hit. Stick around, and I promise I’ll walk you through every step—from ingredients to tips for achieving the perfect silky finish. Let’s dive into the delicious world of Homemade Vanilla Icing!
What Are Homemade Vanilla Icing?
Homemade Vanilla Icing has a storied past, with roots tracing back to the age of European baking traditions. The classic vanilla flavor, derived from natural vanilla beans or extracts, adds a touch of elegance to this simple topping. The taste is a rich, creamy burst of sweetness, while the texture is smooth and pliable, making it perfect for drizzling, spreading, or even dunking.
What sets Homemade Vanilla Icing apart is its freshness. Made with minimal, high-quality ingredients, this icing boasts a homemade charm that store-bought alternatives simply can’t replicate. It’s a classic addition to birthday cakes, holiday desserts, or any occasion that calls for a little sweetness.
You’ll find that mastering this icing is not just about following a recipe; it’s about creating memories. From birthday celebrations to simple family gatherings, every moment deserves a drizzle of joy, and there’s no better way to share your love than through the homemade goodness of vanilla icing.
Why You’ll Love This Recipe
Unforgettable Flavor: There’s something magical about the taste of exquisite vanilla. My Homemade Vanilla Icing is rich without being overpowering, making it the perfect companion for any dessert. You won’t find that artificial aftertaste that sometimes accompanies store-bought frosting here!
Budget-Friendly: Why splurge on pre-packaged options when you can whip this up for mere pennies? With just a few ingredients, you’ll be amazed at the deliciousness you can create without breaking the bank.
Customizable: Feeling adventurous? You can easily tailor this icing to fit your flavor preferences. Add a pinch of cinnamon, a splash of almond extract, or even a hint of citrus zest to shake things up.
Simplicity at its Best: This recipe is perfect for bakers of all levels. With just three core ingredients — powdered sugar, milk, and vanilla extract — you’ll find it’s hard to mess this one up!
Time-Saving: In a pinch? You can make this icing in under 10 minutes. That’s faster than heading to the store for a pre-made option, and trust me, the taste is worth every second you invest!
Combined, these factors make this Homemade Vanilla Icing a no-brainer for your baking adventures. Just think of the joy you’ll spread with luscious drizzles atop cupcakes and cakes — your family and friends will be begging for more!
Ingredients
To make this dreamy Homemade Vanilla Icing, you’ll need:
- 1 cup powdered sugar: For the sweetest finish; sifted for a smooth texture.
- 2 tablespoons milk: Use whole or 2% for a creamier richness. Dairy-free options can include almond or oat milk!
- 1 teaspoon vanilla extract: Opt for pure vanilla for the best flavor; imitation can work in a pinch but will lack depth.
Additional Notes:
- Ensure that your milk is at room temperature for the best blending.
- Organic powdered sugar doesn’t contain anti-caking agents, giving a more natural flavor.
- Use high-quality vanilla extract to elevate the overall taste.
Step-by-Step Instructions
Preparation: Begin by gathering all your ingredients. For the best results, ensure your powdered sugar is sifted and your milk is at room temperature. This helps avoid lumps.
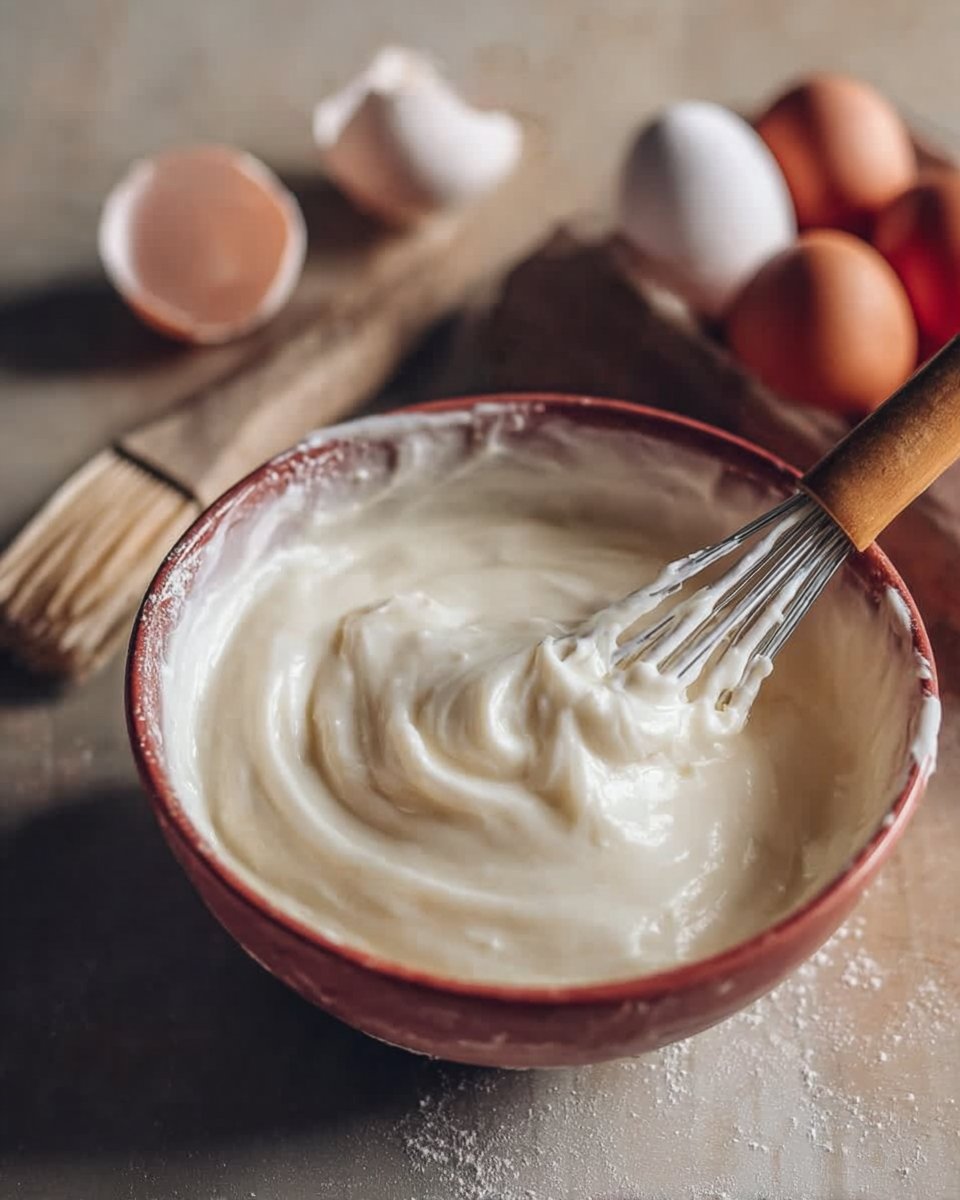
Mixing: In a medium mixing bowl, whisk together 1 cup powdered sugar, 2 tablespoons milk, and 1 teaspoon vanilla extract until smooth and creamy. You can use a handheld whisk or electric mixer for these steps.
Visual Cue: You’ll know it’s ready when the icing has a silky consistency with no lumps—about 2-3 minutes of whisking should do it!
Adjust Consistency: If you need a thinner glaze, slowly add more milk, one teaspoon at a time, until you reach your desired consistency. If you’d like it thicker, add more powdered sugar.
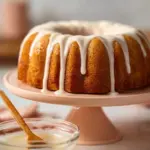
Serve Immediately: Use your Homemade Vanilla Icing right away! Drizzle over cakes, cupcakes, or even warm cookies. Watch it melt slightly, creating a delicious glaze.
Chef’s Tip: To prevent clumping, store any extra icing in an airtight container in the fridge for up to 3 days. Bring to room temperature and whisk before using.
Common Mistakes to Avoid: Be cautious when adding extra ingredients—make sure to add them gradually so you can maintain the perfect consistency you desire!
Expert Tips & Tricks
Perfecting the Icing: If your icing turns out too thick, don’t fret! Just add a drop of milk to loosen it up incrementally.
Storing Leftovers: Store your icing in an airtight container in the fridge. It should last up to three days. For longer storage, consider freezing in a silicone mold for easy portioning!
Make-Ahead Option: You can prepare this icing a day in advance, making hosting a cake party or holiday gathering a breeze!
Troubleshooting: If your icing is too runny, gradually whisk in more powdered sugar until you achieve the perfect thickness.
Ingredient Quality Matters: Use pure extracts and sifted sugar for the best flavor and texture.
Serving at the Right Temperature: Icing tends to thicken as it cools down; gently rewhipping with a splash of milk can revive its creamy consistency.
Serving Suggestions
This Homemade Vanilla Icing pairs beautifully with many desserts. Here are a few suggestions:
- Cakes: Glaze over chocolate cakes or vanilla sponge cakes for an effortless yet stunning finish.
- Cupcakes: What’s a cupcake without icing? Add a swirl on top to make them irresistible!
- Cookies: Use as a dip for sugar cookies or drizzle over ginger snaps for a delightful contrast.
- Presentation Ideas: For a rustic touch, sprinkle some colorful sprinkles on top before serving.
Perfect for birthdays, holidays, or simply to indulge on a Saturday afternoon, you’ll find countless ways to enjoy this icing!
Variations & Substitutions
If you want to experiment with flavors, consider these options:
- Almond Vanilla Icing: Substitute vanilla extract with almond extract for a unique twist.
- Chocolate Dipping Icing: Mix in a couple of tablespoons of cocoa powder for a chocolatey surprise!
- Seasonal Variations: Try using pumpkin spice for a fall-flavored icing, or a few drops of peppermint extract during the winter holidays—delivery of festive cheer in every bite!
Additionally, if you have dietary restrictions, you can easily make this icing vegan by substituting dairy ingredients with almond or coconut milk and using powdered sugar that relies on plants.
Nutrition & Storage Info
- Prep Time: 5 minutes
- Total Time: 10 minutes
- Yield: Approximately 1½ cups of icing (enough for several cupcakes or a full cake)
- Estimated Calories: 50 calories per serving (1 tablespoon)
- Storage Instructions: Store in an airtight container at room temperature for one day, or in the fridge for up to 3 days. Freezing is not recommended for this type of icing as it can change its texture.
FAQ Section
Can I use granulated sugar instead of powdered sugar?
- Unfortunately, granulated sugar won’t provide the smooth icing you desire. Stick with powdered sugar for best results!
How do I make a chocolate version?
- Simply mix in cocoa powder until you achieve the desired chocolate flavor—start with 2 tablespoons!
What’s the best way to decorate with icing?
- Use a piping bag for detailed designs or a spatula for a more rustic spread.
Can I add food coloring?
- Yes! Gel food coloring works best without altering the icing’s consistency.
What if my icing is too runny?
- Gradually whisk in more powdered sugar until the desired thickness is reached.
Can this icing be used for a cake that will be stored in the fridge?
- Yes, but be mindful that refrigeration can alter the texture. Serve at room temperature for the best experience.
What flavor pairs best with vanilla icing?
- Chocolate, lemon, and almond cakes work wonderfully with vanilla icing.
Can I freeze leftover icing?
- Freezing is not recommended, as it may change the texture once thawed.
How long will the icing last in the fridge?
- It lasts up to three days if stored correctly in an airtight container.
Can I use this icing on warm desserts?
- Absolutely! Drizzling it over warm cakes makes for a delightful melty experience.
Conclusion
Homemade Vanilla Icing is not just a recipe; it’s a heartfelt blend of sweetness that can turn any dessert into a cherished memory. Made with love and simplicity, it promises to add joy to your baking endeavors. I encourage you to give it a try—taste the difference, and let the sweet moments unfold!
And as always, I’d love to hear your thoughts. Share your feedback, variations, or any questions in the comments below! Don’t forget to check out other delicious recipes on the blog that can make your baking journey even sweeter!
Homemade Vanilla Icing
Ingredients
Method
- Gather all your ingredients. Ensure your powdered sugar is sifted and your milk is at room temperature.
- In a medium mixing bowl, whisk together the powdered sugar, milk, and vanilla extract until smooth and creamy.
- You’ll know it’s ready when the icing has a silky consistency with no lumps—about 2-3 minutes of whisking should do it!
- If you need a thinner glaze, slowly add more milk, one teaspoon at a time, until you reach your desired consistency. If you’d like it thicker, add more powdered sugar.
- Use your Homemade Vanilla Icing right away! Drizzle over cakes, cupcakes, or warm cookies.