Table of Contents
Table of Contents
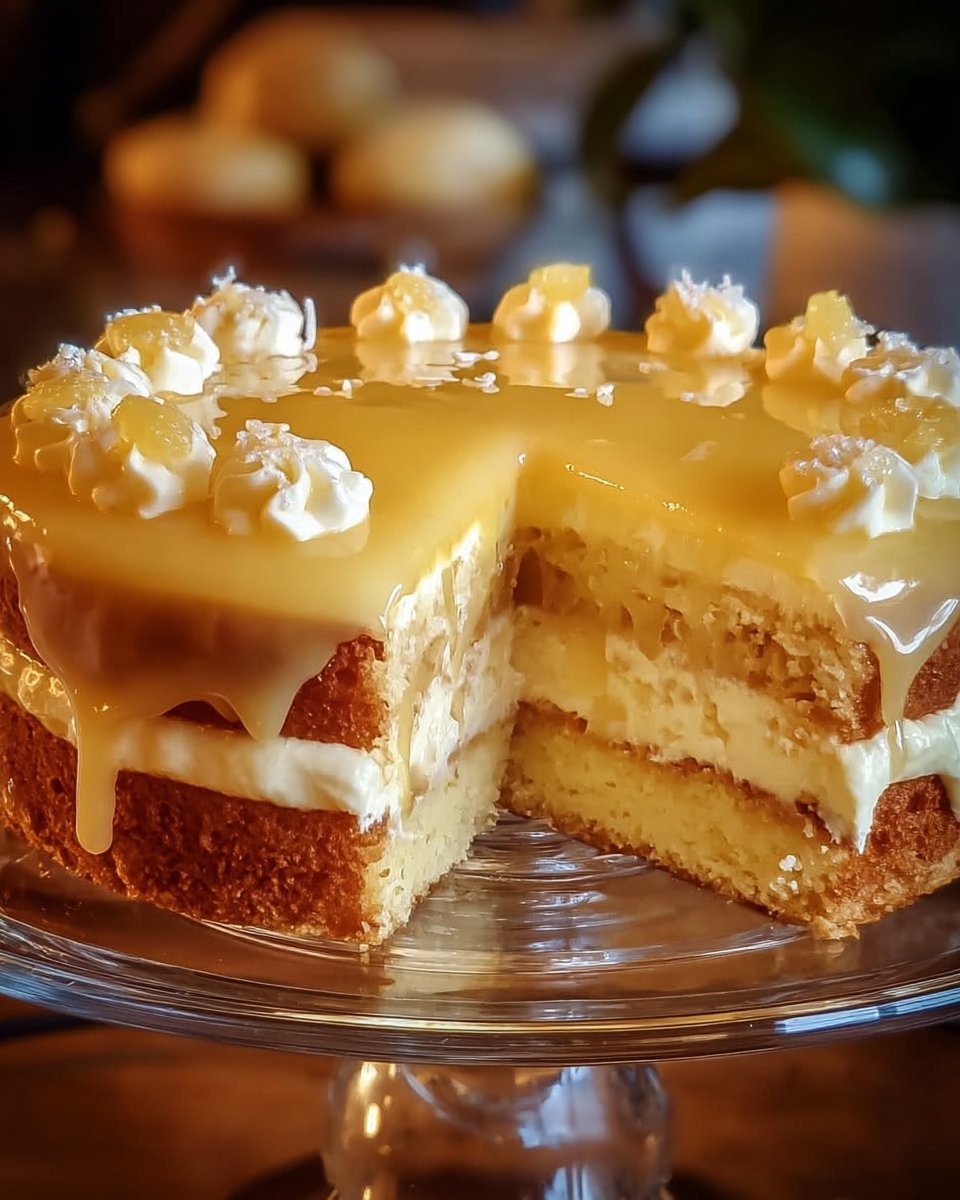
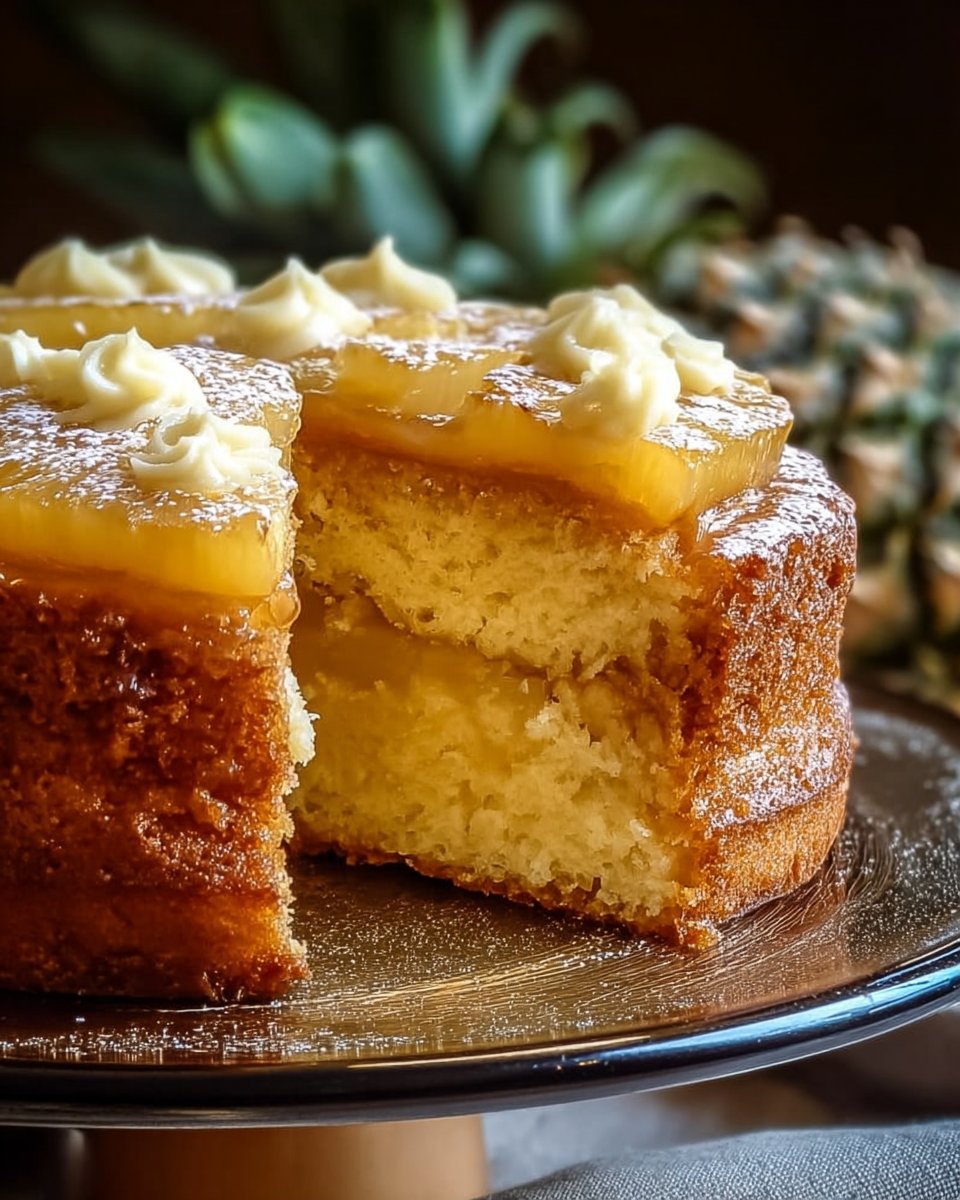
Juicy Pineapple Heaven Cake: A Tropical Delight You’ll Adore
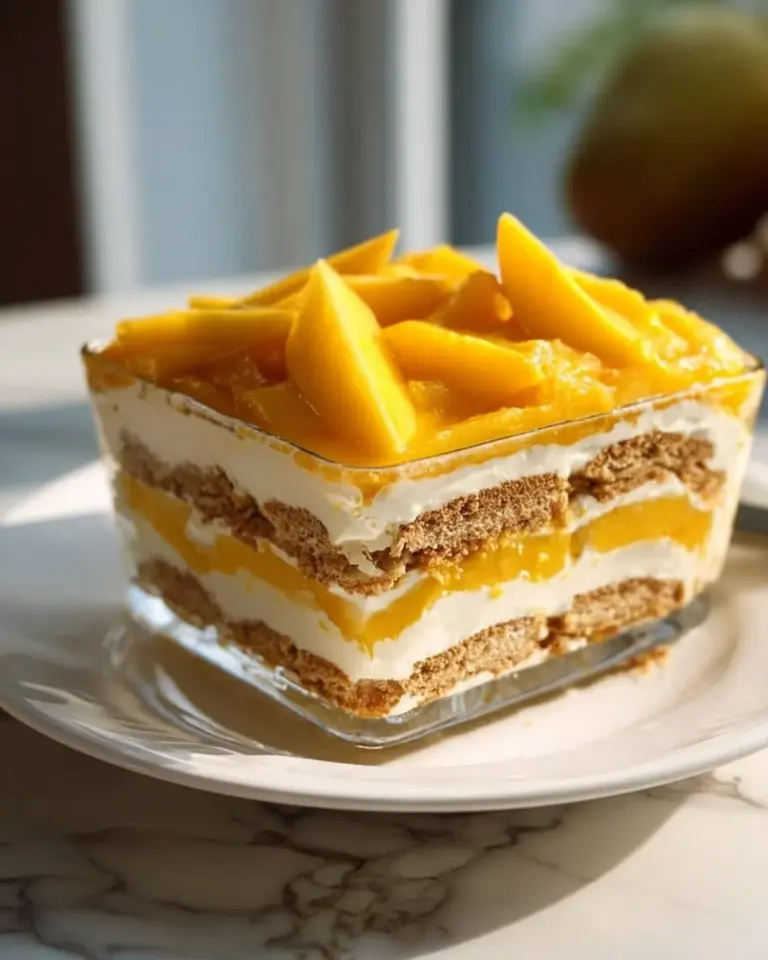
I can still remember the day my grandmother pulled her famous Juicy Pineapple Heaven Cake from the oven, its sweet aroma wafting through the kitchen. It was a summer afternoon, and the scent of pineapples instantly transported me to a tropical paradise. This cake isn’t just dessert; it’s a cherished family memory, a slice of nostalgia that brings everyone together.
As the perfect blend of moistness and tropical zest, the Juicy Pineapple Heaven Cake is not just another cake recipe. Its unique combination of crushed pineapple and sour cream makes it incredibly tender, while the sweet glaze adds a delightful tang. Unlike many store-bought or heavily frosted cakes, this one embraces a more subtle, natural sweetness that’s perfect for any occasion.
In this blog post, I’ll share my tried-and-true recipe, filled with tips and tricks learned from years of baking with my family. You’ll not only learn how to whip up this tropical delight but also gain insights into making it your own. So, let’s dive into this joyful baking adventure together!
What Are Juicy Pineapple Heaven Cakes?
The Juicy Pineapple Heaven Cake hails from the rich traditions of tropical baking—combining the sweet, juicy flavor of fresh pineapples with fluffy, tender bread-like texture. The cake’s lightness makes it perfect for warm summer gatherings or cozy winter afternoons. Each bite feels like a mini-vacation, bursting with sunshine and warmth.
What sets this cake apart from others is its ability to balance sweetness with a slight tang from the crushed pineapple and vanilla undertones. It’s not just a cake to satisfy your sweet tooth; it’s a piece of joy that evokes sunshine, laughter, and a sense of belonging. You can whip it up quickly for a weekday treat or transform it into a centerpiece for birthdays and holidays.
This cake is versatile and uplifting, making it ideal for any occasion where you want to bring a smile to faces. Whether you’re celebrating with friends or indulging in a quiet slice by yourself, this cake is bound to bring happiness to the table.
Why You’ll Love This Recipe
Seriously Scrumptious: The combination of pineapple and vanilla creates a flavor profile that dances on your taste buds, far superior to any packaged dessert.
Cost-Effective: With basic pantry ingredients like flour, sugar, and butter, you can create a delightful cake without breaking the bank. A fraction of the cost of going to a bakery—trust me, your wallet will thank you!
Easily Customizable: You can tweak this recipe to your liking! Swap in coconut for a tropical twist, or toss in some chocolate chips for those who crave a little indulgence.
Simplicity is Key: This cake is beginner-friendly! With a straightforward recipe and minimal steps, even novice bakers can impress their loved ones.
Make-Ahead Magic: This cake keeps well in the fridge for several days and even freezes like a charm. It’s the perfect make-ahead dessert for gatherings.
Ingredients Section
To bake your own Juicy Pineapple Heaven Cake, gather the following ingredients:
1 teaspoon salt
- Enhances the sweetness of the cake.
1 teaspoon baking powder
- Helps the cake rise, giving it that beautiful fluffy texture.
1 ½ cups all-purpose flour
- Works best when sifted for lighter texture. I prefer King Arthur Flour for consistent results.
½ cup unsalted butter, softened
- Room temperature butter is crucial. I’m a fan of Kerrygold for its rich flavor.
1 cup granulated sugar
- Sweetness level that works perfectly with the fresh pineapple.
2 large eggs
- Vital for binding ingredients together.
1 teaspoon vanilla extract
- I love using pure vanilla extract for a richer flavor.
½ cup sour cream
- Adds moisture and a slight tang.
1 cup crushed pineapple, drained
- Fresh or canned work, but fresh gives a brighter flavor.
½ cup powdered sugar
- For the glaze that adds a sweet finish.
2 tablespoons pineapple juice
- To bring the glaze to the perfect consistency.
Step-by-Step Instructions
Preheat your oven: Set the oven to 350°F (175°C). Let’s make sure it’s ready for baking!
Prepare the loaf pan: Grease and flour a loaf pan to prevent sticking—don’t skip this step, or your beautiful cake may rebel!
Mix Dry Ingredients: In a medium bowl, whisk together 1 ½ cups all-purpose flour, 1 teaspoon baking powder, and 1 teaspoon salt. Set aside.
Cream Butter and Sugar: In a large bowl, beat ½ cup unsalted butter with 1 cup granulated sugar until light and fluffy; about 3-4 minutes. This is where the magic begins!
Add Eggs: Beat in the 2 large eggs, one at a time, mixing well after each addition. Stir in 1 teaspoon vanilla extract—your kitchen should smell heavenly by now!
Combine Ingredients: Gradually then, add the dry mixture to the wet ingredients, alternating with ½ cup sour cream. Start and end with the dry mixture, making sure it’s combined well.
Fold in Pineapple: Gently fold in 1 cup of drained crushed pineapple until evenly distributed.
Bake: Pour the batter into the prepared loaf pan and smooth the top. Bake for 50-60 minutes, or until a toothpick inserted in the center comes out clean. When golden brown, it’s showtime!
Cool Down: Let the cake cool in the pan for 10 minutes before transferring it to a wire rack.
Make the Glaze: In a small bowl, whisk together ½ cup powdered sugar and 2 tablespoons pineapple juice until smooth.
Drizzle and Serve: Once the cake has cooled, drizzle the glaze over the top before slicing and serving.
Pro Tip: If the cake seems too dense, you may have overmixed when adding the dry ingredients. Remember, a light hand is key!
Expert Tips & Tricks
Use Fresh Ingredients: Always use fresh eggs and quality vanilla extract. They’ll make a huge difference in flavor.
Sourcing Pineapple: If you’re using canned pineapple, ensure it’s well-drained. Too much juice can make your batter too wet.
Storage: Store leftovers in an airtight container at room temperature for up to 3 days, or in the fridge for about a week.
Make Ahead: This cake freezes beautifully! Just wrap it tightly in plastic wrap and foil for up to 3 months. Thaw in the fridge overnight before serving.
Troubleshooting: If the cake sinks in the middle, it might be due to under-baking or opening the oven door too early. Trust your timing, and use the toothpick test!
Serving Suggestions
This cake shines on its own, but it pairs beautifully with a scoop of vanilla ice cream or a dollop of whipped cream. For a refreshing touch, serve with a side of fresh berries or a tropical fruit salad. Perfect for summer BBQs, potlucks, or any joyful gathering where you want to spread some love!
Variations & Substitutions
Flavor Combinations: Incorporate shredded coconut for a Pina Colada-inspired version or chocolate chips for a rich twist.
Dietary Adaptations: For a gluten-free cake, replace the flour with a gluten-free blend. Use dairy-free yogurt for a vegan alternative.
Seasonal Changes: In winter, you could incorporate spices like cinnamon or nutmeg for a cozy variation.
Nutrition & Storage Info
- Prep Time: 15 minutes
- Cook Time: 60 minutes
- Total Time: 1 hour 15 minutes
- Yield: 10 servings
- Estimated Calories: 210 calories per slice
- Storage: Keep at room temperature for 3 days, in the fridge for a week, or freeze for up to 3 months.
FAQ Section
Can I use fresh pineapple instead of canned?
- Absolutely! Just ensure it’s properly drained and diced.
What if my cake is too dense?
- Overmixing can cause density; ensure gentle folding for lightness.
Can I make this ahead of time?
- Yes! It’s perfect for making ahead; just store it in an airtight container.
Can it be made into cupcakes?
- Yes! Just reduce the baking time to about 20-25 minutes.
What other glazes can I use?
- A cream cheese glaze or citrus glaze could also pair beautifully!
Can I skip the glaze?
- Of course, it’s delicious on its own but the glaze adds a delightful finish!
How do I know when it’s done baking?
- When a toothpick inserted comes out clean, it’s ready!
Can I add nuts?
- Definitely! Walnuts or pecans would add a wonderful crunch.
What’s the best way to freeze this cake?
- Wrap it tightly in plastic wrap, then foil. Thaw in the fridge overnight before serving.
Can I replace sour cream?
- Plain Greek yogurt or buttermilk works well as a substitute.
Conclusion
The Juicy Pineapple Heaven Cake isn’t just a recipe—it’s an invitation to savor life’s sweet moments. This cake embodies family togetherness and travel memories through its delicious tropical touch. I encourage you to give it a try; once you do, I’d love to hear how it turned out. Share your feedback in the comments! And if you’re interested, check out my other summer dessert recipes to keep the sunshine coming.
Graving More Recipes?

Juicy Pineapple Heaven Cake
Ingredients
Method
- Preheat your oven: Set the oven to 350°F (175°C).
- Prepare the loaf pan: Grease and flour a loaf pan to prevent sticking.
- Mix Dry Ingredients: In a medium bowl, whisk together the flour, baking powder, and salt. Set aside.
- Cream Butter and Sugar: In a large bowl, beat the softened butter with the granulated sugar until light and fluffy.
- Add Eggs: Beat in the eggs, one at a time, mixing well after each addition. Stir in the vanilla extract.
- Combine Ingredients: Gradually add the dry mixture to the wet ingredients, alternating with the sour cream.
- Fold in Pineapple: Gently fold in the drained crushed pineapple until evenly distributed.
- Pour the batter into the prepared loaf pan and smooth the top.
- Bake for 50-60 minutes, or until a toothpick inserted in the center comes out clean.
- Let the cake cool in the pan for 10 minutes before transferring it to a wire rack.
- Make the Glaze: In a small bowl, whisk together the powdered sugar and pineapple juice until smooth.
- Drizzle the glaze over the cooled cake before slicing and serving.