Irresistible Peanut Butter Mousse Filling: The Ultimate Creamy Delight
Growing up, nothing quite compared to the sweet aroma of my mom whipping up a dessert in the kitchen. Every Sunday was a ritual; we would gather around the table and indulge in whatever delight she’d created that week. But one recipe that always stopped us in our tracks was her luscious Peanut Butter Mousse Filling. The combination of creamy peanut butter, fluffy whipped cream, and a touch of sweetness was pure magic, and every bite felt like a warm hug from my childhood.
What makes this Peanut Butter Mousse Filling so special? It’s not just about the ingredients—though using quality, creamy peanut butter and freshly whipped cream elevates the flavor beyond any store-bought version. It’s about nostalgia, the comfort food that bridges generations. This mousse is both light and rich, striking the perfect balance that leaves you wanting more without the guilt.
In this recipe, you’ll learn how to create a decadent Peanut Butter Mousse Filling that is whipping up memories while providing that classic taste that everyone loves. Whether you’re planning a family gathering or a special treat for yourself, I promise this recipe will become a staple in your kitchen, just like it is in mine!
What Are Peanut Butter Mousse Fillings?
Peanut butter mousse fillings have a delightful origin that intertwines the culinary trends of both Europe and America. The French culinary art of creating mousses merges beautifully with the beloved American flavor that is peanut butter, giving us a rich, creamy dessert that is distinctly familiar yet exceptionally indulgent.
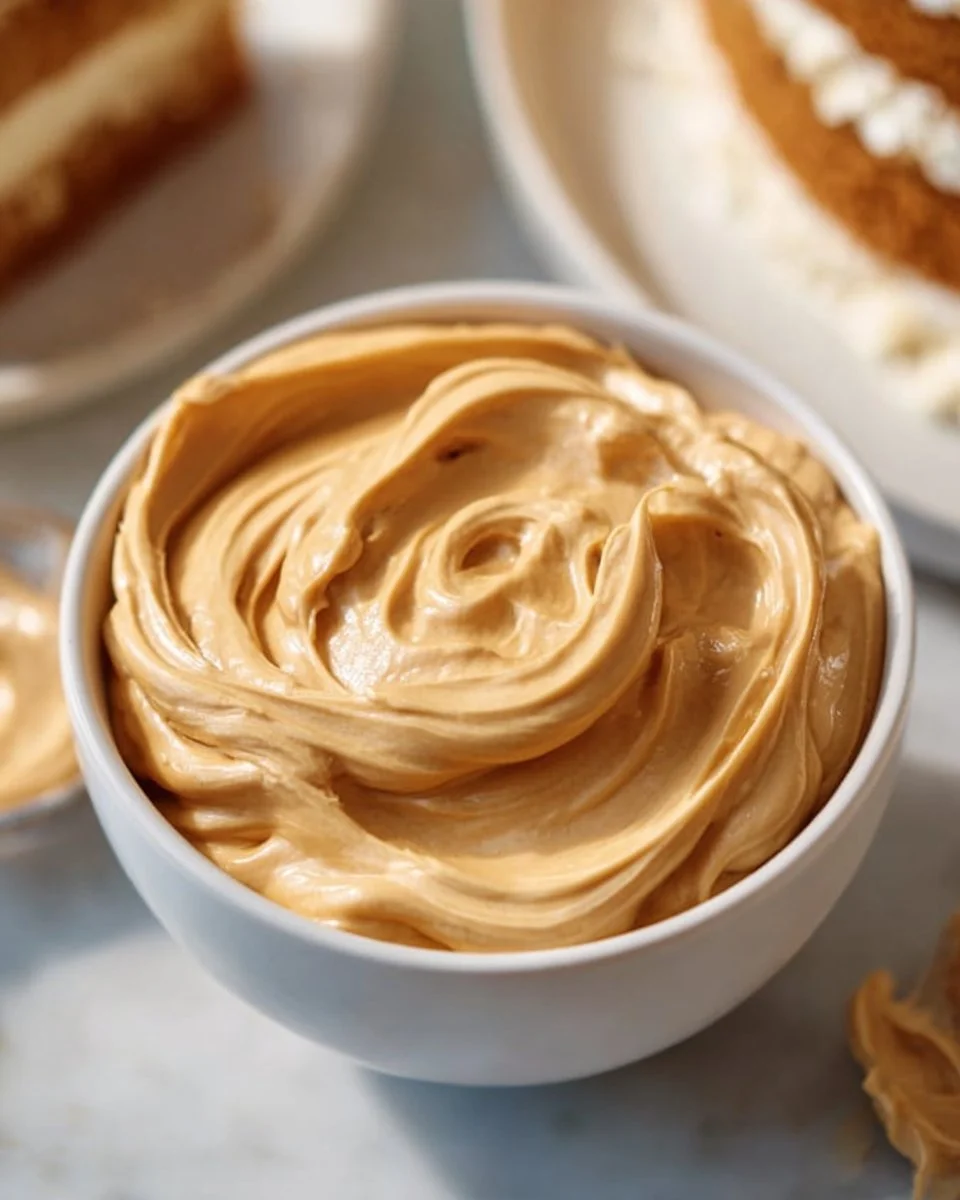
This mousse offers a unique texture—silky and light, with a nutty flavor that dances on your palate. Imagine taking a spoonful and experiencing the perfect blend of richness without being overwhelming. That’s the magic of peanut butter mousse!
You might want to whip this delicious filling for various occasions—whether it’s parties, movie nights, or simply when you need a sweet pick-me-up. It enhances cakes and desserts effortlessly, making it a versatile and crowd-pleasing addition to any table.
Why You’ll Love This Recipe
1. Heavenly Flavor: The combination of rich peanut butter and creamy texture is sheer perfection. This mousse takes ordinary desserts to extraordinary levels!
2. Cost-Effective: Why buy overpriced mousse from a store when you can make it yourself for a fraction of the cost? The ingredients are simple yet effective.
3. Customizable: Want to add chocolate or a sprinkle of sea salt? Go for it! This mousse is a blank canvas that welcomes your creative touches.
4. Quick and Easy: With only a few simple steps, you’ll find that it’s not only easy to make but cuts down on preparation time.
5. Family-Friendly: Kids and adults alike adore this mousse. You can whip it up as a weekend treat or for special occasions, and you can be sure it will please everyone.
This peanut butter mousse filling stands head and shoulders above any prepackaged version you’ll find in stores. Trust me, there’s nothing like the taste of homemade goodness that’s filled with love!

Ingredients
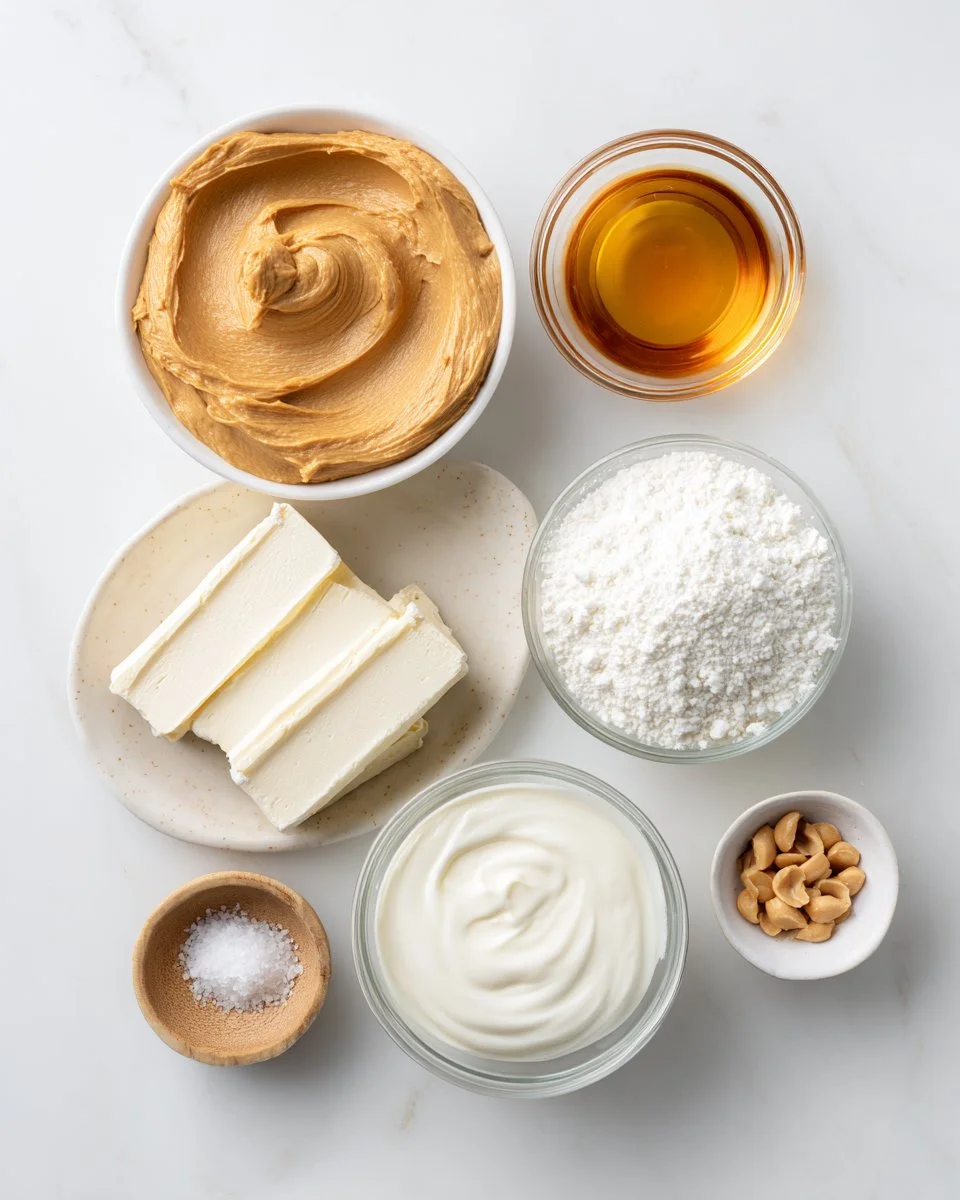
- 1 cup creamy peanut butter (I recommend Jif or Skippy; avoid natural peanut butter for best results)
- 8 oz cream cheese, softened (Philadelphia is my go-to)
- 1 cup powdered sugar, sifted
- 1 tsp vanilla extract (always opt for pure for that gourmet taste)
- 1 1/2 cups heavy whipping cream, cold (use a high-fat content for a fluffier mousse)
- Optional: Pinch of salt if using unsalted peanut butter
Prep Notes: Make sure your cream cheese is at room temperature for easy mixing. Cold whipping cream works best for achieving those stiff peaks!
Step-by-Step Instructions
1. WHIP THE CREAM: Start by grabbing a chilled mixing bowl (I pop mine in the freezer for a few minutes!). Whip the heavy cream on medium-high speed until stiff peaks form. You want it fluffy and light. Once done, place the whipped cream in the refrigerator to keep it cool while you prepare the peanut butter base.
2. MAKE THE PEANUT BUTTER BASE: In a separate large bowl, beat the cream cheese and peanut butter together on medium speed until completely smooth and creamy, about 2 to 3 minutes. Then add the vanilla extract and sifted powdered sugar. Beat until mixed and light in texture.
3. FOLD GENTLY: Time to combine the two mixtures! Add one-third of the whipped cream to the peanut butter mixture and fold gently with a spatula just to loosen the texture. Next, fold in the remaining whipped cream in two additions, using slow figure-eight motions. This helps keep the mixture airy. Be careful not to overmix and lose that airy goodness.
4. CHILL (OPTIONAL): For the best texture, I recommend refrigerating the mousse for about 30 minutes before using. It firms up nicely while retaining that light, mousse-like texture.
Chef’s Tips
- Timing: The whole process takes about 15-20 minutes, but chilling adds another 30.
- Visual Cues: For whipped cream, look for stiff peaks that hold, and for the peanut butter mixture, it should be smooth and fluffy.
Common Mistakes to Avoid
- Overmixing the whipped cream with the peanut butter mixture can lead to a denser texture; be gentle!
- Using oily or natural peanut butter may result in an undesired texture.
Expert Tips & Tricks
Ingredient Quality Matters: Using high-quality peanut butter, cream cheese, and vanilla extract really enhances the flavor.
Storage Recommendations: If you happen to have leftovers (which is rare!), store them in an airtight container in the fridge for up to 3 days.
Make-Ahead Instructions: You can prepare the mousse up to a day in advance, just be sure to give it a good whip again before serving if it has settled.
Troubleshooting: If your mousse is too thick, you can fold in a little extra chilled heavy cream to lighten it.
Flavor Boosts: For a chocolate peanut butter twist, try adding melted chocolate to the peanut butter base.
Serving Suggestions
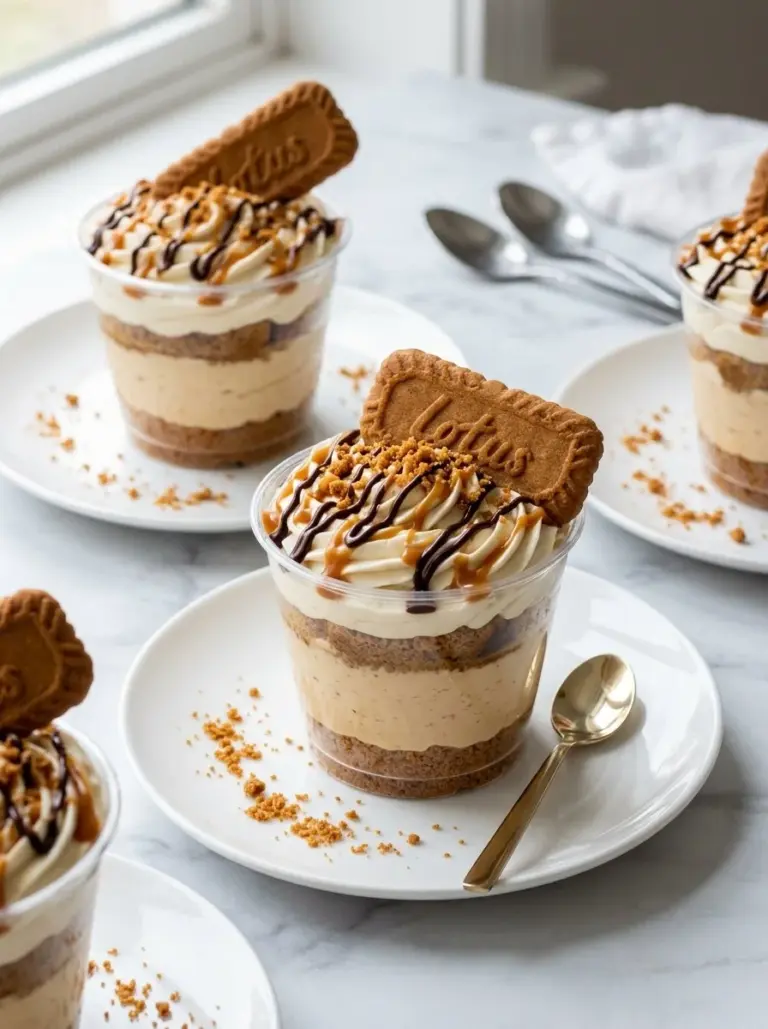
Serve your Peanut Butter Mousse Filling as a cake filling, with graham crackers, or in dessert cups topped with crushed peanuts or chocolate shavings for an elegant presentation. It’s perfect for birthday parties, holiday gatherings, or simply as a cozy treat on a long Sunday afternoon. I love to serve it alongside freshly cut fruit or a drizzle of chocolate sauce for that extra treat!
Variations & Substitutions
- Chocolate Peanut Butter: Add melted chocolate or cocoa powder to the base for an indulgent twist.
- Spiced Peanut Butter: Try adding a pinch of cinnamon or nutmeg to the mousse for a warm flavor.
- Nut-Free Alternative: Swap out the peanut butter with sun butter for a delicious nut-free option.
Nutrition & Storage Info
- Prep time: 15 minutes
- Total time: 45 minutes (including chill)
- Yield: 4-6 servings
- Estimated calories: Approximately 300 calories per serving
- Storage Instructions: Refrigerate for up to 3 days; it does freeze well for about a month.
FAQ Section
Can I use natural peanut butter?
- I recommend using creamy brands like Jif or Skippy for the best texture. Natural peanut butter can result in a more oily mousse.
What’s the best way to serve this mousse?
- You can serve it in individual dessert cups, use it as a cake filling, or dip fruits into it!
How do I store leftovers?
- Keep in an airtight container in the fridge for up to 3 days.
Can I make this dairy-free?
- Yes, substitute cream cheese with a non-dairy alternative and use coconut cream in place of heavy cream.
What if my mousse isn’t fluffy?
- Ensure you’re whipping the cream to stiff peaks and gently folding it into the peanut butter mixture.
Can I freeze this mousse?
- Yes, it can be frozen in an airtight container for up to one month. Let it thaw in the refrigerator before serving.
What’s the best way to serve it with chocolate?
- You can drizzle melted chocolate on top or mix in cocoa powder for a rich chocolate-peanut butter flavor.
Can I adjust the sweetness?
- Absolutely! You can increase or decrease the powdered sugar to suit your taste.
Does it work as a pie filling?
- Yes! It makes for an exquisite pie filling; just pour it into a prepared crust and chill until set.
Is this recipe kid-friendly?
- Definitely! Kids love the creamy, sweet flavor, and it’s a fun treat for them to help make!

Conclusion
This Peanut Butter Mousse Filling is not just a recipe; it’s a journey into nostalgia, a taste of childhood, and a perfect companion to a sweet treat. I can’t wait for you to try it and let me know how it turns out for you. Your feedback means the world to me! Dive into your own sweet adventures and feel free to check out my other peanut butter-inspired recipes on the blog, all made with love and deliciousness in mind. Happy baking!