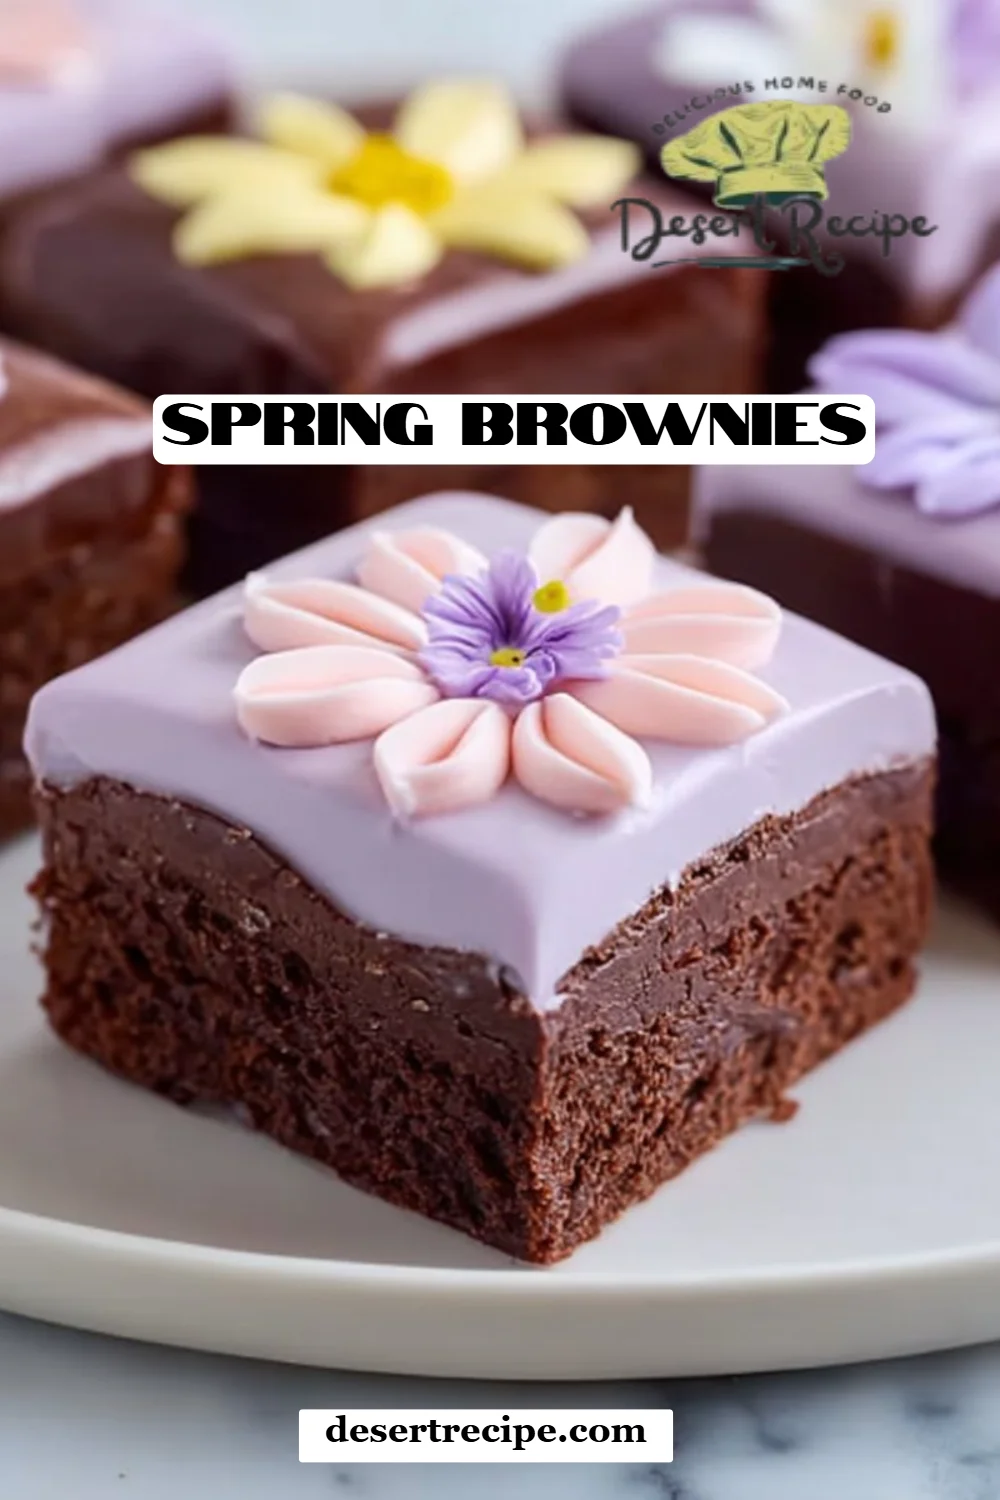
Delightful Spring Brownies: The Ultimate Recipe for Sweet, Happy Moments
When spring arrives, there’s an unmistakable feeling of renewal in the air—a burst of color, the scent of blooming flowers, and, of course, the irresistible lure of baking something sweet. My go-to creation during this delightful season? Spring Brownies. These are not just any brownies; they are fudgy, vibrant, and topped with pastel candies that evoke memories of the playful egg hunts from childhood.
As I mix bright colors and flavors into my baking routine, I cherish those sunny afternoons spent with family, surrounded by laughter and the aroma of chocolate wafting through the air. What sets my Spring Brownies apart is not just the festive toppings or the rich cocoa flavor; it’s that they are crafted with love and shared with the people I hold dear. I’ve tested countless recipes and believe me, this one is a gem! It strikes that perfect balance between gooey decadence and festive joy.
In this post, I’m excited to share my cherished Spring Brownies recipe, a dessert that promises to evoke sweet memories and smiles from friends and family alike! Through this guide, you’ll learn not just how to make these delightful brownies, but also how to customize them and impress with your baking prowess.
What Are Spring Brownies?
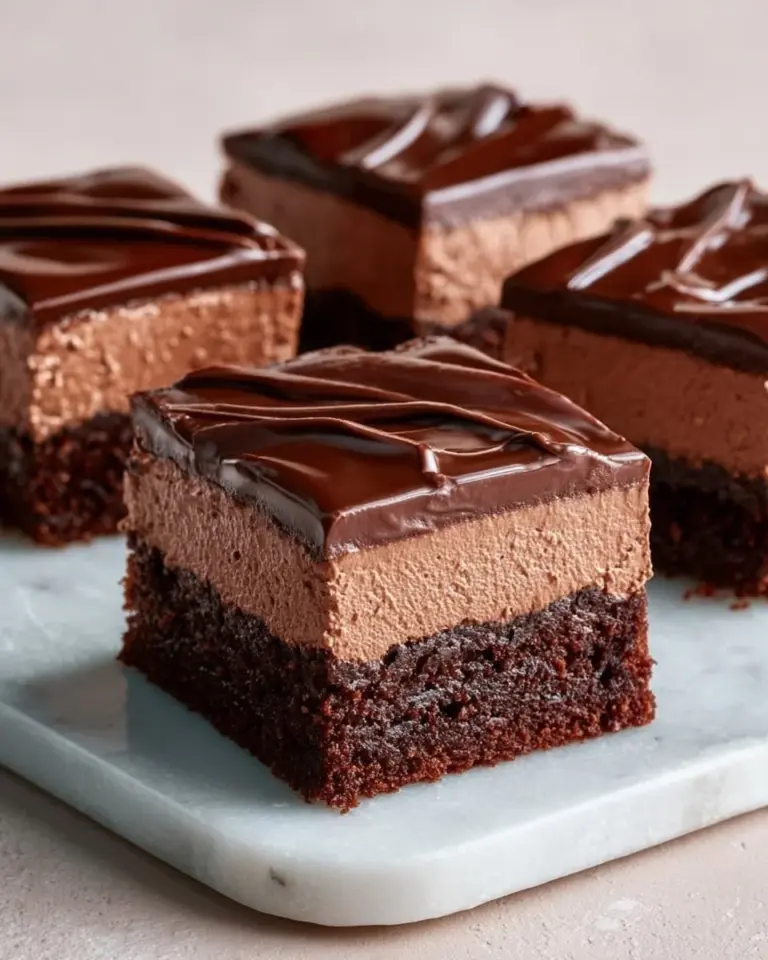
Spring Brownies have their roots firmly planted in the heart of family traditions and celebrations. While your average brownie is a beloved chocolate treat, Spring Brownies take it a step further by adding a colorful and festive aspect to the classic recipe. Imagine biting into a tender, fudgy brownie that’s rich in chocolate, complemented by the sweetness of pastel candies. The texture is perfectly chewy on the inside while still having a slight crispness on the edges—just pure decadence!
These brownies shine during springtime celebrations like Easter, birthdays, or even casual get-togethers. With their vibrant toppings, they symbolize the joy and renewal that this season embodies. Perfect for outdoor picnics or served alongside a scoop of vanilla ice cream, they make every gathering feel a little more special. So, when the trees bloom and the sun shines a little brighter, whip up a batch of Spring Brownies and enjoy the flavors of the season in every bite.
Why You’ll Love This Recipe
Irresistible Flavor: The combination of rich cocoa and the sweet crunch of pastel candies creates a delightful mix that is simply addictive. Each bite offers a symphony of textures that will tantalize your taste buds.
Easy to Make: If you think brownies are hard to create, think again! This recipe requires simple ingredients and straightforward methods—perfect even for beginner bakers. No fancy equipment necessary!
Budget-Friendly: Compared to store-bought brownies, making your own Spring Brownies saves you money while delivering a product that is far fresher and tastier. You won’t believe how inexpensive and rewarding these decadent treats can be!
Customization Galore: Love nuts? Throw them in! Prefer dark chocolate? Substitute the cocoa powder with dark chocolate for an extra depth of flavor. You can easily tweak this recipe to your heart’s content, making it truly your own.
Quick Preparation: You’ll find this recipe requires minimal prep time—under 15 minutes! Perfect for spontaneous gatherings or when you need a sweet fix but don’t want to spend all day in the kitchen.
So grab your apron and let’s dive into creating these mouthwatering Spring Brownies that are sure to become the highlight of your seasonal celebrations!
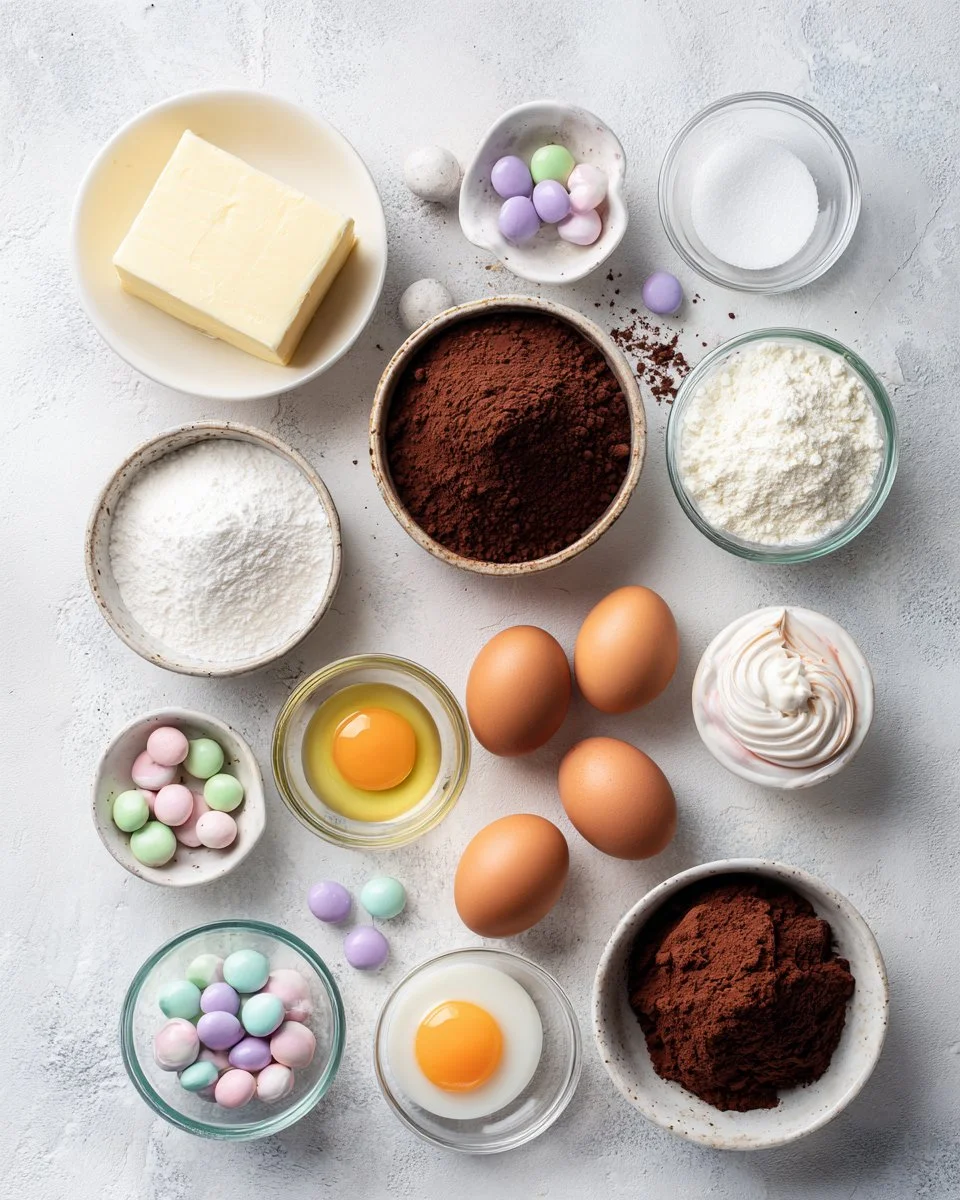
Ingredients Section
- 1 cup unsalted butter, room temperature – For that rich flavor; use high-quality butter for the best results. If you’re dairy-free, you can substitute with vegan butter.
- 2 cups granulated sugar – This adds sweetness and helps achieve that perfect chewy texture; consider organic sugar for a more natural option.
- 4 large eggs – Make sure they’re at room temperature to blend seamlessly into the mixture.
- 1 teaspoon vanilla extract – Pure vanilla extract delivers a more aromatic and flavorful brownie.
- 1 cup all-purpose flour – For the structure; can be substituted with a gluten-free blend if necessary.
- 1 cup unsweetened cocoa powder – A rich cocoa powder will ensure a deep chocolate flavor. Try brands like Ghirardelli or Dutch-processed cocoa for a premium experience.
- 1/2 teaspoon salt – Enhances all the flavors; sea salt works beautifully here.
- 1/2 teaspoon baking powder – Helps the brownies rise slightly.
- Pastel candies for topping – Adds a festive feel; consider mini M&Ms or Cadbury eggs.
- Frosting for swirls – Optional, but a light chocolate or vanilla frosting drizzled on top takes these brownies to another level!
Step-by-Step Instructions
Preheat your oven to 350°F (175°C) and grease a 9×13 inch baking pan with butter or line it with parchment paper for easy removal later.
Melt the butter in a large bowl, either in the microwave or using a double boiler. Once melted, mix in the sugar until well combined—this should take about a minute of whisking.
Incorporate the eggs, adding them one by one into the mixture. Stir vigorously after each addition until the mixture is smooth and glossy. Next, add in the vanilla extract.
In a separate bowl, sift together the flour, cocoa powder, salt, and baking powder. Ensure no lumps remain; this gives an even texture to your brownies.
Gradually fold the dry ingredients into the wet mixture, being careful not to overmix. You want a thick and slightly lumpy batter—this ensures a fudgy texture.
Pour and spread the batter evenly into your prepared pan, smoothing the top with a spatula for nice, even baking.
Bake for 25-30 minutes. Start checking at the 25-minute mark; a toothpick inserted into the center should come out with a few moist crumbs attached, but not wet batter.
Allow to cool in the pan on a wire rack for about 15 minutes before decorating.
Once cooled, let your creativity flow! Top with swirls of frosting and sprinkle those lovely pastel candies over the top. Cut them into squares and savor the beauty!
Chef’s Tips:
- For an extra fudgy brownie, try baking them for 22-25 minutes and enjoy a gooier center.
- Don’t skip the resting time! Allow the brownies to cool for at least 15 minutes before cutting; this helps set the texture beautifully.
- Common mistake to avoid: Overmixing the batter. Gently fold until just combined!
Expert Tips & Tricks
Quality Ingredients: Always opt for the best chocolate and butter you can find—these are the stars of your brownies, and good quality makes a significant difference.
Storage Recommendations: These brownies can be stored in an airtight container at room temperature for up to 3 days or in the fridge for 5 to 7 days. They also freeze beautifully for up to 3 months.
Make-Ahead Instructions: You can make the batter a day ahead and store it in the fridge. Just ensure to let it sit at room temperature for about 30 minutes before baking to achieve a uniform texture.
Troubleshooting: If your brownies come out too cakey, consider reducing the baking time slightly or adding a little more butter next time. For overly glossy tops, gently tap the pan on the counter before baking.
Perfect Presentation: For clean cuts, use a sharp knife dipped in warm water between cuts. Wipe it down after each cut for the neatest edges!
Serving Suggestions
Serve these delightful Spring Brownies alongside a generous scoop of vanilla ice cream or freshly whipped cream for an indulgent treat that everyone will love. You can also pair them with a light fruit salad or a dollop of raspberry compote to balance the sweetness. For presentation, consider cutting them into fun shapes using cookie cutters (like flowers or bunnies) for spring events—it’s sure to impress!
Variations & Substitutions
- Different Flavors: Try incorporating mint extract for a refreshing twist or add chocolate chips for an extra layer of gooey chocolate goodness.
- Dietary Adaptations: You can easily make this recipe gluten-free by substituting the all-purpose flour with almond flour, coconut flour, or a certified gluten-free all-purpose blend.
- Seasonal Variations: For a fall version, replace pastel candies with caramel bits or even chopped apples for a delightful change.
Nutrition & Storage Info
- Prep Time: 15 minutes
- Cook Time: 30 minutes
- Total Time: 45 minutes
- Yield: 24 brownies
- Estimated Calories: About 200 calories per serving
- Storage Instructions: Keep in an airtight container at room temperature for up to 3 days, in the fridge for 5-7 days, or freeze for up to 3 months.
FAQ Section
Can I use dark chocolate instead of cocoa powder?
- Yes! Melt the dark chocolate and replace it in equal measure for a richer, deeper flavor.
Is it better to refrigerate brownies?
- Refrigerating can extend their shelf life and makes them easier to slice, but it can alter the texture, making them denser.
How can I tell when my brownies are done?
- Use the toothpick test; a few moist crumbs should cling to it, indicating fudgy rather than wet batter.
What toppings work well besides pastel candies?
- Nuts, shredded coconut, or sprinkles can add great texture and visual appeal!
Can I make this recipe vegan?
- Absolutely! Use flax eggs, plant-based butter, and dairy-free chocolate as substitutes.
How do I add nuts without affecting texture?
- Lightly toast them beforehand to enhance their flavor, then fold them into the batter—about a cup works beautifully!
Can I replace sugar with a sugar alternative?
- Yes, use sweeteners like Stevia or Erythritol, but check conversion ratios as they vary from granulated sugar.
Why is my brownie texture dry?
- This can happen due to overbaking, so keep an eye on the time and perform the toothpick test to avoid it.
How long do these brownies last?
- They taste best when fresh but will last up to a week in the fridge and can be frozen for up to three months.
Why do you recommend folding in ingredients?
- This method helps keep the air incorporated, resulting in a lighter texture without overmixing—the key to fudgy brownies.

Conclusion
Baking these delightful Spring Brownies is not just about whipping up a dessert; it’s about creating memories that warm your heart and spirit. With each bite, you’ll taste the love and joy that comes from baking together with family and friends. I truly hope you find as much joy in making—and sharing—these brownies as I have!
Give them a try and let me know how they turn out. I’d love to hear your feedback or any customizations you added! Don’t forget to check out my other seasonal recipes on the blog for more delectable treats. Happy baking!

Spring Brownies
Ingredients
Method
- Preheat your oven to 350°F (175°C) and grease a 9x13 inch baking pan with butter or line it with parchment paper for easy removal later.
- Melt the butter in a large bowl, either in the microwave or using a double boiler. Once melted, mix in the sugar until well combined—this should take about a minute of whisking.
- Incorporate the eggs, adding them one by one into the mixture. Stir vigorously after each addition until the mixture is smooth and glossy. Next, add in the vanilla extract.
- In a separate bowl, sift together the flour, cocoa powder, salt, and baking powder. Ensure no lumps remain; this gives an even texture to your brownies.
- Gradually fold the dry ingredients into the wet mixture, being careful not to overmix. You want a thick and slightly lumpy batter—this ensures a fudgy texture.
- Pour and spread the batter evenly into your prepared pan, smoothing the top with a spatula for nice, even baking.
- Bake for 25-30 minutes. Start checking at the 25-minute mark; a toothpick inserted into the center should come out with a few moist crumbs attached, but not wet batter.
- Allow to cool in the pan on a wire rack for about 15 minutes before decorating.
- Once cooled, top with swirls of frosting and sprinkle those lovely pastel candies over the top. Cut them into squares and savor the beauty!