Table of Contents
Table of Contents
There’s something magical about the holiday season—the twinkling lights, the scent of pine in the air, and, of course, the baking that fills your home with warmth and nostalgia. I remember one particular Christmas when my grandma and I spent an entire afternoon in her cozy kitchen, flour dusting our noses as we whipped up batch after batch of her famous Christmas cookie bars. The aroma of melted chocolate mixed with the buttery richness of cookie dough still lingers in my memory, and it’s a memory I cherish dearly.
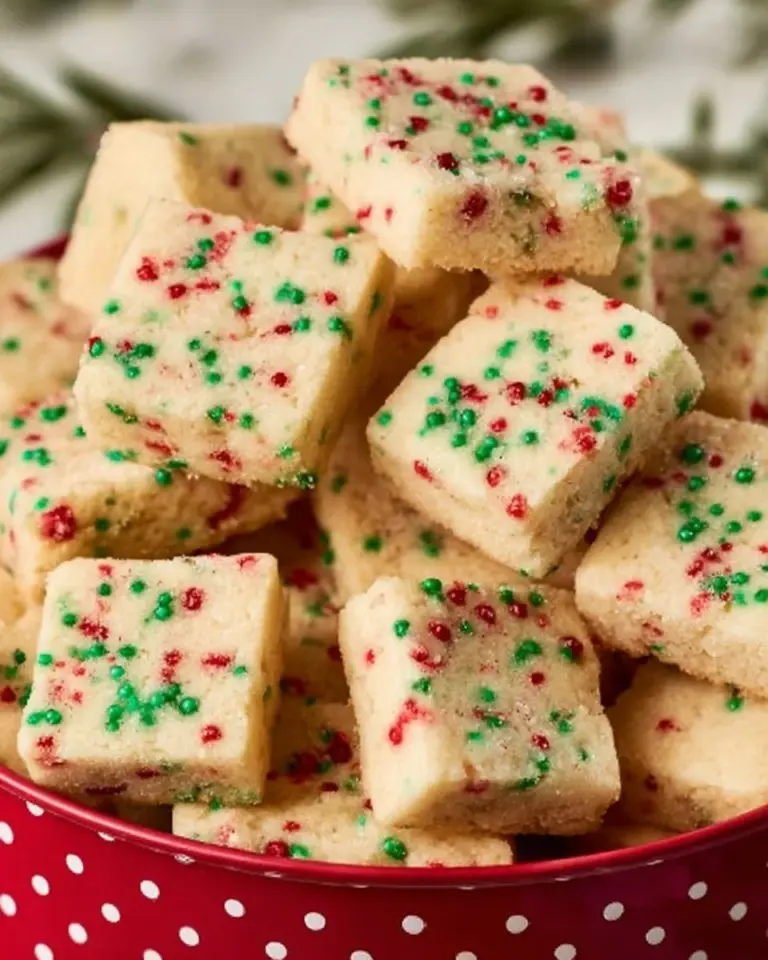
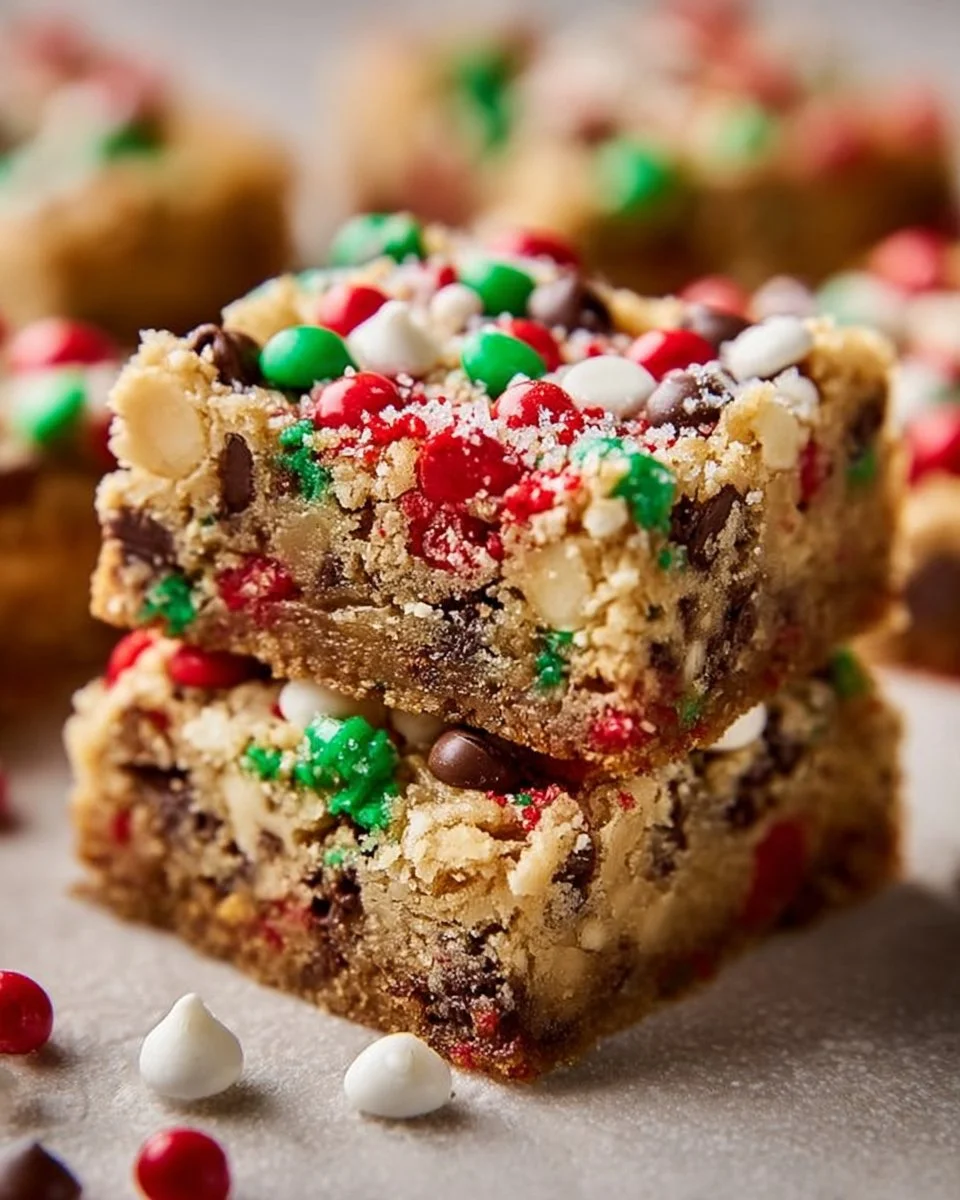
These Christmas Cookie Bars are not just cookies—they’re layers of love, memories, and holiday spirit perfect for sharing with family and friends. Unlike traditional cookies, these bars are delectably chewy, with a gooey center chock-full of chocolate chips. They are the kind of treat that elicits smiles with every bite, making them the ultimate comfort food for this time of year.
But what truly sets this recipe apart? It’s quicker, simpler, and far more forgiving than making individual cookies. Plus, there’s something rewarding about cutting them into perfectly portioned squares—it’s like giving each of your loved ones a little slice of joy! In this blog post, I assure you that I’ll guide you through each step to create these special bars that will become a cherished part of your holiday traditions.
What Are Christmas Cookie Bars?
Origin Story
Christmas cookie bars are a delightful twist on the classic cookie tradition. While cookies have their roots in medieval times, these bars emerged as a modern adaptation, allowing bakers to create deliciously thick, chewy confections in a single baking dish.
Taste and Texture
These bars boast a perfect balance of flavors: the richness of buttery dough, the sweetness of sugar, and the irresistible burst of chocolate chips. Their texture is uniquely satisfying, featuring a crisp upper crust, a soft and chewy interior, and tempting melted chocolate pockets throughout.
When to Make Them
Ideal for holiday parties, cozy family gatherings, or simply bringing a smile to a friend’s face, these bars are suited for any winter occasion. Picture yourself alongside loved ones, sharing stories while indulging in these delicious treats—you simply can’t go wrong!
Why You’ll Love This Recipe
Here’s why my Christmas Cookie Bars recipe stands out as a must-try this holiday season:
Easy to Make: Seriously, if you can mix a few ingredients together, you can make these bars! No need for fancy tools or advanced baking skills. It’s a straightforward process that even a novice can master.
Time-Efficient: While traditional cookies require multiple scoops and baking sheets, these bars come together in one bowl and one pan! Bake them up in about 30 minutes, and you’re ready to indulge or share.
Cost-Effective: With basic pantry staples, making these delicious bars is more economical than buying store-bought cookies or café treats. You can create a larger batch for less without compromising flavor or quality.
Customizable: Add your personal touch! Want to throw in some nuts, or perhaps swap the chocolate chips for festive red and green m&ms? The sky’s the limit! You can tailor these cookie bars to suit any preference.
Family Bonding: Baking these bars is not just about the end result; it’s about creating memories in the kitchen. Get the kids involved—whisking, pouring, and decorating together—and watch the smiles as they enjoy the fruits of your labor.
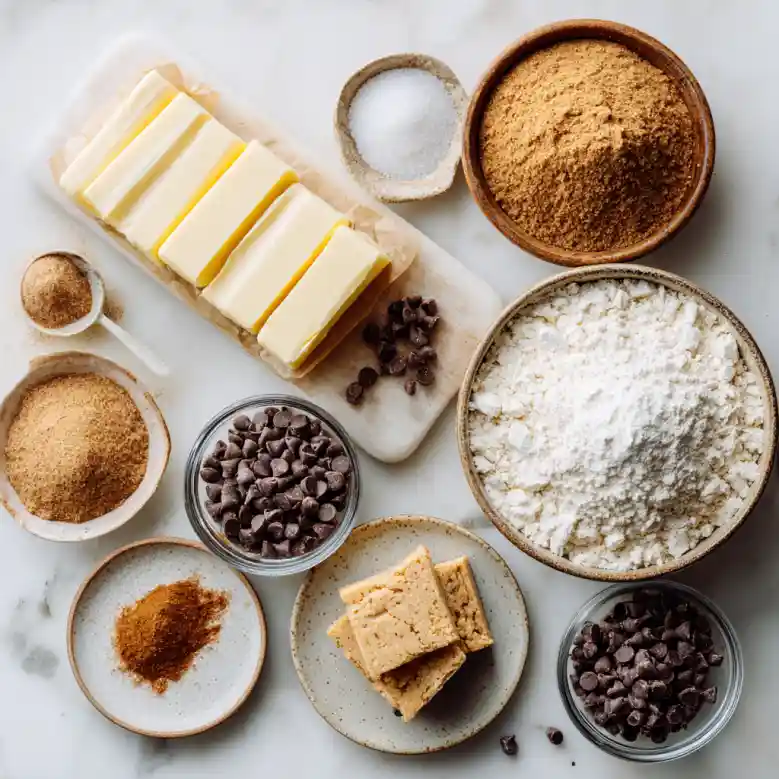
Ingredients
To make my Christmas Cookie Bars, you’ll need the following ingredients, thoughtfully organized for a smooth baking experience:
1 cup unsalted butter, softened: Make sure it’s at room temperature for easy creaming. I love using Kerrygold, as it adds a rich flavor!
1 cup granulated sugar: It sweetens the bars perfectly, creating that nice crispness on the outside. Using organic sugar can give a richer taste.
2 cups all-purpose flour: A high-quality, all-purpose flour works best. I swear by King Arthur Flour—it’s consistent and yields great results.
1 cup chocolate chips: Mini chocolate chips can be a fun twist if you prefer more chocolate in each bite! I personally use Ghirardelli because of its intense chocolate flavor.
Chef’s Prep Notes:
- Allow your butter to sit out 30-60 minutes before you start; it should be soft but not melted.
- Use a mixer or a sturdy spoon and some elbow grease!
Step-by-Step Instructions
Preheat your oven to 350°F (175°C). This will ensure an even bake!
In a large bowl, cream the softened butter and granulated sugar together until light and fluffy. This should take about 3-5 minutes with an electric mixer on medium speed. Visual cue: It should look pale and fluffy, with the sugar fully incorporated.
Gradually add the flour, mixing until just combined. Be careful not to overmix—stop as soon as you no longer see dry flour. Tip: Use a silicone spatula to fold in ingredients for a gentler touch.
Stir in the chocolate chips until evenly distributed throughout the dough.
Spread the mixture evenly into a greased baking pan (9×13 inches works beautifully). Tip: Use an offset spatula to spread it smoothly.
Bake for about 25-30 minutes or until golden brown. Keep an eye on them; the edges should look a little crisper than the center.
Allow to cool for at least 10-15 minutes before cutting into bars. Trust me, they are delicious warm, but cutting them too soon could lead to a gooey mess!
Expert Tips & Tricks
Storage Recommendations: Store your cookie bars in an airtight container at room temperature for up to 5 days, or longer in the fridge for about a week.
Make-Ahead Instructions: You can prepare the dough up to 2 days in advance and keep it covered in the fridge. Just allow it to come to room temperature before baking.
Common Mistakes to Avoid: Be careful not to overmix when adding flour; overworking can lead to tough cookies. Also, resist the urge to open the oven too soon!
Test for Doneness: To ensure they are baked just right, use a toothpick in the center. It should come out clean or with a few moist crumbs.
Serving: These are delightful served with a scoop of vanilla ice cream or a drizzle of warm chocolate sauce!
Serving Suggestions
Unleash your inner creativity with these simple serving suggestions for your Christmas Cookie Bars!
- Pair with Drinks: Serve them alongside a mug of hot cocoa, spiced cider, or a strong cup of coffee.
- Presentation Ideas: Dust the tops with powdered sugar for a snowy effect, or drizzle some chocolate on top for an indulgent touch.
- Occasions to Bring Them Out: Perfect for holiday gatherings, cookie swaps, or just cozy movie nights at home.
Variations & Substitutions
Flavors: Try adding peppermint extract for a minty twist or mixing in butterscotch chips for added sweetness.
Dietary Restrictions: For a gluten-free option, substitute regular flour with almond flour or a gluten-free blend.
Seasonal Variations: Tweak the flavors with seasonal spices like nutmeg and cinnamon during the fall/winter months, or swap in festive candies during the holidays.
Nutrition & Storage Info
- Prep Time: 10 minutes
- Cook Time: 25-30 minutes
- Total Time: 40 minutes
- Yield: 24 bars (depending on how you cut them)
- Estimated calories per serving: 150
- Storage Instructions: Room temperature for up to 5 days, fridge for 1 week, or freeze for 1 month.
FAQ Section
Can I freeze these cookie bars?
Yes, wrap them tightly in plastic wrap and foil before freezing to maintain their freshness.Can I halve this recipe?
Absolutely! Just use a smaller baking dish and keep an eye on baking time.How do I know when they’re done baking?
They should be golden brown around the edges, and a toothpick inserted in the middle should come out with a few moist crumbs.Can I use brown sugar instead of granulated sugar?
Yes! Brown sugar will add a richer flavor and slight chewiness to your bars.What if I overbake them?
If they’re overbaked, you can still soften them by adding a scoop of ice cream on top when serving!Can I add nuts to the recipe?
Yes! Chopped walnuts or pecans would complement the bars beautifully.Is there a vegan version of this recipe?
You can substitute butter with vegan butter and use a flax egg or applesauce for the egg.Will using dark chocolate change the flavor?
Yes, dark chocolate will give a deeper, less sweet flavor which pairs wonderfully with the cookie bar base!How should I cut the bars?
For cleaner cuts, wait until they are completely cooled, or use a sharp knife dipped in hot water between cuts.Can I add fruit?
Dried cranberries or chopped cherries would add a delightful tartness!
Conclusion
These Christmas Cookie Bars are sure to warm your heart and bring a sense of joy to every bite. They are not just tasty—they are a wonderful way to create lasting memories with your loved ones during the festive season. I encourage you to give this recipe a try and savor the happiness they bring. I’d love to hear your feedback—what modifications did you make? What special memories did these bars evoke? And don’t forget to check out my other holiday recipes on the blog for even more festive treats!
Happy baking! 🍪✨
Christmas Cookie Bars
Ingredients
Method
- Preheat your oven to 350°F (175°C).
- In a large bowl, cream the softened butter and granulated sugar together until light and fluffy, about 3-5 minutes.
- Gradually add the flour, mixing until just combined. Be careful not to overmix.
- Stir in the chocolate chips until evenly distributed.
- Spread the mixture evenly into a greased baking pan (9×13 inches).
- Bake for 25-30 minutes or until golden brown.
- Allow to cool for at least 10-15 minutes before cutting into bars.