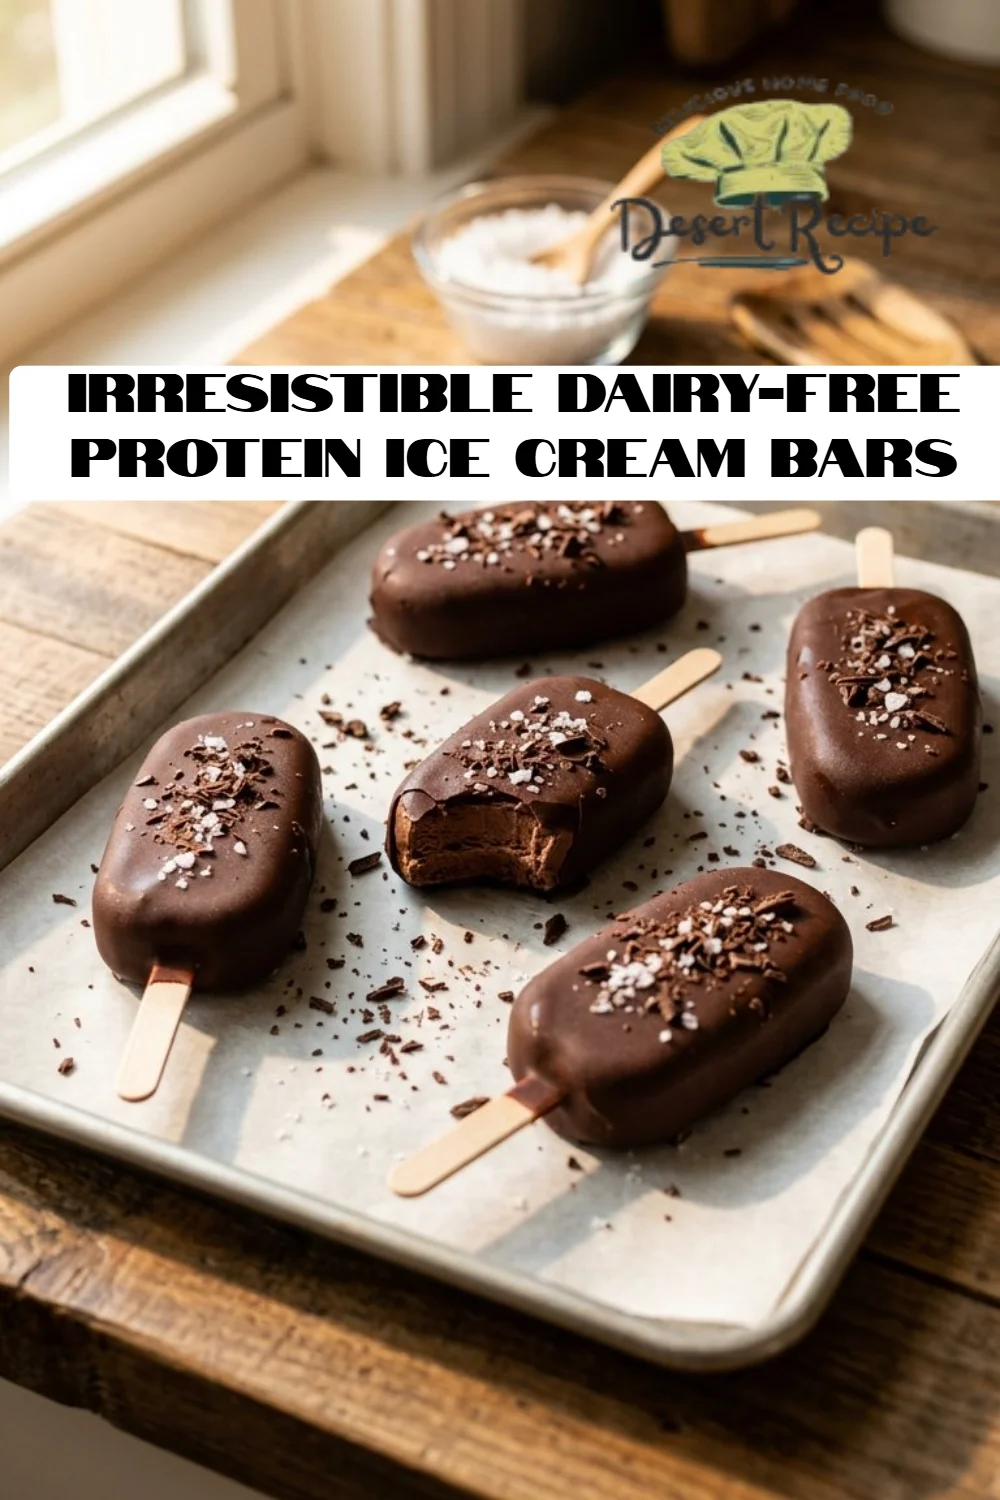
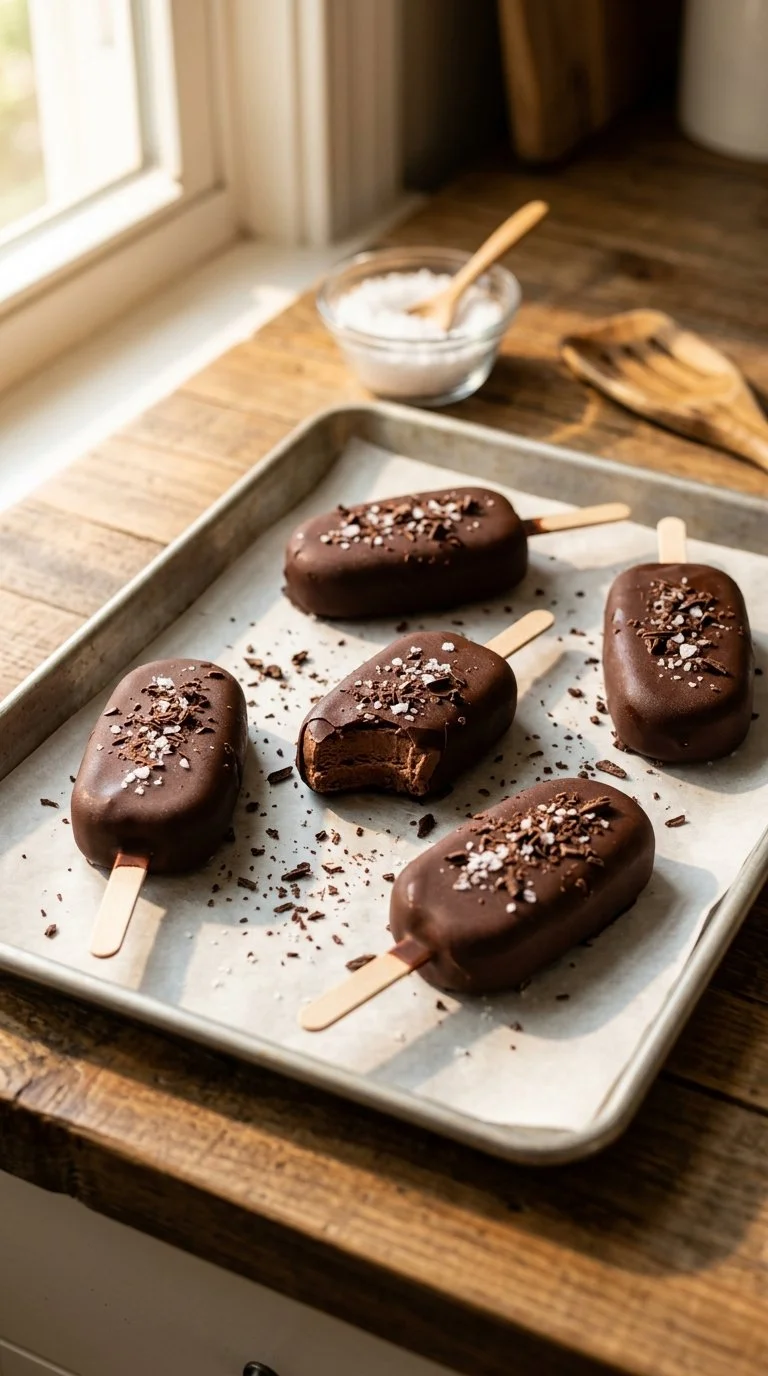
Irresistible Dairy-Free Protein Ice Cream Bars: Decadent Treats You Can Feel Good About!
Introduction
During one scorching summer afternoon, I decided to host a little family gathering in the backyard. The kids were running wild, laughter echoing through the air, but one thing was missing—something sweet and satisfying that everyone could enjoy. That’s when the idea struck me: homemade Irresistible Dairy-Free Protein Ice Cream Bars! With creamy coconut and rich chocolate, they were the perfect way to cool off and still pack a nutritional punch.
What makes these ice cream bars so special is that they combine the classic comforts of ice cream with the benefits of protein, creating a guilt-free treat that you can indulge in without a second thought. Unlike store-bought versions loaded with additives and tons of sugar, my homemade recipe uses wholesome ingredients like sunbutter and hemp protein powder. It brings back those cherished childhood memories of ice cream on hot days, but with a grown-up twist that nourishes your body.
So, what can you expect from this recipe? Spoiler alert: You’ll learn how to whip up your very own ice cream bars that are easy to make, free of dairy, and absolutely delicious!
What Are Irresistible Dairy-Free Protein Ice Cream Bars?
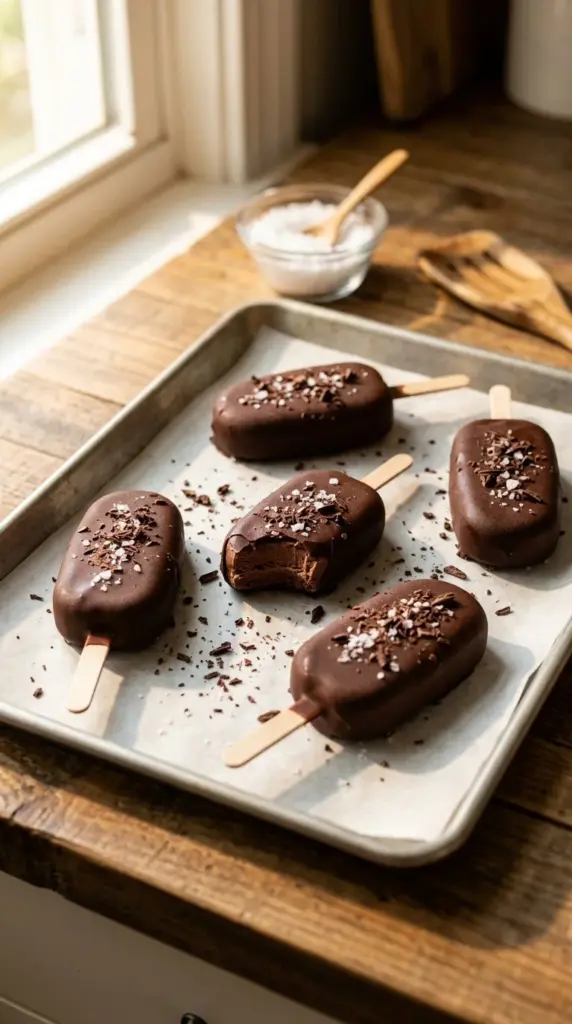
Irresistible Dairy-Free Protein Ice Cream Bars are a delightful fusion of taste and health. Inspired by traditional ice cream bars but reimagined, they provide a creamy texture from coconut cream and a nutty depth from sunbutter. The sweetness comes naturally from maple syrup, making them enjoyable without the guilt associated with many desserts.
You’ll love their smooth taste and satisfying crunch from the chocolate coating. The key ingredient, hemp protein powder, not only adds a protein boost but also a slightly nutty flavor that complements the other ingredients beautifully. They’re perfect for any occasion—whether it’s a hot summer day, a family gathering, or simply a healthy dessert to enjoy while binge-watching your favorite series.
The best part? Making these ice cream bars is straightforward, requiring just a few simple steps. You can customize them to your liking and feel good about what you’re enjoying!
Why You’ll Love This Recipe
Health-Conscious Indulgence: These ice cream bars are packed with protein, making them a smart choice for anyone looking to maintain a balanced diet without sacrificing flavor. Each bite feels like a treat, but you’re actually nourishing your body.
Budget-Friendly: Unlike the fancy dairy-free ice cream bars in the shops, making these at home can save you money while allowing you to control the ingredients. You can make a whole batch for the price of just a few store-bought bars!
Full of Flavor and Customizable: This recipe serves as a blank canvas for your creativity! Add in your choice of nuts, fruits, or even spices to make them your own. Want a hint of mint? Go for peppermint extract! Craving something spicy? A dash of cayenne could elevate the flavor profile beautifully.
Simplicity and Ease: With minimal prep and cleanup, you don’t need to be a professional baker to get these right. The instructions are easy to follow, and I promise you, you will look like a kitchen rockstar!
Make-Ahead Convenience: These bars can be prepared ahead of time and stored in the freezer for those late-night cravings or when unexpected guests drop by. They also make a delightful treat to have on hand for kids after school.
Ingredients
- 1 cup coconut cream (full-fat for the creamiest texture)
- 1/4 cup dark chocolate chips (look for dairy-free options)
- 1/4 cup sunbutter (or any nut/seed butter of your choice; almond butter works well too)
- 1/4 cup maple syrup (organic is best for quality!)
- 1 tsp vanilla extract (pure or imitation)
- 1/4 cup hemp protein powder
- 2 dropperfuls CBD oil (optional for a calming effect)
- 1/2 cup dark chocolate chips (for coating, again dairy-free is key)
- 1 Tbsp coconut oil (helps in melting the chocolate smoothly)
Prep Notes:
- Ensure your coconut cream is at room temperature for easy mixing.
- If using sunbutter or other nut butters that are very thick, warm slightly in the microwave for easier incorporation.
Step-by-Step Instructions
Melt the Chocolate: In a small saucepan over low heat, melt the coconut cream and 1/4 cup dark chocolate chips. Stir occasionally until completely melted (about 3-5 minutes). Chef’s Tip: Make sure the mixture is smooth; if you overheat, it may seize!
Mix the Filling: Remove from heat and stir in sunbutter, maple syrup, vanilla, hemp protein powder, and CBD oil (if using) until smooth and creamy.
Pour into Molds: Carefully pour the filling into silicone popsicle molds, insert popsicle sticks, and freeze for at least 2 hours. Visual Cue: The bars should be firm but not rock solid.
Prepare Chocolate Coating: Melt the remaining 1/2 cup dark chocolate chips with 1 Tbsp coconut oil in a microwave or a double boiler until smooth and glossy.
Dip the Bars: Once the filling is frozen, dip each bar into the melted chocolate, allowing the excess chocolate to drip off.
Lay to Cool: Place the dipped bars on a parchment-lined baking sheet to set.
Add Toppings (Optional): If you want to get fancy, sprinkle toppings like crushed nuts or shredded coconut while the chocolate is still warm.
Freeze Again: Return the bars to the freezer for 30 minutes or until the coating is solid.
Enjoy: Serve immediately or store in an airtight bag in the freezer for up to two months.
Expert Tips & Troubleshooting
Storage Recommendations: These bars should be stored in an airtight container in the freezer. They easily last for up to two months, though I doubt they’ll stick around that long!
Make-Ahead Instructions: You can prepare these bars a day in advance which makes them perfect for gatherings. Just keep them frozen and bring them out right before serving.
Common Mistakes to Avoid: Ensure that the chocolate is not too hot when dipping the bars; this can cause the filling to melt and create a mess. Also, check the consistency of your filling before pouring into molds—it should be thick but pourable.
Professional Tips for Best Results: For an extra creamy texture, chill your coconut cream overnight before using. This allows you to separate the cream from the liquid more easily.
Serving Suggestions
These Irresistible Dairy-Free Protein Ice Cream Bars are delicious on their own, but if you want to up your serving game, consider pairing them with a drizzle of sugar-free chocolate sauce or fresh berries for a refreshing burst of flavor. For a festive touch, add a few mint leaves as a garnish. These bars are perfect for a sunny picnic, birthday parties, or even as a decadent post-dinner treat!
Variations & Substitutions
Flavor Combinations: How about adding a hint of espresso powder to give a mocha twist? Or blend in some frozen fruits such as berries or bananas into the filling for a fruity profile!
Dietary Restrictions: If you’re nut-free, simply swap sunbutter with pumpkin seed butter. For those avoiding sugar, a low-carb sweetener can replace maple syrup without compromising the taste.
Seasonal Variations: Pumpkin spice in the fall, fresh peppermint for the winter holidays, or cooling cucumber mint for summer—these bars are a canvas for any flavor!
Nutrition & Storage Info
- Prep Time: 20 minutes
- Cook Time: 10 minutes (melting)
- Total Time: 2 hours 30 minutes (including freezing)
- Yield: About 8 bars
- Calories: Approximately 150 calories per bar
- Storage Instructions: Keep in the freezer; lasts for up to 2 months. Consume within 1 month for peak freshness.
FAQ Section
Can I use any other sweeteners?
Yes! Feel free to experiment with agave nectar or honey (if not vegan) for sweetness.Are these bars kid-friendly?
Absolutely! Kids love the creamy texture and chocolatey goodness, and they’re a healthy alternative to sugary snacks.What do I do if my mixture is too runny?
If the mixture seems too thin, add a tablespoon more of hemp protein powder to help thicken it up.How do I make these gluten-free?
This recipe is already gluten-free, but always check your ingredients to ensure they are certified.Can I use other types of protein powder?
Yes! Whey, plant-based protein, or pea protein can work, just note that substitutions might slightly alter the taste and texture.What can I substitute for coconut cream?
Silken tofu or cashew cream can also work in a pinch, but will give a different flavor profile.How do I know when the bars are fully frozen?
They should feel firm to the touch and should have a solid feel all the way through.Can I make these without CBD oil?
Yes! The recipe will still be just as delicious without the added CBD.Do I need special molds for these?
While silicone molds are recommended, regular popsicle molds work just fine. Just make sure to grease them lightly!How can I tell if I’ve melted the chocolate correctly?
It should be smooth and shiny, with no lumps. If it starts to thicken or become grainy, it has overheated.
Conclusion
These Irresistible Dairy-Free Protein Ice Cream Bars embody everything a good dessert should be—creamy, chocolatey, and utterly satisfying. Plus, they offer the bonus of being nutritious! I encourage you to step into the kitchen and whip up a batch. Your family will thank you, and you might just find that they become a staple in your home like they are in mine. Don’t forget to share your thoughts and let me know how yours turned out. Happy freezing!
Dairy-Free Protein Ice Cream Bars
Ingredients
Method
- In a small saucepan over low heat, melt the coconut cream and 1/4 cup dark chocolate chips, stirring occasionally until completely melted (about 3-5 minutes).
- Remove from heat and stir in sunbutter, maple syrup, vanilla, hemp protein powder, and CBD oil (if using) until smooth and creamy.
- Carefully pour the filling into silicone popsicle molds, insert popsicle sticks, and freeze for at least 2 hours.
- Melt the remaining 1/2 cup dark chocolate chips with 1 Tbsp coconut oil in a microwave or a double boiler until smooth and glossy.
- Once the filling is frozen, dip each bar into the melted chocolate, allowing the excess chocolate to drip off.
- Place the dipped bars on a parchment-lined baking sheet to set.
- If desired, sprinkle toppings like crushed nuts or shredded coconut while the chocolate is still warm.
- Return the bars to the freezer for 30 minutes or until the coating is solid.
- Serve immediately or store in an airtight bag in the freezer for up to two months.