Table of Contents
Table of Contents
As I stood in my kitchen one chilly afternoon with flour dusting the countertops, I found myself reminiscing about the precious family moments spent baking with my mom. Those cherished memories always come flooding back whenever I whip up a batch of Polar Bear Cookies. The warmth of the oven, the sweet scent of baking butter, and the laughter shared over a mixing bowl are enough to bring a smile to my face.
What makes these cookies truly special is their unique blend of flavors and textures. Imagine soft, chewy cookies adorned with creamy buttercream frosting, making them a delightful treat for kids and adults alike. Unlike other cookie recipes that often lean on simplicity or store-bought additives, this one is all about quality ingredients and the love infused in every step.
These Polar Bear Cookies not only nourish the body but also warm the heart and soul. Through this recipe, you’re not just baking cookies; you’re creating a sweet masterpiece that holds memories and bonds. So grab your apron, and let’s dive into the recipe that will not only fill your tummy but also your heart with joy!
What Are Polar Bear Cookies?
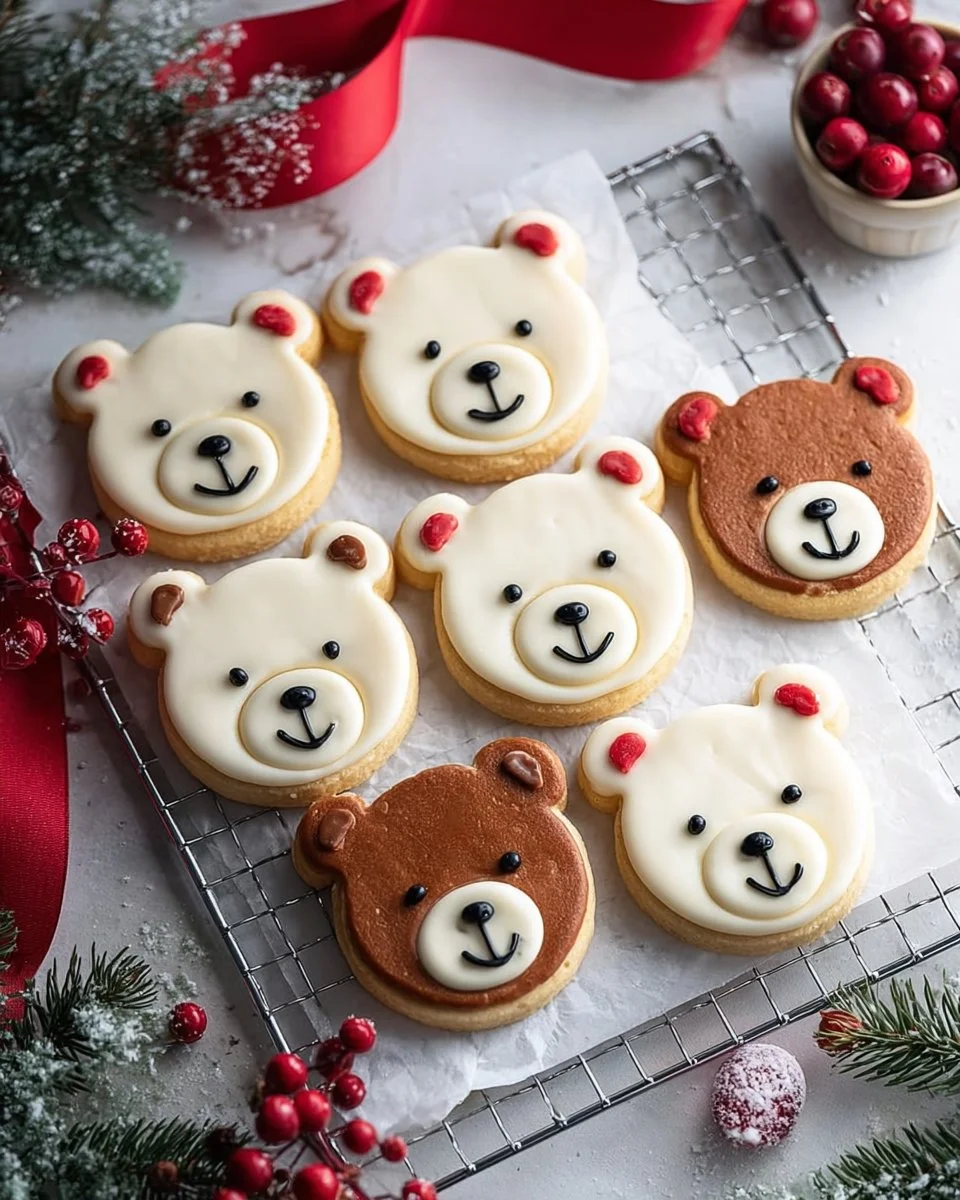
Polar Bear Cookies are a whimsical treat that harks back to childhood memories for many of us. Originating from family kitchens where creativity and fun were encouraged, these cookies evoke images of fluffy, snow-white polar bears that are just waiting to be decorated. They bring a sense of nostalgia and playfulness that other cookies often can’t match.
When you take a bite of a Polar Bear Cookie, you’ll experience a soft and chewy texture that melts in your mouth, paired with the delicious richness of buttercream frosting. The contrast of the sweet frosting with a hint of cocoa powder makes each cookie a delight for the palate. The fun and creativity of decorating them with colors and sprinkles give these cookies a unique flair that brightens any occasion.
Whether you’re celebrating a birthday, holiday, or simply want to indulge in a sweet treat, Polar Bear Cookies will steal the show. They are perfect for family gatherings, school events, or cozy afternoons at home—the perfect excuse to share and connect.
Why You’ll Love This Recipe
Flavorful and Fun: The combination of soft cookie with creamy frosting makes every bite feel like a little celebration in your mouth. Forget the monotonous dessert choices. These cookies are as delightful to eat as they are to decorate!
Cost-effective and Homemade: When compared to overpriced cookies from bakeries, this recipe saves you money without compromising on taste—plus, you get the satisfaction of baking them yourself.
Customization Galore: One of the best parts about these cookies is the freedom to add your personal touch. Want to go wild with colors? Maybe add some sprinkles or nuts? The possibilities are endless!
Easy to Prepare: Don’t worry if you’re a beginner in the kitchen! This recipe is simple and requires minimal time investment. With just a little patience, you’ll reap the rewarding joy of sharing warm cookies fresh from the oven.
Family-Friendly: Kids love to help in the kitchen, and this recipe is perfect for those little hands. It’s a great way to teach them about baking while creating wonderful memories together.
Now, let’s dive into the ingredients you need to whip up these delightful Polar Bear Cookies!
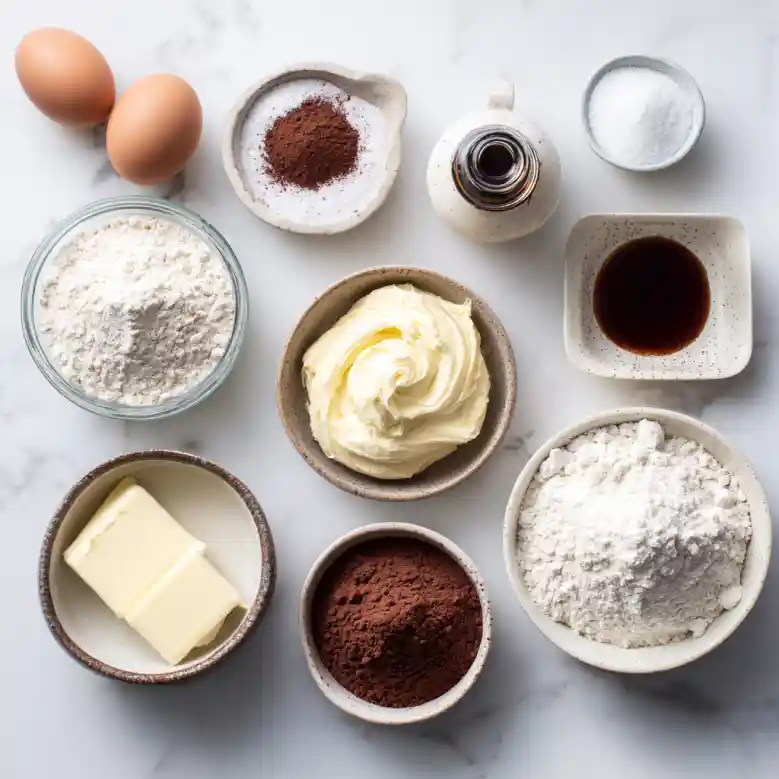
Ingredients
To create these Polar Bear Cookies, you’ll need the following ingredients:
- 2 cups all-purpose flour: For the best results, use a high-quality brand like King Arthur Flour for its consistent performance.
- 1/2 teaspoon baking soda: This provides the necessary lift for your cookies.
- 1/2 teaspoon baking powder: A must to ensure your cookies rise perfectly!
- 1/4 teaspoon salt: Enhances the sweetness of the cookies.
- 1/2 cup unsalted butter, softened: Always bring your butter to room temperature. I recommend using Grassland for its rich flavor.
- 1 cup granulated sugar: Sweetness on a whole new level!
- 1 large egg: At room temperature for better incorporation with the mixture.
- 1 teaspoon vanilla extract: For that warm, aromatic flavor that elevates the cookies.
- 1 cup powdered sugar: Essential for making that fluffy frosting.
- 2 tablespoons unsweetened cocoa powder (for decoration): Adds a rich, chocolaty flavor to the visual appeal.
- Food coloring (optional): Let your creativity shine when decorating!
Prep Notes
- Before you start, make sure your butter is at room temperature for easy creaming.
- Measure your flour correctly—spoon it into the measuring cup and level it off for best results.
- Preheat your oven to 350°F (175°C) before starting the dough for perfectly baked cookies.
Step-by-Step Instructions
Preheat the oven: Set your oven to 350°F (175°C) and allow it to heat while you prepare the cookie dough.
Mix the dry ingredients: In a large bowl, whisk together the 2 cups of all-purpose flour, 1/2 teaspoon of baking soda, 1/2 teaspoon of baking powder, and 1/4 teaspoon salt until evenly combined. Set aside.
Cream the butter and sugar: In another bowl, cream the softened butter and 1 cup granulated sugar together until the mixture is light and fluffy. This should take about 3-4 minutes on medium speed with a hand or stand mixer.
Add the egg and vanilla: Beat in the large egg and the 1 teaspoon of vanilla extract until fully incorporated and smooth.
Combine wet and dry ingredients: Gradually add the dry ingredient mixture to the wet mixture. Combine until just mixed—overmixing can result in tougher cookies.
Shape the dough: Roll the dough into small balls (about 1 inch in diameter) and place them on a baking sheet lined with parchment paper, leaving about 2 inches between each cookie.
Bake the cookies: Bake for 10-12 minutes or until the edges of the cookies are slightly golden. You want them to look underbaked in the center as they’ll continue to cook while cooling.
Cool on a wire rack: Allow cookies to cool on the baking sheet for 5 minutes before transferring them to a wire rack to cool completely.
Prepare the buttercream frosting: In a medium bowl, beat together half a cup of softened butter, 1 cup of powdered sugar, and just a splash of milk until smooth and creamy.
Decorate: Spread or pipe the buttercream frosting onto your cooled cookies. Use cocoa powder and food coloring to decorate as you desire, creating your very own Polar Bear masterpiece!
Chef’s Tips
- Visual cues: Cookies will initially look soft and puffy when removed from the oven. They will firm up as they cool, so don’t overbake!
- Avoid the dreaded flat cookie! Make sure your baking soda and powder are fresh to get the perfect rise.
- Don’t skip the cooling step! Let’s face it, nobody enjoys a melted frosting disaster.
Expert Tips & Tricks
Storage: Store leftovers in an airtight container. They’ll stay fresh at room temperature for up to 5 days or in the fridge for about a week.
Make-Ahead Instructions: The cookie dough can be prepared ahead of time and refrigerated for up to 3 days. Just make sure to let it come to room temperature before baking.
Common mistakes: Overmixing the dough can lead to tough cookies. Be gentle and mix just until combined.
Using a scale: If you have a kitchen scale, weighing your flour (about 240 grams) can ensure more accurate baking results.
Freeze for later: Baked cookies can be frozen for up to 3 months. Just make sure to layer them with parchment paper in an airtight container.
Serving Suggestions
These Polar Bear Cookies are perfect on their own but pair beautifully with a cup of hot cocoa or a glass of milk. If you’re hosting a festive gathering, consider serving them alongside an assortment of treats on a cookie platter—for the ultimate indulgent dessert table!
For a fun presentation, arrange your cookies with some cute polar bear-themed decorations—think cotton balls and blue accents to mimic an icy wonderland. They’re also great for parties, school events, or simply as a sweet surprise for your family after dinner.
Variations & Substitutions
Feeling adventurous? Here are a few variations and substitutions to try with your Polar Bear Cookies:
- Flavor twists: Try adding in chocolate chips, nuts, or dried fruit to the base dough for a twist on flavor and texture.
- Dietary needs: Use gluten-free flour for a gluten-free version or oil instead of butter for a dairy-free option.
- Seasonal variations: For a holiday touch, add peppermint extract in place of vanilla or incorporate festive sprinkles to the frosting for colorful celebration vibes.
Nutrition & Storage Info
- Prep Time: 20 minutes
- Cook Time: 12 minutes
- Total Time: 32 minutes
- Yield: 24 servings (depends on size)
- Estimated Calories: Approximately 150 calories per cookie (varies with frosting)
- Storage: Room temperature for 5 days, refrigerated for 7 days, or freeze up to 3 months.
FAQ Section
Can I use different sugars?
Yes! Brown sugar works perfectly, giving your cookies a lovely caramel flavor.What if I don’t have food coloring?
No problem! You can decorate with sprinkles or leave them white for a classic look!Can these cookies be made without eggs?
Absolutely! Use a flax egg instead (1 tablespoon ground flaxseed mixed with 2.5 tablespoons water), which works well as a binding agent.Do I really need to chill the dough?
It’s not necessary, but chilling can help prevent the cookies from spreading too much.What’s the best way to frost cookies?
Using a piping bag gives you more control. You need to ensure your buttercream frosting is of a spreadable consistency for easy frosting.Can I use margarine instead of butter?
Yes, but keep in mind that the texture and flavor may be slightly different. Stick to unsalted margarine for best results.How do I know when my cookies are done?
Look for slightly golden edges. The centers should look a bit underbaked—that’s okay!What’s the best way to store leftover cookies?
Store them in an airtight container with a piece of bread to help keep them soft longer.Can I freeze the dough?
Yes! Freeze the unbaked cookie balls and bake directly from frozen—just increase baking time by a couple of minutes.What occasions are best for Polar Bear Cookies?
Any occasion! They’re perfect for birthdays, holidays, or simply as a delightful afternoon snack.
Conclusion
These Polar Bear Cookies are not just treats; they’re an experience—one that conjures up the warmth of family, fun, and creativity in every delicious bite. I hope you take the time to try this recipe and create beautiful memories in your kitchen, just like I have. Share your creations and feedback, and let me know how they turned out for you! Don’t forget to explore the other delightful recipes on the blog for more sweet inspiration.
Delicious Starbucks Cake Pop Recipe You Can Make at Home
Happy baking!
Polar Bear Cookies
Ingredients
Method
- Preheat your oven to 350°F (175°C).
- In a large bowl, whisk together the flour, baking soda, baking powder, and salt. Set aside.
- In another bowl, cream the softened butter and granulated sugar together until light and fluffy.
- Beat in the egg and vanilla extract until fully incorporated.
- Gradually add the dry ingredients to the wet mixture, mixing until just combined.
- Roll the dough into small balls (about 1 inch in diameter) and place them on a baking sheet lined with parchment paper.
- Bake for 10-12 minutes or until edges are slightly golden.
- Let cool on the baking sheet for 5 minutes before transferring to a wire rack.
- In a medium bowl, beat together the softened butter, powdered sugar, and a splash of milk until smooth and creamy.
- Spread or pipe the buttercream frosting onto cooled cookies and decorate with cocoa powder and food coloring as desired.