Table of Contents
Table of Contents
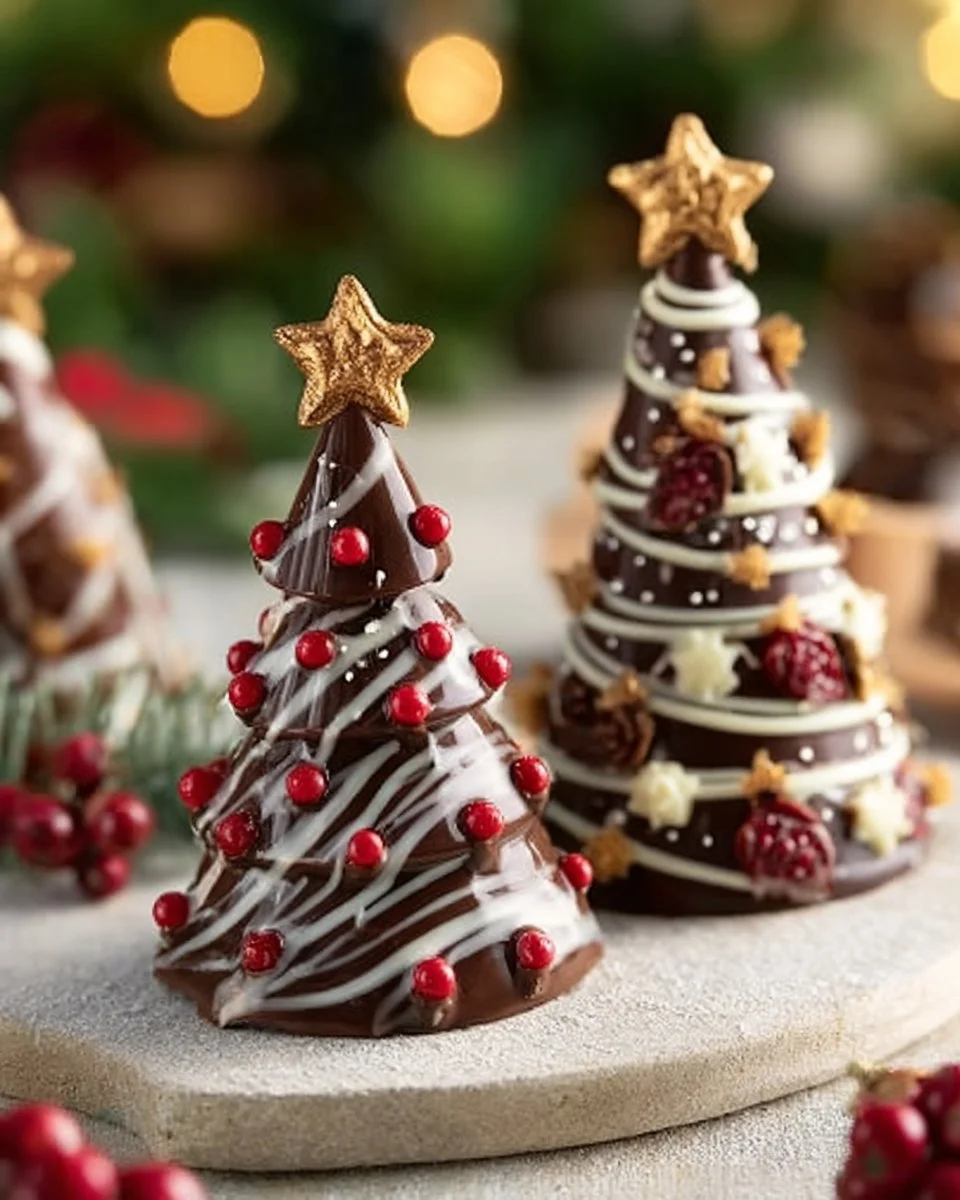
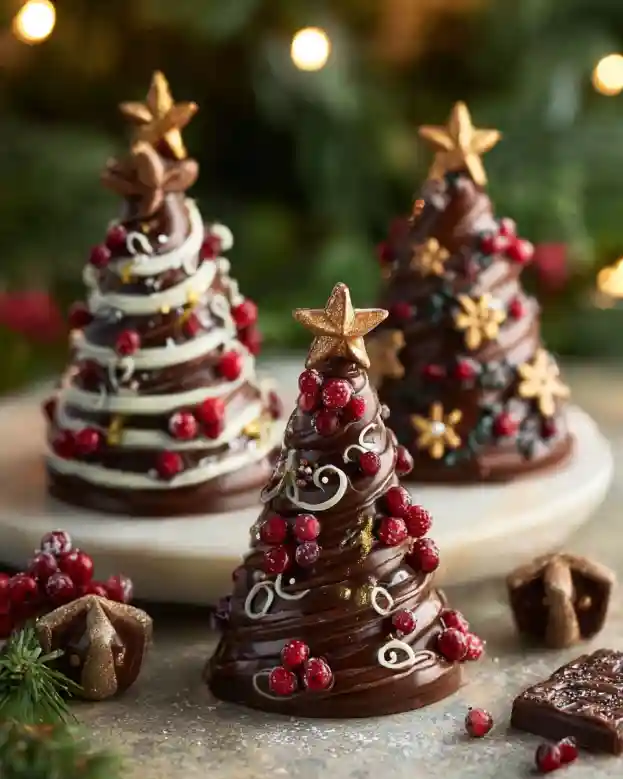
Growing up, my family had a tradition of baking and creating delightful, festive treats during the holiday season. One of my favorite memories is of my grandmother and me in the kitchen, surrounded by colorful sprinkles, warm chocolate, and laughter. This tradition inspired my love for the Christmas Chocolate Trees Recipe, which I now cherish passing on to my children. These little chocolate trees aren’t just adorable; they’re a delicious blend of rich dark chocolate and sweet white chocolate, dressed with vibrant sprinkles that make them as festive to look at as they are to eat.
What sets these Christmas chocolate trees apart from others is not just their charming shape, resembling a winter wonderland, but the ease of making them right in your own kitchen! Each tree is a sweet bite of deliciousness, offering that perfect combination of crunch from the pretzel sticks and smoothness from the chocolate.
By the end of this post, you’ll learn not only how to create these enchanting little trees but also how to make them your own and impress your family with your chocolate-making skills. Let’s get ready to sweeten your holiday celebrations!
What Are Christmas Chocolate Trees?
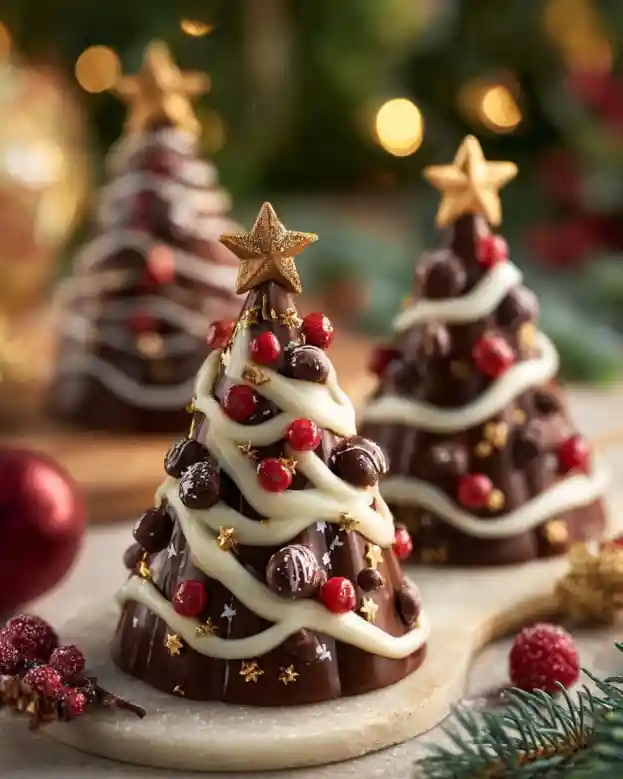
Christmas Chocolate Trees have a whimsical origin steeped in holiday cheer. Imagine tiny chocolate trees emerging from a winter wonderland, each providing a touch of magic to your Christmas parties. These edible delights are made from rich dark chocolate, artfully piped into tree shapes, adorned with a dusting of snow-like white chocolate and a sprinkle of colorful candies.
The taste is a delightful contrast: the slightly bitter richness of dark chocolate paired with the sweetness of the white chocolate and the playful crunch from the pretzel trunks. When you take your first bite, it’s as if you’re tasting the holidays—comforting, familiar, and joyously fun. They make an ideal addition to your holiday dessert table or as a unique treat to gift to friends and family. Whether for a festive gathering or a cozy family movie night by the fire, you’ll want these delightful trees at your side.
Why You’ll Love This Recipe
Easy to Make: Even if you’re not a master baker, this recipe makes creating festive treats feel like a piece of cake—or should I say, chocolate! With just a few simple steps, you’ll feel like a professional pastry chef.
Cost-Effective: Why buy expensive store-bought chocolates when you can whip up a batch with just a handful of ingredients? Not only is this recipe budget-friendly, but it also allows you to create larger quantities at home.
Endless Customization: While the classic recipe uses dark and white chocolate with colorful sprinkles, you can customize your trees! Think peppermint chunks for an added holiday twist, or even different flavors of chocolate, like milk chocolate or caramel drizzle.
Fun for All Ages: This recipe is perfect for a family activity! Kids will love piping their trees and decorating them with sprinkles. It’s a great way to bond while introducing them to the joy of baking.
A Showstopper: Visually stunning and incredibly delicious, these Christmas Chocolate Trees will be the highlight of any holiday gathering. You’ll receive compliments and requests for the recipe—trust me!
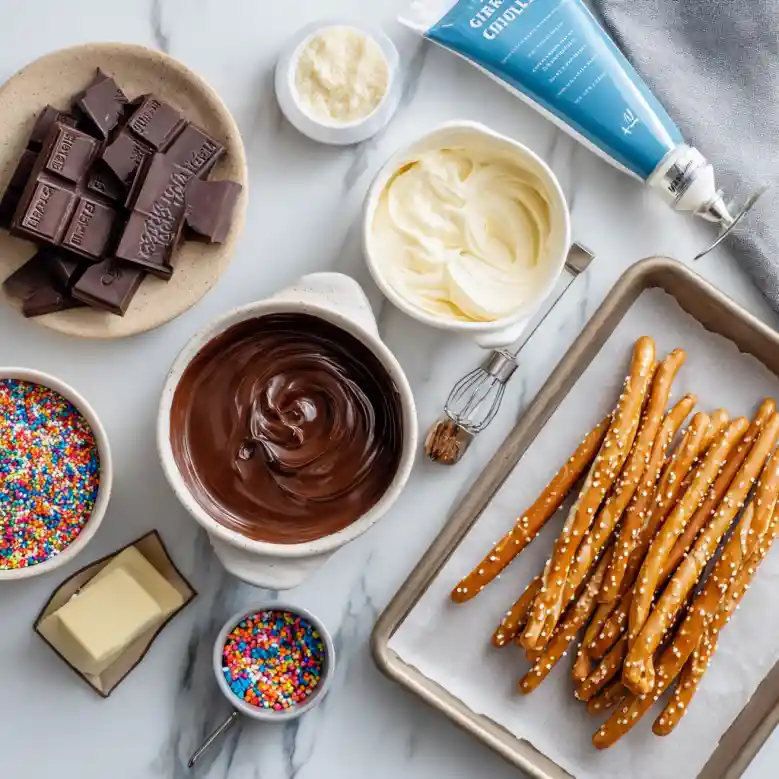
Ingredients
- 200 grams dark chocolate (opt for high-quality chocolate like Ghirardelli or Callebaut for the rich flavor)
- 50 grams white chocolate (the contrast adds visual appeal and sweetness; I love using Baker’s brand)
- 1/4 cup mini colorful sprinkles (grab a mix—the more colorful, the better!)
- 8 pieces pretzel sticks (for the trunks; make sure they are sturdy)
- Prep Notes: Ensure your butter is at room temperature if you are adding any to your chocolate. Additionally, gather all your tools: a piping bag or zip-top bag, baking tray, and parchment paper.
Step-by-Step Instructions
Prepare Your Workspace: Line a baking tray with parchment paper. This is essential for easy removal of the chocolate trees later.
Melt the Dark Chocolate: Place the 200 grams of dark chocolate in a microwave-safe bowl. Heat in 30-second increments, stirring after each session, until the chocolate is completely melted and smooth. This usually takes about 1.5 to 2 minutes.
- Chef’s Tip: Avoid overheating; chocolate can seize if it gets too hot. It should be silky and shiny.
Pipe the Trees: Spoon the melted dark chocolate into a piping bag or a zip-top bag with a small opening cut off. Pipe tree shapes onto the parchment paper, approximately 3 inches tall and 2 inches wide, ensuring that the bottom of each tree overlaps with a pretzel stick acting as the trunk.
Melt the White Chocolate: In a separate bowl, melt the white chocolate. It usually takes around 1 minute in the microwave, but make sure to stir frequently to achieve a smooth texture.
Create the Snowy Effect: Drizzle the melted white chocolate over the dark chocolate trees while they are still wet. This will give them that lovely snow-kissed finish.
Decorate with Sprinkles: Immediately scatter the mini sprinkles over the trees to make them pop. Don’t wait too long, as the chocolate will set.
Set the Trees: Allow the chocolate trees to set at room temperature or refrigerate them for 15-20 minutes until firm.
Serve Your Creation: Carefully lift the trees from the parchment paper and place them on a festive platter, ready to delight your family and friends.
- Common Mistakes to Avoid: Ensure the chocolate isn’t too hot when piping, as it can lead to messy results. Also, be mindful of the white chocolate drizzle—timing is key!
Expert Tips & Tricks
Storage: These chocolate trees can be stored at room temperature for up to a week or in the fridge for two weeks. Just make sure they are in an airtight container to avoid moisture.
Make-Ahead Potential: You can create these trees a few days in advance. They actually taste even better after resting, as the flavors meld beautifully!
Troubleshooting: If your melted chocolate seems too thick, add a tiny bit of vegetable oil to help it flow better. Conversely, if it’s too runny, you may have overheated it; let it cool slightly before piping.
Switching it Up: Try using milk chocolate for a sweeter flavor or experiment with different toppings like crushed peppermint or edible glitter for a festive touch.
Serving Suggestions
Serve your Christmas Chocolate Trees alongside a cup of hot cocoa, fresh from the stove, or as part of a grand holiday dessert spread. Present them on a beautiful platter surrounded by other festive treats like gingerbread cookies or peppermint bark. For added flair, sprinkle some powdered sugar around the base to give them the look of a snowy landscape. Perfect for Christmas parties, family gatherings, or even as a fun activity during holiday break.
Variations & Substitutions
- Flavor Combinations: Incorporate flavors like peppermint, orange, or espresso into your chocolate for a twist.
- Dietary Adaptations: Use vegan chocolate and gluten-free pretzels for a dairy-free and gluten-free version.
- Seasonal Variations: Use pastel colors and heart shapes for Valentine’s Day or colorful sprinkles for a birthday bash. These trees can adapt to any festivity!
Nutrition & Storage Info
- Prep Time: 30 minutes
- Cook Time: 10 minutes
- Total Time: 40 minutes
- Yield: About 8 trees
- Estimated Calories: Approximately 150-200 calories per tree
- Storage Instructions: Best kept at room temperature, but can be refrigerated for a longer shelf life. They last about one week if properly stored.
FAQ Section
Can I use milk chocolate instead of dark chocolate?
Yes! Milk chocolate will add a sweeter flavor.What if my chocolate seizes?
If it becomes grainy, try adding a little coconut oil or vegetable oil and melting gently again.Can I freeze these chocolate trees?
You can, but the texture may change slightly; I recommend eating them fresh for the best experience.Can I use a different type of sprinkles?
Absolutely, you can use any type of edible glitter, nuts, or crushed candy canes for more flavors.How do I create a smoother drizzle on top?
Ensure your white chocolate is completely melted before drizzling, and you can use a thin brush for more control.How do I make this recipe kid-friendly?
Ensure older children handle melted chocolate—keeping younger kids involved in the decorating phase is a great idea!Can I make larger trees?
Sure! Just increase the size when piping, but keep in mind they may need more time to set.What else can I use for the trunk other than pretzel sticks?
You could use chocolate-dipped cookies or even licorice sticks for a fun twist!What is the best way to present these trees?
Use a festive platter and arrange them at varying heights for a more dynamic presentation.Can I make these trees without a piping bag?
Yes! You can use a Ziploc bag with a tiny corner cut off; it’s a great alternative!
Conclusion
Creating these Christmas Chocolate Trees is more than just following a recipe; it’s about making sweet memories with family and friends during the holidays. With their delightful flavors and eye-catching presentation, they’re sure to be a centerpiece of your Christmas celebrations. I encourage you to try making these trees, and I’d love to hear your thoughts and any fun variations you come up with in the comments below! For additional holiday treats, don’t forget to check out my other festive recipes right here on the blog.
Graving More Recipes?
- Classic Chocolate Dipped Butter Cookies for Christmas
- Chocolate Chip Christmas Cookies
- Christmas Spice Cake with Eggnog Buttercream
Happy baking!

Christmas Chocolate Trees
Ingredients
Method
- Line a baking tray with parchment paper.
- Place 200 grams of dark chocolate in a microwave-safe bowl and heat in 30-second increments, stirring after each, until completely melted and smooth (about 1.5 to 2 minutes).
- Spoon the melted dark chocolate into a piping bag or zip-top bag and pipe tree shapes onto the parchment paper, approximately 3 inches tall and 2 inches wide, overlapping the bottom with a pretzel stick.
- Melt the white chocolate in a separate bowl, stirring frequently until smooth (around 1 minute).
- Drizzle the melted white chocolate over the dark chocolate trees while they are still wet.
- Immediately sprinkle the mini sprinkles over the trees.
- Allow the chocolate trees to set at room temperature or refrigerate for 15-20 minutes until firm.
- Lift the trees from the parchment paper and place them on a festive platter.