Table of Contents
Table of Contents
The aroma of cinnamon and pine fills the air, twinkling lights dance on the tree, and soft music plays in the background; it’s the holiday season, a time that always fills my heart with joy and nostalgia. One of my favorite traditions is making DIY Christmas Decorations—especially those charming dried orange ornaments that fill our home with warmth and cheer. The first time I crafted these delicately scented beauties, my children helped me string them together, with laughter echoing in the kitchen. Those moments became precious memories, ones I cherish as we continue the tradition year after year.
What makes these DIY ornaments so special? Unlike store-bought decorations, these handmade gems not only lend a touch of natural beauty to your home but also create a comforting atmosphere infused with the delightful scent of citrus. Plus, they’re surprisingly simple to make and an eco-friendly alternative! This year, I invite you to join me in creating these stunning Dried Orange Ornaments that will not only adorn your tree but also add a personal touch to your holiday festivities. In this guide, we’ll walk through the steps to make your own, share tips and tricks for perfect results, and explore ways to customize them to fit your holiday vibe. Let’s dive in!
What Are DIY Christmas Decorations – Dried Orange Ornaments?
The art of drying orange slices dates back to the Victorian era when they were used to decorate homes during the holiday season. Originating as a core tradition of using natural materials for decoration, these vibrant ornaments are visually striking and have a nostalgic charm. As they dry, the oranges take on a lovely, caramelized fragrance, offering a burst of heartwarming aroma that brings back cherished holiday memories.
Dried orange slices have a chewy, slightly crispy texture, with vibrant pops of color that catch the eye. Their bright orange hue adds warmth and cheer to any holiday display, making them a wonderful addition to your tree or wreaths. You can make them anytime, but they are perfect for crafting decorations when the seasonal rush begins, setting the stage for family gatherings and cozy nights by the fire.
Why You’ll Love This Recipe
Unique & Personal: Unlike generic store-bought ornaments, these dried orange decorations carry your unique touch. Each slice is a piece of art, made with love, and speaks to your creative spirit.
Economical: Creating your own DIY ornaments saves money! Oranges are affordable, and you might already have the other materials at home.
Customizable: Get creative! You can add spices, ribbons, or even paint the edges to suit your holiday theme. This is your chance to let your personality shine through.
Sustainable & Natural: Using natural ingredients means you’re contributing to sustainability. Plus, these ornaments are far more eco-friendly than plastic ones.
Fun Family Activity: It’s a wonderful way to bond with family or friends. As you slice, dry, and string your oranges together, you’ll create memories that will last a lifetime!
Compare this with store-bought ornaments that can be expensive and lack character. Investing around an hour in making these beauties is absolutely worth it, and the exhilaration of creating something from scratch cannot be matched. This recipe is perfectly suited for all skill levels, ensuring that everyone can join in on the holiday fun!
Ingredients
Here’s what you’ll need to craft your very own dried orange ornaments:
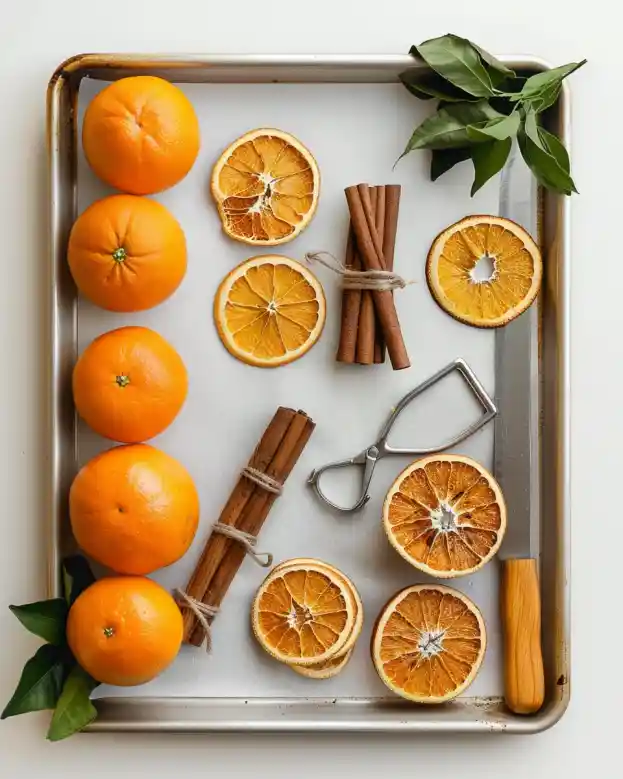
- Oranges (4-6 large): Choose firm, ripe oranges for better slicing. Note: If you want to experiment, try blood oranges for a beautiful twist!
- Cinnamon sticks (optional): For a festive touch and aroma; make sure you go for high-quality Ceylon cinnamon for that sweet scent.
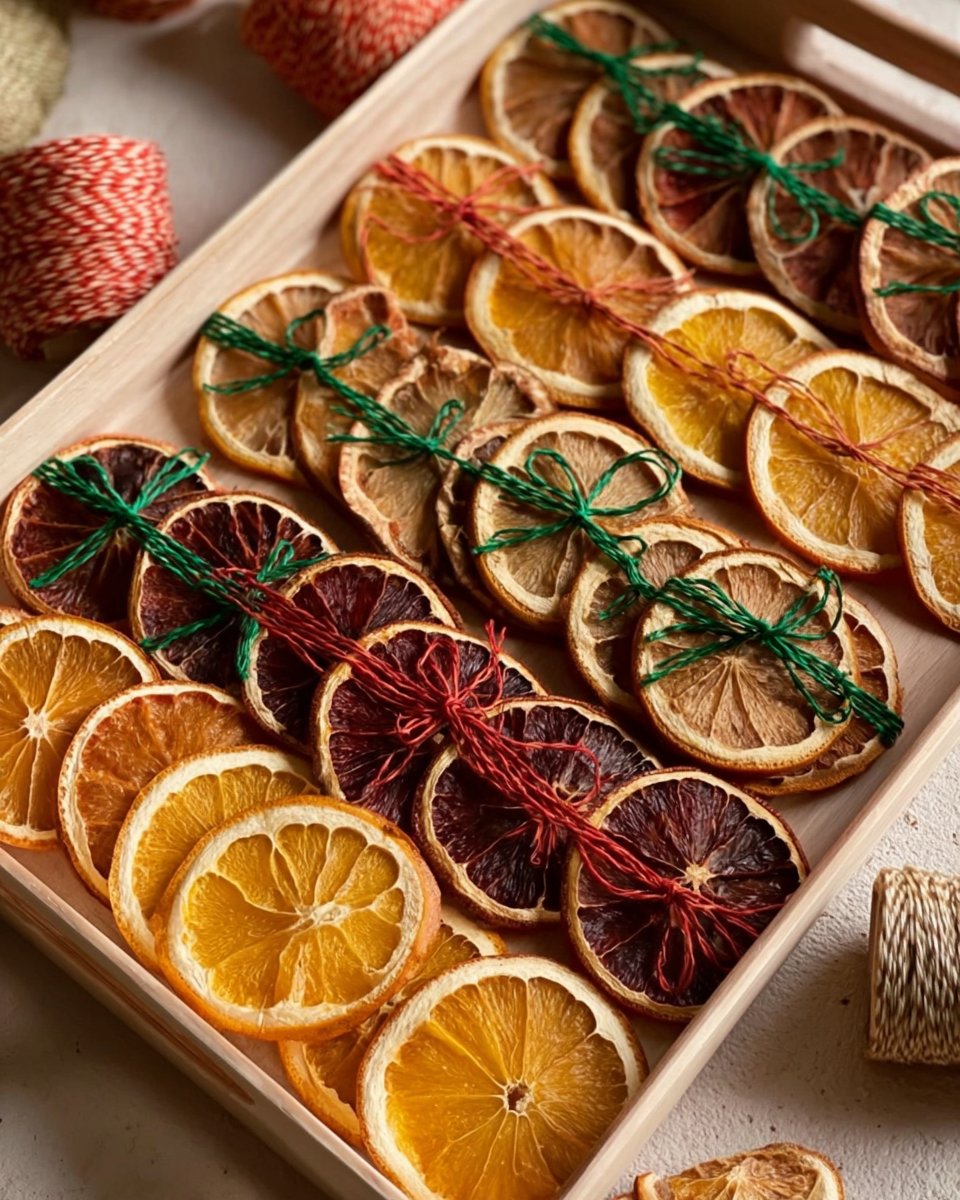
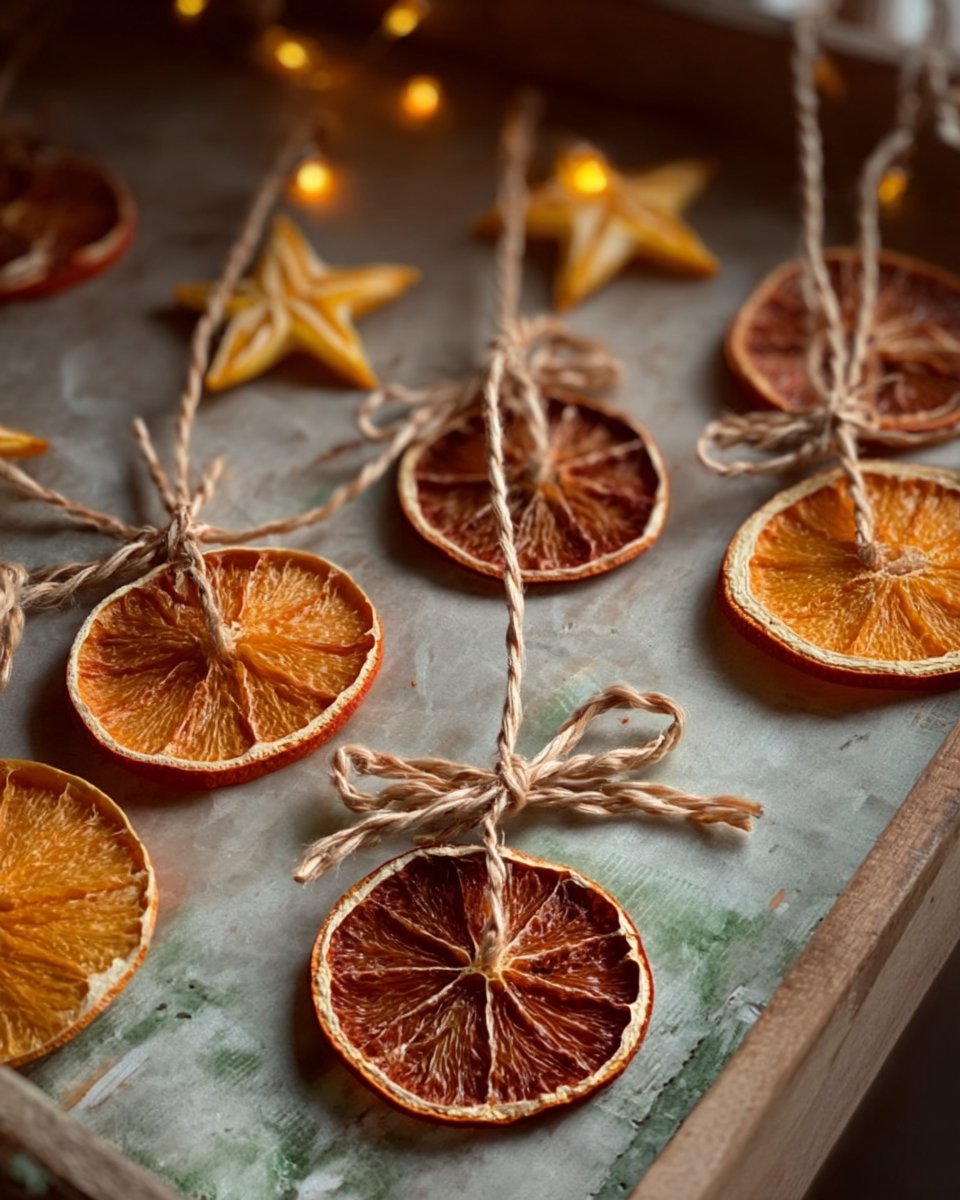
- Baker’s twine or ribbon: Look for seasonal colors like red, green, or gold; these add a festive flair, and I recommend using natural fibers for a more rustic look.
- Baking sheet: Make sure it’s lined with parchment paper for easy cleanup.
- Sharp knife: To cut the oranges into evenly thick slices (aim for ¼ inch).
Prep Notes: Make sure your oranges are at room temperature for easier slicing, and have your baking sheet ready lined with parchment paper to catch any juice.
Step-by-Step Instructions
Preheat Your Oven: Begin by preheating your oven to 200°F (93°C). A low temperature ensures that the oranges will dry without burning.
Slice the Oranges: Using a sharp knife, carefully cut the oranges into ¼-inch slices. Make sure to slice evenly for uniform drying. (Tip: If the slices are too thick, they won’t dry properly!)
Arrange on Baking Sheet: Lay the orange slices flat on the baking sheet lined with parchment paper. Make sure the slices don’t overlap; you want even drying for all pieces. I like to sprinkle a tiny bit of cinnamon over them for an aromatic boost!
Bake the Oranges: Place them in the oven and bake for 2-3 hours. Keep an eye on them to avoid burning. You’ll know they’re ready when they look dry, and you can see a little bit of browning on the edges.
Cool and String: Once out of the oven, let them cool completely. Use baker’s twine or ribbon to string them together as desired. You could even make a garland for your tree or around the house!
Chef’s Tip: Avoid common mistakes like overcrowding the baking sheet and ensuring even slices for uniform drying.
With your beautiful Dried Orange Ornaments ready, you’re bound to feel that cozy festive vibe permeate your home.
Expert Tips & Tricks
Use Fresh Oranges: The fresher the orange, the better smell and aesthetics. Look for oranges with fewer blemishes.
Experiment with Slices: Try varying thickness in slices for different drying times and textures.
Don’t Rush Drying: Be patient; drying them too quickly will ruin the flavor and texture.
Storage: Store your dried oranges in an airtight container away from humidity. They can last for months if stored properly!
Make Ahead: Feel free to make these ornaments well in advance. They make great gifts or party favors too!
Troubleshooting: If you find your slices are still a bit pliable after drying, simply pop them back in the oven for an additional 30 minutes, checking regularly.
Serving Suggestions
These lovely dried orange ornaments can double up beyond just decoration! Hang them on a festive wine bottle or use them in a homemade gift basket. Enhance your holiday spreads with a lovely presentation; string them around holiday flowers or tie them to gift parcels for that extra touch of elegance. Use them as festive coasters during your holiday gatherings or to adorn your kitchen window, filling your space with their delightful scent.
Variations & Substitutions
Flavor Combinations: Got a sweet tooth? Sprinkle the orange slices with a little brown sugar before drying. Or try drizzling them with honey for a fresh twist!
Dietary Adaptation: If you’re looking for a low-sugar alternative, just skip the sweeteners entirely and focus on the oranges’ natural flavors.
Seasonal Variations: Add other dried fruits like apple slices or cranberries to complement your ornaments, creating a colorful display that captures the spirit of the season.
Nutrition & Storage Info
- Prep Time: 10 minutes
- Cook Time: 2-3 hours
- Total Time: About 3 hours
- Yield: Approximately 15-20 ornament slices
Estimated Calories per Slice
Approximately 35 calories per slice, depending on thickness and any additional toppings used.
Storage: Store at room temperature in an airtight container. They can last about 2-3 months if kept dry.
FAQ Section
Can I use other fruits?
Yes! You can dry apples, lemons, and even kiwi for unique ornaments.How do I prevent mold?
Ensure your ornaments are completely dry before storing them and keep them in a low-humidity environment.Do they smell good?
Absolutely! Dried orange slices fill your home with a sweet, citrusy aroma.What do I do if they burn?
If the edges darken but they still smell good, use scissors to trim the burnt parts.How many oranges do I need?
It depends on how many ornaments you want, but 4-6 oranges typically yield a good batch.Can I use these as edible decorations?
While they’re not toxic, they may not taste as good as fresh oranges.Can I add glitter?
Yes, if you want some sparkle for extra festive cheer! Just ensure it’s non-toxic.Will they lose their scent?
Over time, the fragrance may fade, especially if stored improperly, so keep them sealed until use.Can I use this method for other vegetables?
Some vegetables can be dehydrated in a similar manner, like bell peppers, but they won’t work as ornaments.Is this a good craft for kids?
Definitely! Just make sure to supervise them during slicing and baking.
Conclusion
These DIY Christmas Decorations – Dried Orange Ornaments are more than just beautiful additions to your holiday decor; they are cherished keepsakes that embody the spirit of love and togetherness. I encourage you to share your creations and family moments as you craft these delightful ornaments. Your feedback, comments, and stories bring joy to our community, and I can’t wait to hear how they turn out! Don’t forget to check out my other festive recipes on the blog that will complement your holiday festivities.
Happy decorating!

Dried Orange Ornaments
Ingredients
Method
- Preheat your oven to 200°F (93°C).
- Using a sharp knife, carefully cut the oranges into ¼-inch slices.
- Lay the orange slices flat on the baking sheet lined with parchment paper, ensuring they don’t overlap.
- Sprinkle a tiny bit of cinnamon over the slices for added aroma.
- Place the baking sheet in the oven and bake for 2-3 hours, keeping an eye on them to avoid burning.
- Check for dryness and slight browning on the edges to know they are ready.
- Once out of the oven, let the ornaments cool completely.
- Use baker’s twine or ribbon to string them together as desired.